2 years ago
 Level 60 Fire Trap Inquisitor3.21
Life: 2,02078%
ES: 167
Mana: 37
eHP:
7,651
Resistances: 78%/75%/75%/-13%
DPS: 91,198
Speed: 1.67
Hit Chance: 100%
Config: None
Bandit: Kill All
Gear
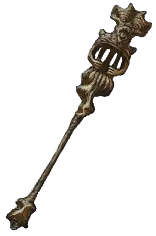
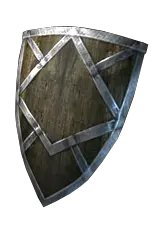
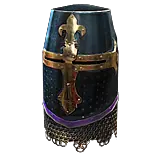
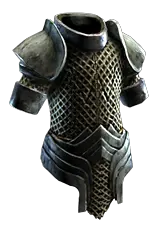



Gems
Scorching Ray
Spell Totem
Flame Dash
Fire Trap
Inspiration
Combustion
Controlled Destruction
Righteous Fire
Burning Damage
Elemental Focus
Inspiration
Summon Stone Golem
Vitality
Flammability
Flame Wall
Determination
Shield Charge
Faster Attacks
Inspiration
Purity of Fire
Tree Preview
- 10% less Damage Taken from Damage over Time
- Critical Strikes do not inherently Ignite
- 100% increased Damage with Hits against Ignited Enemies
- Regenerate 1 Life per second for each 1% Uncapped Fire Resistance
- +50 to maximum Life
- Regenerate 50 Life per second
Notes
---Required Links---

	Travel Setup As Soon As Possible:
		Shield Charge (R) - Momentum (G)
		* Can supplement Leap Slam with Frostblink (B) if you want some additional speed
         Flame Dash (B) or Frostblink (B) for gap traversal

	Lvl 1 and Beyond:
		Rolling Magma (B) - Ele Prolif (B) - Combustion (B) / Arcane Surge (B) until you have combustion

	Lvl 18 and Beyond:
		Rolling Magma (B) - Combustion (B) - Cruelty (R) - any other reasonable damage link if you have 4L

    Lvl 21 and Beyond:
        Rightheous Fire (B) - Elemental Focus (B) - Efficacy (B) - Any other reasonable damage link if you have 4L. If not doing Library, picking of 4th damage support are slim until Lily. Using Lifetap can work if you are proccing lifetap elsewhere.
        Otherwise, the only other damage support that can really apply without 31 gems is Conc Effect (B) or Iron Will (R). Conc Effect is good, it just makes clearing more annoying. Can eventually flip/flop conc effect and increased AoE around.
        Once you get access to 31 gems from either Library or Lily, you can use Burning Damage (R), Inspiration (R), Swift Afflication (G) to help fill out RF links. If using Inspiration, will need a source of inspiration elsewhere to generate charges.
        In actual run, I used inspiration as I had a B-B-R-R, so it was RF - Ele Focus - Burning Damage - Inspiration and used Inspiration on Fire Trap and Shield Charge to ensure I always had charges.

    Once you have sufficiently leveled Fire Trap (Drop Rolling Magma):
        Fire Trap (G) - Combustion (B) - Cruelty (R) - Whatever support gem that ideally applies to both hit and dot component. Inspiration or Lifetap are strong contenders here. Lifetap can be hard to sustain with RF degen until like A9 or A10.
        If you end up with weird colors, conc effect (b) works, swift afflication (g), burning damage (r) will work. I think in actual run I used controlled destruction as I forgot conc effect exists and ended up with  G - B - B - R and

	Auras and Utility:
		Vitality (R) - You can include vitality if you want some HP sustain, but you would need to pay attention to its cost.
        Purity of Fire (R) - Can start using right away if you need the extra flat regen via mastery or wait until Char Lvl 36/Gem Lvl 5 as that is when Purity of Fire gives its first point of max res
        Determination (R) - Once you have enough reservation efficiency, you can have determ, purity of fire, and vitality going at same time. I will typically equip Determ once I get the aura res mastery (sometime during A7).
        If mana is tight, I will priotize Determination and Purity of Fire and drop vitality until later or level a new vitality to fit my mana situation.

---Flexible Links---

	Curse:
		Flammability (B). If a blue slot isn't available, Punishment (R) can work. If you only have green slot free, there are not really good options, so I would skip

	Reservation:
        War Banner (R)
		Some Elemental Herald Of Choice. Typically, Ash. I will also use a second herald and vitality until I swap to RF at 21

	Totem:
		Holy Flame Totem (R) until you return to town and then I will use sorching ray (B) and spell totem support (R). You can use WoC instead of scorching ray. Additionally, you can self-cast or eventually arcanist brand WoC depending on
        preference. I prefer just to use Scorching Ray-Spell Totem setup

	Whenever you have free sockets:
		Add left-click steelskin (R) once you get vortex you can place steelskin on some other button instead and just press occassionally until you get CWDT


---Notable Pathing---

(1) Templar Elemental Damage Start (5pts - Lvl 6)
(2) Retribution (1pt - Lvl 7)
(3) Precision (2pts - Lvl 8 w/ Dweller Pt)
(4) Discipline and Training (2pts - Lvl 10)
(5) Holy Dominion (2 pts - Lvl 12)
(6) Light of Divinity (1pt - Lvl 12 w/ Fairgraves Pt)
(7) Amplify (2pts - Lvl 14)
(8) Explosive Impact w/ Regen Per Fire Resistance Mastery (8 pts - Lvl 21 /w Way Foward Pt) [Path via area dmg node from Amplify and grab Inc AoE node in Explosive Impact cluster]
(9) Sanctity (2pts - Lvl 23)
(10) Combat Stamina (6pts - Lvl 28 w/ Busts Pt)* ***
(11) Arsonist w/ Fire Dmg Over Time small passive beyond Arsonist and the 100% Hit Dmg if Ignited Mastery (6pts - Lvl 33 w/ Piety Kill Pt)
(12) Devotion (4pts - Lvl 36 w/ Deshret Pt)
(13) Divine Judgment (7pts - Lvl 41 w/ Miasmeter and Torments Skill Pts)
(14) Surging Vitality w/ 50 Regen Mastery (5pts - Lvl 44 w/ Tukohama and Abberath Pts)
(15) Purity of Flesh (3pts - Lvl 46 w/ Ryslatha Pt)
(16) 50 Life Mastery on Purity Flesh or Devotion (0pt - Lvl 46) [Respec Light of Divinity for this]*
(17) Sovereignty (4pts - Lvl 50)***
(18) Holy Fire (4pts - Lvl 51 w/ Gruthkul, Ralakesh and Kishara Star Pts)
(19) Barbarism (4pts - Lvl 55)
(20) Hearty (5pts - Lvl 57 w/ Tolman, Gemling Legion, and Yugul Pts)
(21) Acrimony (6 pts - Lvl 60 w/ Shakarri, Garukhan and Vilenta Pts)

* At any point from here on out you can take 30 dexterity node as a singleton for dex attribute solution for Fire Trap if needed. Two will be potentially available, the one near EO and the one near Arsonist/Combat Stamina
** Get 50 life mastery on devotion whenever it will not mess up your regen ratio or you really need the flat life. Here, I get it in A6.
*** If needed, you can get the extra 1% max ele res mastery from armour cluster for having armour on gloves, boot, helm, and chest and from aura cluster for having both life reserv and mana reserv. I would use vitality to get life reserv

---Notes on Gear---
Take Rare Jade Amulet from Act 3 Quest - The Ribbon Spool - to help with dexterity requirements for Fire Trap/Faster Attacks/Momentum Support.
Recommend doing den for second QS as it helps with movement on a shield charge/flame dash setup.

---Gem Acquisition---
Please note that due to currency contraints from run to run, you may not be able to always buy the gems as listed here exactly when they are listed. Likewise, due to color/link constraints, you might not be able to
fit the gem into your gear when you buy it or use it period if proper colors/links do not become available at some point.


    Ranger Mule Hillock Reward:
		Take whatever green (G) from Hillock quest and sell it for a scrap. I will keep the default burning arrow gem to use as part of topaz ring recipe with an iron ring if needed.

	Main Character Hillock Reward:
		Take Rolling Magma (B)

	Hailrake/Submerged Open Reward:
		Take Arcane Surge (B) from Hailrake Quest Reward via Nessa
		Buy Flame Wall (B) from Nessa and Buy War Banner (R). Preference towards buying War Banner first unless you do not have a red socket for it
		Take Holy Flame Totem (R) from Submerged Quest Reward via Tarkleigh
        Take Frostblink (B) from Second Submerged Quest Reward via Tarkleigh

	Lower Prison Enter Reward:
		Take Combustion (B)

	Brutus Kill Reward:
		Take Shield Charge (R) quest reward
        Buy Flame Dash (B)
		Optional: Buy vitality if you have an extra transmutes, otherwise buy Vitality when returning to A1 for Way Forward Skill Point. If you could not afford Flame Dash (B), do so when returning as well.

	Merveil's Caverns Enter Reward:
		Take Scorching Ray (B)
		Optional: Buy Efficacy (B), otherwise wait until returning to A1 for Way Forward Skill Point Reward.

	Fidelitas/Baleful Gem Reward:
		Take Herald of Ash (R)
		Optional: Buy herald of thunder (B) if you have extra alteration and want some extra damage for Act 2
        Optional: If not using scorching ray spell totem as your exposure source, buy Wave of Conviction (B) for same purpose

	Weaver Kill Reward:
		Take Cruelty (R)
        Buy Elemental Focus (B)

	Way Forward Skill Point Act 1 Retrun:
		Buy Flamedash (B) if you haven't
        Buy Efficiacy (B) if you haven't
        Buy Vitality (R) if you haven't
        Buy Spell Totem Support (R)
		Optional: Buy Steelskin (R) if you have open red socket and can meet strength requirements. I would then just put steelskin on left click for now.

	Clarissa/Tolman Quest:
		Flammability (B)
		Buy Purity of Fire (R) from Clarissa

	Gravicius Quest:
		No need to do Gravicius unless you want to use arma brand, firestorm, cremation, flameblast or some other 28 gem as either part of your clear or single target setup instead

	Open Mines Quest:
		Take Stone Golem (R).

	Open Belly Quest:
		Whatever gem you want. Arcanist Brand (B) is helpful if you want to use WoC as your exposure source or to automate cursing.

	Lily in A6 Quest:
		Buy Fire Trap (G) to level in off hand setup until its sufficiently level as it will become your single target skill instead of Rolling Magma. to determination in A7 after reservation nodes
		Buy relevant support gems as needed such as Inspiration (R), Lifetap (R), Swift Affliction (G). Other supports can be used. These are just examples. What you will buy to fill out links
        depends on the active skill gem, ie ideally you want something that applys to both hit and dot component of Fire Trap.
		Buy any other gems you may need to fill out links

	Other:
		I like using steelskin if I have an open red socket. Will not always happen. As result, I will usually either keep one in inventory OR have it leveling in weapon swap for when I do have free red socket.
        It can be quite easy to forget this step though. If you're really swimming in red sockets and have a spare alch, steelskin + CWDT is great.


---Bandit Choice---
Alira or Kill All. Alira provides the most QoL through its resistance bonus and mana regen. The resistance bonus allows us more regen via the fire mastery and it allows us more leeway to stack fire resistance with crafts since
we will not be as tight on cold/lightning res. Mana management is also a serious concern as using life tap is extremely hard to sustain until very late in the run.

Kill all is a good option as well just makes mana management and gearing more annoying.

The 2 extra skill points while strong do not outweigh QoL of alira in campaign enough to make it clearly more worth than Alira. As a result, this decision is a judgment call and can rely
a lot on preference.

I would recommend Alira over Kill All for speed leveling purposes. Otherwise, kill all will have more applicability if you're planning on taking the build past campaign.

---Pantheons---
Major: Brine King is a good option to prevent stun lock scenarios and its an easy to just click and forget. Arakali is the play if you are still having issues with sustain.

Minor:  Ryslatha. Other lessers can be taken for improvements to quality of life, but Ryslatha will typically be best for additional comfort via flask sustain. Gruthkul or Tukohama are good alternatives if you want damage reduction instead of sustain.

---Muling---
Muling ranger is highly recommended for the extra currency, chance a good links for the run, and to get momentum support as Templar gets neither Momentum nor Faster Attacks anymore. You do not, however, need to mule as this run can
be done perfectly fine without it and you will instead just use Flame Dash as primary movement skill until you get access to Faster Attacks/Momentum via Library or Lily.
Nonetheless, Shield Charging with Momentum will be faster than flame dash in long run as well as having much higher QoL from the extra starting currency/chance at colors and links.

---Wands vs Sceptres---
Use a Goat's Horn as soon as possible to get the flat fire damage implicit. Once you get the ability to do the flat fire craft from Solaris 2, you can swap to a Sceptre to benefit from the % elemental damage to improve RF. You want the flat fire craft
to help with single target for rolling magma/fire trap.

---Movement Skills---
You will use frost blink into shield charge at level 10. Because shield charge cannot traverse walls/gaps, you should also keep a secondary movement skill that can. Both flame dash and frostblink work for this purpose. I typically prefer flame dash
as there are certain gaps frostblink cannot traverse

---Exposure Source---
Scorching Ray Totem will be used to apply exposure. You can alternatively self-cast, totem, or arcanist brand WoC. However, we do not this and instead use Scorching Ray as it provides more exposure (25% to 15%) than WoC. One downside of
Scorching Ray exposure is the time for it to ramp to apply the exposure. Can use your preference, but for campaign at least, I prefer the synergy with damage over time multiplier and the larger exposure Scorching Ray has.

---Library, Lily, Both or None---
You will need to do one of Library or Lily to get Fire Trap. It does not make a huge difference whether you start using Fire Trap in first half of campaign via Library or second half via Lily. Thus, it is your preference. In the run, I used Rolling Magma
through first half of campaign and did Lily early in second half of campaign to get Fire Trap. The upside to doing Library over Lily is access to Faster Attacks for Shield Charge and better single target in Late A4/A5. The downside of doing Library is
that it can take a decent amount of time which you might not make up for with the better single target from Fire Trap and Faster Attacks.

---Max Resistance---
There are a number of options for max fire resistance. In the run, we will always eventually use Purity of Fire and get Barbarism. We can also get the aura mastery for 1% max res if we have both life and mana reserved,
using vitality as our life reservation. You can also choose the armour mastery for 1% max res, if you have armour on gloves, helm, boots, and chest. I did not take either aura mastery or armour mastery in run as I wanted to ensure broadest
applicability of skill tree for sustain without requiring extra steps/sockets/gear requirements that may not consistently be possible in any given run.