2 months ago
 Level 100 LL Ball Lightning of Static Pathfinder3.28
Life: 7680%
Ward: 28,858
Int: 1,911
eHP:
30,886
Resistances: 75%/75%/75%/10%
Evade: 87%
DPS: 193,131,328
Speed: 10.27
Hit Chance: 100%
Config:
50% Shock, Custom Mods
Bandit: Kraityn
Pantheon: Soul of Arakaali, Soul of Shakari
Loadout
Gear

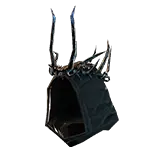


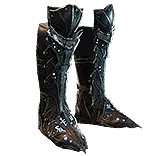









Gems
Ball Lightning of Static
Hexblast of Contradiction
Lightning Penetration
Elemental Penetration
Hypothermia
Cast when Damage Taken
Cruelty
Cast on Ward Break
Summon Skeletons
Withering Step
Less Duration
Raise Zombie of Falling
Convocation
Swift Affliction
Raise Spectre
Animate Guardian
Summon Flame Golem
Meat Shield
Minion Life
Vaal Haste
Eternal Blessing
Herald of Ice
Arrogance
Cast on Ward Break
Phase Run
Immortal Call
Vaal Righteous Fire
Conductivity
EnemyExplode
EnemyExplode
Tree Preview
Runegraft of Time
20% chance for Skills to not consume a Cooldown on use
Limited to 1 Runegraft of Time
Runegraft of the Agile
Elusive's Effect on you is increased instead for the first 2 seconds
Limited to 1 Runegraft of the Agile
Tattoo of the Ramako Fleetfoot(x13)
2% increased Movement Speed
 Runic Boon
 Acrobatics
 Elemental Overload
 Pain Attunement
 Attributes Mastery
- 5% increased Attributes
 Cold Mastery
- 40% of Physical Damage Converted to Cold Damage
 Flask Mastery
- Recover 4% of Life when you use a Flask
 Mana Mastery
- Regenerate 5 Mana per second
Notes
This build is designed for card farming focusing on SPEED while maintaining very comfortable DPS and TANK
Can you build it to have more TANK or DPS or both? yes
Can it be done on a different ascendancy? yes
In fact the slower you go the safer and stronger this gets, BUT I want SPEED
and for speed maxing - this is the build and these are my choices

~~~~~~~~~~~~
Core concept of the ward loop:

Heroic tragedy Timeless Jewel can roll Regenerative runes which make you gain Iron Flask charges when your ward breaks,
activating this flask recovers your ward back to full, so with enough investment into flask charges gained you get instant Ward recovery every time ward breaks
Pair that with Cast on Ward Break support to trigger some minions
Add a Heartbound Loop ring to take dmg when minions die to trigger the ward break again
and with enough ward we can achieve a fast and simple loop:
Ward breaks - Triggers minions - minions die dealing dmg to you which breaks ward again and the loop repeats triggering not only minions but also spells for damage.


-----------------------------------
------ FLASK CHARGES GAINED
-----------------------------------

Required amount of % increased flask charges gained for instant ward recovery:

with 4 regenerative runes you need 172%
with 5 regenerative runes you need 117%
with 6 regenerative runes you need 81%

It's not mandatory, but I do have a jewel with 6 regenerative runes and I still get to 175% to ignore the Delirium debuff

1x Iron Flask (ilvl 84) with t1 increased charge recovery*
		*It is important to get at least 64% here or you will need more flask charges gained investment than what I have in the POB

-----------------------------------
------ TIPS TO INCREASE WARD
-----------------------------------

- Drop the explode jewel and the socket under Elemental Overload for some efficient % energy shield on the tree, could also be actual ward scaling from the timeless jewel
- Stone Golem: it can sometimes die so if you rely on it it can mess up the loop, but it is easy and impactful for a temporary fix
- Energy shield tattoos: definitely not ideal, since you lose some damage but a reliable option to get some more ward
- and lastly if you are missing around a 100 ward you might be able to fix it with cooldown recovery implicit on your boots

-----------------------------------
------ WARD LOOP SETUP
-----------------------------------

There are a few ways to setup a fully self feeding ward loop, but if you want to run fast and I want to run REALY FAST I can't use Summon Raging Spirits because they despawn if you go too far away from them, meaning they never actually die of old age, just dissapear.
So for my setup there's only one option:
Summon Skeletons with 5x To Dust jewels (99% reduced skeleton duration ) and Raise Zombie of Falling

To simplify the rest here are 2 breakpoints to get the loop going:

Endgame goal: at least 28400 ward which would get you to ~15 procs/s, for that you need:
	5x To Dust jewels + Summon Skeletons linked with 20/20 Less duration and any Swift Affliction

Lower budget: at least 18300 ward which would get you to ~10 procs/s, for that you just drop Swift Affliction and the rest is the same:
	5x To Dust jewels + Summon Skeletons linked with 20/20 Less duration

-----------------------------------
------ CLUSTER JEWELS
-----------------------------------

3x Large clusters:
	Base: Elemental dmg = explosion scaling
	35% Effect + INT + ALL ATTR + %DMG(Luxury)
		I am not picking up all the passives on them, so they don't even have to be 12 passive jewels.
	Crafting them is... Let's just say I recommend buying them. Get any base with those stats and do some Refracting Fog magic to fix the base.

4x Medium clusters:
	This differs a little bit if you have 6 Regenerative Runes and if you dont.
	TLDR:
	If you have 6 runes, you can rely on a conditional "20% inc flask charges gained if you have crit recently" to get to 172%, because the build works even if you don't have that active.
	However with only 4 Runes, not having that conditional charge gain would break the build. It's a simple change of one cluster and the rest would be the same:

Base: Damage while affected by a herald (this needs to be rolled only once you are done with crafting your ideal suffixes)
	as for suffixes, they are kindof flexible: ideally INT + 1*
		*Elemental res: great option for lower budget when you don't have a misted ring
		*Chaos res: it is the weakest link in your defences so getting more is nice, but as long as you are above 0 you're fine
		*All attributes: more int = more DMG and more ward, can't go wrong with that
Notable combos that we need:
	1x Fasting + Assert Dominance
	1x Spiked Concoction + Assert Dominance (this is where you would get another Fasting)
	1x Fasting + Blessed Rebirth (Very rarely but it might save you from dying, because your loop minions cannot be randomly killed by aoe)
	1x Fasting + Life from Death (This provides a huge amount of life recovery to minions which makes buffs from permanent minions quite reliable unless ofc they get completely oneshot)

Crafting these medium clusters is very simple yet not very cheap:

	Step 1 - Get a notable fractured (not FASTING*)
		*only exception is if you are using a 4 Regenerative Runes jewel, then you can get 1 jewel with fractured Fasting
	Step 2 - Change the base with Refracting Fog until any base with flask stuff
	Step 3 - Use harvest bench Reforge Speed* + Exalt slams until you have your desired t1 suffixes
		*Only 2 speed modifiers available: Fasting and Spiked Concoction (make sure only 1 jewel has Spiked Concoction(does not stack))
	Step 4 - Change the base with Refracting Fog until you get "Damage while affected by a herald"*
		*"Area damage" does not scale Ball Lightning dmg

-----------------------------------
------ PERMANENT MINIONS
-----------------------------------

I was farming 80% delirious maps with Plenty scarabs which add monsters that even after dying keep doing massive amounts of damage so they can delete the less tanky minions making it mandatory to put them in a:
4link with Meatshield and imbue Minion Life onto one of them.

Spectres (both corpses from Ritual):
	- Perfect Spirit of Fortune: Wrath + Lucky lightning dmg (this is the most important one and the tankiest minion(never died))
	- Perfect Pain Artist: Zealotry (this one is relatively squishy, kept dying and never resummons for me(bugged?))

Animate Guardian:
	Check Item set named "animate guardian"
	Which is using a Kingmaker, Crown of the Tyrant and Legacy of Fury to boost my dmg
	and then the rest are to beef him up to not get oneshot in those div card farming maps:
	Doppelganger Guise for a massive defensive boost against physical and chaos dmg
	and Rare gloves to get his resistances up.
		*one thing to note is I focus on cold resistance because Shaper beams are scary and in Originator maps that guy shows up quite often

-----------------------------------
------ SOCKETS AND LINKS
-----------------------------------

A few notable things about the imbued gems:
- Swift affliction is cheap to get on Withering Step or Phase Run, 1/3 odds
- Haste with 21/20 eternal blessing gives more movement speed than imbued
- Herald of Ice imbued with Arrogance for QoL and to reach Low Life. Because weapon swapping removes Blood Magic even if you have another source of it in your off-hand, you lose everything reserved on life every time you do it.
- Main dmg skills: ideally Balll Lightning imbued with Hypothermia so that you can use level 1 Hexblast to reduce the life drain from skill costs, but totaly playable and potentially cheaper to get the imbued support on Hexblast


-----------------------------------
------ GEAR
-----------------------------------

Above 20% quality ward gear is extremely expensive, especially if you keep losing bases like I did... I lost almost a thousand divines just getting the corect fractures on my gloves and boots...
Better save your divines for a good roll on the belt, because it gets very pricey very fast and it's way more impactful.

------ Body Armour

	Bigest ward source when paired with Ynda's stand belt, so quality, triple t1 prefixes and good rolls on them is very important
	There are multiple different crafting options for it, but since both Intelligence and Area of effect are Essence mods, you either fracture one of them and get both but suffer crafting prefixes,
	or do what I did, get INT from a veiled mod, but have an easier time finishing prefixes

	!!!!!!!! Also STR+INT helps with STR requirements, otherwise you need %STR ring corruption or spend more points on large clusters

	Crafting(fractured prefix):
	Step 1 - Fracture t1 prefix
	Step 2 - Use Essence of Hysteria for Area of Effect and annul until it's the only suffix
	Step 3 - Craft can have up to 3 crafted modifiers + Suffixes cannot be changed + use Veiled chaos orb (50/50 to add veiled suffix)
		*it can fill suffixes with a random mod in which case you have to annul to save or if not - start from step 1
	Step 4 - Unveil* INT (they all give up to 35 INT but STR+INT would be ideal)
		*57% chance to give any INT mod -> REMOVE crafted mods, craft "Regenerate 150 Energy shield per sec..." to block the most likely mod. If you don't get INT go back to Step1
	Step 5 - Eldritch chaos/exalt/annul the prefixes (Don't forget to make Searing Exarch dominant xdd)

------ Gloves

	VERY IMPORTANT -> 30% Less Life cost of Skills While on Low Life (Comes from Exiles in the Mirage so you must recombinate onto a ward base)
	Implicits: I chose Freeze proliferation for better Herald of Ice visuals, but it can also be changed to Unnerve for 10% more DMG

	Crafting:
	Step 1 - Recombinate + Fracture the Life cost mod
	Step 2 - Use essence of Spite* until you have an open suffix
		*Intelligence cannot be rolled naturally so needs to be an essence
	Step 3 - Craft "cannot roll attack mods" and make Exarch dominant
	Step 4 - Eldritch Chaos orb/Exalt/Eldritch Annul until triple T1 ward

------ Boots

	- Abyssal socket* is not mandatory, but ideal for the build
		*Most important mods on the jewel are CB implicit and INT, then you could get some life, resistances, more intelligence or what I wanted: movement speed
	- Fractured prefix is the easiest crafting path

	Crafting:
	Step 1 - Fracture t1 prefix
	Step 2 - Abyssal socket + t1 Chaos res + open suffix
		2.1 - Hollow + Abberant + Corroded fossil combo 1/12 for t1 Chaos res
		2.2 - If Hollow is giga expensive: annul until only Abyssal socket -> Suffixes cannot be changed -> Harvest augment Chaos (1/6 for t1)
	Step 3 - Eldritch Chaos orb/Exalt/Eldritch Annul until triple T1 prefixes (Don't forget to make Searing Exarch dominant)

------ Heartbound Loop ring

	needs to have elemental resistances corruption which lets you get better stats on your cluster jewel suffixes
	and % intelligence is obviously good for INT stacking

	~Tip for crusader influence:
		You cannot add influence to a low level item, BUT you can use recombination to reduce the item level of an influenced item to have way better corruption outcomes

------ Helical Ring

	- needs to have Conductivity on hit, it is super important for Hexblast to get 300% more dmg with every hit, it also makes that foulborn explode jewel a great addition for clear
	- Recoup is quite good, but if you use a different Timeless Jewel that let's you path through life recoup you could get all attributes on the ring fro more dmg and ward
	- Misting the ring can get very expensive, but it's definitely not mandatory to start the build, I played without capped resistances for a while and it was okay

	Crafting (with life recoup):
	Step 1 - Recombinate + Fracture the Curse mod
	Step 2 - Use essence of Spite until t1 all elemental resistances
	Step 3 - Annul everything except INT and ALL RES
	Step 4 - Suffixes cannot be changed + Harvest Augment Life* for Life Recoup
		*1/28 for t1, 1/14 for at least t2
	Step 5 - Craft an irrelevant prefix like +# to maximum energy shield
	Step 6 - Lock* + Reflecting Mist hover until GG
		*t1 life recoup ring is very time consuming to craft so I would better go farm currency for locks

	Crafting (no life recoup):
	Step 1 - Recombinate + Fracture the Curse mod
	Step 2 - Use essence of Spite until t1 all elemental resistances
	Step 3 - Annul if no open suffix
	Step 4 - Craft +# to all attributes
	Step 5 - Reflecting Mist*
		*YOLO mist because it's "easy" to recraft

!!!!!!!!!!
If you are going for a misted ring DO NOT craft -# mana cost!!
I learnt the hard way that even though -# mana cost doesnt affect the life cost of my skills while using Blood Magic, when it flips it chages the wording and it adds mana cost that DOES affect life cost...
!!!!!!!!!!


------ FLASKS

We want 2 Iron Flasks, but only 1 needs to be ilvl 84 for t1 increased charge recovery*
		*It is important to get at least 64% here or you will need more flask charges gained investment than what I have in the POB
		+ Chance to freeze and shock is important since this is not a crit build, but it needs to be on this flask specifically to not lose effect of the other mods we want
	- like the increased ward on the other Iron Flask, which needs to be at least ilvl 78 for t1 ward