2 years ago
 Level 100 Chieftain3.23
Life: 3,032150%
ES: 75
Mana: 87
eHP:
52,498
Resistances: 88%/88%/88%/75%
Armour: 10,443
Hit Chance: 25%
Config: None
Bandit: Kill All
Gear


Gems
Phase Run
Frostblink
Increased Duration
Efficacy
Lifetap
Purity of Fire
Malevolence
Petrified Blood
Enlighten
Fire Trap
Righteous Fire
Awakened Burning Damage
Awakened Elemental Focus
Lifetap
Efficacy
Vitality
Defiance Banner
Arrogance
Herald of Ash
Cast when Damage Taken
Steelskin
Cast on Death
Vaal Breach
EnemyExplode
EnemyExplode
Tree Preview
 Might of the Bear
 Eternal Youth
 Armour Mastery
- You take 30% reduced Extra Damage from Critical Strikes
 Damage Over Time Mastery
- 15% increased Duration of Ailments on Enemies
- 15% increased Skill Effect Duration
 Elemental Mastery
- Hits have 25% chance to treat Enemy Monster Elemental Resistance values as inverted
 Fire Mastery
- Fire Exposure you inflict applies an extra -5% to Fire Resistance
 Life Mastery
- +50 to maximum Life
- 15% increased maximum Life if there are no Life Modifiers on Equipped Body Armour
 Mana Mastery
- 12% increased Mana Reservation Efficiency of Skills
 Reservation Mastery
- Auras from your Skills have 10% increased Effect on you
Notes
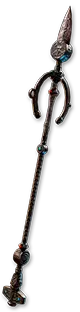
Guide by Allie
https://www.twitch.tv/Allliee_
https://www.youtube.com/c/Alliee


Video Guide for this PoB - https://youtu.be/NxrOUp_C6Cc
Crafting Video for this Guide - https://youtu.be/lGjVy4-jNMg


How to Start This Build

This build requires ~Level 70 at a minimum to play.
Since this is a build that requires expensive items to even work I am going to assume you have ~100c spare to buy leveling gear.
The quickest way to level would be to follow Tytykillers Hollow Palm Leveling Guide.

All of the leveling uniques are going to cost ~100c and you can sell everything back to other people once you are done with it.
Leveling like this will take anywhere from 2-5 Hours depending on how good you are at leveling.
I will not be including any other way to level in this guide, if you have a different way you enjoy leveling a Marauder, do that instead to Level 70.

Once you are 70 you can self level with the build just fine but if you wish to jump into the action ASAP, buy some 5-way carries to Level 90.

Tytykiller's Leveling Guide: https://tinyurl.com/TytyLevelingGuide


What Charms to Use

We will be using the Primalist Affliction Ascendancy in this build giving us access to 3 Charm Slots which can give us mini versions of other Ascendancies.
There are a ton of useful options here but there is going to be one very specific roll we want on all of our charms.

First, you will need 3 Ursine Charms with "Enemies you or your Totems Kill have 1% chance to Explode, dealing 500% of their maximum Life as Fire Damage"
This is mini version of Chieftan's Hinekora node and its the bread and butter of how this build works. The more of these we have the more consistent the whole build will feel.

On 2 of your charms you will need 2 additional rolls, you will need:

"+1/2% to maximum Fire Resistance"
"x% of Overkill Damage is Leeched as Life"

These 2 rolls are VERY IMPORTANT and take precedence over the Chieftain explode node.
If you cannot afford the explode node and 1 of those 2 mods, then buy a charm without the explode node.

The Maximum Fire Resistance is very important as we need 90% Max Fire Resistance. The charms can roll 1% or 2% and you will need at least 2 1% rolls to get to 90%.
Our Fire Resistance is our maximum for Cold and Lightning as well through Valako on our Ascendancy.
Most of the Physical Damage we will be taking will be converted over to Elemental meaning that every extra bit of % closer to 90% makes us substantially more tanky.

The "Overkill Damage is Leeched as Life" node gives us incredible sustain as we won't be using a Life Flask in this build.
We are also a Petrified Blood build which means we will never go above 50% Maximum Life and that means we will never lose the Leech from hitting Full Life.
This means whenever we take any damage, the Leech will always be there at full power ready to get us back up.


How Self Ignite Works

The way this build works is very simple and revolves around Fulcrum and the Medium Cluster Jewel node Fan the Flames.

The whole idea behind the build goes as follows:

1. Kill a mob with Fire Trap, hoping either our Ascendancy Hinekora procs or Oriath's End procs.
2. The Explosion from either will deal a large Fire Hit which will Ignite due to us having "100% chance to Ignite".
3. The Ignite from the enemies hit by the explosion will then be reflected to us through Fulcrum's "Elemental Ailments you inflict are Reflected to you"
4. We are now Ignited but don't care about it due to our Ascendancy Tasalio.
5. Fan the Flames spreads the Ignite that is on us which is MASSIVE due to Hinekora's "500% of Monster Life as Fire Damage"
6. Things die to the Ignite, Explode, cause more Ignites that then get reflected back to us and the cycle continues.

The TLDR here is: Kill monster, monster goes boom, you get ignited, ignites spread.
Another bonus of all of this is that Oriath's End will do Cold, Fire, or Lightning Damage.
This means we can use Winterweave to turn the Chills on us into increased Action Speed and gain a massive Movement Speed increase.

One issue that happens because of Oriath's End is we will also be Shocked which we cannot turn into a beneficial ailment so we need to negate it.
This is done through a Notable on the passive tree being turned into Rural Life by Elegant Hubris for "80% chance to Avoid being Shocked"
With the last 20% being handled by an Abyss Jewel with the same modifier.


Gear

Basic overview of every slot and what to look for.

IN GENERAL - Fit Chaos Resistance on your Helmet, Gloves, & Boots.
This build is super over Res Capped for free due to how overpowered our Ascendancy Tasalio is at taking care of everything with Purity of Fire.

You will need a lot of Chaos Resistance as that is the only thing we are scared about in this build.
Try to focus on getting high rolls everywhere.

Due to Elegant Hubris and Supreme Ostentation, we need no attributes on any of our gear allowing us to fit Flat Life Regen and Life Regeneration Rate everywhere.


Helmet
Crafting Video for this Guide - https://youtu.be/lGjVy4-jNMg

The best helmet for this build is going to be a Rare helmet. We need "+2 to Level of Socketed AoE Gems" to get our Purity of Fire to Level 23 for the breakpoint that gives us +1% Maximum Fire Resistance.

Ideally, get an Armour base.
We are converting the majority of damage we take to Elemental making even a small amount of Armour very effective against the small amount of Physical Damage we will take.

There are going to be 2 ways to get the +2 Helmet we need.
The first way will be the cheap way of buying one that someone already unveiled with +2 AoE Gems.
The second way will be crafting one but the crafted helmet will be much stronger.

If you wish to buy one, please use the trade link below and buy one of these.
All that matters is that it has an Open Prefix to craft "x% of Physical Damage from Hits taken as Fire Damage"

You can add extra filters to it and try to get Chaos Resistance, Life & Life Regen if you wish but it will be more expensive.
I've set them up for you, just turn on the filters you wish to see.

Trade Link: https://www.pathofexile.com/trade/search/Affliction/Ey2R2J4u5


Crafting Guide to make your own (this saves 3 passive points)

Start with a Fractured Chaos Resistance Armour base. Buy a Tier 1 Chaos Resistance base if possible.

1.Use Shrieking Essence of Loathing until you hit Tier 1 Life Regeneration Rate this is ~1/91 chance. You DO NOT need to use Deafening Essences which are A LOT more expensive.
The Reservation roll MUST BE 8% which means you will need to Divine the roll to 8% OR run a Mana Reservation Efficiency Jewel for the last 1%.

2. If your helmet has 3 Prefixes, you must Annul one Prefix off. To do this, use a Searing Exarch Ember on the helmet to Influence it then use an Eldritch Orb of Annulment.

3. Use a Wild Bristle Matron in the Bestiary to craft "Suffixes Cannot be Changed" this will cost ~1.2 Div per try vs the 2 Div on the Crafting Bench.

4. Use a Veiled Chaos Orb and DO NOT unveil yet. If you have an Open Prefix craft "+1 to maximum number of Raised Zombies, +1 to maximum number of Skeletons" this will raise the chance of success from ~37.166% to ~43.746%.

5. Unveil and pick "+2 to Level of Socketed AoE Gems, x% increased Area of Effect" if you do not get it, use another Wild Bristle Matron or manually craft "Suffixes Cannot be Changed" and go back to Step 4.
If you do not have an Open Prefix, you need to Annul for one using an Eldritch Orb of Annulment like in Step 2.

6. If you have an Open Prefix, finish the craft with "x% of Physical Damage from Hits taken as Fire Damage."
If you do not have an Open Prefix, you can Influence the helmet with a Searing Exarch Ember and use an Eldritch Orb of Annulment for a 66% chance to remove a Prefix that isn't "+2 to Level of Socketed AoE Gems."
YOU DO NOT NEED TO DO THE ANNUL - You will be fine with no "x% of Physical Damage from Hits taken as Fire Damage" craft. You can play just fine without one.

With a Crafted Helmet - You can drop the Mana Mastery at the top of the tree to get your 3 passive points back.


Once you have your helmet:

Use "Lesser Eldritch Ichor" on the helmet to get "x% of Physical Damage from Hits taken as Fire/Cold Damage." You can get Lightning as long as it's NOT CHAOS. Fire/Cold are the best due to us running a Ruby Flask & Taste of Hate lowering the damage further.
This is a massive EHP increase and I would recommend to use "Grand Eldritch Ichor'' if you can to hit 7%.

Use "Lesser Eldritch Ember" or "Grand Eldritch Ember" if you can afford it to hit "x% increased Area of Effect." This is the only useful Exarch mod and is an amazing clear increase.


Chest

The only good chest in this build is Cloak of Flames. We are trying to convert the majority of our Physical Damage taken into Elemental Damage to utilize our 90% Resistances.
The only important roll is the "x% increased Ignite Duration on Enemies" as this DOES apply to the Ignite Fulcrum reflects onto us making the build more consistent.


Corrupted chest plates are very very strong in this case due to compounding Maximum Resistance.
Ideally we want to get "+1% to all maximum Resistances"
These will be very very expensive but if you can get +1% as a corrupted implicit, this is your Endgame chest.

If you buy one, linking it is very very easy and cheap.
Once you buy one, Corrupted Jeweller's Orb it to 6 sockets, these are very very cheap and will either add 1 or remove 1 socket from the chest.
It will take you ~40-60 Jeweller's to get the chest to 6 sockets.

Once you have it with 6 sockets, go to the bench and force 4 link it, this will cost a few Vaal Orbs but is not bad.
Then, use a Tainted Fusing Orb on it, this will be a straight up 50/50 on adding or removing a link. If it goes down to 3, force the 4 link again with the bench.
If it goes to a 5 link then it's a 50/50 for 6 links. If you lose it and it goes back down to 4 just try again. On average it should only take 4 Fusings to 6 link the chest.
Now, you could get unlucky and have it take more, I had a chest take 27 before but for the average person it should just be 4.

This allows us to get a massive massive damage increase for only a few div. RIP Tainted Fusing Prices

I have a video guide on how to 6 link a corrupted chest here: https://youtu.be/Fqeu9F3IRME


Belt

For this build our best belt before Headhunter is Bisco's Leash. Bisco's Leash gives us access to Rampage which allows us to go even faster.
There is nothing else we really want or need on a belt other than more Movement Speed but you can choose to go with a Stygian Belt with Chaos Resistance and Life too.

If you go for Bisco's Leash, try to get a corrupted one with "x% increased Movement Speed during any Flask Effect." This roll should be very cheap and will give you more Movement Speed.

Headhunter will send this build into the stratosphere. It will make it move an order of magnitude faster, give it more damage, and make it much much tankier.
Headhunter is your BIS belt and is something you very much wish to strive for in this build.


Weapon

The only weapon for this build is The Fulcrum.

As mentioned in the "How Self Ignite Works" section, we need the "Elemental Ailments you inflict are Reflected to you" roll to be able to reflect Ignites back to us.

There is no way around this and this is a HARD REQUIREMENT for this build to work.


Gloves
Crafting Video for this Guide - https://youtu.be/lGjVy4-jNMg

In the glove slot we are going to look for a pair of gloves with Life, Chaos Resistance, Life Regeneration & Life Regeneration Rate.

The glove is simply just going to be a filler for more regen and general good stats.
If you want to buy a half decent pair of gloves, use the trade link below.

Trade Link: https://www.pathofexile.com/trade/search/Affliction/WVPJQwztm

Glove Crafting Guide (Expensive but will be better)

Start with a Fractured Life Regeneration Rate or Regenerate x Life Per Second Armour base. Buy a Tier 1 base if possible.

1.Use Deafening Essence of Envy until you hit Tier 1 Life Regeneration Rate OR Regenerare x Life Per Second based on which Fracture you bought.
This is ~1/88 chance if going for Regenerate x Life Per Second and a ~1/85 if going for Life Regeneration Rate. You can use Shrieking Essences if you want to make the gloves for cheaper.

2. Influence your gloves with a Searing Exarch Ember. If your gloves have Prefixes on them, use an Eldritch Orb of Annulment to remove them all.

3. Craft "+x to Armour" on the gloves, any Tier works. Then, use Eldritch Exalted Orbs or Exalted Orbs based on which one is cheaper to slam 2 Prefixes onto the Gloves.
You are looking for Tier 3 or higher Maximum Life. This is ~1/39 chance per Eldritch Exalted Orb.

3.5 If you fill up all Prefixes without hitting any decent Maximum Life roll, use Eldritch Orbs of Annulment to remove all Prefixes and try again, crafting the "+x to Armour" before Eldritch Exalt slamming again.
Stop when you hit a Tier of Maximum Life you are happy with.

4. Once you are happy with your Maximum Life roll, craft "x% increased Damage while Leeching" on the gloves.

Once you have your gloves:

Use "Lesser Eldritch Ichor" on the gloves to get "Inflict Fire Exposure on Hit, applying -x% to Fire Resistance."
This is a massive DPS increase and I would recommend to use "Grand Eldritch Ichor'' if you can to hit 13%.

Use "Lesser Eldritch Ember" or "Grand Eldritch Ember" if you can afford it to hit "% to Fire Damage over Time Multiplier." This is also a massive DPS increase.


Boots
Crafting Video for this Guide - https://youtu.be/lGjVy4-jNMg

In the glove slot we are going to look for a pair of boots with Life, Movement Speed, Chaos Resistance, Life Regeneration & Life Regeneration Rate.
This is very very similar to the boots and is the same exact craftting process as the helmet if you wish to make your own.

The boot is simply just going to be a filler for more regen and general good stats.
If you want to buy a half decent pair of boots, use the trade link below.

Trade Link: https://www.pathofexile.com/trade/search/Affliction/YVXMMYvIY

Boots Crafting Guide (Expensive but will be better)

Start with a Fractured Life Regeneration Rate or Regenerate x Life Per Second Armour base. Buy a Tier 1 base if possible.

1.Use Deafening Essence of Envy until you hit Tier 1 Life Regeneration Rate OR Regenerare x Life Per Second based on which Fracture you bought.
This is ~1/65 chance if going for Regenerate x Life Per Second and a ~1/62 if going for Life Regeneration Rate. You can use Shrieking Essences if you want to make the gloves for cheaper.

2. If your boots have 3 Prefixes, you must Annul one Prefix off. To do this, use a Searing Exarch Ember on the helmet to Influence it then use an Eldritch Orb of Annulment.

3. Use a Wild Bristle Matron in the Bestiary to craft "Suffixes Cannot be Changed" this will cost ~1.2 Div per try vs the 2 Div on the Crafting Bench.

4. Use a Veiled Chaos Orb and DO NOT unveil yet. If you have an Open Prefix craft "+x to Maximum Life" this will raise the chance of success from ~50.776% to ~57.459%.

5. Unveil and pick either the Movement Speed Hybrid with "Onslaught on Kill" OR "Movement Speed if you haven't been Hit Recently" if you ONLY get the one with "100% chance to Avoid Being Chilled" that is a brick and you need to try again.
If you do not get it, use another Wild Bristle Matron or manually craft "Suffixes Cannot be Changed" and go back to Step 4.
If you do not have an Open Prefix, you need to Annul for one using an Eldritch Orb of Annulment like in Step 2.

6. If you have an Open Prefix, finish the craft with "+x to Maximum Life."
If you do not have an Open Prefix, you can Influence the boots with a Searing Exarch Ember and use an Eldritch Orb of Annulment for a 66% chance to remove a Prefix that isn't the Movement Speed Hybrid.
YOU DO NOT NEED TO DO THE ANNUL - You will be fine with no "+x to Maximum Life" craft. You can play just fine without one.

Once you have your gloves:

Use "Lesser Eldritch Ichor" on the gloves to get "x% increased Life Regeneration rate."
This will be a nice increase to recovery and you can use Greater Eldritch Ichor to get a 9% roll.

Use "Lesser Eldritch Ember" to hit "+1% to maximum Fire Resistance."
You do not need to use any better Embers as all 3 tiers will only hit +1%.
This is a big EHP increase due to compounding Maximum Resistance.


Rings

There are only 2 rings you would ever want in this build, Winterweave and Death Rush.

Winterweave allows us to turn all Chills on us into Increased Action Speed instead of decreased, which is effectively a Movement Speed multiplier giving us insane speed.
It is also required to counteract Oriath's End as without it, every time the flask Explosion does Cold Damage we will be massively slowed.

Death Rush is a great pick on any build that just needs defensives and speed. Death Rush gives us Adrenaline which is 10% Physical Damage Reduction, 100% Increased Damage & 20% Movement Speed.
The Life on Kill is also a great stat due to us killing 10s of mobs per second giving us a great first line of defence against DoTs and any big hits.
MAKE SURE to get a 2 Second or 3 Second Adrenaline roll as a 1 Second roll will feel incredibly bad and inconsistent.


Amulet

The only amulet to ever consider in this build is Defiance of Destiny.
Defiance of Destiny is a new amulet introduced with 3.22 and is now a core drop in 3.23. The special thing about this amulet is a new defensive layer that has never existed before, recovery before a hit.
A max rolled Defiance of Destiny with 20% Quality using Fertile Catalysts will recover 42% of your missing health before every hit against you.
This is extremely powerful and when added with everything else in this PoB, you can literally facetank anything that is a hit.

If you wish to learn more, I have a whole video discussing it.

Defiance of Destiny Video: https://youtu.be/xk6l5f2Mva4


Flasks

Flasks are going to be very simple in this build as there isn't anything special we need except generic Armour, Movement Speed & a Ruby Flask for all of the Fire Damage we take.

In terms of flasks for this build there are 2 major Unique flasks to consider otherwise we just want normal flasks.

Oriath's End
This flask is going to be a major contributor to our clear while also giving us an incredible amount of Movement Speed due to Reverse Self Chilling through Winterweave.
The Charge Recovery roll doesn't matter as it will always be full due to its duration and the only relevant roll is the Explode Chance. You are more than fine to buy a low rolled one and to upgrade later.

Taste of Hate
Taste of Hate is great for helping us live which is all we really need help with from our flasks. Taste of Hate converts a portion of Physical Damage we take over to Elemental Damage.
Due to our high Maximum Elemental Resistances this means we will take significantly less damage from the portion it converts to Cold Damage.
The only roll that matters is going to be the "x% of Physical Damage from Hits taken as Cold Damage" roll as we do no Physical Damage so the Phys as Extra roll is irrelevant.

Normal Flasks
We are going to want to run 3 Utility Flasks in this build.
For the 3 Utility Flasks we are going to want: Quicksilver, Granite & Ruby.
All this build really needs is generic tank stats so we are going to use our flasks for that specific purpose.

There isn't much else to say here other than make sure you focus on your flasks. These are with you at all times and are very much an extension of your build.
Make sure to upgrade to Tier 1 rolls when you can as it does make a difference and make the build overall feel better.

Flask Prefixes
On your 3 utility flasks you want "x% reduced Duration, 25% increased effect" as your Prefix.
We unfortunately dont have any sort of flask mods in this build allowing us to extend the duration of them but as this build is meant to do high density farming it will always be up.

Another option is to go for the Prefix "Gain x Charges when you are Hit by an Enemy"
This will give you 100% uptime in high density maps and might feel better than Increased Effect due to the higher uptime but its honestly not needed.

Flask Suffixes
There are 3 major Suffixes that we want to get on our flasks.
The only one that id recomment to care about where it is placed is the "Freeze, Shock and Ignite Chance" Suffix.
Put this on your Ruby Flask for better uptime.

We need:
x% increased Movement Speed during Effect
x% increased Armour during Effect
x% chance to Freeze, Shock and Ignite during Effect


Gems

There are some very powerful jewels for this build that we want to be on the lookout for.

Watcher's Eye is also a very important unique for this build helping us get closer to 100% of Physical Damage converted to elemental.

On a Watcher's Eye you want to prioritize the Purity of Fire mod over anything else.
Watcher's Eye looks like an EHP decrease in PoB but that is only true against small hits that cant even kill you in the first place. Against big phys hits where you dont have 90% Phys DR, it is an EHP increase.
Outside of the "Phys taken as Fire" roll, the only other relevant mod to consider is the Malevolence "+x% Damage Over Time Multiplier" roll.
Under any circumstance DO NOT get the Malevolence "Your Ailments Deal Damage Faster" mod as it will brick your build as your Ignite will fall off of you faster.

That Which Was Taken is a new jewel added in 3.23. This jewel can roll any 4 Charm modifiers on it and can be incredibly strong.
This is the Watcher's Eye of Charms. The only roll that is required on this is the "+2% Maximum Fire Resistance" roll.
This is crucial to hitting 90% Maximum Fire Resistance but otherwise you can get any other mods you see fit on it.

Elegant Hubris is an important part of this build as the Keystone Supreme Ostentation from Caspiro will allow us to ignore all Attribute Requirements which would otherwise be too difficult to get.
You need to find an Elegant Hubris that also has a Rural Life node to get "80% chance to Avoid being Shocked."
You can use the Find Timeless Jewel button in PoB under the Passive Tree to find one.
An example on how to do this is also in the Video Guide linked at the top of the Notes.

Normal Jewels

We have 2 slots open in this build which we will fill with normal Jewels.
What I recommend is 1 Abyss Jewel and 1 Crimson Jewel.

On the Abyss Jewel you want to get "x% chance to Avoid being Shocked" and "x% chance to gain Phasing for 4 seconds on Kill."
The Shock roll does not matter the tier of as any will  get you to 100% with Elegant Hubris.
As for the Phasing roll, try to get a Max 8% roll for it to feel as comfy as possible.
Otherwise, you should find Maximum Life on the Jewel.

As for the Crimson Jewel, get one with "x% Increased Mana Reservation Efficiency" if you have done the helmet craft and did not Divine the 7% RMR to 8%.
Otherwise, look for generic stats such as:

x% Maximum Life
x% increased Area Damage
x% increased Damage Over Time
x% to Fire Damage Over Time Multiplier


Cluster Jewels

There are a few Cluster Jewels we want to get in this build.
There is going to be 1 Large Cluster Jewel, 3 Medium Cluster Jewels & 1 Small Cluster Jewel.

All of these are not worth crafting and should just be bought as they will be cheaper.


Large Cluster Jewel

On the Large Jewel we want a 8 Passive Elemental Damage Jewel with:

Sadist & Widespread Destruction
Either Corrosive Elements OR Prismatic Heart

The point of Corrosive Elements and Prismatic Heart is that they will go to the back of the cluster by the 2 Jewel Sockets meaning Sadist and Widespread Destruction are on the sides.
This saves us 2 Passive Points while allowing us to get the nodes we need.


Medium Cluster Jewel

There are going to be 2 types of Medium Cluster Jewels we need, 2 Area Damage and 1 Burning Damage.

On the Burning Damage Cluster you want:
Fan the Flames
Burning Bright

Fan the Flames is REQUIRED for this build to function and you cannot skip out on it. Burning Bright offers 2 great stats for our build.

On the Area Damage Cluster you want:
Towering Threat
Assert Dominance

Both of these nodes give us Area of Effect helping our Explosions reach a bit further.


Small Cluster Jewel

For the Small Cluster Jewel you want a 2 Passive Point Small with Enduring Composure as this will give us consistent Endurance Charges.


.


'