a day ago
 Level 99 Crit Lightning Strike Warden3.28
Life: 3,935106%
Mana: 42
eHP:
64,293
Resistances: 75%/75%/75%/52%
Evade: 85%
Armour: 71,359
Evasion: 50,767
DPS: 11,926,191
Speed: 9.85
Hit Chance: 100%
Crit Chance: 100.00%
Crit Multi: 486%
Config: 35% Shock, Frenzy, Power
Bandit: Alira
Pantheon: Soul of Lunaris, Soul of Ralakesh
Loadout
Gear




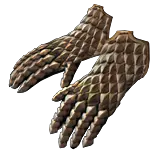
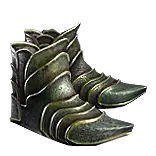










Gems
Vaal Lightning Strike
Trinity
Greater Multistrike
Nightblade
Inspiration
Invert the Rules
Assassin's Mark
Lifetap
Mark On Hit
Blood Rage
Automation
Whirling Blades
Faster Attacks
Precision
Arrogance
Wrath
Purity of Elements
Enlighten
Determination
Enlighten
Grace
Anger
Frostblink
Unbound Avatar
Tree Preview
Runegraft of the Fortress
10% reduced Attributes
40% increased Global Defences
Limited to 1 Runegraft of the Fortress
Tattoo of the Ramako Sniper(x10)
5% increased Projectile Speed
 Armour and Evasion Mastery
- 40% increased Evasion Rating if you have been Hit Recently
- 40% increased Armour if you haven't been Hit Recently
 Claw Mastery
- Skills Supported by Nightblade have 40% increased Effect of Elusive
 Dagger Mastery
- Elusive also grants +40% to Critical Strike Multiplier for Skills Supported by Nightblade
 Elemental Mastery
- Hits have 15% chance to treat Enemy Monster Elemental Resistance values as inverted
 Evasion Mastery
- +15% chance to Suppress Spell Damage if Equipped Helmet, Body Armour, Gloves, and Boots all have Evasion Rating
 Leech Mastery
- 5% of Leech is Instant
 Life Mastery
- 15% increased maximum Life if there are no Life Modifiers on Equipped Body Armour
- +30 to maximum Life
 Mana Mastery
- 12% increased Mana Reservation Efficiency of Skills
 Reservation Mastery
- 8% increased Damage for each of your Aura or Herald Skills affecting you
- Auras from your Skills have 10% increased Effect on you
 Spell Suppression Mastery
- You have Phasing if you have Suppressed Spell Damage Recently
- +8% chance to Suppress Spell Damage while Phasing
 Tincture Mastery
- The first 6 Mana Burn applied to you have no effect
- Tinctures deactivate when you have 12 or more Mana Burn
Notes
Notes Appendix:

1. Build Mechanics
2. Conditionals/skills/abilities that are not activated in the loadouts
3. League mechanics - what the build excels at, what it struggles with, and small tips
4. Leveling Notes
5. Build Options/Personal Preference Choices
6. Specific Loadout Notes
7. Crafting Guide Notes


Build Mechanics

 - Trinity Support
 	- This support requires you to hit harder with 1 element than the other 2, and to do the same again with another element, within a 4-second window. You don't need all 3 elements, just alternating damage between 2. For example, this build will likely
	    hit hardest with fire often due to a low roll range for fire damage and due to the lots of fire damage we have from Anger. However, lightning has a giant roll range, so sometimes you will massively exceed your fire damage with lightning damage due
	    to all the damage received from Wrath. As long as these hits are alternating, Trinity will work as intended. The way to see this for your build is properly importing your character, then going to the calcs screen and reviewing the "MH Hit Damage"
	    section to see how hard the elements are each hitting. Ideally you have a high roll range with lightning, and your fire or cold damage falls somewhere inside of that roll range, which will make your trinity consistent. If you were running without
	    lightning damage, you'd want your fire and cold damage to be fairly similiar roll ranges to keep it consistent.

 - Tinctures
 	- These are half of the build's identity (along with aura scaling,) and are the primary source of up-front cheap and easy damage, as well as solving for some hard-to-obtain-stats. Making sure these are well-rolled and applying quality to them as
	    soon as possible will help massively. Due to the amount of tincture effect we're running, the two tinctures will give you most of the stats you need for crit chance, ele penetration, attack speed, and % increased damage - meaning you can focus
		your currency into other areas.

 - Auras
 	- These are half of the build's identity (along with tinctures,) and are the primary source of flat damage + tankiness. Scaling aura effect is akin to increasing the damage on your weapon, and it also will provide additional resistances, armour, and
		evasion. Scaling armour and evasion will also scale your % increased damage, thanks to Perseverance.

 - Perseverance scaling
 	- This unique belt provides the build with permanent onslaught (due to being permanently fortified from chest eldritch implicit,) as well as significant long-term scaling by gaining extra offensive power from scaling your defensive stats. In the endgame,
		this belt will be close to half of your % increased damage. As you craft better rares (especially the body armour,) this belt will help with making each upgrade feel significant due to its inherent scaling properties.

 - Lightning Strike "sweet spot" double hit
 	- When you have at least 1 source of "non-vaal strike skills target 1 additional nearby enemy," Lightning Strike is capable of now "double hitting" with both the melee and the projectile. When you strike in front of you, the animation calls down a bolt
		of lightning, which projectiles shoot out of. However, with an additional strike, it is possible to get this lightning bolt to hit on the ground in front of you AND on the enemy's head, making that enemy get hit by the projectile AND the melee.
		I recommend reviewing a youtube vide of this if you are confused, as this is an important part of Lightning Strike's advantage over Frost Blades.

 - Lightning Strike odd number of projectiles
	 - With the above "sweet spot" in mind, it is important that you actually shoot straight so you can "double hit" a single target mob. With that in mind, it's critical that you keep an odd number of projectiles - this way 1 projectile always shoots directly
		in front of you. If you have an even number of projectiles, they will fork in front of you and not shoot straight.

 - Increasing clear - pierce, strikes, projectiles
	 - Damage is usually not a significant issue on this build, so your clear is usually only limited mechanically and not numerically. Additional pierce will help with chewing through large packs of mobs that are clumped together. Additional strikes will help
	   with screen-wide coverage, as will scaling additonal projectiles on Lightning Strike, or running Fury Valve on Frost Blades. Projectile speed also helps a lot with making your clear feel "snappy".

 - How to increase damage on this build
 	- Flat damage comes from your weapon and auras, so this can be increased by upgrading your weapon or increasing the gem level and/or aura effect for Wrath and Anger. % Increased Damage comes primarily from your Prismatic Tincture and
	   from Perseverance, so getting a well-rolled high-quality tincture and increasing your armour/evasion will provide you more of this stat. Make sure you have a 6-link setup with the correct supports, and make sure your gems are leveling or leveled.
 	  Elemental Penetration and Enemy Resistances are dealt with by your tinctures, passive tree, and Invert The Rules Support. Attack speed mainly comes from your weapon and tinctures. Frenzy charges come from Blood Rage, make sure it's active.
 	  Make sure you uber ascend to get Avatar of the Wilds, as it is a button with 100% more damage on it. Many unique jewels in the loadout progression give you a lot of damage, make sure you are purchasing these. Overall I recommend following
	   the loadout progression guide.

 - How to increase tankiness
 	- Early on you might struggle with squishiness, especially the first few days of the league. As you push into red maps, its important to get your chaos res above 0%. Increasing your maximum life (via levels and better gear) will help a lot with the
 	  feeling of "being 1-shot." Getting Grace and Determination running helps a ton with smaller hits, and the Endgame Body Armour is one of the most significant upgrades for defensiveness that you'll obtain. If you're struggling with phys hits,
	   getting %physical damage reduction on your shield, body armour, and watcher's eye will help, as will a Light of Meaning for armour. As you push the build further and into lategame, scaling your max resistances and obtaining crit immunity will
	   help significantly. If you're tight on currency early and feel you need to just be 20% tankier for the content you're running right now, try checking out the personal preferences section for options, I recommend giving the Ruthless Support package
	   a try.

 - Solving lategame map mod problems
 	- Crit immunity gets solved via shield + watcher's eye. Reducing your mana cost significantly can allow you to run no-regen maps, *or* no leech maps (do not run both at the same time.) Reflect has been taken care of in 3.29 and is no longer a
		concern for the build. Action-speed issues in t16.5s and nightmare maps can be handled with a Balance of Terror + Temporal Chains self-cast, if needed. Most monster damage mobs are not that relevent due to Oath of Winter permanently
		freezing most of the screen.


Conditionals/skills/abilities that are not activated in the loadouts
1. Molten Shell
2. Avatar of the Wilds
3. Flasks
4. Higher shock value (from Avatar hitting harder)


League mechanics - what the build excels at, what it struggles with, and small tips

Below is a rating of how well Frost Blades handles each mechanic:
 - Abyss 10/10
 - Mercenaries 7/10
 - Blight - 7/10
 - Blighted Maps - 5/10
 - Beasts - 6/10
 - Essences - 6/10
 - Expedition - 6/10
 - Unstable Breach - 8/10
 - Breach Hive Fortress - 8/10
 - Betrayal - 7/10
 - Legion - 7/10
 - Harvest - 6/10
 - Maven Witness Guardians - 7/10
 - Ritual - 10/10
 - Beyond - 10/10
 - Ultimatium - 10/10
 - Delirium - 7/10
 - Settlers - 8/10
 - Rogue Exiles - 7/10
 - Strongboxes - 7/10
 - Alva - 8/10
 - Simulacrum - 10/10

Below is a rating of how well Lightning Strike handles each mechanic:
 - Abyss 8/10
 - Mercenaries 10/10
 - Blight - 6/10
 - Blighted Maps - 6/10
 - Beasts - 10/10
 - Essences - 10/10
 - Expedition - 6/10
 - Unstable Breach - 9/10
 - Breach Hive Fortress - 5/10
 - Betrayal - 5/10
 - Legion - 8/10
 - Harvest - 7/10
 - Maven Witness Guardians - 10/10
 - Ritual - 6/10
 - Beyond - 10/10
 - Ultimatium - 6/10
 - Delirium - 10/10
 - Settlers - 6/10
 - Rogue Exiles - 9/10
 - Strongboxes - 5/10
 - Alva - 6/10
 - Simulacrum - 7/10

Tips:
 - Expedition - Recommend taking the "monsters cannot block your attacks" attack mastery on the Multishot wheel
 - Abyss - If playing Frost Blades, try Fury Valve for this
 - Maven Witness Guardians - Recommend picking up multiple sources of extra strikes
 - Recommended regex for t16s: "!ced e|ilm|f max|l max|ss ac|eche|taun"
 - Recommended reget for t16.5s and Nightmare Maps: "!aura|elo|l max|k at|ilm|f max|ates|ss ac|kes|eche"


Leveling Notes

1. Make sure to use the Loadouts dropdown section near the top right for each section. For leveling, keep an eye on the Skills section to check for changes to gems.

2. Use your gold - gamble for upgrades in your worst slots with the vendor in each town. If your weapon is bad, gamble for weapons. If it is good, gamble for items with good sockets/links/stats. I do not recommend gambling for jewelry.

3. I HIGHLY recommend creating a mule (throwaway character that clears Hillock only, then converts all its gear to wisdom scrolls and puts them in the bank for character #2 to use) so that you can purchase 2 iron rings and a rustic sash at the vendor.
This will make Mud Flats much easier, and help you tremendously if you want to pursue the league mechanic early.

4. This is an attack build - you need to always be on the lookout for better weapons. Your damage does not scale with levels nearly as well as it does on spells, your weapon is critical to having good damage.

5. Frost Blades is not an insanely strong skill in Acts 1 and 2. Brutus and Merveil are not fast! You will need to be patient while your damage ramps. The build really comes online in late Act 3 and will start cruising through the rest of the campaign. The
swap to crit in Act 7 is ridiculously strong with the 2nd tincture.

6. Make sure to procure a Prismatic Tincture early, preferably as soon as possible. Vendors in Act 2 can sell them, or you can typically buy one on the trade website for a single chaos orb early. This makes a massive difference, especially if you roll
the suffix to have attack speed or elemental penetration. In Act 7, you pickup a Rosethorn Tincture and roll whichever suffix you didn't on the first one.

7. Some leveling uniques can be very helpful. Prismweave is the primary one to boost your damage, and Carnage Heart can do a lot for your resistances + attributes while leveling. If you're doing the league mechanic and swimming in currency while
leveling, then you should also look into unique rings like Ngamahu's Sign or Tasalio's Sign or Winterweave, as well as Berek's Grip or Berek's Pass. Additionally, Ondar's Clasp can be very strong in the first 3 acts for flat damage.

Act 1:
 - Act 1 links before Brutus: Frost Blades-Chance to Poison-Momentum
 - Make sure to pickup and vendor magic/rare gear throughout Act 1 - you will need transmutes to purchase several gems, and better weapons from the vendor in the event you do not find a good weapon on the ground or from gambling.
 - Prioritize new weapons (preferably 1h swords, daggers, or claws so you can continue to use Whirling Blades) with increased damage on them. Flat elemental damage and % increased physical damage are both good mods to look out for.
 - Make sure to keep Frostblink in so you can go over walls/cliffs easily instead of going around them with Whirling Blades.
 - Vitality and Clarity are just for convenience prior to getting instant leech. If you don't mind pressing flasks constantly, then feel free to skip these auras and just grab a Herald in Act 2 for more damage prior to the big auras in Act 3.
 - Lifetap is for Assassin's Mark, which we won't use until Act 7. This can be skipped for now if needed.

Act 2:
 - Make sure to keep Frostblink in so you can go across the broken roads/bridges in the riverways zone.
 - Doing Chamber of Sins first is advisable to pickup Blood Rage early.
 - Gambling for gear in late Act 2 should start to result in 4-links, so it's important to gamble for armour pieces at this point instead of weapons so you can get your 4-link setup.
 - If you don't find a 4-link, note that here is a combo of 2 red beasts you could potentially get that would provide you with 2 orbs of binding - this is really good if you got unlucky trying to find a 4-link, so pay attention to what beasts you get from your
Act 2 encounters.
 - If you're a player that has not run Trinity Support before and are unfamiliar with how it works, make sure to check out the Build Mechanics section of the notes to ensure you're not messing it up while leveling.
 - Feel free to either help Alira or kill all 3 bandits in Act 2, both are good options. I've put Alira in while leveling because I feel it is high-value and makes it much easier on a newer player for gearing early.
 - Make sure you have some source of flat added fire damage to attacks, either on your weapons, jewelry, or gloves. You need at least a little fire damage to ignite enemies to engage the fire mastery's damage increase against ignited enemies.
 - Assassin's Mark does basically nothing currently, but we'll be using it starting in late Act 7.This can be skipped for now if needed.
 - Friendly reminder to get a Prismatic Tincture.

Act 3:
 - Make sure to link Automation to Molten Shell. You can link it to Blood Rage too if you're lazy, but keep in mind this will cause you to be constantly bleeding out. It's like a fun minigame where you can't loot for too long or you'll die.
 - Auras are entirely up to you. Haste is very good for just moving/attacking fast, which typically will result in the fastest campaign clear. If you don't like dying, you can run Purity of Elements or Determination. If you want to just hit hard, or if you need
an easy way to setup Trinity Support, then running Anger or Wrath will usually be the best. Matching the auras to your playstyle will usually result in the best outcome.
 - Make sure to cap your resistances and craft on your gear prior to going into Labyrinth. If possible, having room to craft flat added elemental damage on your jewelry, gloves, and weapon will give you a massive increase in damage.
 - Getting quality on your Assassin's Mark from the labyrinth reward is pretty good since it's the only source of power charge generation in the build, which you will need later after swapping to crit. Up to you to go for the deterministic reward with
Assassin's Mark quality versus gambling for a good meta transfigured gem.

Act 4:
 - Make sure to pickup additional accuracy on the tree prior to grabbing a lot of life nodes, otherwise you might brick your Precise Technique. If you have a lot of rares with life, you might want to take the accuracy mastery too.
 - Friendly reminder to look for leveling uniques.

Act 5:
 - You can path through Quickstep intead of Path of Nature if you prefer the movement speed.

Act 6:
 - Respec out of Spirit Void and isntead invest those points into Clever Thief since it is better and in a better location.
 - You may want to start saving gold for gambling gear and respeccing to crit in Act 7 at this point.
 - If you don't like to automate Blood Rage and also forget to press it, it is worth picking up Mark the Prey + mark mastery to generate frenzies at this point. I recommend simply automating Blood Rage, though.
 - It is common to start encountering mobs that reflect ailments near the end of Act 6. This is really irritating to freeze and chill yourself. If you're noticing being frozen a lot, then I recommend putting on Purity of Elements at this point.

Act 7:
 - After ascending in 2nd labyrinth, make sure to equip a Rosethorn Tincture. It is good to roll it for elemental penetration if you can. Recommend putting more quality on Assassin's Mark at the end of this labyrinth.
 - After equipping a Rosethorn Tincture, it is time to swap to crit. Make sure to spec out of passive points as shown in the difference between the Act 6 and Act 7 loadouts at this point. If you have Precise Technique still allocated, you will NOT be able
to critically strike.
 - Looking for a claw with crit chance on it is best at this point. Any claw with life-gain-on-hit and 100+ ele dps with crit chance on it will do. The one shown in the Items section at this point is an idea of what you should strive for.
 - Make sure to allocate both tincture masteries to make your life easy so that you don't forget to turn them off repeatedly. Recommend binding both tinctures to one button on your mouse or using some type of auto-hotkey.
 - Do not forget to put in Nightblade Support.
 - You should be absolutely blasting at this point. If you're not, you probably missed a step or are not pressing your tinctures.

Act 8:
 - Make sure to grab the elemental mastery - it's very good against bosses.
 - Swapping from Gladiator's Perseverence to Multishot is purely preference at this point, though in the future you will not be next to Gladiator's Perseverence so it makes sense to swap sooner rather than later. Still, if you're tight on gold, you can
wait on this.

Act 9:
 - Reminder to gamble or look for a weapon if you don't have a good one yet.

Act 10:
 - Make sure you bring a decent life flask into labyrinth 3 with you.
 - Oath of Winter and more Assassin's Mark quality as lab 3 rewards.
 - If you've been blasting for several hours since the league launched at this point, then I recommend a quick break for a shower or food - give your poor body a break!


Build Options/Personal Preference Choices
 - Lightning Strike versus Frost Blades
 	- Lightning Strike has better Single Target due to it's ability to "double-hit" with the melee and the projectile at the same time, and gives access to Vaal Lightning Strike, which is great for blasting down large amounts of mobs in open areas. Frost
 	  Blades is overall a better clear skill in any situation where the map isn't completely wide open (like Strand or Dunes) due to Lightning Strike projectiles having a tendency to get stuck on terrain. Additionally, Frost Blades really wants to run Greater
	   Ancestral Call Support to maximize it's clear and QoL, which significantly lowers its damage. The harder the content you're doing, the better Lightning Strike is. The easier the content you're doing, the better Frost Blades is.

 - Lethal Pride versus Brutal Restraint
 	- Brutal Restraint provides dexterity to passives in it's radius and can provide your notables with Aura Effect as an added benefit. Lethal Pride provides strength to passives in it's radius and can provide your notables with Double Damage,
	   Endurance Charge on Kill, Rage, and Intimidate. I choose Brutal Restraint for the aura effect because I love scaling my auras, but if you cannot get 4 nodes with aura effect, then it is typically more value to go for Lethal Pride due to it making
	   your gearing easier (via a lot of free strength) and more direct damage buffs (double damage, rage, intimidate.) Ultimately it comes down to personal choice. Just note that Brutal Restraint does help with accuracy, so you may need to pay
	   attention to that if you choose Lethal Pride.

 - Avatar of the Wilds versus The Unseen Hand (3rd Ring Slot Bloodline Ascendancy)
 	- Avatar is another button (gross,) but it does give 100% more damage - that's a pretty good button. The Unseen Hand lets you fit in Death Rush for free, which is huge, but it turns off your flasks. You would pair The Unseen Hand with Runegraft
 	  of the Imbued to buff your tinctures and run only instant life flasks. Once Screams of the Dessicated is re-added to the game, this will be the obvious path to go for. But for now, it is up to you to choose Avatar + flasks versus tincture effect and
	   Death Rush. I feel Avatar and Flasks are a stronger pick, personally.


 - 12-Link Claw + Squire versus Endgame Claw + Shield
	 - This is endgame multi-mirror status and I'd expect most players to not need to make this choice. If the 12-link claw has been crafted and is available to be mirrored, then you have the option of dropping your rare claw and shield in exchange for
	    the 12-link claw + squire setup for a LOT more damage. Keep in mind this does cause some uncomfortability with your gem sockets at times, has some significant issues with mana cost, and significantly lowers your defenses. If you're willing to
	   make this trade, then it is a gigantic damage increase. In my opinion, I don't feel the build needs that amount of damage.

 - Herald of Ice and other sources of explode
 	- I personally do not feel the build needs Herald of Ice or any other form of explode. However, if you're adament on having it for the pops, then you would likely drop the Melding setup and Purity of Fire. You could also drop Purity of Elements
	   if you're able to solve for the suffix pressure and get ailment immunity, but this would be difficult. Another option is dropping Grace or Determination, but you'd want to also drop Perseverance in that case, which would be a massive damage loss.
 	  If you really want explode but you're not picky on the source, you can try Oriath's End flask or Annihilation Support.

 - Action Speed Immunity
 	- Easiest way to get this in my opinion would be putting in Balance of Terror and Temporal Chains self-cast. You could go for the Aul Bloodline instead of Avatar, but this would require you to drop a lot of gems - namely Whirling Blades and
	   Precision, which would be pretty bad. Only go for this if you *really* need this for the content you're running. If you're having issues with just getting stuck on stuff in Delirium or for example Drowning Orbs, then I recommend just using Frostblink.

 - Rage
 	- Yes, you can get Rage from Rage Support or from a Lethal Pride or an eldritch glove implicit, and yes it is a lot of damage on paper. This is personal preference and playstyle-based. If you clear the entire map first before looting, then Rage is
	    really good. But if you loot as you go, Rage sucks on this build. Personally I don't go for it because it's not 100% uptime typically and I don't want to constantly be thinking about my Rage. If you want Rage, I recommend going Lethal Pride with
 	   2 rage nodes.

 - Inspiration Support and Lifetap Support
 	- Either of these can help solve mana issues. The build does now run Inspiration Support over Elemental Damage with Attacks Support due to the mana changes in 3.29. If you run the 12-link claw setup, you are likely going to run Lifetap due to
	   obscene mana cost issues. Make sure your mana cost does not get to 0 if you're running Inspiration, as that will make the gem provide 0 damage buff.

 - Behead Support
 	- This is a very cool support gem that is actually pretty good, and worth trying to see if it's a good fit for your playstyle. This basically gives you Headhunter. If you try this, like it, and want to keep it, then you have a few options. You can replace
 	   Invert the Rules Support for a damage loss, replace Inspiration Support if you can solve mana issues somewhere else, or replace Yoke of Suffering with Uul-Netuul's Vow amulet for a damage loss.

 - Ruthless Support + Stun Mastery for early Endurance Charge generation, interaction with Perseverance
	 - Ruthless Support is numerically a very strong support gem - it also helps with hitting high shock values on beefy ST targets. While mapping though, it guarantees stuns, which you can pair with the Stun Mastery from the Perfectionist wheel to
	   generate endurance charges relabily while mapping. This also has a cool interaction with Perseverance, as it will also fortify you - meaning you can swap out the eater eldritch implicit on your body armour to something else, such as aura effect.
 	  If you go for this, I'd recommend dropping Invert the Rules Support.

 - Headhunter
	 - Since this isn't a phys-conversion build, you don't gain a ton of offensive value from Headhunter outside of the Soul Eater buff. That said, it does make you fast and very tanky. I do not recommend Headhunter over Perseverance, but you can try
	   it and see if you like it. I'd recommend Behead Support before I'd recommend Headhunter for this build.

 - Physical Claw versus Elemental Claw
 	- The primary advantages to a Physical Claw are it's synergies with Headhunter, Hatred aura, and converting the remaining 40% of phys to cold in order to easily freeze enemies. However, a physical claw can make it harder to proc Trinity, it's very
	   difficult to craft (especially on leaguestart,) and it would really want to be paired with Headhunter - which is a significant damage decrease from Perseverance, and removes a lot of the build's identity. I don't recommend a physical claw, personally.
 	  I'd also add that the build really doesn't need more damage in my opinion, and if you wanted more damage, you could just go for the 12-link claw which would be better than a phys claw anyways.

 - Point Blank keystone
	 - This is really a Lightning Strike specific option. Basically it will make you do more ST damage but will lower your clear damage by a similiar amount. It's up to you - on paper in PoB it will be 30% more projectile damage. I usually run without it.

 - Blood Rage degen - lategame fix
 	- If you really hate the Blood Rage degen while looting your maps, you can either turn off Automation, take out Blood Rage entirely, or invest into flat life regen. If you take out Blood Rage, you'll want the Mark Mastery for generating frenzy charges.
 	  If you turn off Automation, remember to turn it back on in the next map. If you want to invest into flat life regen (probably the best permanent solution,) I'd recommend the Armour/Evasion mastery that gives you life regen every 4 seconds. You
	   could also invest into some life regen nodes from a Lethal Pride, and you could also grab 1 or 2 suffix's on gear for big life regen if you can solve attributes and resistances elsewhere.

 - Tattoos
 	- This is entirely personal preference. You can use these to help cap your resistances, become stun immune, increase your projectile speed, grab Blind, make yourself move faster, and help cap your suppression. I do recommend at least 5-10
	    projectile speed tattoos to make your clear snappy, but outside of that you can pick whatever is best for you. It is best to tattoo everything if possible. If your accuracy dips low, you can grab accuracy tattoos.

 - Getting Lightning Strike to 7 projectiles
 	- There's 3 easy ways to do this. One is to run 2 Fan of Blades large clusters and take Multishot on the tree. Another is to swap Yoke of Suffering for Ashes of the Stars and put Lightning Strike into a green socket, which will give it enough quality
	    to generate the projectiles you want. The last is to use Forbidden Flame and Forbidden Flesh to take Endless Munitions from Deadeye. I personally don't feel this is needed, but it is up to you and depends on the content you're running.

 - Fury Valve versus Yoke of Suffering for Frost Blades
 	- Fury Valve is absolutely insane for clear with Frost Blades. If you're not running content that has beefy mobs, then Fury Valve is insanely good and I would recommend it over Yoke of Suffering. However, if you are running Delirium or guardians
 	  or anything like that with a large health pool, I do think Yoke of Suffering is better. If you're running the newly reworked abyss without delirium, then Fury Valve is going to be very good.

 - Massive thread of hope in lategame
	 - For those unaware, this would socket in above Charisma. This requires a lot of point investment, but it offers access to a ton of very valuable points on the tree. I'd recommend this if you don't like running clusters at all. Note that this build is
	   already very tight on jewel socket pressure.

 - Impossible Escape
 	- Similiar to above, this can be really good if you grab one for Imbalanced Guard and take the max res nodes. However, this does take up a jewel socket and several passive points, so in my opinion it is not worth it since you can get that max res
	   from elsewhere.

 - Return projectile (and Nimis)
 	- I do not recommend Returning Projectiles Support since there are already so many good supports for this build. However, Nimis is numerically an incredibly strong option if you just want to maximize damage. I personally hate what Nimis does with
	   Lightning Strike if I don't have 9 or more projectiles, so I do not run Nimis. It is up to you and personal preference.


Specific Loadout Notes

NOTE: All budgets are estimated costs based off previous league experience. Each league has a different economy and meta, so prices are subject to change based off the economy and RNG. These are historically what it's cost me to craft and
procure these items myself, but I also play a lot on league start and I craft all my own stuff - so your unique items and crafts may vary in cost compared to mine. You should always pricecheck the materials needed and uniques for your next upgrades
rather than assuming the PoB is correct, as the economy changes every day and every league.

NOTE: Items that are named in the "Items" section of the PoB will have a crafting guide posted below for each individual item. Note that the new mechanic will likely make each step cheaper/more efficient if you choose to interact with it.

1 Divine Budget - This is intended to reflect your initial upgrades that fix your resistances and attribute and a corrupted 6-link. Do not worry about capping Chaos Resistance, that is just an added bonus if possible. The helmet is the only item that will
need to be crafted - you'll just need a good base and hit it with Shrieking or Deafening Loathing essences until it gets something useful - such as a good life roll. The body armour can be searched for on the trade website and will typically cost 20-50
chaos depending on how good the armour is. All the other gear can be gambled from the vendor or cheaply purchased on the trade website since it is all 2-mod or 3-mod items with another mod crafted.

2 Divines Budget - Improved Tinctures and a better claw.  Tinctures are a massive part of this build's damage and should not be overlooked, it is critical that you upgrade these when possible and roll them to have increased attackspeed,
increased effect, and elemental penetration. The tinctures are more important than the weapon upgrade. For the weapon, it can be advantageous to buy a claw with a fractured t3 or t4 elemental damage mod (if it exists) and then hit it with essences
until you get attack speed and crit, then craft the final elemental roll. If you cannot get a fractured claw, then just roll with Deafening Hatred/Anger/Wrath essences (whichever is cheapest, with Hatred being the best for freeze) until you get 2 other
good rolls (attack speed, crit chance, flat elemental damage) and then craft another mod. Recommend rolling on an ilvl74+ Imperial Claw (to open up the possibility of rolling a t2 elemental damage roll) and ilvl73+ tinctures (to open up the possibility
of rolling a t2 elemental penetration roll.) If you're slower getting to maps, then higher ilvl items may already exist that you can purchase.

10 Divines Budget - Fractured rares + uncorrupted 6-link body armour. This is a large currency jump from the last loadout, but you can do each of these rares 1-at-a-time to progress steadily as long as you keep your resistances and attributes
capped. Crafting guide is available for every rare item in the PoB from this point forward. Recommend doing Uber Lab by now if you haven't already, Avatar is a crazy strong CD to blast down bosses to help setup the atlas quickly. Getting automated
flasks at this point will be great for defenses, too.

The helmet and body armour MUST have the mana reservation efficiency modifier on them from a Deafening Loathing essence, as it is important for future loadouts. Recommend saving the claw craft for last if you stick with Anger and Wrath - if you
want to swap to Determination and Grace + Perseverance belt early for tankiness, then do the claw craft first prior to doing that swap. Overall recommendation for priority of upgrades: Gloves > Body Armour > Helmet > Amulet > Death Rush >
Rare Ring > Boots > Shield > Claw. The claw is a proportionally larger damage increase if your base damage is lower - which would happen if you remove added cold support or remove Wrath/Anger. If you keep all 3 of those in, then the claw craft
is lower priority.

16 Divines Budget - Purchase enlighten gems to start leveling them up to level 3 (or purchase corrupted level 3's if there's little-to-no price difference) and look to snipe some ilvl 85+ and 26+% quality tinctures from the trade website and craft them to
perfection. At this point, it is best to make some of the decisions in the "Build Options/Personal Preference Choices" section, as those decisions will start determining some of the stats required in your future upgrade paths. The PoB progression
guide will follow my personal preferences to make it easy for you to follow along and copy me. This means I'll be swapping to Vaal Lightning Strike and going Brutal Restraint over Lethal Pride in future loadouts.

20 Divines Budget - Aul's Uprising for free Determination or Anger, link the free aura to a new Arrogance Support gem, and both Enlighten's at level 3 allow the build to fit 5 different 50% auras in it. Additionally, picking up a good brutal restraint will
give an extra 24-32% aura effect, which is huge with this many auras on at this point.The build should start feeling significantly tankier going forward now that it has Grace and Determination online.

25 Divines Budget - Armour Light of Meaning + a Watcher's Eye with Anger crit multi mod + 2 other useful mods. Also some significant passive tree changes to free up some points for these jewel sockets.

30 Divines Budget - Quality on gems, Invert the Rules Support, 10 Projectile Speed tattoos, and double-corrupted Perseverance.

50 Divines Budget - Time to start making the big, endgame upgrades for the build. First up is the Endgame Body Armour, which will make a gigantic difference in tankiness. As usual, crafting guide below. Also, it's important to start getting to a high
level for future loadouts - it might be best to invest in some omens of amelioration, just in case. Also recommend picking up Runegraft of the Fortress, if it isn't too expensive.

75 Divines Budget - Large cluster + Small clusters + passive tree swap around + Yoke of Suffering. Make sure your large cluster has the Fan of Blades notable since you'll be dropping the Multishot wheel and will still want to shoot straight. The small
clusters for reservation efficiency allow the build to fit the 5th aura without Aul's Uprising making it free, which effectively frees up the amulet slot for this giant DPS upgrade. Remember to move your free aura off of Arrogance since it is no longer free,
as that will cause it to reserve your entire health bar. The small clusters can be very irritating to craft; it might be easiest to self-fracture them with the league mechanic for the 35% effect. I do recommend getting attributes on this as high as feasible
since it is so point-efficient and it costs little to roll these clusters other than time. The league mechanic's crafting system can probably speed up the rolling of these clusters, too.

100 Divines Budget - Min-max of skill and support gems. This is a bigger damage boost than you would think. Greater Multistrike is huge on this build.

130 Divines Budget - Endgame Ring + Kalandra's Touch. I like to get accuracy on this ring so that I can swap accuracy passive points around to better nodes. Recommend self-fracturing this ring with the new league mechanic, unless the base is very
cheap.

150 Divines Budget - Endgame Boots. Suppression on these is to prepare the build for reallocating points later to another cluster and removing suppression points. The max fire res implicit is preparing the build for Melding.

170 Divines Budget - Endgame Helmet. Suppression is again to prepare the build for reallocating points later. It's important to get this specific unveil to boost the level of your auras, specifically Purity of Fire later on once it gets put into the build.

180 Divines Budget - Endgame Shield. You can skip on the unveil prefix if you want but it is incredibly strong since you'll be in soul gain prevention a lot of the time. It can be an irritating craft with the unveil, though. The league mechanic's crafting
system should help significantly with this.

200 Divines Budget - 2nd Large Cluster +  passive tree swap around + rare jewel + double foulborn ancestral vision. This unique jewel is really strong since we're already suppress capped and have a ton of armour. If you don't feel this is the right
fit for you, the next best thing here is forbidden flame and forbidden flesh for Gathering Winds or Endless Munitions.

260 Divines Budget - Endgame Gloves with temple mod. The eldritch implicits on this can be quite irritating to get right, but it is worth doing since it's a significant upgrade to your clear. The league mechanic's crafting system should help a ton with
this. Note that you can reroll a different temple mod into the cold mod if you use the harvest bench.

300 Divines Budget - Endgame Claw. You can do this craft earlier if you feel like you really need more damage. I do recommend getting a 24%+ quality claw and self-fracturing with the league mechanic so that the harvest enchant is better.

550 Divines Budget - 2 Awakened Enlighten 5's + Purity of Fire + Melding of the Flesh. Primary thing this does for you is allow you to swap around your flasks and get your maximum resistances up a lot higher while mapping.

575 Divines Budget - 2nd Endgame Ring. Primary reason to do this is getting your max res up to 90. You'll need to self-fracture this base, obviously. It's important to have an open suffix to craft the chaos res with so that you can get chaos res capped.

700 Divines Budget - 3-passive voices + enduring composure 2-point cluster to fit in endurance charges (this is likely overkill and entirely optional)


Crafting Guide Notes

NOTE: If you are an inexperienced crafter and don't want to learn or risk losing currency to poor RNG, then I recommend trying to purchase similiar items on the trade website.

NOTE: Most of these crafts are high-variance, meaning there's a lot of mods in the pool that it can roll, and getting a specific combination is not super likely. It's important that you assess the amount of resistances/attributes/etc that you need and make
sure you accumulate those modifiers across all of your items, rather than on a specific item. If you aim for the exact items shown in the Items section, it will be very expensive. Being flexible with which items grant you the required
strength/intelligence/resistances will make it much cheaper to get your character to the desired state. Some items can be very good but not fit your build - this is something you have to learn over time, and being able to flip these items for profit is what
makes crafting very profitable.

NOTE: You can use the harvest bench to change an elemental resistance roll into another type of elemental resistance. So if you happen to roll t1 fire res on all your gear, you can swap some of them to cold or lightning to flesh out your build.

NOTE: You can use the new 3.29 league mechanic to change an attribute roll into another attribute, similiar to the harvest note above. This mechanic can also likely reduce the cost of most or all of the crafts below and/or leave you with a better item,
but it is impossible to write a guide for it until I try it myself - recommend watching some youtube videos on it prior to using it unless you're a good crafter.


Midgame Claw:
 - ilvl82+ Imperial Claw with any fractured flat elemental damage of at least tier 3. Note that exactly ilvl 82 is preferable if possible for no price difference, as higher adds undesirable mods and lower removes desirable mods. Odds calculated below
assume the claw is ilvl 85, so your odds are better if it is lower ilvl.
 - Roll with Deafening Essences of Hatred/Wrath/Anger (depending on which is cheapest and what is fractured on the claw) until you hit at least t3 of the third element.
 - If the claw has undesirable suffix's (mods that are not crit multi, crit chance, or attack speed) or very low tiers of desirable suffix's, you will need to craft Prefix's cannot be changed for 2 divines and then scour the item to clear the suffix's. If the claw's
suffix's are empty, skip this step entirely. If the claw's suffix's are full and are undesirable, then it is best to use an Orb of Annulment and pray it hits one of the suffix's so you can then proceed with this step. If it hits a prefix, start over with essence
rolling.
 - If the claw already has good suffix's, then skip this step entirely and the craft is completed. If the suffix's were just wiped off the item and they are now empty, craft "Can have up to 3 Crafted Modifiers," then craft t1 % increased attack speed and
hybrid crit chance + strengh/intelligence.
 - Craft completed!


Midgame Shield:
 - This is a high-variance craft. If properly flipping your successful crafts, this craft should be mostly free and should take 2 or 3 fractured bases to achieve the desired outcome for your specific character's need.
 - ilvl 84+ Cardinal Round Shield (preferred) or Elegant Round Shield with t2+ fractured life. Note that ilvl86+ is preferable if possible for no price difference, as there are lots of good suffix's available at higher ilvl.
 - Roll with Deafening Essences of Envy until you hit 2 different t3 (or higher) useful modifiers. You want the fractured modifier, the essence modifier, 2 other useful mods, and then be able to craft a 5th modifier.
 	- (Note: Useful modifier's for this craft are cold resistance, fire resistance, lightning resistance, all maximum resistances, all elemental resistances, attack speed, % physical damage reduction, % chance to suppress spell damage, strength, or t1
flat armour/evasion rating.)
 - Craft % increased armour/evasion or a desired suffix (hybrid strength/intelligence, hybrid elemental/chaos res, hybrid elemental/elemental res rolls are all good options)
 - If the last modifier slot is empty, slam it with an Exalted Orb and hope you get something useful.
 - Craft completed!


Midgame Helmet:
 - ilvl 84+ Haunted Bascinet (preferred) or Conquest Helmet with t2+ fractured life. If you're open to flipping your crafts, ilvl 85+ is slightly preferable since it opens up valuable suffix's for selling to others. If properly flipping your successful crafts, this
craft should be mostly free and should take 2 or 3 fractured bases to achieve the desired outcome for your specific character's need.
 - Roll with Deafening Essences of Loathing until you hit t3 or higher Intelligence + 1 other t3 (or higher) useful modifier. You want the fractured modifier, the essence modifier, a t3+ intelligence modifier, 1 other useful mod, and then be able to craft
a prefix.
 	- (Note: Useful modifier's for this craft are strength, % chance to suppress spell damage, chaos res, fire res, cold res, lightning res, t1 flat armour/evasion, or t1 % increased armour/evasion.)
 - Craft "projectiles pierce an additional target"
 - If the last modifier slot is empty, slam it with an Exalted Orb and hope you get something useful.
 - Roll with Lesser Ichor's until you hit % increased mana reservation efficiency of skills.
 - Roll with Lesser Ember's until you hit % reduced mana cost of attack skills.
 - Craft completed!


Midgame Body Armour:
 - ilvl 84+ Conquest Lamellar (preferred) or Marshall's Brigandine that is already 6-linked, or a good fractured modifier and then 6-link it yourself if you're willing. Note that ilvl 86+ is preferable if there's no cost difference.
 - Roll with Deafening Essences of Loathing until you hit 2 different t3 (or higher) useful modifiers. You want the essence modifier, 2 other useful mods, and then be able to craft a suffix. You DO NOT want any life modiifer on the item.
 	- (Note: Useful modifier's for this craft are strength, % chance to suppress spell damage, % physical damage reduction, chaos res, fire res, cold res, lightning res, % increased armour/evasion, or t1 flat armour/evasion.)
 - Craft a desired modifier for your build - strength/intelligence suffix is high value
 - If there are open prefix's, you should not slam with Exalted Orbs because you might hit life, which would be bad (unless it's literally t1 life.) If there are no open prefix's but there is an open suffix, then slam it with an Exalted Orb and hope you
get something useful.
 - Roll with Lesser Ichor's until you hit melee hits have % chance to fortify.
 - Roll with Lesser Ember's until you hit % increased effect of non-curse auras from your skills.
 - Craft completed!

Midgame Gloves:
 - This is a high-variance craft. If properly flipping your successful crafts, this craft should be mostly free and should take 2 or 3 fractured bases to achieve the desired outcome for your specific character's need. Note that gloves are typically a better
item for crafting, since most attack builds run rare gloves.
 - ilvl 84+ Wyvernscale Gauntlets (preferred) or Chimerascale Gauntlets with t2+ fractured life. If you're open to flipping your crafts, ilvl 85+ is slightly preferable since it opens up valuable suffix's for selling to others.
 - Roll with Deafening Essences of Zeal until you hit 2 different t3 (or higher) useful suffix's. You want the fractured modifier, the essence modifier, 2 useful suffix mods, and then be able to craft a prefix.
 	- (Note: Useful suffix's for this craft are strength, % chance to suppress spell damage, chaos res, fire res, and lightning res.)
 - Craft increased projectile speed
 - If there is an open prefix, slam it with an Exalted Orb and hope you get something useful.
 - Roll with Lesser Ichor's until you hit projectiles pierce an additional target.
 - Roll with Lesser Ember's until you hit non-vaal strike skills target an additional enemy.
 - Craft completed!


Midgame Amulet:
 - This is a high-variance craft. If properly flipping your successful crafts, this craft should be mostly free and should take 3 or 4 fractured bases to achieve the desired outcome for your specific character's need.
 - ilvl 81+ Agate Amulet with t2+ fractured life. Note that ilvl 84 or 86 is preferred.
 - Roll with Deafening Essences of Scorn until you hit 2 different t3 (or higher) useful modifiers. You want the fractured modifier, the essence modifier, 2 useful suffix mods, and then be able to craft a 5th modifier.
 	- (Note: Useful modifier's for this craft are strength, intelligence, elemental damage with attack skills, level of all skill gems, level of all cold skill gems, all attributes, fire res, cold res, lightning res, chaos res, and all elemental res.)
 - Craft a desired modifier for your build
 - If the last modifier slot is empty, slam it with an Exalted Orb and hope you get something good.
 - Annoint the amulet with Divine Judgement (Sepia/Teal/Black)
 - Craft completed!


Midgame Ring:
 - This is a high-variance craft. If properly flipping your successful crafts, this craft should be mostly free and should take 3 or 4 fractured bases to achieve the desired outcome for your specific character's need.
 - ilvl 84+ Amethyst Ring with t2+ fractured life.
 - Roll with Deafening Essences of Spite until you hit 2 different t3 (or higher) useful modifiers. You want the fractured modifier, the essence modifier, 2 other useful mods, and then be able to craft a prefix.
 	- (Note: Useful modifier's for this craft are strength, elemental damage with attack skills, all attributes, fire res, cold res, lightning res, chaos res, and all elemental res.)
 - Craft mana efficiency (previously it was non-channeling skills have -7 to total mana cost prior to 3.29)
 - If the last modifier slot is empty, slam it with an Exalted Orb and hope you get something good.
 - Craft completed!


Midgame Boots:
 - This is a high-variance craft. If properly flipping your successful crafts, this craft should be mostly free and should take 2 or 3 fractured bases to achieve the desired outcome for your specific character's need. Note that boots are typically a better
item for crafting, since most builds run rare boots.
 - ilvl 84+ Wyvernscale Boots (preferred) or Chimerascale Boots with t2+ fractured life. If you're open to flipping your crafts, ilvl 85+ is slightly preferable since it opens up valuable suffix's for selling to others.
 - Roll with Deafening Essences of Envy until you hit 2 different t3 (or higher) useful suffix's. You want the fractured modifier, the essence modifier, 2 useful suffix mods, and an open prefix.
 	- (Note: Useful modifier's for this craft are strength, fire res, cold res, lightning res, chaos res, and % chance to suppress spell damage.)
 - If the prefix's are full, use a Lesser Ember to make the Searing Exarch dominant on the boots, then use an Eldritch Orb of Annulment to remove a prefix. If there is an empty prefix, skip this step and proceed to the next.
 - Purchase or Capture a Wild Bristle Matron beast, then go to the menagerie and select the craft for "add a crafted Meta-modifier to a non-Unique item." This will force "Suffix's cannot be changed" onto the item, since it is the only meta modifier that is
a prefix.
 - Use a veiled chaos orb to force a veiled modifier onto the item. If the other prefix is empty, craft flat mana on the boots to block that unveil option from appearing.
 - Unveil the prefix with Jun; movement speed should be guaranteed. If there are multiple movement speed options, take whichever one is best.
 - If the last prefix is empty or already crafted, then craft % increased armour and evasion.
 - Roll with Lesser Ember's until you hit % increased action speed.
 - Roll with Lesser Ichor's until you hit % increased elusive effect. This isn't a significant difference and is optional if you'd rather not use the currency on it.
 - Craft completed!


Endgame Body Armour:
 - Purchase ilvl 86 Conquest Lamellar w/ fractured t1 %increased armour and evasion or t1 flat armour and evasion. If price is unreasonable or the item doesn't exist, you can buy a 22%+ quality ilvl 86 base and self-fracture with the league mechanic.
 - Use Deafening Essence of Loathing until you hit t1 Strength or t1 dexterity. If you have a 3rd suffix, successfully annul it or continue using essences. Note that if you hit Dexterity, you will need to swap it to Strength later with the league mechanic.
 - With the mana reservation efficiency and t1 attribute suffix's and an open suffix, craft "suffix's cannot be changed" on the crafting bench and then reforge physical with harvest. You are looking for % additional physical damage reduction of t3 or
    higher - it is fine to settle with lower than t1 on this. t3 or higher is a 3/13 chance, so expect to do this a few times. If you hit the phys reflect prefix and still have an open prefix and suffix, you can simply try again immediately. If the empty suffix or
	prefix fill up, then you will need to try to eldritch annul, and go back to spamming essences if you fail. Once you have the 3 suffix's, proceed to the next step.
 - Make exarch influence dominant on the implicits.
 - Use eldritch annulments/exalts to get t1 % increased armour and evasion and an empty prefix.
 - Craft armour during soul gain prevention prefix.
 - Use greater eldritch embers and roll for increased aura effect implicit.
 - Use 1 exceptional eldritch ichor to maximize the chance of upgrading exarch influence.
 - Use orb of conflict, hope exarch influence is upgraded and eater influence is downgraded. If successful, repeat steps 6 and 7. If you fail and eater upgrades, go again - if eater upgrades again, go back to step 5, if you succeed, then repeat this step.
 - Use methodology from the 2 previous steps to upgrade exarch all the way to perfect. Every time exarch is upgraded to a new tier, apply a new exceptional ichor to maximize the chances of increasing exarch again. Recommend using the new league
	mechanic with orbs of conflict for getting exarch from t5 up to t6 since that can be a painful experience if you get unlucky.
 - After achieving t6 perfect exarch influence on aura effect, roll grand eldritch ichors until you get % chance to fortify with melee hits.
 - Make sure to quality the body armour if it wasn't already.
 - Craft completed!


Endgame Ring:

 - Purchase ilvl 84+ Amethyst Ring w/ fractured t1 elemental damage with attacks, or self-fracture with the league mechanic.
 - Use Deafening Essence of Scorn until all 3 suffix's are filled with desired t1 modifiers. For me, this is t1 accuracy and and a t1 res roll.
 - Use beastcrafting with Wild Bristle Matron to force on "Suffix's cannot be changed" for cheaper (the beast should always be less than 2 divines.) If you cannot do this because your prefix's are full, you'll need to try to annul one of them off.
 - Use the harvest bench to reforge Life, which forces on a maximum life roll. It is a 1 in 8 to get t1 life.
 - Craft mana cost efficiency.
 - Quality the ring with the desired catalyst type.
 - Craft completed!


Endgame Boots:

 - Purchase ilvl 84+ Wyvernscale Boots w/ fractured t1 life or self-fracture with the league mechanic. If you want to go for 35% movement speed instead of unveiled movement speed, you will need ilvl 86 boots.
 - Use Deafening Essences of Envy until all 3 suffix's are filled with desired t1 modifiers. For me, this is t1 suppression and a t1 res. If you cannot do this because your prefix's are full, you'll need to eldritch annul one of them off, make sure exarch
is dominant first before doing this.
 - Use beastcrafting with Wild Bristle Matron to force on "Suffix's cannot be changed" for cheaper (the beast should always be less than 2 divines.)
 - Use a veiled chaos orb to force on a veiled prefix modifier. This is guaranteed to offer at least 1 movement speed option. Make sure to craft flat mana to prevent that outcome from being available in the unveil list prior to unveiling.
 - Benchcraft % increased armour and evasion after unveiling movement speed.
 - Use greater eldritch ember to roll maximum fire resistance.
 - Use 1 exceptional eldritch ichor to maximize the chance of upgrading exarch influence.
 - Use orb of conflict, hope exarch is upgraded and eater is downgraded. If you fail and eater upgrades, go again with an orb of conflict - if eater upgrades again, go back to rolling with greater eldritch embers to get the maximum fire res modifier,
then proceed with orbs of conflict.
 - Use methodology from the 2 previous steps to upgrade exarch all the way to t5 exceptional. Every time exarch is upgraded to a new tier, apply a new exceptional ichor to maximize the chances of increasing exarch again.
 - After achieving t5 exceptional exarch influence, roll grand eldritch ichors until you get elusive effect.
 - Make sure to quality the boots if they weren't already.
 - Craft completed!


Endgame Helmet:

 - Purchase ilvl 84+ Haunted Bascinet w/ fractured t1 life or self-fracture with the league mechanic.
 - Use Deafening Essences of Loathing until you hit t1 suppression. If you have a 3rd suffix, successfully annul it or continue using essences. Craft "suffix's cannot be changed" on the crafting bench and then reforge chaos with harvest. Chaos res
is guaranteed, but the tier of the roll is not. If you don't hit t1, try to annul it off - if successful then try again, if you fail then go back to spamming essences.
 - Once the suffix's are completed, use beastcrafting with Wild Bristle Matron to force on "Suffix's cannot be changed" for cheaper (the beast should always be less than 2 divines.)
 - Use a veiled chaos orb and craft "level of socketed melee gems" to prevent this outcome from appearing in the unveil list prior to unveiling. You want to unveil +2 to level of socketed AoE gems here. If you miss, then repeat the previous step and
then this one. If your prefix's are full from the veiled chaos orb, you can deterministically remove one by making exarch dominant and then using an eldritch orb of annulement.
 - Benchcraft +1 pierce
 - Use greater eldritch ichors and roll for increased mana reservation efficiency of skills implicit.
 - Use 1 exceptional eldritch ember to maximize the chance of upgrading eater influence.
 - Use orb of conflict, hope eater is upgraded and exarch is downgraded. If successful, repeat the last step and then this one. If you fail and exarch upgrades, go again with an orb of conflict - if exarch upgrades again, go back to rolling with
greater eldritch ichors to get the reservation modifier then proceed with orbs of conflict.
 - Use methodology from the two previous steps to upgrade eater all the way to t6 perfect. Every time eater is upgraded to a new tier, apply a new exceptional ember to maximize the chances of increasing eater again.
 - After achieving t6 perfect eater influence on mana reservation efficiency, roll grand eldritch embers until you get reduced mana cost of attacks.
 - Make sure to quality the helmet if it wasn't already.
 - Craft completed!


Endgame Shield:

 - Purchase ilvl 86+ Cardinal Round Shield w/ fractured +2 all maximum resistances, or self-fracture with the league mechanic.
 - Use the harvest bench to reforge physical repeatedly until you hit t1 % additional physical damage reduction. If you have a 3rd suffix, successfully annul it or go back to reforging physical.
 - Craft "suffixes cannot be changed" on the crafting bench, then reforge critical with the harvest bench. This is guaranteed to give you reduced extra damage from critical strikes, but the tier is not guaranteed. If you have a highly-rolled Watcher's Eye,
then you can probably settle with t2 here. Make sure your Watcher's Eye + this modifier add together to be 100% crit damage reduction. if you hit t3 or lower, try to annul it off - if successful then try again, if you fail then go back to spamming
essences.
 - Use beastcrafting with Wild Bristle Matron to force on "Suffix's cannot be changed" for cheaper (the beast should always be less than 2 divines.) If you cannot do this because your prefix's are full, you'll need to try to annul one of them off.
 - Use the harvest bench to reforge Life, which forces on a maximum life roll. This can be painful because there are hybrid life rolls in the pool as well, you're looking at a 1 in 14 to get t1 life.
 - Once t1 life is obtained and there is an open prefix, beastcraft "Suffix's cannot be changed" with a Wild Bristle Matron.
 - Use the league mechanic with a veiled exalted orb and hope it removes the craft or an undesired prefix that isn't maximum life. If this removes the maximum life, then you need to back 2 steps and try again. If the unveil doesn't remove life and you
have an open prefix to craft with, then craft hybrid fire damage/cold damage to prevent this outcome from appearing while unveiling prior to doing the unveil.
 - Unveil armour during soul gain prevention or hybrid armour/evasion/life.  You prefer the armour during soul gain prevention, but it is up to you if you are willing to reroll for it if it doesn't appear in the unveil list.
 - If you have an open prefix still, craft % increased armour and evasion.
 - Make sure to quality the shield if it wasn't already.
 - Craft completed!


Endgame Gloves:

 - Purchase ilvl 84+ Wyvernscale Gloves with any alva temple mod.
 - Use the harvest bench to swap the resistance/alva mod back and forth until the cold res alva mod has a high roll of % increased damage.
 - Get the gloves to have 4 modifiers on them. If it has more than 4, you can make exarch dominant and then use eldritch annulment orbs to remove prefix's until there are 4 total mods on the item.
 - Use the league mechanic and a fracturing orb to self-fracture the item. If you miss, repeat the previous steps.
 - Once the temple mod is fractured, use Deafening Essences of Zeal until you hit t1 chaos res. You can also try to force on chaos res with harvest bench and Suffixes cannot be Changed, but spamming essences is typically going to be cheaper.
 - Make exarch influence is dominant on the implicits.
 - Use eldritch annulments/exalts to get t1 life and t1 flat armour/evasion. You can settle without the flat armour and evasion if you wish, it is not a giant difference either way. It will be much cheaper to settle, and you can exalt slam at the end to get
something random anyways.
 - Craft % increased armour and evasion
 - Use greater eldritch embers and roll for additional non-vaal strike skills implicit.
 - Use 1 exceptional eldritch ichor to maximize the chance of upgrading exarch influence.
 - Use orb of conflict, hope exarch is upgraded and eater is downgraded. If successful, repeat the previous step and this one. If you fail and eater upgrades, go again - if eater upgrades again, go back two steps.
 - Use methodology from the two previous steps to upgrade exarch all the way to t6 perfect. Every time exarch is upgraded to a new tier, apply a new exceptional ichor to maximize the chances of increasing red again.
 - After achieving t6 perfect exarch influence on additional strike skills, roll exceptional eldritch ichors until you get additional pierce (this is potentially very expensive.)
 - Use the league mechanic with an orb of conflict, hope exarch is downgraded and eater is upgraded - you should have +2 strikes and +2 pierce. If you fail and eater is downgraded, repeat the previous step and this one.
 - Quality the gloves if they weren't already.
 - Craft completed!


Endgame Claw:

 - Purchase fractured t1 elemental damage ilvl 82+ imperial claw, or purchase a 24%+ quality ilvl 82+ imperial claw and self-fracture. Any element works, cold is slightly preferred as it is our best element for freezing and you are likely to get baited
into settling on a lower mod later.
 - Use deafening essences of Anger, Wrath, or Hatred to apply the 2nd t1 flat elemental roll, and use these essences repeatedly until you achieve the 3rd t1 elemental damage prefix.
 - Once all 3 prefix's are filled with desirable mods, you will need to get attack speed, crit, and crit multi. Assuming you didn't get super lucky and roll two of these at the same time as the last prefix, you will need to wipe your suffix's by crafting
prefix's cannot be changed for 2 divines and then scouring the claw. If there is not an open suffix to craft "prefix's cannot be changed," then you will need to use an orb of annulment and hope it doesn't hit your prefix's - if it does, start over.
 - After wiping your suffix's, craft "prefixes cannot be changed" again and use the harvest bench to Reforge Speed, which will guarantee attack speed - it is up to you if you settle on lower than t1. It is a 1 in 8 to hit t1 attack speed at this stage, and
there is a very low chance that you will fill your suffix's while performing reforges.
 - After achieving the desired attack speed, craft "prefixes cannot be changed" and use the league mechanic with a veiled exalted orb. You're hoping to get a veiled modifier that removes your craft, not your attack speed. You're hoping to unveil
either crit chance or crit multiplier. If you removed the attack speed, then I recommend returning to the previous step. If you kept your attack speed but got a bad unveil, then I recommend keeping it (unless the unveil is completely useless) since this
craft kinda sucks - but it is up to you if you want to go back and try again.
 - With attack speed + your unveil (presumably crit chance or crit multi,) craft the other crit mod that you didn't get.
 - Harvest enchant for attack speed.
 - Craft completed!


2nd Endgame Ring:

 - Purchase ilvl 84+ Enthalpic Ring w/ fractured t1 elemental damage with attacks, or self-fracture with the league mechanic. You are almost certainly going to have to self-fracture this, as I doubt someone else will do this and list the item.
 - Use Deafening Essence of Scorn until you hit t1 life and a t1 res roll that helps you cap your resistances.
 - Craft hybrid elemental/chaos res roll that helps you cap your resistances.
 - Use a foulborn exalted orb with the league mechanic to slam on a good 6th mod of your choosing - I'll likely go for rarity here since it's nice for gold generation and dropping more uniques.
 - Quality the ring with the desired catalyst type.
 - Craft completed!