9 months ago
 Level 92 Crit Frost Blades of Katabasis Duelist3.25.ruthless
Life: 3,738112%
ES: 30
Ward: 209
Mana: 124
eHP:
226,527
Resistances: 82%/82%/82%/59%
Armour: 10,035
DPS: 8,358,310
Speed: 4.85
Hit Chance: 100%
Crit Chance: 100.00%
Crit Multi: 430%
Config:
30% Shock, Frenzy, Power, 15x Wither, Custom Mods
Bandit: Alira
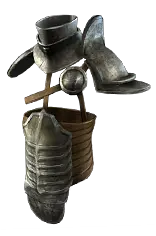
Gear







Gems
Frost Blades of Katabasis
Added Cold Damage
Inspiration
Multistrike
Ruthless
Elemental Damage with Attacks
Mark On Hit
Assassin's Mark
Lifetap
Cold Snap
Bonechill
Culling Strike
Herald of Ice
Tempest Shield
Precision
Blood Rage
Consecrated Path
Faster Attacks
Vaal Smite
Power Charge On Critical
Molten Shell
Automation
Summon Ice Golem
Cast when Damage Taken
Tree Preview
Tattoo of the Kitava Blood Drinker
0.5% of Attack Damage Leeched as Life
- +500 to Accuracy Rating
- -2 to Accuracy Rating per Level
- Non-Vaal Strike Skills target 1 additional nearby Enemy
- 80% increased Critical Strike Chance against Bleeding Enemies
- +2% to maximum Chance to Block Attack Damage
- +1% Chance to Block Spell Damage per 5% Chance to Block Attack Damage
- Enemies permanently take 5% increased Damage for each second they've ever been Frozen by you, up to a maximum of 50%
- +25% to Critical Strike Multiplier against Unique Enemies
- 50% increased Effect of non-Damaging Ailments you inflict with Critical Strikes
- Hits have 15% chance to treat Enemy Monster Elemental Resistance values as inverted
- Melee Hits Fortify
- -3 to maximum Fortification
- 5% of Leech is Instant
- 15% increased maximum Life if there are no Life Modifiers on Equipped Body Armour
- 20% chance to Avoid Elemental Ailments while holding a Shield
- 120% increased Critical Strike Chance with Swords
- -20% to Critical Strike Multiplier with Swords
- 8% chance to gain a Frenzy Charge when you Hit a Unique Enemy
Notes
Build adapted from a Frost Blades of Katabasis Slayer called 'GiveMeAlcs' in Ruthless Settlers league, for the Legacy of Phrecia event (Ruthless SC Trade)

Overview:

- Due to not being Slayer we lose Masterful Form (could get FF jewels for it if playing this in bench, likely to be extremely expensive though), so frenzy charge stacking with ice bite is out, along with no slayer overleech
- However as Gambler we get 50% chance to invert enemy res which is an insane dps boost, along with some chance for triple damage which will be really strong for getting bigger shocks + freezes, plus some other really good stuff for survivability.
- This build should have enough dps and survivability to comfortably prog to t16s and 2 voidstones in ruthless, after that its dps starts to skyrocket with a few chase unique items
- Recombinator will help us get a good ele dps foil with attack speed and whatever extra crit chance/multi we can manage.
- Event being Settlers means Svalinn is farmable, and we have another really good common unique shield to use untuil we find it (Kiloava's Bluster) which combos really well with Gambler

Why not Lightning Strike?

Because I don't want to play Lightning Strike. This build actually has more single target dps as lightning strike without changing anything else, due to it being able to double hit if you position properly. However FBoK clear is much better.

I might get a 20/20 vaal LS gem that I can swap into for pinnacles. Endgame dps will be more than enough for all content on FBoK anyway though.

Pros:

- Frost Blades of Katabasis has strong clear due to how it can shotgun with melee splash (check ruetoo video on this if you don't know about it), almost like playing a bow skill due to massive range
- Between 7-15m endgame dps depending on what buttons are pressed, all gear realistically obtainable in ruthless
- 90% chance for ele res to count as 90 vs hits + 68/65 block with Bluster shield. With Svalinn, 91/88 effective block and 50% chance for ele res to count as 90.
- 100% chance to avoid elemental ailments, stun immune
- Big freezes, herald of ice shatters
- Consecrated path for faster movement

Cons:

- No 30% ms boost from ascendancy, will be slower early on and in general (consecrated path helps with this somewhat)
- Leveling experience in ruthless may depend on your experience playing melee
- Growing Accumulator may feel rough in practice before you get more attack speed
- Can get unlucky and still get bonked through failing block + risky exploit.
- Recovery vs single target not amazing if the above happens muitplie times in quick succession (if you're giga unlucky)

Leveling trees are a rough guide and a point or two over estimate per act because I tend to go slower and kill everything as I level.

Leveling Notes:

- Avoid taking passive tree wheels for specific weapons even if you have a good weapon of that type, so that you can equip any good upgrade that drops.
- Need some flat fire damage from somewhere to make use of the 100% inc dmg wheel - can be weapon, mod on gloves/ring, or by using a skill like molten strike
- If you're happy to save all your regrets you could level as paladin for a potentially smoother experience (get 25% inc ele dmg taken + ele relics + free aura) and respec to gambler later on (will cost 30 regrets total, can do some with gold)
- Take Alira for res to offset Gambler -25% penalty.
- Ascendancy order is either
    - 1) take Growing Accumulator if you need damage early and then Risky Exploit -> Reversed Odds later on or
    - 2) take Risky Exploit first if your damage and res is decent so you can get Reversed Odds sooner and then take Growing Accumulator for merc lab.
    - Then take Risk Aversion last, need a few things to reach 100% ele ailment avoid (not sure if node before will give any % ele ailment avoid or not)
- Leveling with Precise Technique means low chance to freeze, can get 20% pathing to Primeval Force, it's not enough to justify the 5% inc dmg per second frozen cold dmg mastery. Take 40% conversion at first and swap when you go crit.
- +30 attribute nodes are optional, try to get what you need on gear, also depends on what base types you're using

Quest Gems:

- Can mule regular Frost Blades from ranger.
- Use either Molten Strike or Double Strike for single target early on
- Get Precision from Brutus
- Past act 1 you have more options for main skill(s)
    - Regular FB is decent for clear, less so for single target. Molten Strike decent for single target, less so for clear. Could just stick with these two.
    - Mule a marauder to siren WP for Sunder or Volcanic Fissure, can pick up Moten Shell + Enduring Cry/Vitality
    - Scion starts with Spectral Throw, very good for single target if you can position properly, mule Decoy Totem from mud flats to help with that
- Get Blood Rage after Intruders in Black
- Gravicious reward gems aren't any good for us, could play around with Ice Crash if you want to.
- Can farm FBoK from normal lab or continue further with other skills, depends on how things feel
- Take Ice Golem after opening the mines

Siosa Gem Order:

1) Punishment first so that we have a usable curse
2) Consecrated Path
3) Automation

Uniques Used:

(Probably) Cheap:

- Kiloava's Bluster is highest prio, maybe less cheap due to high demand from gamblers but still common enough.
- Painseeker gloves are nice before going crit to get better freezes if you want to use the 5% inc dmg per second frozen mastery earlier on.
- Daresso's Salute is just a great early-mid amulet for any melee build. Good with block as well, easier to stay on full life.
- Southbound gloves are very strong with FBoK because its dot portion will kill everything that isn't frozen and we get much better triple damage freezes. This can however mess with culling strike.
- Rat's Nest is good if you can afford to not have res on helmet after swapping to crit, gives a lot of damage and movement speed.

(Definitely) Not Cheap:

- Svalinn should drop for you eventually from killing The Black Knight enough times. That or you can buy one. You want as much spell block as possible, 15% max roll ideally.
- Heatshiver is a no-brainer, massive amount of extra fire damage.
- The Taming likewise gives a lot of extra damage since we are applying multiple elemental ailments. Can realistically only fit one of these in the endgame build.
- Yoke of Suffering is arguably farmable, requires you to be clearing t17 Fortresses. This build should be good vs the Fortress boss at least; this should be the last and most significant upgrade, unless you manage to buy one
- Bottled Faith is a luxury, can cap cirt without it for bossing via brittle

Other notes on gear etc.:

- Tincture is a lot of damage when it's on and can last a while without any itincture investment on tree as long as mana pool isn't super tight.
- Before going crit use the best ele dps sword you can get, flat cold damage is most important. After going crit you want a foil with as much flat ele dmg + aps + crit stuff as you can get.
- Brittle ground eldritch mod on boots is high priority once you go crit, so focus on getting good boots and then throw every ember you drop on them.
- You don't have to go Iron Reflexes if you aren't running a hybrid chest. When you get Svalinn you want 20%+ tempest shield buff effect plus enough spell block from eldritch mods to hit spell block cap.