16 months ago
 Level 62 Leap Slam Champion3.25
Life: 2,17690%
Mana: 155
eHP:
17,036
Resistances: 75%/75%/75%/-10%
Evade: 75%
Armour: 5,387
Evasion: 9,700
DPS: 607,292
Speed: 2.72
Hit Chance: 100%
Config: Boss, 10% Shock, Frenzy
Bandit: Alira
Pantheon: Soul of the Brine King, Soul of Garukhan
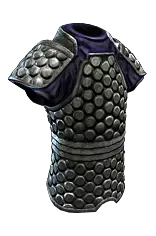
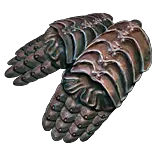
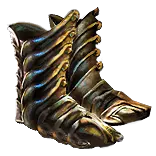
Gear


Gems
Leap Slam
Faster Attacks
Flame Dash
More Duration
Blood Rage
Vaal Lightning Strike
Multistrike
Elemental Damage with Attacks
Volatility
Trinity
Vaal Lightning Strike
Multistrike
Elemental Damage with Attacks
Volatility
Trinity
Vaal Lightning Strike
Multistrike
Elemental Damage with Attacks
Volatility
Trinity
Corrupting Fever
Lifetap
Second Wind
Anger
Sniper's Mark
Mark On Hit
Lifetap
Wrath
Precision
Cast when Damage Taken
Molten Shell
Tree Preview
- +500 to Accuracy Rating
- -2 to Accuracy Rating per Level
- Non-Vaal Strike Skills target 1 additional nearby Enemy
- Hits have 25% chance to treat Enemy Monster Elemental Resistance values as inverted
- 10% of Leech is Instant
- 12% increased Mana Reservation Efficiency of Skills
Notes
Levelling Guide:
There are lots of different ways to level this build and this may not be the most optimal but it has worked for me in testing and was pretty quick. I think there are 4 different ways you can level this build:
- Different skill (Spectral Helix) until late campaign using 2 handed phys weapons
- Levelling with lightning strike using 2 handed phys weapons and taking advantage of the change in quality to weapons and using added fire to get elemental damage + Anger + flat lightning damage crafted on your gear.
- Levelling as above but dual wielding
- Levelling lightning strike with dual wielding but not focussing on phys damage much past act 3 and use elemental crafts + anger + % ele damage gems to get damage.

I am going to be using the last option as I feel it is the easiest and if you happen to get unluckly with your whetstone drop rate you can end up stuck going phys vendor weapons. With the change in how whetstones work it is also not clear how quickly the cost ramps up


General Tips:

In every act always be on the lookout for new weapons. Ideally you want to be looking for axes and swords as this means we can use leap slam. If you end up with a sword and a dagger this will disable leap slam. Early on phys damage weapons is all you will find, but once you get into act 3 onwards weapons can start dropping with flat elemental
damage and you can also craft elemental damage onto your weapons, rings & amulet.

Strength and Intelligence Requirements:
We need big strength and intelligence when we get towards the end of the campaign to make sure we can push the auras up that scale the damage.
Use the +30 STR & INT nodes if needed temporarily
Run an Agate amulet preferably with some sort of attributes on
Run a heavy belt


After 1st lab get used to using corrupting fever to proc adrenaline

Run every side area from level 12 as you may drop a vaal lightning strike gem

You need either ancestral call in your links OR +1 strike mastery to get lightning strike to double hit.

Use Heist later on to get your gear to progress to red maps. After level 50 start going to the rogue harbour every level and buying demolition contracts. The "?" chests in here often drop chaos & vaal orbs. If the contract is level 59+ you can also start using the items for the chaos recipe. Even if you hate heist I recommend you do this. You should only
be in heist for half an hour and you should leave with enough currency to buy the items needed to push straight through to red maps

Smite Aura:
The smite aura makes up a big portion of end game damage, but you should not have to use this until you get to higher tier red maps, but if you feel you want a burst of damage at boss just hit them once with smite. Later on you will get used to this and will probably keep it up through most of your maps.

Single Target Rotation in Maps:
- 1 x Smite
- Pop Flasks
- 2 x Vaal Lightning Strike
- Attack enemy with lightning strike ensuring you get in position to double hit

Weapons:

From act 1 onwards use any one handed weapon that is an upgrade. When you start using leap slam you want to use axes and swords. Melee builds scale all their damage from the weapon so upgrading regularly is important. Look for a weapon with flat elemental damage and an open prefix to the craft more elemental damage. These weapons
should just about last you untill act 7 then you unlock the second tier of flat elemental damages and want to then look for a new weapon and craft the higher tier of elemental damage on these


Act 1

Tips:

Flat damage is king in acts 1 & 2 and picking up a few items can double your damage and make these acts a lot more comfortable. Items you want to look out for or buy from vendors:
- 2 x Iron Rings
- 1 x Rustic Sash
- 2 x % phys damge weapons (can be any one handed weapon). If you also find spare blacksmiths whetstones use these on the weapons as it should only take 1 to get to 20% qualitry which is 20% more damage. The same goes for if you find a weapon on the ground use a whetstone on the weapon if it has % increased physical damage
- Movement speed boots
- 3 link

You will get an essence from killing the dweller. If this is an essence which can add damage to a weapon use it on a base that requires item level 8 or more. Do not use it on the weapon you get at level 1. If it is something like a woe essence use it on a pair of boots

Get a sapphire ring for the merveil fight. You can either buy one from nessa or sell and iron ring and blue skill gem to a vendor

Vendor weapon recipe: 1 x weapon - 1 x magic rustic sash - 1 x blacksmiths whetstone


Level 1 - 12:
Frost Blades - Ancestral Call - Added Fire (If 3 link)
Double Strike - Chance to Bleed - Added Fire (If 3 Link)
Dash/Frost Blink
Leap Slam - Faster Attacks

Use Frost Blades for clear and double strike on bosses.

Ideal 3 link is R-R-G but G-G-R will also work just swap added fire for faster attacks

Level 12:
Lightning Strike - Ancestral Call - Added Fire
It might be that single  target on lightning strike is fine as ancestral call will allow you to double hit and if you have managed to get vendor crafted weapons this should be enough damage. If Lightning Strike is fine drop double strike setup
Double Strike - Chance to Bleed - Added Fire (If 3 Link)
Dash/Frost Blink
Leap Slam - Faster Attacks
Snipers Mark (If using Lightning Strike)

Act 2:

Take Blood Rage as your reward and buy Herald of Ice. Use both auras
Weaver reward do not take just let it level up in the vendors as neither of these will be better than added fire and we still need ancestral call
Help Alira if you are worried about resists or help Kryton for movement speed

Links at end of Act 2:
Lightning Strike - Ancestral Call - Added Fire
Dash/Frost Blink
Leap Slam - Faster Attacks
Snipers Mark (If using Lightning Strike)
Herald of Ice - Blood Rage

Act 3:

In early act 3 you will unlock the +1 strike mastery so you can drop ancestral call from your links. Buy Cruelty from Act 2 vendor and replace ancestral call. You will also get access to added Fire & Lightning crafts on the bench midway through. Craft as much added Lightning as you can on your gear along with one added fire craft. Try to do this on items
you are not going to upgrade for a while like rings and amulets or weapons if you have some with flat elemental damage. Swap Cruelty for ele damage with attacks (Act 2 reward) We can also buy anger from the town 3 vendor once we have defeated piety for the first time. Use Anger and drop herald of ice. With this gem, flat damage on gear
and lightning conversion from the gem trinity should proc which will be your 4th link when you do find a 4 link which can start dropping in act 3

Links at the end of Act 3:
Lightning Strike - Volatilty Support - Trinity - Elemental Damage to Attacks
Snipers Mark
Dash/Frost Blink
Leap Slam - Faster Attacks
Snipers Mark (If using Lightning Strike)
Anger + low level precision + Blood Rage

Goals for Lab: 800 Life+ with Ele damage crafted on gear and as close to resistance cap as you can get. You can use the bench to craft resistances where you have not crafted flat elemental damage

Act 4:

This is when we can pick up multistrike as a gem reward, but you are unlikely to hit level 38 before the end of the act. You will hit precise tehcnique at level 30. You need to make sure from here out that your accuracy is always above your life. To check this go to hideout and go to offence and select lightning strike.
Scroll down and look for main hand and off hand accuracy rating. If you need to boost it use a low level precision. If mana is a problem you can take the 12% reservation efficiency mastery in the mana cluster that we pathed through

When you get multistrike your damage and the feel of the build will get so much better so do not worry if you struggled a bit to this point as it should be plain sailing from here. Life will likely be very low though so do not let the odd death deter you. At this point you should also be resistance capped as we get 33% from just the tree + Alira so only need
some rings and a craft or 2 to hit cap.

When you complete lab and get your first ascendancy go back to act 2 and buy corrupting fever. Slot this gem into your gear and see how much of your life it takes. This gem needs to take just over half your life as this is how you will proc adrenaline. You can buy lifetap from act 1 vendor if you need to boost
the life this skill uses (swift affliction can also be used as a third link if you still need more life to be taken). You need to look at this skill gem level carefully as you go along and do not instantly level it up each time it offers you the chance. If your adrenaline is procing just right click the gem to pause the level up. When the gem stops taking half
your life as you level up then up the level of the gem. Manage this gem so that it always takes just over half your life

Links at the end of Act 4:

Lightning Strike - Volatilty Support or ele damage with attacks- Trinity - Multistrike
Snipers Mark
Dash/Frost Blink
Leap Slam - Faster Attacks
Snipers Mark (If using Lightning Strike)
Anger +  Blood Rage
corrupting fever - lifetap - swift affliction (use whatever supports you need to get to the right life amount)

You should no longer need precision once you pick up the elemental resistance/accuracy wheel and mastery. At this point you may also be able to run vitality gem if you want some life recovery

No changes in act 5 to the links

Act 6:

We want to make quite a few changes to the setup here. If you have enough gem sockets getting all your links set up for maps is worth doing even if it takes 10 minutes. We also want to buy quite a few gems from Nessa and the act town vendors:
Mark on hit support from act 4 vendor (If you have an alchemy orb) and link this to snipers mark
Added Lightning, Wrath, Smite, inspiration, lightning penetration (level all these gems in your offhands)
Buy Flame Dash and swap out Dash/Frost Blink
We need to start trying to pick up intelligence and strength to level up these gems so use the INT & STR nodes if needed and keep looking for good heavy belts and agate amulets.
The only links you do not worry about at this stage are molten shell linked to cast when damage taken as we have so little armour it will not make a difference

Also use this time to craft more resists on gear or use any spare essences on bases you need to improve. You want to be as close to resistance cap as possible as the game starts getting harder

Final Links:

Lightning Strike - Volatilty Support or ele damage with attacks- Trinity - Multistrike
Snipers Mark - Mark on Hit - Lifetap (optional at this stage)
Flame Dash
Leap Slam + Faster Attacks
Anger + Blood Rage
Corrupting fever - Lifetap - Swift Affliction (use whatever supports you need to get to the right life amount)

Gearing up in Act 9

These are your links as you get towards act 8/9 when I recommend running a few demolition contracts to get around 30 chaos. You will also net a few vaal orbs so go to act 1 and buy lightning strike gems from nessa and use vaal orbs on them until one turns into vaal lightning strike. You now have much more boss damage. Run the second lab
and take inspirational as this is going to help a lot when we switch to ichimonjis. If you feel squishy take fortification instead

The currency you get from heist should buy you:
2 x Ichimonjis
Prism Weave if you can afford to lose the strength
5 Link body armour
Rare gear if you need to up strength or intelligence

The reason I recommend doing this now is if you get set up properly with the attributes and resistances you can just push straight into early red maps on a 5 link without having to make any more purchases or worry about crafting gear

With your ichimonji equipped your can remove the mastery for wielding 2 different weapon types. Check the Ichimonji Loadout at the top of the screen to see the damage you can expect in act 9 which is more than enough for early to mid maps and will get higher and higher as your gems level up

Ichimonji Links (Level 58+):

Lightning Strike - Volatilty Support - ele damage with attacks- Trinity - Multistrike (If mana cost is too high swap inspiration in for elemental damage with attacks)
Snipers Mark - Mark on Hit - Lifetap
Flame Dash
Leap Slam + Faster Attacks
Anger + Blood Rage
Corrupting fever - Lifetap - Swift Affliction
Smite + increased duration (You do not need to use this yet as is only good when the gem gets very high level)

Do not worry about defensive auras yet we will sort them out when we get to maps as at the moment you will kill stuff so quick you will not need the extra damage

Gem swap in maps:
Blast through the rest of the campaign and early maps and now aim for the gear, tree and skills in the early map loadout. When you hit level 78 buy perseverance belt and take onslaught nodes. When you pick up all the reservation nodes you can now run 3 x 50% auras and a low level precision if you need to. We are going to switch to a pure
lightning build so swap trinity for added lightning. Your Auras will now be Determination (buy from act 3 vendor), Grace (buy from act 3 vendor), Wrath

Final Links are as per the setup in the early map loadout. Follow the progression for gear, trees and links from here on out


Areas when you need to respec points in the tree:

1st respec: If you are running elemental damage weapons you want to respec the tree between Tree 3 & 4. If you are using phys weapons do not respec yet. It does mean you need more points to fill out the rest of the tree, but you will dump them eventually
2nd respec: Tree 6 - Removing the ignite nodes and extra strike nodes and taking multishot + strike mastery and forces of nature + invert resistances mastery. Also dropping the single leech node and taking life and leech at the top of the tree. Adding reservation mastery to mana cluster
3rd respec: early maps when you are overcapped dropped the accuracy and resistance wheel and take acuity and the same mastery for +500 accuracy
4th respec: early red maps drop the mana nodes and dual wield nodes. Take swords nodes next to point blank, cull against marked enemies (also next to point blank), mana cost nodes and 12% mana efficiency mastery, onslaught nodes, primevil force
(onslaught nodes are for perseverance belt) you do not really need these nodes until you get the belt)