11 months ago
 Level 90 Crit Double Strike Gladiator3.25.ruthless
Life: 3,920113%
Mana: 109
eHP:
228,048
Resistances: 79%/80%/79%/-4%
Armour: 7,852
DPS: 2,181,935
Speed: 5.02
Hit Chance: 100%
Crit Chance: 73.87%
Crit Multi: 351%
Config:
Pinnacle, Frenzy, Custom Mods
Bandit: Kraityn
Gear



Gems
Vaal Double Strike
Multistrike
Brutality
Close Combat
Fortify
Mark On Hit
Poacher's Mark
Lifetap
Consecrated Path
Precision
Pride
Flesh and Stone
Blood Rage
Cast when Damage Taken
Steelskin
More Duration
War Banner
Riposte
Maim
Melee Physical Damage
Brutality
Close Combat
Enduring Cry
EnemyExplode
Tree Preview
- 50% more Accuracy Rating at Close Range
- +1% to all maximum Elemental Resistances if Equipped Helmet, Body Armour, Gloves, and Boots all have Armour
- Non-Vaal Strike Skills target 1 additional nearby Enemy
- Gain 2 Rage on Hit with Axes
- 80% increased Critical Strike Chance against Bleeding Enemies
- +2% to maximum Chance to Block Spell Damage
- +25% to Critical Strike Multiplier against Unique Enemies
- 20% chance to gain Elusive when you Block while Dual Wielding
- Hits have 50% chance to ignore Enemy Physical Damage Reduction
- Your Elemental Resistances cannot be lowered by Curses
- +7 to Maximum Rage
- Inherent loss of Rage is 20% faster
Notes
Thanks to MrReward for the inspirtation for this build with his 1 div challenge video - https://www.youtube.com/watch?v=D1Kz0PpmXvk

Why play this build?

- Melee got insane buffs to damage and QoL. How could you *not* play melee this league?
- Very fast mapper, blink into enemy packs with consecrated path and eviscerate them instantly.
- Can get bleedsplosions despite not being a bleed build.
- Very strong single target damage vs bosses, damage without War of Attrition scaling is also far more than enough for mapping.
- Roughly 89% effective chance to block all damage due to lucky block, with minimal investment thanks to Versatile Combatant buffs.
- Best-in-slot weapon is farmable from heist, should be easy to acquire on trade (unless a lot of people follow this guide and send demand through the roof). Gear is otherwise pretty flexible.
- Can respec more easily this league making it easier to transition to crit.

Why Double Strike?

- Gained around 190% more damage from the melee changes. While it lost some built-in flat damage, the added effectiveness and other buffs to melee more than make up for that
- Has a Vaal version which gives us a good use for Vaal souls now that Vaal Ancestral Warchief is no more.
- Achieves very good damage without needing to invest in trauma, so we can take advantage of how broken the new Gladiator nodes are for ruthless instead of having to play Jugg and pray for Determination (which also got nerfed)
- Double Strike of Impaling got nerfed in the 20/20 gem reveal (25% less damage effectiveness, ouch). Was previously building around it and had to swap to regular Double Strike instead. Only lost about 10% damage from this, no biggie.
- (aside from the hour I wasted making a video guide for the impale version)

What are the downsides?

- Block being a main defense can mean that you just get very, very unlucky sometimes, but we have other defensive layers to help mitigate this.
- Cannot take advantage of the warcry/banner changes as much as a slow slammer can.
- Before getting Replica Wings of Entropy, you need to run a Precise Technique non-crit tree and work with whatever you can find (ideally two decent phys axes).
- Block does not help us vs degen pools and the like, stay out of those.
- You cannot runecraft the new enchants onto unique weapons, so we miss out on this part of the mechanic, though we can use it to boost our pre-RWoE weapons and save the runes for another build or trade them away.

General levelling notes

- For the smoothest levelling experience, start with a Marauder mule. Take Ground Slam after Hillock and grab Decoy Totem after Breaking Some Eggs.
- If you avoid leveling your Ground Slam your duelist will be able to use it from the get-go, likewise for Decoy Totem. Use and level Heavy Strike to kill bosses like Brutus.
- Kill Brutus on the mule for Enduring Cry and push through to the Cavern of Wrath to grab Sunder.
- Now make your Duelist and grab Cleave after Hillock. Use this or Ground Slam depending on what feels better and what weapons drop. Flexibility is key.
- Grab War Banner after Breaking Some Eggs (banners are quest rewards now, this one should be here) and Precision after sending Brutus to the shadow realm.
- Grab whatever you want from Cavern of Wrath waypoint, we are using Sunder from this point on. Can also use Double Strike for single target.
- You can dual wield, 1h+shield or use 2h during the early acts, we rush Precise Technique and then the nearby Hatchet Master axe wheel for rage on hit, then Bastion Breaker + ignore phys reduction mastery.
- Take Blood Rage from Intruders in Black.
- We can grab Poacher's Mark with our first Siosa gem in a3, Consecrated Path with our second in a5, and Swordstorm with the third and final one in a10.
- You can swap from Sunder to Double Strike fully by taking Tribal Fury + mastery, but you can just use Sunder all the way to maps if you want.
- You want to swap to dual wield by the time you've done cruel lab. The sooner you swap the sooner you can make use of the dual wield + block nodes.
- If you have a good shield around a 7-8  you can keep it for a bit after taking Determined Survivor and just grab As The Mountain at first.
- Check your accuracy as you level, make sure to not overinvest in life to the point that Precise Technique stops working.
- First priority once you hit maps is to get Replica Wings of Entropy - heist is a good mechanic you can do without any atlas tree investment outside of blocking other mechanics. Livesearch for this if you are on trade.


Ascendancy order

1) War of Attrition. Our bossing dps is now solved! We do not care about this giving no damage vs packs while mapping in the endgame build, we do more than enough of that.
2) Determined Survivor. Get dual wielding online around this point to pop off.
3) More Than Skill. Easy to enter maps with 87%+ effective block chance with this just from tree.
4) Gratuitous Violence. We get 35% chance to bleed per attack so this will give us lots of pops without actually being a bleed build. You can delay Uber Lab until you have gone crit.

Gem progression

/Main skills/

- We get our main skill, Double Strike, from the beach, making it very easy to get extra copies of if we fail to Vaal it. As we don't need a trans gem, we don't need to farm lab for anything except quality (best done in Uber Lab IMO).
- Later on, get 20% quality on it first and then double corrupt in Alva temple, praying for Vaal Double Strike. Never attempt this with a Vaal orb, always temple. Hitting a lv 21 + vaal version is the jackpot.
- Quality on Poacher's Mark gives us frenzy charges while bossing. The 5% chance is more than enough when we can hit 10 times per second.
- Steelskin is our best guard skill since we don't scale a lot of armour. Level it to 20 for a lv 20 CWDT so that we mitigate the big hits that get through our block.
- Swordstorm has very high damage effectiness and can work well as a dps supplement. If it follows the same rule as other attacks that hit with both weapons at once it should always crit, and it hits with both mainhand and offhand at once.

/Support Gems/

- Multistrike is essential for both being one of our best possible supports for overall damage and helping us with mana cost. Though it doesn't help with Vaal Double Strike damage, it's still vital for the build.
- Mark on Hit is huge for QoL, very big priority.
- Level 20 CWDT for Steelskin will make it a lot harder for enemies to get through our hp pool if we fail to block multiple times in a row.
- Urgent Orders on Enduring Cry makes it a lot easier to cast in situations where we aren't sustaining the charges through Inexorable.
- Run Fortify Support until you can get the chance to fortify eldritch mod on your body armour, unless you want to spend the points on the tree for it.
- Can put Maim Support on Swordstorm to also make it boost Double Strike damage. Can put Culling Strike on it as well if the new Oakbranch Tincture doesn't provide it.

/Auras/

- Level Precision to 20, can always delevel it a little once you have your endgame build all setup if you want a bigger mana pool and you maintain the accuracy you need.
- You can drop vitality once you get enough of your other auras to the point that it's making your mana pool too small.
- Pride is valuable for boosting our damage. If you want to be tankier you can run Herald of Purity alongside Arctic Armour instead, but Pride is generally the best choice as it provides 39% more overall damage.
- Flesh and Stone is a lot stronger now, you can alternate between 20% more damage and taking 20% less damage depending on the situation. Start boss fights in sand stance, switch to blood stance when Attrition is stacked + banner ready + VDS.

Gear Progression

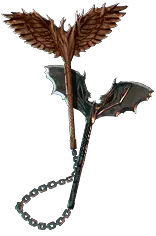
/Weapon/

- Early on, take flexible passives on the tree and use whatever drops. Towards the middle of act 2, you want to be using axes for the passives + rage on hit mastery for >30% more damage
- Around act 8 you ideally want to have switched to dual wielding two decent one handed axes.
- Your damage should be fine entering maps using whatever you've found; focus on getting Replica Wings of Entropy ASAP. This is your best in slot weapon forever.

/Helmet/

- Rare with life and fire/chaos res early, armour base
- Later on you can get mana reservation efficiency and reduced cost of attacks here via implicits.
- Abyssus is an extremely powerful option but you have to put 3 points back into Spirit of War, only use this if you aren't trying to push more levels. as the downside severely reduces our phys max hit pool.

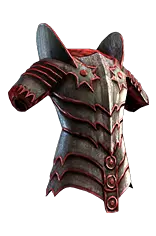
/Body/

- Nothing special here early on, life, fire/chaos res and armour. If using hybrid here you need to spend a point for Iron Reflexes, though we are not jugg so it is less effective unless you get a really good hybrid.
- On a good 5+ link you can use ichors/embers to get chance to fortify on hit and all max res.
- A usable corrupted 6 link would take priority over the above, however.

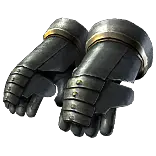
/Gloves/

- Life, fire res, chaos res, rarity, etc.
- Get +1 strike implicit on the best gloves you can find.

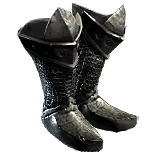
/Boots/

- Armour, fire/chaos res, etc., 30% ms
- Action speed implicit is nice here
- Brittle is about 10% more dps but you have to maintain it, needs at least the greater mod to be comfy IMO. Can get the unique only mod for better uptime as well.

/Rings/

- Amethyst rings for chaos res, get life res and attriubtes here
- phys leeched as mana on one of the rings is ideal for endgame setup, lets you drop Spriit of War once you have your helm implicits.

/Amulet/

- Whatever you can find early with the usual good stuff
- Lots of good unique options, Daresso's Salute is a common and powerful option. Block helps us keep the full life effects active most of the time.
- Hyrii's Truth is a t4 unique that can help a lot with accuracy and gives a chunk of crit multi.
- At the top end, an Eternal Struggle with useful implicits is probably best in slot. We can use either the cull or the madness effect.
- For anoint, Battle Trance is super cheap for the extra dps it provides, and you can use it before going crit.
- Feline Swiftness is also cheap and gives movement speed and block chance, making it very useful before you have Replica Wings of Entropy
- Once you are crit, Titanic Impacts gives the best total dps for its cost

/Belt/

- Rare leather belt with the usual good stuff early.
- Belt of the Deceiver is great for providing Intimidate if you aren't taking the rage mastery that gives it, and also helps us vs crits (i.e. oneshots)
- Arn's Anguish is nerfed because endurance charges are a lot more valuable now.
- If you take the rage mastery for Intimidate, a rare Stygian Vise with a strong abyss jewel is best in slot. Can get more life this way.

/Flasks+Tincture/

- Two life flasks, one with bleed removal/CB, the other with poison removal. 'Instant when on low life' is the best prefix.
- QS flask for obvious reasons.
- Leave space for a tincture of your choice, no idea how this will feel so best to experiemnt yourself. Oakbranch Tincgture might provide Culling Strike again, which would be valuable.
- Can put 'use when frozen' enchant via Einhar on a utility flask that removes freeze if you want pseudo freeze immunity while mapping.

/Jewel(s)/

- 1 jewel socket, mostly taken because we want the endurance charge and taking everything else around it makes sense.
- Get whatever you need to fix res/attributes and some life is possible, then damage. CB immunity also good here.
- Some Watcher's Eye mods are a huge boost for out dps.

Mapping

- Use Consecrated Path to blink into packs and double strike to blow them up, rinse repeat.
- Stack valour for War Banner in case you run into a nasty rare or the boss. Can use this to good effect during things like ritual and Jun events as well.
- Can stay in sand stance a lot of the time while mapping, switching to blood stance if you run into anything tanky, for Flesh and Stone's powerful effects

Bosses

- Damage ramps up over time with War of Attrition. Consider this to be in full effect vs any boss where want the damage it provides.
- Consider swapping between sand stance and blood stance depending on what the boss is doing and whether Vaal Double Strike is up. Always be in blood stance when you place your banner.

Accuracy

- Use the +500 mastery while you're Precise Technique, with both accuracy wheels eventually, and then drop Weathered Hunter and the mastery for just one wheel and the 50% more when close mastery when you go crit.
- Accuracy on items early on can save passive points, but you shouldn't need any later on.

Mana

- When you have auras and more supports and your mana pool is becoming a problem, Spirit of War + Mastery is valuable for reducing mana cost of attacks and providing more reservation efficiency alongside Leader of the Pack.
- You can drop this wheel once you get helmet implicits for reduced mana cost and mana reservation efficiency and a ring giving mana leech. Can take a while to farm for the right implicit so be sure about the helm you want to put them on.

Rage

- With our endgame tree we gain 10 rage per second while attacks, so we can stack to max rage very quickly.
- Veteran's Wrath is very valuable for rage QoL, hard to pass up on this. Can take the Intimidate mastery while leveling as well, and even keep it if you don't want to use Belt of the Deceiver.

Block

- Until we have blocked recent we have a 67% chance to take no damage from hitst. If we have blocked recently we have a 90% chance to take no damage from hits.
- The lucky block chance helps sustain its own effect as long as we stay in the fray
- Not hard to get Versatile Combatant attack and spell block to cap with just a bit of investment + Replica Wings of Entropy's extra block chance
- Swagger and Deflection aren't worth the points, we get our charges comfortably otherwise and we don't need the block from these nodes.

Fortify

- Can take the wheel on the tree at first, but lucky block should make you pretty tanky for a while so you could just slug it out and get Fortify Support asap.
- You could try swapping the support out if you hit the melee Hits have x% Chance to Fortify body armour implicit, but I don't see this being reliable enough even with our fast aps, given how fortify works.

Impale

- Takling the axe and crit wheels is just more dps than investing further into Impale if you are running the support.
- You can just ignore Impale entirely and run other supports, it's slightly less effective dps but it means all your damage is from hits which is better for stun and ignoring enemy PDR.

Leech

- Blood Rage gives us life leech, passives on tree or ring mod give us mana leech
- Vaal Pact is technically an option since we hit 10 times per second, but it leaves us really vulnerable to ailments and other degens while we don't have anything to hit.

Crit swap

- Save up your free respecs for this, should be comfortable with those plus a bit of gold to tidy things up maybe.
- Gold cost for respec goes up more the more you level so the sooner you get Replica Wings of Entropy the better in case you need to use gold to help.
- We only take 3 new wheels (Dismembering, Cornered Prey and Twin Terrors) for crit chance and multi, plus the crit chance small passives for Feller of Foes.