16 months ago
 Level 99 Sunder Juggernaut3.25
Life: 4,896129%
Mana: 71
eHP:
47,065
Resistances: 80%/79%/80%/75%
Armour: 30,364
DPS: 1,428,907
Speed: 2.31
Hit Chance: 100%
Config: Pinnacle
Bandit: Kraityn
Pantheon: Soul of Solaris
Gear
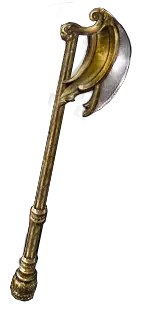
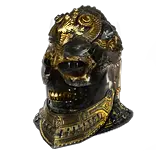
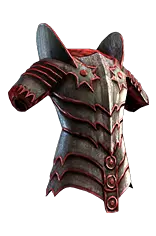
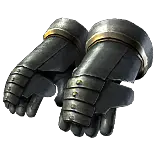


Gems
Sunder
Melee Physical Damage
Close Combat
Fist of War
Brutality
Ruthless
Vulnerability
War Banner
Blood Rage
Lifetap
Pride
Herald of Purity
Blood and Sand
Intimidating Cry
Enduring Cry
Urgent Orders
Lifetap
Seismic Cry
Autoexertion
Frostblink
Leap Slam
Faster Attacks
Lifetap
Tree Preview
- +1% to all maximum Elemental Resistances if Equipped Helmet, Body Armour, Gloves, and Boots all have Armour
- Gain 2 Rage on Hit with Axes
- Banners also cause Enemies to take 8% increased Damage
- Melee Hits Fortify
- -3 to maximum Fortification
- 12% increased Mana Reservation Efficiency of Skills
- 10% more Maximum Physical Attack Damage
- 40% increased Damage with Hits against Rare and Unique Enemies
- Warcries cannot Exert Travel Skills
Notes
----------------------------------------------------------------------------------------------------------------------------------------------- GENERAL TIPS -----------------------------------------------------------------------------------------------------------------------------------------------

**REMEMBER TO USE THE NECESSARY DROPDOWN MENUS (in "Tree" and "Skills")

		// BASICS OF PoE //

- PoE beginner guide  ->  https://youtu.be/qUPz0t8qcmo?si=z2u9_GPrU8Fy62JW
- full campaign playthrough on fresh character -> https://youtu.be/EOJ4JPrTxDY?si=4WPe02m6Vt2JntDF

		// GENERAL SKILL ROTATION //

1) Leap Slam & Frostblink around until you find some monsters, pressing Blood Rage every 5 seconds or so.
2) Sunder once or twice
		**IF ALL MONSTERS DIE HERE, go back to Step 1.
3) uh oh! tanky enemy! now, press all of the following once:
		Vulnerability, Intimidating Cry, War Banner (if it's available)
4) more Sunder (and Intimidating Cry, when it comes off cooldown) until ded. Keep tossing in Blood Rage, every now and then, just to make sure it's still activated!

rinse & repeat!

		// UPGRADING YOUR GEAR DURING CAMPAIGN //

--WEAPON --

	ACTS 1-3
if you need a better weapon, go to a vendor and sell these things ALL TOGETHER:
	- the best 2H axe basetype available (buy from your current Act's vendor) (also, if you have 2+ Blacksmith's Whetstones, use ONE on the axe, first!)
	- a MAGIC or RARE-rarity Rustic Sash belt (a RARE one will give you a better weapon!)
	- a single Blacksmith's Whetstone

This give you an axe with a guaranteed "% increased physical damage" roll of up to 64% (based on the RARITY of the Rustic Sash you used.)

	ACTS 4-10
- Buy the best 2H axe available to you (from your current Act's vendor)
- use an Orb of Scouring on it (if it's not already COMMON-rarity)
- use as many Blacksmith's Whetstones as necssary (anywhere from 1-4) to reach 20% quality.
- slap an Essence, an Orb of Alchemy or an Orb of Binding on it, hoping for decent "physical damage" stats (both % AND +) with some attack speed.

if you landed only ONE of "%increased physical damage" OR "adds x to x physical damage" but you ALSO landed "increased attack speed":
	- take the axe into your hideout's Crafting Bench (talk to Helena in Act 2, if you don't have a hideout) and craft whichever "phys" stat is missing, if the other prefixes are not filled (hold the "alt" key while hovering over an item to see its affixes.) **DO NOT SPEND YOUR CHAOS ORBS ON THIS CRAFT! CHOOSE A LOWER TIER!

--ARMOR--

- you're simply looking for as much LIFE and RESISTANCES as possible.
- look to equip "armor" or "armor/evasion" basetypes, as they have the highest chance at the correct-color-sockets.

again, remember to utilize your CRAFTING BENCH to fill one empty affix slot on an item!

consult the "Items" tab, here in PoB, for more concrete examples (ignore the stat values - just look at the stats themselves.)

		// IF YOU'RE STUCK //

 refer back to my PoE Beginner Guide YT vid ( https://youtu.be/qUPz0t8qcmo?si=z2u9_GPrU8Fy62JW )

----------------------------------------------------------------------------------------------------------------------------------------------- LEVELING ---------------------------------------------------------------------------------------------------------------------------------------------------------

		// ACT 1 //

- After killing Hillock (the big zombie), take Ground Slam as your reward. Link Ruthless to it. Drop Heavy Strike.
- Look out for a 3-linked (3L) item with 2 Red & 1 Green socket (2R, 1G)
- After Mercy Mission quest (Tidal Island zone):
	choose Momentum as your reward. Link it to Ground Slam.
		*at this point, if you still do not have a 3L (2R, 1G), just socket Momentum anywhere until a 3L drops.

-After Breaking Some Eggs quest (Mud Flats zone), buy these gems from Nessa:
	Frostblink (KEEP THIS AT LEVEL 1!  DO NOT EVER LEVEL IT UP! you can right-click its level-up icon to move it into your inventory and get it off your gameplay screen.)
	Blood and Sand (toggle on and ALWAYS STAY IN BLOOD STANCE! once activated, you can toggle the skill to switch between the two stances.)
	War Banner (activate whenever you need damage)

- After The Caged Brute quest, take one of the following gems as a reward and BUY the rest from Nessa:
	Added Fire Damage
	Enduring Cry
	Faster Attacks
	Intimidating Cry
	Leap Slam
	Lifetap (x2)
**if you don't have enough currency to grab all of these gems, don't worry - just keep coming back & buying them occasionally.

- Once you arrive in Merveil's Caverns, IMMEDIATELY grab the waypoint and go back to town to acquire Sunder (drop Ground Slam for it.)

At this point, your overall gems should look like this:
	Sunder w/ Added Fire & Momentum
	War Banner (only press when you need damage)
	Intimidating Cry (only press when you need damage)
	Enduring Cry (only press if you're dying)
	Blood and Sand (toggle on and STAY IN BLOOD STANCE!)
	Leap Slam w/ Faster Attacks (do not link to Lifetap yet - you won't be able to recover HP quite fast enough.)
	Frostblink (level 1!)

		// ACT 2 //

- This is where you should start looking for your first 4-linked (4L) item. This can be either as a natural drop or by using an Orb of Binding on a Common-rarity item.
	You'll need 3 red sockets and 1 green socket (3R, 1G) for Sunder, so you should look for either a PURE ARMOR or ARMOR / EVASION basetype, as these items roll red sockets more frequently.
- Rush these two quests first:
	Sharp and Cruel (The Weaver's Chambers -> go left out of town and stay left until the Western Forest zone. look for spider webs)
		take Melee Physical Damage as your reward & buy Close Combat from Yeena.
			**swap out Added Fire & Momentum in your Sunder links for these but KEEP Added Fire somewhere in your gear! (you can drop Momentum entirely, though.)

	Intruders in Black (Chamber of Sins -> go right out of town until the Crossroads zone, then go up)
		take Seismic Cry as your reward and buy Herald of Purity, Herald of Fire & Blood Rage from Yeena

- Afterwards, your gems should look like:
	Sunder w/ Melee Phys & Close Combat (& Added Fire if you have a 4L)
	War Banner (press for damage)
	Intimidating Cry (damage)
	Seismic Cry (AoE)
	Enduring Cry (dying)
	Blood Rage (press it every 5 seconds or so - you want it active whenever you're in combat)
	Herald of Ash (toggle on & always keep it on)
	Herald of Purity (toggle & keep on, as well)
	Blood and Sand (toggle on, STAY IN BLOOD STANCE!)
	Leap Slam w/ Faster Attacks (still no Lifetap)
	Frostblink (still level 1)

At this point, you will likely NOT HAVE ENOUGH ROOM IN YOUR SKILL BAR TO USE ALL OF YOUR ABILITIES (lol)
	simply hold the "ctrl" key and assign your Reservation Skills (Heralds & Blood and Sand) to this bar, instead.

FOR BANDITS:
	help Kraityn (8% movement speed)

		// ACT 3 //

- You should have a 4L item now, or get one shortly after starting Act 3 (and remember to link Added Fire to Sunder once you get one.)
- After Lost in Love quest, buy these gems (MINUS the one you chose as a reward!):
	Vulnerability
	Pride **(do NOT activate Pride yet! keep your Heralds on, instead, until Act 4.)
	Autoexertion

If you don't have room in your main gear sockets, you can store both Pride and Autoexertion in your "weapon swap", for now.
Click the "II" Roman Numeral above your weapon, buy two random Common-rarity weapons (with red sockets) from any vendor, put them on and socket your gems - they will still gain experience, as normal.

- After A Fixture of Fate quest (The Library zone), choose Urgent Orders as the reward.
- Before you enter The Scepter of God zone, I recommend you complete the Lord's Labyrinth to acquire your Ascendancy Class (Juggernaut.) You can access the Labyrinth (lab) by completing the necessary Trials - interact with the Stone Plaque at the top of The Sarn Encampment's spiral staircase to see which Trials you are missing.

		// ACT 4 //

- If you somehow STILL do not have a 4L, use an Orb of Binding on any piece of vendor gear (armor OR armor/evasion basetype) or... if you... somehow don't have one of those, either... use your Jeweler's Orbs and Orb of Fusings on it, instead. Point being - GET A 4L!
- After both The King of Fury & The King of Desire quests, acquire both gems (take one as your reward & buy the other from Petarus and Vanja):
	Fist of War
	Brutality

Then, make the following changes to your gems:
	Sunder = drop Added Fire for Fist of War
	Replace Herald of Ash with Pride. Toggle it on.
	Link Seismic Cry to Autoexertion and toggle it on (it will reserve some of your mana, like an aura.)

**Check the Skills tab (choose "Acts 4-10" from the dropdown menu) to see if you have all of your gems setup correctly!

Finally... GOOD NEWS!
You now have ALL of the gems for the build!
That means, for the rest of the campaign - you can simply focus on getting more powerful from LOOT and PASSIVE SKILLS alone! WOO!

	// ACTS 5-10 //

- Simply complete all quests AND Ascendancy Trials (check Trials in Act 7's town.)
- You can complete Cruel Lab in Act 7 (recommended lv55+) and Merciless Lab in Act 10 (recommended lv68+.)
	**COMPLETE THE MERCILESS LAB BEFORE KILLING THE ACT 10 BOSS!
- Remember to USE YOUR CRAFTING BENCH! (namely, for resistances)
- After the final boss of both Act 5 and Act 10, all of your resistances will be lowered by 30% (for a grand total of -60% after Act 10 boss.)
	 Buy Common-rarity jewelry from vendors and upgrade them to Rare-rarity (with Alchs or Essences), in-hopes of fixing any resistance issues.

Sunder link priority: Melee Phys > Close Combat >  Fist of War  > **Brutality > ** Ruthless
	**you likely will NOT have the links for these supports until you buy a 5L or 6L from another player (I'm just putting this here in case you SOMEHOW drop a 5L or 6L item... you lucky, bruther...)

For the Pantheon, I recommend using Soul of Solaris (major) and Soul of Yugul (minor) but you can really use whatever you'd like.

Finally, after you have killed the Act 10 boss, remember to UNSPEC out of the leveling passive nodes (flip between the "Acts 9 & 10" and "Early Maps" trees to see the nodes!)

Refer to the top of this page if you need help finding gear upgrades or are otherwise stuck.

------------------------------------------------------------------------------------------------------- POST-CAMPAIGN UPGRADES -------------------------------------------------------------------------------------------------------

The VAST majority of your power, past the campaign, comes from your GEAR. To easily acquire better gear, you'll begin trading other players.
For the basics of trading, refer to my PoE Beginner Guide's section on trading, here: ( https://youtu.be/qUPz0t8qcmo?si=-5VmYJTswF_BR0pp&t=912 )

As with EVERY item you acquire, remember to USE YOUR CRAFTING BENCH to fill a missing affix, should the item you just bought have one available (hold "alt")

Here is the order of upgrades I recommend you start saving up for:
1) 700+ physicalDPS (pDPS) 2H axe
2) 6L Body Armor (the stats don't necessarily matter - you can always spam a few Chaos Orbs on it until it rolls decently, then craft another affix on it via your crafting bench.)
3) Helmets, Boots, Gloves, Amulets, Rings and Belts with higher Life & Resistances values than what you currently have.
4) 20 Gemcutter's Prisms (use on Autoexertion)
5) ... there are a LOT of things you could do to upgrade the build (it's what PoE is all about, baby!)

Check the "Upgrades to save up for" Item set & "Endgame Upgrades" Skill set for more concrete examples.

 Finally, refer to the "Build Comparing" section of my PoE guide for more info ( https://youtu.be/qUPz0t8qcmo?si=1A_1DDseRkcafoYs&t=1289 )

------------------------------------------------------------------------------------------------------- FINAL NOTES -------------------------------------------------------------------------------------------------------

- refer to the top of this page for helpful info
- do NOT overlevel Blood Rage and Faster Attacks (too much Dex requirement for little benefit)
- KEEP Frostblink AT LEVEL 1!
- Ascendancy Order = check leveling passive tree dropdowns (Jugg is over on the bottom-left of the tree!)
- remember to unspec out of Butchery and Destroyer, once you finish the campaign!
- refer to the General Skill Rotation at the top of this page for tips on actually playing the build.
- dying is normal.
- not doing damage is normal.
- EVERYTHING in this game revolves around upgrading your character. it NEVER stops! don't get discouraged. grind out some currency, trade some players & make some upgrades!

and finally...

HAVE FUN! WOOOOOOOOOOOOOOOOOOOOOOOOO!

if you have any questions, leave a comment on this YT video or stop by my stream ( twitch.tv/wooliegaming )
I hope you enjoy the build!