2 months ago
 Level 94 Eviscerate Gladiator3.25
Life: 4,302108%
Mana: 53
eHP:
305,961
Resistances: 80%/80%/79%/34%
Armour: 24,904
DPS: 3,152,411
Speed: 0.92
Hit Chance: 100%
Config: Pinnacle
Bandit: Alira
Pantheon: Soul of Arakaali, Soul of Ralakesh
Gear

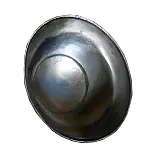

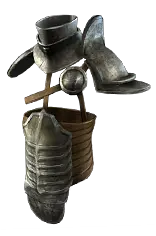
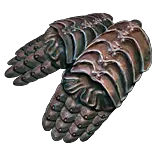



Gems
Bladestorm
Faster Attacks
Shield Charge
Blood Rage
Flame Dash
War Banner
Crushing Fist
Expert Retaliation
Maim
Fist of War
Vitality
Enduring Cry
Pride
Malevolence
Eviscerate
Expert Retaliation
Melee Physical Damage
Brutality
Volatility
Fortify
Vaal Molten Shell
Cast when Damage Taken
Vulnerability
Lifetap
Thirst for Blood
Enduring Cry
Tree Preview
- +1% to all maximum Elemental Resistances if Equipped Helmet, Body Armour, Gloves, and Boots all have Armour
- 8% increased Evasion Rating per Frenzy Charge
- 8% increased Armour per Endurance Charge
- +3% to Damage over Time Multiplier for Bleeding per Endurance Charge
- 100% increased Charge Duration
- 10% less Damage Taken from Damage over Time
- 12% increased Mana Reservation Efficiency of Skills
- Your Elemental Resistances cannot be lowered by Curses
- 10% chance when you use a Retaliation Skill for a different Retaliation Skill to become Usable
- 20% increased Armour for each different Retaliation Skill you've used in the past 10 seconds
- 80% increased Duration of Ailments inflicted by Retaliation Skills
- 20% chance to Avoid Elemental Ailments while holding a Shield
Notes
GORATHA'S EVISCERATE FULL BUILD GUIDE! **MAKE SURE YOU USE THE NEW LOADOUT SYSTEM ON TOP RIGHT!!** (it automatically chooses correct gear sets, passive trees, and gems)

THE NOTES! (from the beginning)

PLAYSTYLE
	-We mostly just shield charge and flame dash around, occasionally using Bladestorm. Eviscerate / Crushing Fist whenever you block
	-On single target you want to cast Vulnerability, Bladestorm, and use Eviscerate / Crushing Fist procs. You also want to put down your War Banner (this is instant cast, really not as bad as it might seem).
	-In bosses with their own loadscreen you'll want to use Enduring Cry to keep up Endurance Charges.

LEVELING NOTES
	-In this guide I go over how I leveled personally, keep in mind if you are experienced and want to level as sunder or something else, that's completely fine!
	-Retaliate skills are the most clunky early on before you get the ascendancy, block, and points on the tree (they become MUCH smoother in the end-game!)
	-EARLY ANOINTS (these are extremely cheap!) Go for Indiscriminate Revenge early for massive AOE (it's three clear oil, you can farm this in SSF act 3 sewers if you want)
	-Crushing Reply for early "fortify" is also an option and probably the best anoint after you get the AOE on the tree (this let's you replace Fortify gem for a good gem) - also very cheap!

GOOD LEVELING UNIQUES!
	-Stone of Lazhwar is one of the only ways to get early spell block, this will help a TON on bosses like Merveil for retaliate skills
	-Lycosidae will make all of your retaliate skills one-shot early on with the massive cold damage it adds (this doesn't really fit the bleed theme, but it's very strong)
	-Le Heup of All rings, these give a ton of attributes, res, damage, and rarity! I used one of these until level 90+ on my character personally.
	-Kaom's Sign, this gives you enduring cry saving you a gem slot and it also gives +1 endurance charge, which is quite nice for how easy it is to get

ACT ONE (check the gem links in the POB!)
	-Early on the best gem to use by far is Spectral Throw, however if you want to use Retaliate skills such as Crushing Fist at level four - you'll need to use a shield
	-With that in mind I opted to go for Shield Crush, it's not the best, but it works the best early on with retaliate skills specifically
	-You'll also get Shield Charge early, which if linked with chance to bleed is actually quite good at killing monsters

ACT TWO
	-We get Eviscerate at level 16, this does a TON of damage, easily enough to one-shot some act bosses
	-Make sure to grab "Prepared Response" with 80% duration of ailments, this will also enable the pingpong playstyle (crushing fist has a chance to activate eviscerate and vice versa)
	-Chance to bleed nodes do nothing for Eviscerate as it always bleeds and always hits (this is also why we don't worry about accuracy) however it helps shield charge, shield crush, and crushing fist
	-You can opt to use Herald of Purity for more damage or something like Herald of Ash - but from my testing Herald of Purity caused more issues by making monsters attack your minions instead of you (so I didn't like it)
	-If you are having mana issues at this point, you can always take "Spirit of War" early on
	-Tempest Shield can be added here to help with early spell block (we will drop it later though!)

**BANDITS**
	-I helped Alira and never changed it, the 15 all res helps a TON with gearing, especially if you go for suppression
	-You can always choose to kill all for an extra point

ACT THREE
	-This is where you'll add "Pride" aura gem and "Vulnerability" curse
	-With Vulnerability you can self-cast it or link it to CWDT and keep it lower level
	-Important to note you want to get 20 quality on this gem ASAP (it gives 10% chance to aggravate, which is quite big)
	-There is no "Act 3" tree but you'll basically want to head for the block nodes asap to generate more retaliate procs
	-First Lab can be either "Measured Retaliation" OR "Determined Survivor" - I recommend "Measured Retaliation" if you can get a good block shield + stone of lazhwar

ACT FOUR + FIVE
	-Replacing Shield Crush with Bladestorm!
	-Once we start getting more and more block we will need to use less and less filler abilities (such as Shield Crush)
	-Bladestorm has a few big advantages, it hits a lot of times per attack, which helps aggravating bleeds, and it also lingers on the ground, which helps with leech ect.
	-We can link "Maim" and "Culling" or to make it less clunky "Faster Attacks" and "Momentum" - I opted end-game to link this with Shield Charge to save gem space
	-For gear you want to keep upgrading your axe as you progress through the campaign, as well as capping your resistance, and trying to get a high armor chest/shield
	-Make sure to get the block nodes and "Iron Reflexs" + "Versatile Combatant" (it's important that you dont evade hits because you won't block them if that happens, causing you to not proc retaliates, this is also why "Unwavering" is really strong)

CRUEL LAB
	-You'll take either "Measured Retaliation" OR "Determined Survivor" whichever you didn't grab from first lab
	-This is where the build will really start to flow well, you should be max block / spell block at this point
	-Make sure you respec the old block nodes as they are not needed anymore! (check Act 8 tree)

ACT EIGHT - ACT TEN
	-Indiscrimate Revenge is REALLY important for overlapping Eviscerates, the build feels a lot better with AOE early, make sure you grab this after you cap block!
	-Blood Magic helps ignore all mana cost issues and gives a bit more HP, eventually we will drop this for more auras once we get -mana rings + helm implicit
	-Important to note that you will link Pride to Eternal Blessing making it free, and you can also use "Vitality" with Blood Magic as it is a flat reservation aura

MERC + UBER LAB + RESPEC FOR PINNACLES?
	-There is actually a choice here, you can go for "Lucky Block" which will make you feel almost immortal to hits + proc a ton more retaliates OR you can go "Gratuitous Violence" this is bleed POPS and it feels great for clearing
	-I opted to go for the bleed pops, but it is up to you to decide, both are really strong and you'll take the other one at Uber Lab
	-For bossing later you can go for "War of Attrition" over "Gratuitous Violence" - this is mostly for early Pinnacles or other big bosses (with really good gear "Weapon Master" might be better for 30% more on low life)

----------------------------------------------------------------------------------


EARLY MAPPING NOTES

GOOD EARLY UNIQUE ITEMS FOR MAPS!
	-Elevore is a highly underrated cheap mapping unique, this gives a ton of suppression early on especially once you take Entrench nodes + Lucky Suppress mastery (you take this if you aren't capped)
	-Elevore also gives a ton of recovery which is a big weakness early on for this build
	-Jack the Axe is another very big early item, this should be quite cheap at this point in the league and it carried me until level 95 + all 4 voidstones
	-Jack also gives a reservation aura "Thirst for Blood" this is 20% more damage with bleed, and up to 2000 life regen (it's 400 per enemy affected by your bleed up to 5 enemies)
	-This recovery helps a TON and Jack also gives pretty good damage (at least early)
	-Le Heup + Kaom's rings are still not bad even in early maps

MID-END GAME UNIQUES!
	-Ryslatha's Coil is HUGE for this build, this item can be a bit expensive, but you'll want to get it ASAP
	-The most important stat on this belt is "More Maximum Physical Attack Damage" the other stats don't really matter, even "Less Maximum Physical Attack Damage" matters very little if you are using Volatility (it's already really low anyways)
	-Light of Meaning unique jewel (this comes from ritual boss) this jewel is INSANE, ideally you get the physical damage variant as it scales the bleed pops and gives a ton of damage
	-If you can't afford the physical one, you can use "armor, evasion, chaos res" all of these are pretty good value in the duelist jewel slot

AILMENT IMMUNITY AND PANTHEONS
	-The best way to get Ailment Immunity will be through Essence of Loathing + Eater Implicit "avoid ailments" on boots (you'll want 60% here combined, so Defeaning + High Implicit)
	-This will be a bit expensive but its the most efficient way, since we get 20% from Thick Skin life nodes already and we can get 20% avoid on a Shield Mastery
	-Early on you use Brine King for freeze and Garukhan + Helm implicit to deal with shock (and boots to deal with chill, you can replace this with onslaught once you get avoid boots)
	-Swap to Arakaali and Ralakesh once you get this

BLEED TINCTURE IS INSANE!
	-You could grab one of these in the campaign even (you'll need "Bloodsoaked Blade" if you are Blood Magic)
	-This is a BIG damage boost and the uptime is actually pretty good without any investment
	-Important to note that if you are mana based you'll want to put lifetap on CWDT because with this you will eventually run out of mana and this will cause CWDT to not proc potentially

NO FORIGVENESS ANOINT AND PREPARED RESPONSE (this replaces "Crushing Reply" so you'll need to use fortify gem again)
	-These two allow for Eviscerate and Crushing Fist to be spammed quite a lot
	-Between the Anoint and ascendancy you have a 70% to re-use the cooldown and ontop of that if you use Crushing Fist you have a 35% to reset Eviscerate
	-With that in mind I have added a Crushing Fist set-up with Maim linked
	-Possible to drop "Expert Retaliation" for another damage link with this set-up, however I really like the QOL still

DROPPING CRUSHING FIST ENDGAME?
	-If you hate pressing so many buttons you can drop Crushing Fist once you get "No Forgiveness"
	-To be honest, I am still unsure of which I prefer, I am leaning towards using Crushing Fist still personally as I like pressing buttons
	-If you want to use Crushing Fist you would combine Bladestorm+Shield Charge links and take "Prepared Response" on the tree

RED MAPS AND PINNACLES

LIFE ON BLOCK SHAPER SHIELD (this makes you immortal to small hits)
	-Ideally you craft on an Ilvl 86 Evasion Shaper Shield (t1 suppression is ilvl 86, evasion makes suppression double weight and shaper is far easier to roll life on block over warlord)
	-I recommend using "reforge life" harvest spam until you get life on block + suppression, and then you can go from there

DAMAGE SCALING PRIORITY
	-6-Link is VERY important for damage, get this ASAP
	-Aggravate Implicit on Gloves + 20Q on Vulnerability (this is important, even though it doesn't show on POB!!)
	-Bleed Tincture
	-Damage over time Multi on Amulet
	-Jack the Axe is good but you'll want a rare eventually - remember all your damage comes from the weapon
	-Rsylatha's is the next huge upgrade (make sure you use "attack" catalysts on it"
	-Light of Meaning is huge %phys damage
	-Cluster set-up eventually can add a lot of damage
	-You can also go for "Focused" heist amulet for huge dot multi + life (if you can get +phys gems, or flat phys, that's also insane)

BLEED POPS NOT GOING OFF?!
	-Once your damage is very high you might start noticing less bleed pops, this is because you are one-shotting monsters with the hit and they are not bleeding when they die
	-You can use Deadly Ailments on Eviscerate to fix this, but you'll lose fortify (it's based on hit damage) - the workaround is to use Crushing Fist as well to proc fortify
	-Make sure you don't use Cruelty and Deadly Ailments together, they do not work together

HOW I CRAFTED AXE

JACK THE AXE REPLACED?! (this DOUBLED my damage)
	-Finally replaced Jack with a 670 top end rare axe (most important stat is the top end phys, attack speed is QOL)
	-I crafted this by using a "Fracturing Orb" on a 4-mod rare axe that had t1 hybrid (dictator's)
	-Afterwards I used reforge phys from harvest to hit flaring with an open prefix (you can do this with Essence of Contempt as well)
	-Then I did "Prefix can't be changed" veiled orb to hit %phys damage + blind chance (you could also do prefix can't be changed reforge physical... but this is far more expensive and more likely to fail but results in higher damage if you hit t1/t2/t3)
	-For the suffixes, I started by doing another "Prefix can't be changed" and scoured off the rest of them
	-After it was clean of suffixes I did yet ANOTHER "Prefix can't be changed" and harvest augmented speed (this gurantees attack speed, but all the tiers are equally weighted, if you aren't satisified you can do it again)
	-To finish it I blocked "accuracy" and slammed to hit "damage over time multiplier" this was quite lucky but you can technically guarantee this eventually
	-In order to get this 100% you could do "Cannot Roll Attack" and slam, this limits the pool significantly and makes it far more likely
	-In the likely event it fails you can use an Annulment Orb (as long as you have "Cannot Roll Attack" on it still) this makes it so it only removes non-attack modifiers, unfortunately this includes itself, so you might have to do it more than once
	-For the last suffix I just crafted Phys DOT from the bench

RING OF THE ACCUSER ON PINNACLES
	-This is a new ring that grants "Penace Mark" it basically spawns a bunch of weak enemies every time you hit
	-These will proc your retaliate without having to tank boss abilities, it also keeps up fortify, onslaught, on kill effects, and even caps your Cruelty (more on this later)
	-Very nice ring and definitely worth using if you struggle on bosses!

GEM SWAP ON BOSSES
	-I've started to switch from "Expert Retaliation" to "Cruelty" for bossing
	-Expert Retaliation is very nice QOL while mapping but seems unnecessary on bosses, especially with Ring of the Accuser
	-Cruelty adds a TON of extra dps, if we abused "War of Attrition" we would be dot capped in certain situations

CLUSTER SET-UP AT HIGH LEVEL
	-Once you reach high 90s, you can drop "Hatchet Master" and go for a cluster set-up instead
	-You are looking for "Master the Fundamentals" "Furious Assault" and "Battle-hardened"
	-These are quite easy to roll with just "jagged" fossils

TATTOOS
	-I would recommend using one "Attack Damage Leech" in the situation where you don't use Blood Rage (possibly on bosses?)
	-Both %armor and %phys damage are both quite good to replace some strength nodes
	-Int/Dex are too important to really replace

------------------------------------------------------------

THE CLUSTER SWAP (this is very end-game stuff)
	-When you are high level 90s you can start thinking about dropping all the right side nodes for a cluster set-up
	-You'll need a dex+suppression cluster (dex for good body armor) Elegant Form makes up for the avoid ailments + Suppression that you lose by dropping Thick Skin + Entrench
	-You also need to tattoo four 10 strength nodes into 1% attack block nodes and the block mastery for spell block
	-You can use the extra points to become super tanky or to do more damage
	-Cluster Swap POB is more HC oriented and Cluster Swap SC POB is more SC oriented
	-Medium Thread of Hope is quite good at marauder jewel slot, it hits a lot of big notables such as: Slaughter, Cleaving, Crushing Reply, Strong Arm