a day ago
 Level 30 Marauder3.28
Life: 93049%
Mana: 105
eHP:
857
Resistances: -26%/-6%/-25%/-60%
DPS: 99
Speed: 1.53
Hit Chance: 100%
Config:
Custom Mods
Bandit: Kraityn
Pantheon: Soul of the Brine King, Soul of Ralakesh
Loadout
Gear


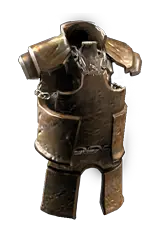
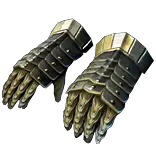
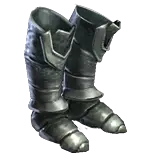



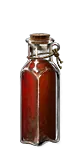

Gems
<<Level 1-30>>
Go to Notes for a REGEX you can use for vendors
<< Damage Skills >>
Ground Slam
Chance to Bleed
Faster Attacks
Stop Groundslam when u get sunder
Sunder
Chance to Bleed
Faster Attacks
<< Auras >>
Blood and Sand
Herald of Ash
Vitality
<< Warcry >>
Intimidating Cry
<< Mobility >>
Frostblink
Leap Slam
Faster Attacks
Level all gems to MAX level Except For
Lifetap - This should only be maxed on RF & FT


Notes
You can find more Information on RF by visiting my Website ---> Pohx.net
You can also Hold Left Control and Scroll mouse wheel to increase Text Size!

Filters = https://www.pathofexile.com/account/view-profile/Pohx-1588/item-filters

                                                                              REGEX for lvling

Melee Lvling  Regex  --> -\w-.-|-\w-|Runn|rint|s:.+ax
	(Mainly for 2H Axe  / links)

Library Regex ---> "^fire t|male|^trap a|^effi|^elemental f|^burning da|^swift af|bots$|busti|rmag|mabi|tap"


A special Note make sure to Sell a lot of Blue/Rare Items Unidentified for Transmutation Orbs. You're going to want at least 6 so you can craft Fire Resistance on Gear

~~~~~~~~~~~~~~~~~~~~~~~~~~~~~~~~~~~~~~~~~~~~~~~~~~~~~~~~~~~~~~~~~~~~~~~~~~~~~~~~~~~~~~~~~~~~~~~~~~~~~~~~~~~~~~~~~~~~~~~~~~~~~~~~~~~~~~~~~~~~~~~~~~~~~~~~~~~~~~~~~~~~~~~~~
                                  Cheap Uniques for the Campaign & Early Mapping                                                                    Higher Level Uniques
~~~~~~~~~~~~~~~~~~~~~~~~~~~~~~~~~~~~~~~~~~~~~~~~~~~~~~~~~~~~~~~~~~~~~~~~~~~~~~~~~~~~~~~~~~~~~~~~~~~~~~~~~~~~~~~~~~~~~~~~~~~~~~~~~~~~~~~~~~~~~~~~~~~~~~~~~~~~~~~~~~~~~~~~~

Kikazaru       		 	Lvl 20       Good for Regen       												 		Rise of the Phoenix            Lvl 65           Best Way to hit 90 Max res early, also amazing for Regen and makes Exarch a joke
Pyre Ring      			Lvl 11       Good for Damage													 		Dawn Breaker                    Lvl 67           If you have great regen use this for Phys Mitigation
Goldrim         			Lvl 1         Great Resistances													 	   Immortal Flesh                    Lvl 50           Best belt for Regen for its price
Thrillsteel     		 	Lvl 18       Gotta go Fast															  	 Annihilation's Approach      Lvl 95           My Favorite Boots, check website FAQ To understand how to run them
SpringLeaf      	 	 Lvl 7         Good for early Regen                                                       Death Rush                        Lvl 30           Very good for Adrenaline for mapping.
Wanderlust   			Lvl 1         Good boots for MS & Freeze Immune                               Defiance of Destiny            Lvl 49           Expensive but great alternative for people who want to be more tanky, You lose a lot of damage though.
Lochtonial Cares      Lvl 1         Good gloves for Cast Speed
Thousand Ribbons   Lvl 1 	    Great Flat Ele Damage in Act 1
Perandus Blazon      Lvl 16       Good Attributes + Fire Res

More Expensive

Replica Atziri's Foible            Lvl 16      Crazy Life + Life Regen     	                                                               Pickup All the Transmutation Orbs and save them.
Replica Karui Ward               Lvl 5        Great Damage + AoE                                                                            Pickup All the Transmutation Orbs and save them.
Xoph's Heart		                 Lvl 5		Good Life + Damage																		      Pickup All the Transmutation Orbs and save them.
Seven League Step              Lvl 1        Zoomer Boots
Cloak of Flame                     Lvl 18       Fantastic Fire Res and can use to lvl 100


~~~~~~~~~~~~~~~~~~~~~~~~~~~~~~~~~~~~~~~~~~~~~~~~~~~~~~~~~~~~~~~~~~~~~~~~~~~~~~~~~~~~~~~~~~~~~~~~~~~~~~~~~~~~~~~~~~~~~~~~~~~~~~~~~~~~~~~~~~~~~~~~~~~~~~~~~~~~~~~~~~~~~~~~~
                                                     Level 1-30 (Leveling As Melee. Groundslam/Sunder)
~~~~~~~~~~~~~~~~~~~~~~~~~~~~~~~~~~~~~~~~~~~~~~~~~~~~~~~~~~~~~~~~~~~~~~~~~~~~~~~~~~~~~~~~~~~~~~~~~~~~~~~~~~~~~~~~~~~~~~~~~~~~~~~~~~~~~~~~~~~~~~~~~~~~~~~~~~~~~~~~~~~~~~~~~

Skill Tree Order
Born to Fight ---> Versatility ---> Butchery --> Barbarism ---> Resolute Technique ---> Hearty

Grab a starting 2H Weapon from Tarkleigh. I like Stone axe.

Use Groundslam + Ruthless. Buy Iron Ring if you got a 2H Weapon drop from Hillock.
	(You're going to want 2 iron rings for later, pick them up when you see them)

Kill Hailrake and get Chance to Bleed + Quicksilver Flask. Buy Blood & Sand.  Use Groundslam + Chance to bleed If 3 link add faster attacks.
	Note: I like to be in Blood Stance, Also Purchase Frostblink. You can use this once you get Versatility from the Skill Tree

After completing the quest "Breaking some eggs" grab Shield Charge and throw in your weapon swap to level

Note: You want to use a rustic sash as your belt and collect Whetstones.  Make sure to keep rare rustics for a future recipe.
	Recipe = White,Magic,Rare Rustic + Weapon + Whetstone  (sell to vendor)

After killing Brutus get Leap Slam & Intimidating Cry.  Use Leap Slam + Faster Attacks
	Also grab vitality for later. You can use now if u want

After getting to Merveil's Caverns go back to town and grab Sunder. Replace groundslam for this.
	If your axe is bad and has no dmg mods, consider gambling one at Bestel in town.

Act 2

Once you kill "Fidelitas, the Mourning" in "The Chamber of Sins Level 2", and turn in the quest, "Intruders in Black", you will be able to purchase a Righteous Fire Gem from Yeena in "The Forest Encampment"
	You want to make sure to put Righteous Fire in your weapon swap to level up. You also want to Purchase "Herald of Ash" and "Bloodrage" Bloodrage is optional.

For Bandits I like to Help Kraityn For the Movement Speed, You can also kill all for a skill point.


Act 3

At the start of Act III After killing Piety the first time, You're going to get access to a new set of Auras & Curses. I like to take "Purity of Elements" Which helps resistance Cap you & Provide Ailment Immunity
	Make sure you're not linking any of your Auras to support gems. Usually by this point I'm running  Blood & Sand, Purity of Elements + Herald of Ash. If mana is too rough, drop herald of ash

~~~~~~~~~~~~~~~~~~~~~~~~~~~~~~~~~~~~~~~~~~~~~~~~~~~~~~~~~~~~~~~~~~~~~~~~~~~~~~~~~~~~~~~~~~~~~~~~~~~~~~~~~~~~~~~~~~~~~~~~~~~~~~~~~~~~~~~~~~~~~~~~~~~~~~~~~~~~~~~~~~~~~~~~~
                                       Roughly Level 32        Preparing the RF Swap. Make sure to Read If you're New
~~~~~~~~~~~~~~~~~~~~~~~~~~~~~~~~~~~~~~~~~~~~~~~~~~~~~~~~~~~~~~~~~~~~~~~~~~~~~~~~~~~~~~~~~~~~~~~~~~~~~~~~~~~~~~~~~~~~~~~~~~~~~~~~~~~~~~~~~~~~~~~~~~~~~~~~~~~~~~~~~~~~~~~~~

Before Killing Piety the Second time, I usually make my way over to "Library" This is mandatory to complete so you can get support gems for your Righteous Fire & Also so you can purchase your new single target "Fire Trap"
You won't be able to use this skill right away. So make sure to put it in your weapon swap so it can level on the side. Down below is a list of gems to purchase from Library

Regex to buy gems -->      "^fire t|male|^trap a|^effi|^elemental f|^burning da|^swift af|bots$|busti|rmag|mabi|tap"
^x3F6DB3
^x70FF70Fire Trap^7^7^7, ^x8888FFEfficacy, Elemental Focus^7, ^x70FF70^x70FF70Trap & Mine Damage^7, ^xE05030Burning Damage, Armageddon Brand, Flammability, Combustion
2x Lifetap.   Optional:  2x Swift affliction, Malevolence

Total Cost
6 Transumation Orb
2 Alteration
2 Orb of chance
+2 Chance +1 alt if grabbing optional gems


Note: This Respec costed me 750 Gold at level 32. To be safe get more. Make sure you swap to the "Getting RF Started" Loadout on the Tree.

You want to make sure you do the Ruby Ring Recipe (Iron Ring + Red Gem):
	Open a NPC Vendor and place your Iron Ring + Red Gem (any red gem) and they will offer you a Ruby Ring in return, do this Twice to guarantee 2x Ruby Rings

If you didn't find any Iron Rings on the Filter, you can always go to the shops and check, you can even go back to Act 1

From this point you want to Craft "Fire Resistance" On every piece that has an open Suffix. Simply place it in the Crafting Bench and Craft Fire Resistance for 1 Transmute, the more the better

You want a minimum of 120 Fire Res, the more the better as you combine this with the Fire Resistance Mastery "Regenerate 1 Life Per second per uncapped fire resistance"  This means the number in the (     )

This is also a good time to swap to a shield and start Shield Charging if you want to speed up your campaign

At this point you're going to want to Gamble for a 4-Link piece for your Righteous Fire assuming you don't have one yet. What I like to do is look at my Helmet or Gloves, and gamble the worst piece.
	Gambling has a nice chance for the gear to already be Pre 4-Linked. There is an NPC in each act who will allow your to spend your Gold on Gambling

If you want to go a bit faster and do more damage, consider purchasing "Blood Rage" This will add an additional Degen to your character but Provide Frenzy Charges on Kill

Check the Skills Section to know what to link, Also make sure you're using the Loadout function at the top right. Select "RF Start"

Usually shortly after the RF Swap I Ascend and take Tasalio, cleansing water (usually at the start of act 4 when I get my golem)

~~~~~~~~~~~~~~~~~~~~~~~~~~~~~~~~~~~~~~~~~~~~~~~~~~~~~~~~~~~~~~~~~~~~~~~~~~~~~~~~~~~~~~~~~~~~~~~~~~~~~~~~~~~~~~~~~~~~~~~~~~~~~~~~~~~~~~~~~~~~~~~~~~~~~~~~~~~~~~~~~~~~~~~~~
                                                     Level 41-60 Swapping to Fire Trap
~~~~~~~~~~~~~~~~~~~~~~~~~~~~~~~~~~~~~~~~~~~~~~~~~~~~~~~~~~~~~~~~~~~~~~~~~~~~~~~~~~~~~~~~~~~~~~~~~~~~~~~~~~~~~~~~~~~~~~~~~~~~~~~~~~~~~~~~~~~~~~~~~~~~~~~~~~~~~~~~~~~~~~~~~

At around level 40 I usually swap out Arma Brand for Fire Trap. We gamble pure Armour bases for our 4-Link

If you're lacking Dexterity for Fire Trap, you can purchase a Turquoise Amulet, You can also Allocate a +30 Dexterity node by Acrimony, You're also able to craft "Dexterity" as a suffix on gear

After Killing the bosses Daresso & Kaom, and turning in the quest, you'll gain a new support gem "Increased Area of effect". I like to replace Efficacy in RF for Increased Area of Effect

After Going to Chamber of Sins & killing Maligaro in his instance you will be able to access the Final Trial for Cruel Lab. After Ascending you will have 2 Choices. You can either go for "Ramako, Sun's Light" OR "Hinekora, Death's Fury" I prefer Hinekora for clear speed but Ramako provides a lot more damage

If going Ramako Swap out "Combustion Support" for "Swift Affliction"

If going Ramako Swap your curse from "Flammability" To "Punishment"

This is because with Ramako, Sun's Light you no longer benefit from Minus Resistance such as Flammability

If you chose Hinekora, Death's Fury You will make the above changes when you allocate Ramako after Finishing Merciless Labrynth (Around level 65)


~~~~~~~~~~~~~~~~~~~~~~~~~~~~~~~~~~~~~~~~~~~~~~~~~~~~~~~~~~~~~~~~~~~~~~~~~~~~~~~~~~~~~~~~~~~~~~~~~~~~~~~~~~~~~~~~~~~~~~~~~~~~~~~~~~~~~~~~~~~~~~~~~~~~~~~~~~~~~~~~~~~~~~~~~
                                                     Level 61-90 Starting Maps & Pantheon
~~~~~~~~~~~~~~~~~~~~~~~~~~~~~~~~~~~~~~~~~~~~~~~~~~~~~~~~~~~~~~~~~~~~~~~~~~~~~~~~~~~~~~~~~~~~~~~~~~~~~~~~~~~~~~~~~~~~~~~~~~~~~~~~~~~~~~~~~~~~~~~~~~~~~~~~~~~~~~~~~~~~~~~~~

After Finishing the Campaign make sure to type /Passives and make sure you have all your additional skills points

Before I start mapping I like to look at my gear and gamble for upgrades. (Do not gamble weapon/Accessories it's a waste of gold IMO)

I focus on Gloves/Helmet/Boots/Body. Your primary focus here is to get High Life with Fire Resistance, Chaos Resistance or Life Regen Rate which is a MULTIPLIER to your FLAT Life Regen that you scale with the Fire Mastery

This is around the time when you stop stacking Fire resistance and focus on other affixes. Such as:
	Life, Chaos Resistance, Dexterity, Life Regeneration Rate, BIG Flat Life Regen

Note: It's still important to have High Fire Resistance since we're capping our Cold & Lightning Resistance Via Fire Resistance due to Tasalio, Cleansing Waters (our ascendancy)

You can also look at some of the gear in the POB Gear Section under this loadout to see examples

Starting Maps I like to start using Enduring Cry for Endurance Charge Generation, we will passively generate Endurance Charges later on with an Amulet Annoint
	Endurance Charges make you take less Ele Damage & Physical damage while provide you more Life Regen because you take less damage from RF

Also make sure you have selected your Pantheon. You want to be running Brine King + Ralakesh

After finding my first labyrinth trial (In Yellow Maps) and completing it you will gain a Offering to the Goddess. After completing your Uber Lab you're going to want to purchase a Divine Vessel (if you haven't already found one)

Search on the Atlas "Brine King" You're going to want to run the map that states "100% Chance to avoid being frozen" Put the Divine vessel along with this map in the device, run it and consume the vessel to unlock your Freeze Avoidance

After finishing the Panthon + Uber Lab you may now Swap your Auras. I Swap to:

	Skitter Bot + Unbound Ailments
	Tempest Shield
	Flesh and Stone  (Only in Sand Stance)
	Purity of Fire

This is also a great time to snag an Immortal Flesh Belt & Rise of the Phoenix to help push you to 90% Max All Resistance


~~~~~~~~~~~~~~~~~~~~~~~~~~~~~~~~~~~~~~~~~~~~~~~~~~~~~~~~~~~~~~~~~~~~~~~~~~~~~~~~~~~~~~~~~~~~~~~~~~~~~~~~~~~~~~~~~~~~~~~~~~~~~~~~~~~~~~~~~~~~~~~~~~~~~~~~~~~~~~~~~~~~~~~~~
                                                     Around Level 90 Going Block Based, Getting Ignite Proliferation & Setting up 6 Life Mastery
~~~~~~~~~~~~~~~~~~~~~~~~~~~~~~~~~~~~~~~~~~~~~~~~~~~~~~~~~~~~~~~~~~~~~~~~~~~~~~~~~~~~~~~~~~~~~~~~~~~~~~~~~~~~~~~~~~~~~~~~~~~~~~~~~~~~~~~~~~~~~~~~~~~~~~~~~~~~~~~~~~~~~~~~~

Going Block Based allows you to survive while being Surrounded or Taking a barrage of hits. This complements very well with lower damage builds that end up soaking a lot of damage. This is also the time when I like to purchase a Cloak of Flame. To help manage big Physical Hits

To make this swap you're going to want to find or Purchase a "Shaper Shield" I prefer having an Armour shield. The more the better but don't spend too much on it. Some good examples would be. Pinnacle Tower Shield, Ezomyte Tower Shield, Colossal Tower Shield

To craft this shield you can refer to the crafting tab on the top of my website. In Trade League I like to use Pristine Life Fossils or Harvest Reforge Life although I prefer Fossils. You're going to do this till you hit Recover 3-5% Life on Block

We will respec part of our Tree to take the block nodes shown along with the Keystone "Glancing Blows" This will get us 75% Block & Spell Block

Ignite Proliferation is a Modifier you can find by using "Exarch Embers" on your gloves. It's a 1/50 Chance to roll and elevates your clear to the next level. Your Hinekora Explosion has the ability to Ignite which works off your Global Ignite Chance, you can find this in the character sheet under Default Attack
	You either want to use the above stat mentioned or go down the Cluster Jewel route via "Fan the Flames"  which I have removed from this PoB due to players getting Confused

6 Life Mastery Setup - This combined with the Life on Block Shield should make your character Insanely tanky. It makes it very easy to hit values like 7k+ Life even on a budget. You want to take them all at the same time since a lot of the masteries don't really provide any benefit. Make sure to read them!


~~~~~~~~~~~~~~~~~~~~~~~~~~~~~~~~~~~~~~~~~~~~~~~~~~~~~~~~~~~~~~~~~~~~~~~~~~~~~~~~~~~~~~~~~~~~~~~~~~~~~~~~~~~~~~~~~~~~~~~~~~~~~~~~~~~~~~~~~~~~~~~~~~~~~~~~~~~~~~~~~~~~~~~~~
                                                     HELP I DON'T HAVE ENOUGH MANA TO RUN ALL THE AURAS
~~~~~~~~~~~~~~~~~~~~~~~~~~~~~~~~~~~~~~~~~~~~~~~~~~~~~~~~~~~~~~~~~~~~~~~~~~~~~~~~~~~~~~~~~~~~~~~~~~~~~~~~~~~~~~~~~~~~~~~~~~~~~~~~~~~~~~~~~~~~~~~~~~~~~~~~~~~~~~~~~~~~~~~~~

Here are some common Problems:

Don't link your auras to Lifetap or other support gems unless stated in the POB such as Skitterbot with Unbound Ailments

Make SURE To take ALL The Reservation Nodes that the POB Takes. Take a second Glance then a third then allow your friends to look as well

Make SURE to use the Loadout Feature in the Top right of PoB so that you are navigating correctly

Pay attention to the gear, Sometimes such as in the "Malevolence" Loadout, you will use a shield with Gem Reservation

In this instance FOLLOW the Skills Section to know what Gems go WHERE. We also use a Cluster Jewel in this Loadout which reduces Malevolence Mana Reservation


~~~~~~~~~~~~~~~~~~~~~~~~~~~~~~~~~~~~~~~~~~~~~~~~~~~~~~~~~~~~~~~~~~~~~~~~~~~~~~~~~~~~~~~~~~~~~~~~~~~~~~~~~~~~~~~~~~~~~~~~~~~~~~~~~~~~~~~~~~~~~~~~~~~~~~~~~~~~~~~~~~~~~~~~~
                                                     Additional Information
~~~~~~~~~~~~~~~~~~~~~~~~~~~~~~~~~~~~~~~~~~~~~~~~~~~~~~~~~~~~~~~~~~~~~~~~~~~~~~~~~~~~~~~~~~~~~~~~~~~~~~~~~~~~~~~~~~~~~~~~~~~~~~~~~~~~~~~~~~~~~~~~~~~~~~~~~~~~~~~~~~~~~~~~~


What Bandits do I help/Kill?
	Helping Kraityn is what I'll do for 8% Movement Speed
	Helping Oak is advisable for newer players for 40 Bonus life
	Killing all Bandits is the best option for Single target since it offers you a Skill Point

What auras to use in Campaign?
	In the very early acts we'll be using Vitality, Later in Act 3 We'll gain Access to Purity of Elements & Determination. Use the Purity of Elements and hold the Determ till once you pickup the Auras Reservation nodes
	After securing Freeze Immunity on the Panthon we'll drop Purity of Elements in Favor of Purity of Fire & Skitterbots.

What jewels to I look for?
Rare Jewels usually end up being expensive, remember you can look for many different combinations. I'll list some usable stats you can mix and match to save currency:
	Prefix
	Life, Fire Damage
	Suffix
	Increased Damage, Fire damage over time multiplier, damage over time multiplier, area damage, burning damage, chaos resistance, dexterity


Which Large Cluster Jewels to use?
	Anything with Prismatic heart or Burning bright in the front. You can also opt out for 12 Passive clusters and try to craft them for stats like + Life & Chaos Res with Increased effect

Which Medium Cluster Jewels to use?
	Flow of life + Any combination


As a reminder, Golems usually start to fall off in Yellow maps, they will repeatedly die as you get into higher content, I suspect a similar fate to the Animate Guardian