16 months ago
 Level 95 Hybrid Crit Tempest Flurry Invoker0.1
Life: 18%
ES: 5,968287%
Mana: 2,322
Int: 738
eHP:
12,568
Resistances: 75%/75%/75%/-29%
DPS: 530,805
Speed: 7.25
Hit Chance: 100%
Crit Chance: 44.66%
Crit Multi: 938%
Config: Uber, 15% Shock, Power
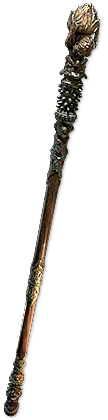
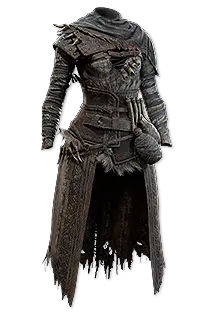
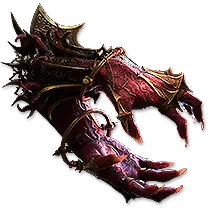
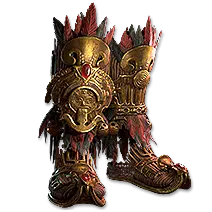
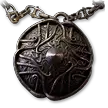
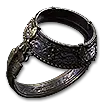
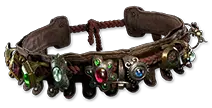
Gear


Gems
Unbound Avatar
Tempest Flurry
Lightning Exposure
Martial Tempo
Ignition
Tempest Bell
Immolate
Concentrated Effect
Primal Armament
Hourglass
Minion Pact
Skeletal Cleric
Elemental Army
Meat Shield
Minion Mastery
Ingenuity
Sacrifice
Grim Feast
Clarity
Cast on Critical
Profusion
Fast Forward
Overabundance
Impetus
Profane Ritual
Herald of Thunder
Innervate
Shock Siphon
Ambush
Longshot
Coursing Current
Profane Ritual
Arcane Tempo
Intense Agony
Mobility
Unleash
Corpse Conservation
Flicker Strike
Perpetual Charge
Momentum
Rage
Lightning Infusion
Inevitable Critical
Wind Dancer
Wind Wave
Unbreakable
Energy Barrier
Magnified Effect
Tree Preview
Notes
This build was developed for bossing and mapping (normal, juiced, breach, delirum) with minimal gem swapping. Simulacrum is untested at this point in time, but I suspect it won't work too well with the way that this build obtains charges.
At it's core, this build is an Invoker that uses attribute stacking and Cast on Crit and prioritises fluidity of gameplay and survivability. Made and written by GGMonka

GAMEPLAY
YouTube link: https://youtu.be/5QrsbUBc5OY

BOSSING:
Turn off all spirit skills except war banner, sacrifice and turn on as many minions as you can. I personally use 8 minions, but you can have the same effect with as little as 4 minions.

Manually cast profane ritual to build power charges -> confront boss -> place war banner -> cast unbound avatar if you have it specced (this is optional) build 4 combo with tempest flurry -> put down Tempest Bell -> dodge roll or walk away (2 metres) and then flicker back.

HOW IT WORKS:
Profane Ritual: This is to build charges (note, depending on the rolls on your Powertread boots, having 9 power charges can give you up to 135% critical damage bonus).
War Banner: This gives 36% attack damage (basically a better fully charged rage you can use on command)
Unbound Avatar: This is optional, this only serves to increase damage on command
Tempest Flurry: This serves to ignite the enemy (synergy with Immolate support on bell) and build 4 combo for Tempest Bell
Tempest Bell: The shockwave is where most of the bossing damage comes from
Flicker Strike: This dashes between the bell and the boss, damaging both.

MAPPING:
Turn off sacrifice and remove all minions, turn on Herald of Thunder, Cast on Critical, Grim Feast and Wind Dancer. I personally swap War Banner with Wind Dancer as they both use the Magnified Effect support gem.

With this setup you should be able to self sustain power charges. Cast on Critical will be procced almost every time you use Flicker Strike, though if you are having issues, you can add more supports to increase the critical hit rate for betterPrioritise INT over the other attributes as this will make Flicker Strike stronger and also increase the AoE of it's 'teleporting' range. sustain.

HOW IT WORKS:
Herald of Thunder: This is optional, this serves to help with clear speed and allow you to move further and faster through a map. Although you can turn it off, I would recommend leaving it on for mapping.
Cast on Critical: This is how you build charges while mapping, note that there must be corpses on the ground for this to work. The supports are there to minimise downtime between Flicker Strikes (less skill duration means that the charges will 'fly' towards you faster).
Grim Feast: This is one of the best survival skills in the game and is necessary to stay alive during rippy maps.
Wind Dancer: This is your second layer of defence. This serves to increase your stun threshold which is already criminally low as a Chaos Innoculation user and to also explode the screen when you get hit. This is used as an 'oh shit' button, though luckily this recharges incredibly quickly.
Tempest Flurry: You won't be using this unless you get completely surrounded, though Wind Dancer should take care of that for you.
Tempest Bell: This will only ever be used on map bosses
Flicker Strike: Make sure you don't spam the button, as you cannot gain charges while using the skill. Use Flicker Strike, then wait for the charges to come to you, then you can cast again. Soon you will get the timing down and will be flickering around at the speed of sound.

NOTE:
Try not to buff your cold damage too much, as this will freeze and explode corpses and you will not be able to use profane ritual on them.


GEAR:
Weapon: Pillar of the Caged God quarterstaff - Attack speed is not super important here, so go for critical damage runes here.
Helmet: The +1 maximum power charges corrupt enchant is optional, but it does make a difference. No need to attribute stack here. Just get as much ES as possible.
Body Armour: Get as much ES as possible, this is more important that ES on any other piece as the ES from your body armour gives spirit - and you want as much spirit as possible.
Gloves: Hand of Wisdom and Action gloves - Dex is not super important. Prioritise Int, no need to get perfectly rolled gloves.
Boots: Powertread boots are a big damage boost as each power charge gives +15% critical damage bonus, and also gives +1 maximum power charges. Try to get boots with a high roll for movement speed and critical damage.
Amulet: Any amulet will do, +3 melee skills works well, and so do non-Astramentis attribute stacking amulets.
Ring 1: Breach ring with high attributes and flat damage
Ring 2: Unset ring with high attributes and flat damage
Belt: Ingenuity to increase the stats of the rings

Where possible, prioritise INT over the other attributes as this will make Flicker Strike stronger and also increase the AoE of it's 'teleporting' range.

JEWELS:
Sapphire Jewels: Prioritise high ES and gain % ES as stun threshold.
From Nothing Diamond: This allows you to get the 'Polymathy' node, which gives 10% increased attributes.
Megalomaniac: This just gives you extra notable passive skills. I've opted for Jack of All Trades and Fated End. Jack of All Trades gives damage based on your lowest attribute and Fated End itself is useless, however it sits within the radius of the Against the Darkness jewel, giving +4% fire damage and +4% Intelligence.
Controlled Metamorphosis: This allows you to get nodes without branching to them
Heroic Tragedy: Quite possibly one of the most misunderstood jewels. Most people get this jewel in Vorana as it will allow you to change a nearby Keystone into 'Circular Teachings', which changes Strength's inherent bonus to give 1% increased energy shield per 2 Strength (instead of life, and we use Chaos Innoculation so we don't need life).
My specific jewel has 'Remembrancing 1514 songworthy deeds by the line of Vorana', which changes two nearby notable nodes into 'Steel Bastion', these give 40% Increased Elemental Damage each.
Against the Darkness: Any notable passive skill within it's radius is given extra stats, in this case, gain 4% damage as fire and 4% Intelligence. Prioritise INT over the other attributes as this will make Flicker Strike stronger and also increase the AoE of it's 'teleporting' range.Prioritise INT over the other attributes as this will make Flicker Strike stronger and also increase the AoE of it's 'teleporting' range.