10 months ago
 Level 98 Death Wish Elementalist3.25
Life: 3,535114%
ES: 248
Ward: 174
Mana: 18
eHP:
312,406
Resistances: 76%/75%/75%/33%
Armour: 19,711
DPS: 44,505,404
Speed: 6.05
Hit Chance: 100%
Config:
Pinnacle, 40% Shock, 7% Scorch, Covered in Ash, Frenzy, Custom Mods
Bandit: Kraityn
Pantheon: Soul of the Brine King, Soul of Ryslatha
Gear


Gems
-----Helmet-----
Death Wish
---Body Armour-----
Raise Spectre
Minion Life
Empower
-----Weapon-----
Flame Dash
Enhance
Convocation
-----Shield-----
Vaal Molten Shell
Efficacy
More Duration
-----Gloves-----
Arcanist Brand
Flame Surge
Flammability
Tempest Shield
-----Boots-----
Determination
Malevolence
Faster Attacks
Shield Charge
-----etc-----
Primal Aegis
Tree Preview
Tattoo of the Hinekora Warmonger(x24)
Minions have 5% increased maximum Life
Tattoo of the Ngamahu Warrior(x8)
5% increased Fire Damage
Tattoo of the Ramako Fleetfoot(x2)
2% increased Movement Speed
- +1% Chance to Block Spell Damage per 5% Chance to Block Attack Damage
- 20 Life gained when you Block
- 20 Mana gained when you Block
- +10% to Damage over Time Multiplier if you've Killed Recently
- Critical Strikes do not inherently Ignite
- 100% increased Damage with Hits against Ignited Enemies
- Regenerate 1 Life per second for each 1% Uncapped Fire Resistance
- Fire Exposure you inflict applies an extra -5% to Fire Resistance
- 15% increased maximum Life if there are no Life Modifiers on Equipped Body Armour
- Convocation has 40% increased Cooldown Recovery Rate
- +1% Chance to Block Attack Damage per 5% Chance to Block on Equipped Shield
Notes
-----------------------Build Stats----------------

Damage: 5/5
Defense: 4/5
Mapping: 5/5
Bossing: 5/5

-----------------------Pros-----------------------

1. Fantastic All-Rounder (Excellent Mapper, Excellent Bosser)
2. 400k+ Spectre Life, 20m+ Ignite DPS
3. 90% Effective Attack/Spell Block Chance
4. Ailment Immunity, 2000+ Prim Aegis
5. No Cluster Jewel Required

-----------------------Cons-----------------------

1. Weak Against Dot Damage
2. Can't do 'Ailment Avoidance' and 'Less Recovery Rate' Map Mods

-----------------------Note-----------------------

1. Even though Death Wish is a Channelling skill, we don't need to channel it to full stages before releasing it. Reaching just 1 stage and releasing is more than enough in
most situations. Note that, 1 stage explodes 1 spectre, and channeling to full stages will explode them all.

2. The Spectres used in this build are Perfect Dark Marionette and they have a whopping 448k Life each! These Spectres can be acquired from either Ritual rewards or be
bought from other players. We use 4 of them. After their death, these Spectres revive automatically after 4 seconds. So we don't lose them after they explode/die.

3. The secret to the absurd Spectre Life lies in the Elegent Hubris Timeless Jewel, whose Seed is 88700. It gives us 3x Axiom Warden node for 240% increased Minion Life.

4. Being the Caspiro variant, the Elegent Hubris also gives us the Supreme Ostentation Keystone, which lets us use as many Tattoos as we want. For the Tattoos, we are
using 24x Hinekora Warmonger, 8x Ngamahu Warrior, and 2x Ramako Fleetfoot.

5. Even though the Hit based damage from the Explosions are pretty high, we are not doing them frequently enough. So ignore that part of the DPS in PoB. Ignite is our
main damage source here.

6. Ignite Proliferation from the Berek's Respite ring is unmatched. It gives us an insane level of clearspeed while mapping (old pre-nerf ED-Contagion level clearspeed).

7. We use the Eldritch Battery Keystone for using our skills, and for that to properly work, we must have some source of Energy Shield in our gears. This we cover in our Gloves.

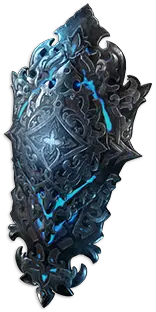
8. The Svalinn shield is a huge game changer. It's Chance to Block is Lucky mod is what gives us the effective 90% Block Chance. It also automates normal Molten Shell
(the Vaal version we have to use manually).

9. Other defensive layers of this build are the Defiance of Destiny amulet for tanking small hits, Primal Aegis from the Bastion of Elements Ascendency Notable for huge
amount of Elemental Damage mitigation, and the Vampirism notable for insane sustain/recovery while mapping.

10. Be careful of Dot Damage. This build is weak against it.

11. To achieve Ailment Immunity, we get a combined 100% Chance to Avoid Shock mod on our Stygian Vise Belt and it's Abyss Jewel socket, and pair them with
the Stormshroud jewel.

12. The Endurance Charges and Frenzy Charges are On Kill effects, and as such, they are typically not available during Boss Fights. They are primarily for Mapping.


========================================================================================================================
If you have any other questions, please ask in the youtube comment section (As I still don't have a Discord server yet).
I'll try to answer them to the best of my knowledge.
========================================================================================================================