2 years ago
 Level 90 Crit Blade Vortex Elementalist3.20
Life: 4,278125%
ES: 162
Mana: 69
eHP:
70,643
Resistances: 75%/75%/75%/51%
Supp: 100%
Armour: 24,764
DPS: 1,282,421
Speed: 2.10
Hit Rate: 7.50
Hit Chance: 100%
Crit Chance: 58.52%
Crit Multi: 444%
Config: Pinnacle, 15% Shock
Bandit: Alira
Pantheon: Soul of the Brine King
Gear

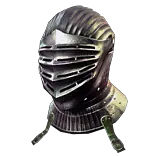
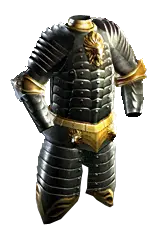




Gems
Vaal Blade Vortex
Awakened Unleash
Increased Critical Damage
Hypothermia
Inspiration
Awakened Cold Penetration
Vortex
Bonechill
Arcane Surge
Shield Charge
Faster Attacks
Summon Stone Golem
Summon Flame Golem
Summon Ice Golem
Summon Chaos Golem
Hatred
Herald of Ice
Anomalous Herald of Purity
Determination
Frost Bomb
Frostblink
Anomalous Assassin's Mark
Defiance Banner
Vaal Molten Shell
Frostbite
PrimalAegis
Tree Preview
- 40% of Physical Damage Converted to Cold Damage
- +25% to Critical Strike Multiplier against Unique Enemies
- 10% more Skill Effect Duration
- 40% increased Effect of Non-Damaging Ailments
- Exposure you inflict applies at least -18% to the affected Resistance
- +50 to maximum Life
- 10% increased maximum Life
- 10% reduced Life Recovery rate
- Auras from your Skills have 10% increased Effect on you
- 8% increased Damage for each of your Aura or Herald Skills affecting you
- +12% chance to Suppress Spell Damage if your Boots, Helmet and Gloves have Evasion
Notes
Chronic_Painless's Guide to League-Starting with BV:

Date of Export: Dec 5th 202
(See Bottom of this Page for POB Configuration Tips)

p.s. If you're reading this, please accept my apologies for the spammy "Read the Notes Section" everywhere else in this POB, but also please trust me that it was necessary.


------- THE BASIC OUTLINE ---------

Start with Stormblast Mines in Acts 1-5, getting Elemental Overload and +1 Chain Lightning Mastery to abuse Orb of Storms as soon as possible. This build will get you to act 6.
Alternatively, you can use Spark or Lightning tendrils if you don't like the Mines playstyle.

After completing the Twilight Strand and the Labrynth, swap to Blade Vortex with 100% Physical to Cold Conversion via Hrimsorrows. Use Vortex+Bonechill on left-click for a damage boost.

Get the Shaper of Storms Ascendency first, as enabling your Herald of Ice to shock will dramatically improve your clear speed, and its a nice damage boost as well.

Next, get the Golem Ascendancies, and use Flame/Stone/Chaos Golems for damage and survivability as well as a source of culling strike.

Take advantage of Shield Charge for faster movement.

Continue using Elemental Overload. This build will get you to at least yellow maps.

Get the Bastion of Elements Ascendency for increased survivability.

At approximately Level 70, unspec from Elemental Overload and invest in critical strikes, specifically with the addition of Ice Golem, Assassin's Mark, and eventually Brittle Ground boots.

This should easily level you into Red Maps, and with a 5-link and about 10-15 Chaos spent per gear slot, this build will easily kill non-Uber end-game bosses and do the basic Maven's Invitations, creating a strong foundation for farming currency.

Get a Cluster Jewel with the Blast-Freeze notable for a massive survivability boost, and invest in increased freeze duration to enable freezing even beefier enemies.

Invest in inreased effect of non-damaging ailments to bolster the effect of your Brittle Ground, Bonechill, and the Shock from Shaper of Storms.

Add Determination and Defiance banner by investing in Mana Reservation Efficiency.

Look for armour items with high spell suppression, and use Eldritch Implicits to turn them into end-game viable gear. Get to 100% Spell Suppression with the Instinct Notable Cluster, Mastery, and/or a Crafted Mod on your Shield.

Once you have a decent amount of currency, respec to Occultist to take advantage of the clearspeed of Profane Bloom, and enable scaling into higher budget investment.

Stack skill gem levels to maximize damage, with a secondary focus on Power Charges, Aura Effect, and Critical Strike Multiplier.


NOTE: Generally, ignore Socket Colors in the "Items" section of this POB, and refer only to the "Skills" section or the notes below when determining which colors to target overall.
This is left open because it doesn't matter where you put mines/orb/vortex/golems/auras/curses in your boots/helm/gloves/weapons, as long as the skill and support links are correct. You don't even need to put Blade Vortex in your Chest until you have a 5-link.
In the extremely high budget versions, there ma be socket groups that must be in a certain gear slot, but they will be called out specifically.


------ STARTING WITH STORMBLAST -------

Make a Scion to get Onslaught Support, plus give yourself an extra chance to find good links or movement speed boots from the vendors.

Get three items with B-B-G links as fast you can.

Use Frostblink/Frost Bomb to maintain Onslaught at first.

Use Stormblast Mines/Orb of Storms to kill harder packs/bosses.
Alternatively, you can use Spark or Lightning tendrils if you don't like the Mines playstyle.

Make a wand using the Vendor Recipe for Tier 8 added lightning damage to spells. (Normal Topaz Ring + Orb of Alteration + Magic Wand)

Get to Elemental Overload as soon as possible (passing through Lightning Walker), then get the +1 Chain Lightning Mastery.

Add Skitterbots and Herald of Thunder as soon as you are high enough level.

Help Alira, Alira is Bae.

At level 18, use Elemental Focus Support instead of Added Lightning Damage on your mines/orb. Start using Orb of Storms to generate Onslaught at this point.

Remove Frost Bomb and use Flame Dash instead of Frostblink. Link Flame Dash to Arcane Surge.

At level 20, make two Vendor Recipe wands with Tier 6 added lightning damage to spells. (Rare Topaz Ring + Orb of Alteration + Magic Wand)

As soon as you start getting 4-links, try to get B-B-B-G so you can use both added lightning and elemental focus on your mines/orb, prioritizing the orb.

Also try to save any G-G-G-B links,  B-B-B-B links, or 4-linked Evasion/Energy Shield items in general, as you will want those for the swap to Blade Vortex + Vortex.

You'll want at least one item with Red sockets as well, for Herald of Purity, Shield Charge, and eventually Golems.

Continue putting points on the tree to get closer to the Level 41 version. Prioritize Life nodes, then Ash Frost and Storm. The rest of the points won't be of much impact until after the swap.

This will get you through Act 5, as there aren't any more gem changes or Vendor Recipes needed until the swap to BV.


------ SWAP TO BV -------

Clear the Labrynth and get the Shaper of Storms Ascendancy. (NOTE: Check "Enemy is Shocked" on POB configuration while this ascendency is selected.)

You can also do the lab after the swap to BV, but I recommend doing it first, especially if you've been speedrunning, because the loot from the treasure chests can aid with the swap.

Clear the Twilight Strand to unlock all basic gems.

Ideally, buy Hrimsorrow Gloves (should be 1-5C). If you can't do this, skip ahead to the pink section below.**

Unsocket these gems:
1. Stormblast + Supports
2. Orb of Storms + Supports
3. Conductivity
4. Flame Dash
5. Herald of Thunder
6. Summon Skitterbots

Buy these gems:
Act 6 - Cold Penetration, Shield Charge, Faster Attacks Support
Act 1 - Blade Vortex, Unbound Ailments Support
Act 2 - Herald of Ice, Herald of Purity, Culling Strike Support
Act 3 - Hatred, Frostbite, Vortex
Act 4 - Bonechill (and Stone/Chaos/Flame golems if you have orbs of Chance, but you won't equip these yet)

Use the vendor recipe to change your lightning damage wands into cold damage wands.

Use your Respec Points to remove the lightning damage increases from the Passive Tree.

Drop Lightning Walker in favor of Frost Walker.

Get the 60% Increased Freeze Duration Cold Mastery.

***Benchcraft dex/resistances as needed.

Make sure you have the Increased Skill Duration Mastery

Add Vortex with Bonechill Support, attaching a low level Arcane Surge as well.

Do not level up the Vortex gem unless you happen to have weapons/jewelry with increased mana regeneration, as the main purpose of Vortex is activating Bonechill's damage boost and generating consistent Arcane Surge.

Go back to using Frostblink/Frostbomb to generate Onslaught.

Start leveling shield Charge with Faster Attacks Support in your weapon-swap. They'll feel a lot smoother if they're leveled when you try adding it to the build, and it's probably too early to do so until we get to maps.

Add Hatred, Herald of Purity, and Herald of Ice. Get the Herald Reservation Efficiency nodes to free up enough mana.

Get Vaal Blade Vortex ASAP, even before you can afford gem quality. I immediately use every vaal orb I get, until I hit a Vaal BV or can afford one off of trade.

This will get you through the rest of the Campaign.


------ **IF HRIMSORROW ARE INACCESSIBLE -----

If you weren't fortunate enough to drop a few chaos orbs in the early acts, are playing SSF, or lack access to Hrimsorrow Gloves for whatever reason:

Unsocket these gems:
1. Stormblast + Supports
2. Orb of Storms + Supports
3. Conductivity
4. Flame Dash
5. Herald of Thunder
6. Summon Skitterbots

Buy these gems:
Act 6 - Physical to Lightning Support, Shield Charge, Faster Attacks Support
Act 1 - Blade Vortex, Unbound Ailments Support
Act 2 - Trinity Support, Herald of Ice, Herald of Purity, and Culling Strike Support
Act 3 - Hatred, Elemental Weakness, Vortex
Act 4 - Bonechill Support (and Stone/Chaos/Flame golems if you have orbs of Chance, but you won't equip these yet)

Change your Lightning Mastery to "Lightning Damage with Non-Critical Strikes is Lucky"

Get the Cold Mastery "Convert 40% of Physical Damage to Cold Damage"

With this setup, your damage should be balanced enough to maintain full Trinity Resonance, but you may have to make small tweaks depending on your gear. Make sure to add "50" in the config for resonance in POB.

Changes to Consider:
	1. Swap Herald of Ice/Herald of Thunder/Herald of Purity
    2. Use the vendor recipe to change the damage on your wands
	3. Move points around on the tree, out of or into lightning/cold nodes
	4. Hatred outclasses Wrath immensely in overall DPS, so swap them only as a last resort

The Trinity setup will actually work into red maps if necessary, but balancing your cold and lightning damage is a hassle, so you'll still want to pick up a pair of Hrimsorrow Gloves as soon as you can afford them.

In the meantime, go back and complete the section above, starting with "Benchcraft dex/resistances as needed" ***


----- EARLY MAPPING -----

Once you get your Silver Flask from the A10 Quest, drop Onslaught Support.

Continue using Frost Bomb as a source of Exposure and Frostblink as a gap crossing tool.

Get the Golem Ascendencies.

Use Flame/Stone/Chaos Golems to boost your damage and survivability, and Lightning Golem for QOL from cast/attack speed.

Add Culling Strike Support to 3/4 of your Golems in one of your 4-link setups.

Don't worry about getting a 4th Unleash seal via Caster Mastery until at least level 15 Unleash, as before that point you won't have fast enough seal generation or long enough skill duration for the 4th seal to be useful.

Start working Shield Charge with Faster Attacks support into the build as soon as you can get a haflway decent shield.

If you get a 5-link, use Hypothermia as the 5th link.

Use the Brine King and Abberrath Pantheons for Freeze Immunity and protection against Ignites. 60% Less Duration of ignites is more than enough mitigation, because if 40% of an ignite is enough to kill you, the hit that applied the ignite probably would have one-shot you already.

This will get you well into Yellow/Early Red Maps.


------  LATE MAPPING (INVESTING IN CRITICAL STRIKES AND MORE) -------

At around level 70-75, you should have enough passive points to get to the Whispers of Doom Notable, enabling the addition of Assassin's Mark.

Spec out of Elemental Overload and the Caster Mastery on the left side of the tree. Instead, get Caster Mastery from the Arcane Expanse Notable.

Change up your support gems, probably dropping Hypothermia and Cold Penetration in favor of Increased Critical Strikes and Increased Critical Damage, but check POB because the damage output is often very close either way, and individual results may vary depending on gear. If you're struggling with Cold-Resistant Archnemesis Monsters, definitely keep using Cold Penetration support.

Add Ice Golem. It doesn't matter which 3 of your 4 golems have culling strike, as they all "hit", so the socket colors for this setup in the Skills section are just suggestions.

Get Boots with Brittle Ground implicit, or try to add Brittle Ground implicit to your boots.

Look for sources of "Increased Effect of (Non-Damaging/Cold) Ailments" and "Increased Freeze Duration."
Ailment Effect increases the boosts from Bonechill, Brittle Ground, and Shaper of Storms.
Freeze Duration will let you freeze much beefier targets. 20% freeze duration is essentially "Freeze as though dealing 20% more damage."

Get a Cluster Jewel with Blast-Freeze as soon as possible, as this is one of the biggest upgrades in the entire build, providing significant defense via freeze proliferation and more clear for Herald of Ice explosions.
Blast-Freeze can be found on Large Cluster Jewels with Increased Cold Damage and Medium Cluster Jewels with Increased Effect of Non-Damaging Ailments .

You can also consider linking Herald of Ice to a support gem like Added Cold Damage or Increased Critical Strikes, if you can afford the necessary upgrades to cover the extra mana reservation. This can increase your clear speed substantially if you find that basic Herald of Ice isn't enough.

When you do the Uber Lab, get Bastion of Elements for a big survivabiliuty boost.
Alternatively, if you're satisfied with your tankiness but want more damage, get Mastermind of Discord. Try to find a Medium Cluster Jewel with the Heraldry Notable, as making your exposure reliable is important for getting the most from this Ascendency.

The Starkonja's Hood in the gear for this setup is just an example of a helm with a lot of Dex and Life, and sometimes you can get lucky and find an affordable one with a BV enchant because people get them from Div Cards. It's not a necessary unique for the build by any means.

Carcass Jack is also just a suggestion, but is certainly a very strong item for the build.

If you get a 6-link, add Inspiration Support, but only if you're high enough level to use Gem Level 18+, as the mana cap for resetting charges will be too low to reliably have 5 charges at lower levels. If you're too low level, add whichever of these four (Hypothermia, Critical Strike Damage, Cold Penetration, Added Cold Damage) you're not using.

This build should be strong enough to kill End Game Bosses and farm Alch+Go T16 Maps, even without the 6-link.


-------- TANKING UP (5-10 Div Budget) --------

Once you have about 5-10 Divines to invest in the build, you're ready to tank up.

Get Awakened Unleash Level 5, so you no longer need Caster Mastery.

Get an Amulet you won't mind keeping for a while, and annoint Charisma on it. (Gold+Gold+Opalescent)

Craft a Grand or Exceptional Mana Reservation Effciency Eldritch implicit on your helm. Consider using the Orb of Conflict method to save currency if the price is right (see my video on this for details).

Get a 3-passive Small Cluster Jewel with Mana Reservation Efficiency, and either a Spiteful Presence or Uncompromising Notable.

Spec into the Herald Reservation Efficiency nodes on the tree if you don't have them already.

For the last little bit needed, there are three options:
1. Get a jewel with a mana reservation efficiency explicit.
2. Look for small clusters with increased effect.
3. Increase your base mana (ideally with ring prefixes, since its hard to make good use of these at lower budget levels)

Add Determination, Defiance Banner, and a Granite Flask.

Add Vaal Molten Shell, either manually cast or linked to Cast When Damage Taken Support depending on your personal preference.

For Spell Suppression:

Drop Hrimsorrows in favor of rare gloves with high Spell Suppression.

Add the Eater of Worlds Physical to Cold Conversion implicit and a crafted Conversion mod to the gloves.

Spec into the 40% Conversion Cold Mastery.

I recommend aiming for 90% Conversion at first (25% Exceptional Tier Eldritch Implicit + 25% Crafted Mod + 40% Mastery), since the cost of going for the 35% Exquisite Tier Eldritch Implicit or crafting gloves with the 35% Veiled Mod and Spell Suppression is significantly higher, and the main benefit of 100% conversion isn't the extra damage, but the ability to do Physical Reflect content, which is something of a luxury.

Look for other Armour/Evasion bases that have high Spell Suppression. Spell suppression can only roll on bases with evasion, and you'll want as much base armour as possible as well.

If you can get max-rolled T1 Suppression on your Gloves, Helmet, Body Armour, and Boots, you can get up to 64% Spell Suppression. Try to get at least 56% from your gear.

Use Eldritch Currency to turn the Spell Suppression gear into end-game viable gear.

The best Eldritch Implicits to target are:
Exarch Helm - Physical Damage to Spells, Frostbite Effect, Damage Per Power Charge (Individual Results May Vary, Consult POB)
Eater Helm - Mana Reservation Efficiency
Exarch Chest - Increased Aura Effect
Eater Chest - Increased Hatred/Determination Effect
Exarch Gloves - Chance to Unnerve Enemy on Hit
Eater Gloves - Phys to Cold Conversion
Exarch Boots - Brittle Ground
Eater Boots - Phys as Extra Cold, Life Regeneration Rate

For the final 36-44% Spell Suppression, craft spell suppression on your shield, spec into the Instinct Notable cluster on the top right of the tree, and get the "+12% Chance to Suppress Spell Damage if Gloves/Helm/Boots have evasion" Mastery

This can get you up to 108% supression, leaving wiggle-room for less than perfect affixes on your gear.

For even more extreme survivability, add a Jade Flask and swap out Hatred for Grace.
I personally don't recommend this, but if you're newer to POE and feel like you're dying too much it might be worth considering.

This build should be able to easily farm Juicy T16s, Logbooks, Blueprints, or anything else short of 100% Delirious Maps and the Uber Pinnacles.


-------- SWAP TO OCCULTIST -------

Before swapping to Occultist, make sure you have the following items:
   1. A Void Battery Wand or any weapon of similar power level. Choose whatever has the best price/damage ratio.
   2. 1-2x Medium Cluster Jewels with Vast Power and Towering Threat Notables
   3. Militant Faith Timeless Jewel with High Templar Dominus (look for aura effect and area/elemental damage per devotion mods, and then use the new timeless jewel feature in POB to check if it will ruin an important notable on the tree)
   4. Ring with Frostbite-on-Hit (you should have this already, but it's absolutely necessary for the Occultist to take advantage of Profane Bloom)
   5. A source of Lifesteal to make up for losing the Golem regen. Doryani's Lesson Cluster Notable, Amulet Explicit/Implicit, or Anamolous Quality Blade Vortex are preferred.

Level to approx 94-95, as you will want the extra points to get to the +1 power charge nodes without sacrificing too much beyond what is no longer needed (crit/golems).

Spec out of the golem nodes and critical strike chance nodes on the passive tree, and into the nodes relevant to Power Charges.

With Power Charges, Brittle Ground, Assassin's Mark, and a little bit of ailment effect, you should be crit-capped, and IMO golems are not worth the hassle without the ascendency that resummons them on death.

Spec out of the "wheel of life" nodes near the Scion start, and grab the life nodes closer to the maximum power charge nodes, these grant aura effect and life recovery on kill, which are very useful.

Spec out of Caster Mastery if you haven't already.

Use the extra points to add 1-2 Medium Cluster Jewels with Vast Power and Towering Threat. Whether you add one or two will depend on your current clusters, because a Blast-Freeze Medium Cluster can only be replaced if you can get Freeze Proliferation elsewhere.

Swap out Hypothermia Support for Power Charge on Critical Support.

Add Frost Bomb back to the build until you can afford Level 5 Awakened Cold Penetration Support, as you will need a source of exposure without heraldry.

Your DPS/Max HP won't change dramatically with these initial upgrades, but the addition of Profane Bloom is an immense boost to your farming speed that cannot be quantified by POB, and increasing your damage output from here is much more efficienct than it would be for the Elementalist.

This build is the absolute map-blaster that will farm you your Headhunter. It clears similarly difficult content to the Elementalist, but does so much faster.


--------- IMPROVING THE OCCULTIST ---------

Once you've made the swap to Occultist, no upgrade will feel as massive as a Headhunter, so I highly recommend saving for one if you can, but the build can still be improved in smaller increments as well, either before or after the addition of the Headhunter.

That being said, maintaining 100% spell suppression while getting more damage from your armour past this point can be extremely expensive if not nearly impossible.

Therefore, focus on improving jewels, jewellery, and weapons with +Skill Gem Levels, Max Power Charges, and Crit Strike Multi.

Unique Flasks like Taste of Hate and Bottled Faith are also excellent options for more damage.

A Circle of Guilt with Herald of Purity Buff Effect and Increased Phyiscal Damage, plus good implicits, can be a huge damage boost if you can afford to lose the resistances from your ring.

The best Watcher's Eye damage mods are:
1. Hatred Cold Pen
2. Zealotry Crit Pen
3. Zealotry Increased Damage taken on Consecrated Ground
4. Hatred Crit Chance (if not capped)
Other mods are usually significantly worse, but it may depend on the rest of your gear.

The Watcher's Eye Determination mods are all nice defensive bonuses with the obvious exceptions of Block Chance and Reduced Physical Reflected Damage Taken. The best is probably Reduced Extra Damage Taken from Critical Strikes, but it's difficult to say for sure.

Get a Skill Duration Enchantment on your Helmet ASAP, as it is a nice QOL boost, and necessary for the ideal final shape of the passive tree.

An Impossible Escape Jewel with Necromantic Aegis or Magebane enables you to get the Skill Duration bonus you need to maintain the ideal Skill Duration :: Seal Generation Ratio without wasting travel points (as long as you have a helmet enchant), unlocking the ideal final shape of the passive tree.

The ideal final shape of the tree includes the mana reservation nodes on the far left (Sovereignty Notable), and these nodes plus Enlighten Supports, plus another small cluster with mana reservation, should enable adding Zealotry Aura. The level of Enlighten Support you need will depend on the tier of your Helm Implicit. You can also look for a mana reservation cluster with increaed effect if you're just a bit short.

The final tree also adds a Physical Damage Large Cluster, to take advantage of the strong notables: Force Multiplier, Battle-Hardened, and Iron Breaker, and to create room for more Medium/Small Clusters.

Once you have the second large cluster, you can add a Medium Cluster with Purposeful Harbinger for another damage boost. Consider a Megalomaniac as well.

If you can afford an Explode Chest, you can spec out of Profane Bloom and get Unholy Authority instead. Explode Chest is especially powerful when combined with Headhunter, due to the large number of buffs that grant Physical Damage as Extra Lightning/Fire/Cold/Chaos Damage.

The best way to improve your movement speed (besides a Mageblood, of course) is to get Onslaught/Tailwind/Elusive boots, but this almost certainly means sacrificing Spell Suppression. You can get Suppression back from the passives near Magebane if you have that version of the Impossible Escape.
O/T/E boots also definitely means sacrificing Brittle Ground, which means you will need a Hatred Crit Chance Watcher's Eye and likely a Diamond Flask to compensate. A Shaper or Hunter Chest with +Spell Critical Strike Chance can be good as well.

To improve the build beyond this point, I recommend choosing to either...

Go the extremely tanky route that I laid out in my Blade Vortex vs. Uber Pinnacles Video: https://www.youtube.com/watch?v=YWd7PsxAkEw
                                     OR
Ditch Spell Suppression and pump Damage. It's definitely possible to get high enough DPS to essentially trivialize the Uber Pinnacles, even to the point where you can skip the generally skippable immunity phases.

In my opinion, with the overall nerfs to defenses in 3.19, the Glass Cannon is looking more attractive as a top-end loadout than in previous patches.


--------------------------------------------------------------
---------- OVERALL KEYS TO THE BUILD ----------
--------------------------------------------------------------

1. Damage output is largely contingent on maintaining 10 Blades, since BV scales exponentially with the number of blades you have out.

2. Maintaining 10 Blades is easy and comfortable if the following conditions are met:
		a. You have 4 maximum Unleash seals (creating 5 blades on a max seal cast)
		b. Your Skill Duration for BV is at least 1 second more than TWICE the time it takes to generate maximum seals. USE THIS EQUATION:    Skill Duration - 1 >= 2*MaxSealTime
		c. You cast BV whenever you are at maximum seals or within about a .5 second window
        d. This principle is referred to as the "Skill Duration :: Seal Generation Ratio"

3. Until you can afford to tank up, the best defense is a good freezefense.
		Blast-Freeze and full cold-conversion will enable you to freeze even extremely strong enemies with relatively low investment. This build starts out as a not-quite-glass cannon that largely relies on freezing enemies before they can do anything to you, but can easily be made a lot tankier with a little investment.

4. Golems are spectacular in the early part of a league, because their effectiveness isn't contingent upon gear at all. Simply getting the Elementalist ascendancies and leveling the skill gems will provide a substantial boost to offense and defense no matter how well geared you are.

5. This build can function on extremely low Unreserved Mana. Approximately 70-80 should be plenty, and since you don't ever spam cast, having ~70-80 Mana Regen is sufficient. As long as you can cast Vortex and Blade Vortex without waiting for regen, you'll never feel like you don't have enough mana.

6. Stacking a lot of +Skill Gem Levels is better than ever before thanks to the new damage numbers. BV scales exponentially with more levels (up to Gem Level 30), and bigger base numbers mean that the exponential scaling is even more dramatic at the top end.

7. Vaal Blade Vortex serves many purposes
	a. Gives you an option to do damage from range, which is essential for porcupines prior to corpse explosion, and extremely helpful for very dangerous mobs and Heists.
	b. Two charges means a huge damage boost on bosses
	c. Enhances clear speed
    d. Helps with League Content like Blight/Legion/Breach where it's good to be doing damage over a large area.

8. Blade Vortex gets +1 Base Radius at Gem level 22 and again at Gem Level 29. This is massive, especially with Vast Power and other large sources of increased AOE. Keep this in mind when debating between rare wands/sceptres and Void Batteries, and when deciding to use Empower Support or not in high-end version of the build.

9. Alira is pretty much always the ideal Bandit Choice, because although this build has some very crucial nodes on the tree, and even in cluster jewels, it doesn't benefit greatly from extra points beyond those essentials.
I would only give up Alira if I was extremely overcapped in Resistances, and somehow had plenty of Mana Regeneration without any investment that couldn't be better used on damage/survivability.
It's already hard to do better than 25% Crit Multi with just 2 points, so the other benefits would have to be completely useless for it to be justifiable.

10. Ailment Effect is a sneakily strong source of damage up to a certain point, since it increases the effectiveness of Bonechill Support and Brittle Ground.
The benefit to Bonechill is capped when your Vortex is chilling at 200% increased effect, for a total of 30%.
The benefit to Brittle Ground is capped at 200% increased effect as well, since Brittle is capped at 6% and Brittle Ground defaults at 2%. Of course, it's also capped when you're crit-capped.
You'll reach the Bonechill cap first since Bonechill itself provides increased ailment effect and we use Unbound Ailment Support on Vortex as well.

10. Blizzard Crowns are worse than a helmet WITHOUT any implicit in 99.9% of cases with this build.  Do not be fooled. Delete the implicit from the helm in POB and check if your damage goes up.

11. The phases of the build are all designed to be strong at BOTH Bossing AND Mapping, and so there are certainly trade-offs that could be made in favor of one or the other if you have a specific goal.
The balance currently being struck is meant to make mapping feel quick and easy, while also enabling you to handily defeat all invitations/pinnacle bosses as you unlock them during the beginning of the league.

12. Shield Charge provides a massive boost to movement speed, and is definitely worth learning to use even if it seems difficult at first.


--------- RANDOM GEARING TIPS ------------

1. Good Harvest Reforge Bases:
			Cold - Large Cluster (Cold Damage)
			Caster - Redeemer Influenced Ring
            Critical - Viridian Jewel
			Life - Viridian Jewel
			Fire/Lightning/Chaos - Any Ring or Stygian Vise

2. Dexterity and Strength deficits will be your biggest obstacle while leveling your BV, so always be on the lookout for Str/Dex gear, particularly from Jewels.

3. The best alternate quality gems are:
		1. Anomalous Assassin's Mark (so good, it's even worth getting an enhance support for it)
		2. Anomalous Herald of Purity (taunting = tanking)
		3. Anomalous Defiance Banner (straight upgrade)
		4. Anomalous Golems (buff effect is obviously better than the useless default, but still not that impactful, it's probably better to save your currency for the occultist swap)
		5. Divergent/Anomalous Inspiration (divergent is great for mana issues, and Anomalous isn't much of a bonus but the default is useless)
		6. Divergent Power Charge on Critical (occultist only, and only if you are still crit capped without the default bonus)
		7. Divergent Bonechill (straight upgrade, but very small)
		8. Anomalous Arcane Surge (more damage on vortex is basically useless since we rely on the baseline chilled ground effect, so might as well get more mana regen, but the numbers aren't impressive)
		9. Divergent Frost Bomb (might as well since default is worthless)
		10. Divergent Determination (extremely small upgrade)
		11. Divergent Hatred (pure luxury)

	All other skill gems should be left as their default quality as alternate qualities are worse than the default or provide literally no benefit.

4. The only NECESSARY uniques for the build are the Hrimsorrow Gloves (until you can afford rare gloves with an eldritch implicit), and the Militant Faith Timeless Jewel for the Occultist. Other uniques in this POB are just suggestions, and can always be replaced by rare items.

5. Corrupt Hrimsorrows offer some nice bonuses, particularly curse-on-hit and spell critical strike chance.


----------- POB CONFIGURATION TIPS  ------------

1. This export is configured for the 5-10 Divine Budget version of the build.

2. Use the passive tree manager, item set manager, and skill set manager to cycle through earlier phases of the build. There may be some configurations that need adjusting as well.

3. For the early part of the Elementalist stage of the build, make sure to check "Enemy is Shocked" while you have the Shaper of Storms ascendency, or it won't display the proper bonus.

4. Uncheck "Enemy is Unnerved" if you don't have the Eldritch Implicit on your gloves yet.

5. Check "Do you use Power Charges?" if you are looking at the Occultist stage of the build.

6. Check "Is Enemy on Consecrated Ground?" if you get a Bottled Faith

7. Check "Is Enemy Exposed to Cold?" if your only source of exposure is Awakened Cold Penetration or another conditional proc. It will be applied automatically if you have Frost Bomb or Heraldry+Herald of Ice.

8. "Enemy is Chilled" should automatically be checked and stay that way, just in case.

9. Uncheck "Is Enemy on Brittle Ground?" if you don't have that Eldritch implicit yet.