19 months ago
 Level 78 Blink Arrow of Bombarding Clones Guardian3.23
Life: 3,862124%
ES: 593
Mana: 365
eHP:
14,799
Resistances: 75%/69%/74%/-29%
Block: 50%
Armour: 6,302
DPS: 51,224
Speed: 2.67
Hit Chance: 68%
Config: None
Bandit: Kill All
Gear
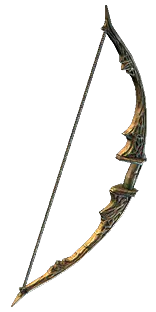
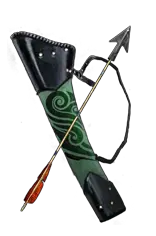
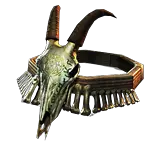
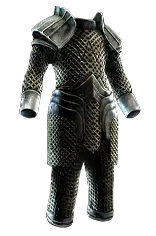
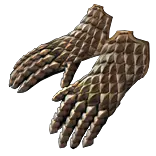
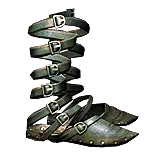


Gems
Mirror Arrow
Fresh Meat
Minion Damage
Added Cold Damage
Blink Arrow of Bombarding Clones
Fresh Meat
Volatility
Elemental Damage with Attacks
Sniper's Mark
Vitality
Determination
Summon Stone Golem
Desecrate
Feeding Frenzy
Flammability
Spirit Offering
Clarity
Convocation
Summon Sentinel of Radiance
Summon Elemental Relic
Tree Preview
- Blink Arrow and Mirror Arrow have 100% increased Cooldown Recovery Rate
- 10% more Skill Effect Duration
- +50 to maximum Life
- 12% increased Mana Reservation Efficiency of Skills
- 20% increased effect of Offerings
Notes
Levelling Notes:
******************************************************
A lot of this has come from studying how others level minion builds on templar. Big shout out goes to Havoc and Subtractum as their videos gave me a lot of guidance on how best to get this build through the acts. This is a levelling guide aimed at all players. If you want a speed running set up please see this linked video from Havoc:
(https://youtu.be/WxP2vmqvdI8?si=VXAzFWj0m1MtM2x4)

You can switch to Mirror/Blink arrow at any stage, however it is a lot of travel points to get to the mandatory 100% cooldown reduction mastery. Therefore I recommend levelling as Flame Skills until level 38 and then swap to SRS. When around this level we really do not need more damage nodes from the tree so at this point is when you can start
heading down to get the nodes ready for the end of the campaign. It also means you have 3 labs to get the gem or have the currency the buy the gem. When using the font check for popular gems that you can sell to get a bit of currency and ensure you can buy the gems we need at the end of the acts. If you are playing in SSF speed running the
first lab is the best way to get the gem

You want to be looking out for a one handed sword and axe with 1.45+ Attacks per second. When we get to level 24 and have 8 transmutes craft fire damage with spells onto your weapons. You can then dump whatever weapons you are using and use these two weapons until maps.
This just makes levelling much quicker as you can leap slam through zones

Weapons to buy for Leap Slam Levelling:
Rusted Axe or Boarding Axe
Rusted Sword or Sabre


Act 1:
When you get to town take Rolling Magma as your reward and link to ele proliferation.
After Tital Island take Quicksilver Flask, Holy Flame Totem, Frost Blink and buy Flame Wall

Ele prolif should mean clear is decent. Single target put down your totem and place a flame wall in front of the totem. Fire your magma orb through the flame wall to get DPS Boost

At Prison and when reaching level 8 take Combustion and add to your Rolling Magma Setup

After Killing Brutus take Clarity and when you have the currency buy Flame Dash and drop Frost Blink

FINAL ACT 1 SETUP:
Rolling Magma - Elemental Proliferation - Combustion
Flame Dash + Arcane Surge (level 1)
Clarity
Flame Wall
Holy Flame Totem

Act 2:
Bandits - KILL ALL

* Leave the lab trial in this zone as it is quite a lot of travelling to get to the crypt. Do this when you are ready to complete your first lab as hopefully you will have better movement speed by then and you can one shot all the mobs for flask charges

After completing Chamber of Sins take Herald of Lightning as your reward
After Killing Weaver we do not need any of the gems. Leave them unclaimed we will be coming back later for one of the gems. You can leave them with the vendor and they will level up and this saves you a gem slot
There are no more linsk to add in this act but pick up and sell as many unidentified rares as you can as we will need 8 x transmutes in Act 3 to add big damage to the build

FINAL ACT 2 SETUP:
Rolling Magma - Elemental Proliferation - Combustion
Flame Dash + Arcane Surge (level 1)
Clarity
Flame Wall
Herald of Thunder
Holy Flame Totem


Act 3:
In this act we are going to swap to a wave of conviction/Arma Brand set up at level 28. This means you do need to kill Gravicious as he unlocks Arma Brand
After the Crematorium add Anger into your setup and DROP Herald of Ice
Buy Flammability and use this on bosser
At Level 28 Take Armageddon Brand as your reward and replace Rolling Magma
Head back to Act 2 and buy Wave of Conviction
When you have crafted your sword and axe switch to these weapons and use leap slam and Momentum support (You can buy Leap Slam from Act 1)

FINAL ACT 3 SETUP:
Armageddon Brand - Elemental Proliferation - Combustion
Clarity
Flame Wall
Flammability
Wave of Conviction
Holy Flame Totem
Anger
Leap Slam - Momentum Support

Playstyle from here is just throw Brands out as you progress through the campaign zones. Ignore beefy enemies unless you come across a big pack.
Single Target (This is the optimal rotation, but I do not bother with flame wall as is too many buttons for my small brain to handle!)
Totem - Brand on Boss - Flame Wall - Curse - Spam Wave of Conviction and use Mana Flask when needed.
On moving targets do not bother with Flame Wall just keep a curse and brand on the boss and use Wave of Conviction as your main spell. Summon Totem when it runs out!

We will only be on this setup for the First Lab and a couple of bosses so do not sweat it too much.

Act 4:
Before completing Lab make sure you have a GREEN SKILL GEM. We will be putting this into the font at the end to try and get Mirror Arrow or Blink Arrow of Bombarding Clones
Complete Lab and take Radiant Crusade. Assign this minion to an active skill on your bar and ensure he is always summoned.
Go to act 3 and buy Concocation and assign this to your move button. This helps this slow ass minion keep up with you

At level 38 we are going to switch the build to our final levelling setup which will be SRS
When you get offered a golem take whatever fits in your sockets prioritising Carrion Golem or Stone Golem
As your reward for getting to Belly of the Best take Unleash Support. This is the gem we have been waiting for to switch to SRS
If you have an Alchemy Orb buy: Multistrike
Go to Act 1 and buy Summon Raging Spirits from Nessa
Go to Act 2 and take your Weaver Reward and choose Elemental Damage with Attacks

At this stage I drop Flame Wall, Totem and Wave of Conviction and replace with Desecrate (act 2 Vendor) and Flesh Offering (act 1 Vendor)
FINAL ACT 4 SETUP:
Summon SRS - Unleash Support - Elemental Damage with Attacks/Minion Damage - Melee Splash (Clear)/Multistrike (Bossing)
Leap Slam - Momentum Support
Clarity
Flesh Offering
Desecrate
Flammability
Flesh Offering
Anger

Act 5
No change in gems. Only thing to do in this act is take a Granite Flask when you get offered a choice of flasks

Act 6
Buy 2 x  Fresh Meat from Act 2 and level in off hand
Buy 1 x Feeding Frenzy link to your golem if you have the sockets (drop totem or WoC if needed)
Buy 1 x Blink Arrow & Mirror Arrow and level in off hand (This is in case we get the option in lab to change a gem into the same type of transfigured gem)
Buy Faster Attacks and Replace Momentum Support
Buy and level Added Cold & Grace

No other changes. If you feel Mana is an issue you can take the life mastery to make skills cost 30% of life instead of Mana. We are going to start removing nodes as and when we get regrets. At some  point you also want to respec out of the nodes
near the start that give elemental damage and resistances (Holy Dominion), however this is not urgent and can wait until into maps if you are struggling for resistances

FINAL ACT 6 SETUP:
Summon SRS - Unleash Support - Elemental Damage with Attacks/Minion Damage - Melee Splash (Clear)/Multistrike (Bossing)
Leap Slam - Faster Attacks
Clarity
Flesh Offering
Desecrate
Flammability
Anger
Stone Golem + Feeding Frenzy

Act 7
Flask Reward take Jade Flask. You flask setup should now be Life, Quicksilver, Granite, Jade & Mana Flask
No Skill Changes until next Labrynth
Try to roll a bleed flask at this point and use Beast Crafting if needed (Sealing Mod) as bleed starts to become more noticable from here

Act 8
After completing 2nd Lab take unwavering Crusade. You can now drop Anger as this is provided from the relics. You can now run Determination for more armour or Haste for more speed and DPS
When you do swap to Bombarding Clones start using bow filter linked in video description

FINAL ACT 8 SETUP:
Summon SRS - Unleash Support - Elemental Damage with Attacks/Minion Damage - Melee Splash (Clear)/Multistrike (Bossing)
Leap Slam - Faster Attacks
Clarity
Flesh Offering
Desecrate
Flammability
Determination
Stone Golem + Feeding Frenzy


No more gem swaps just follow the rest of the levelling trees. You can swap to Bombarding Clones once you have the gem and the 100% cooldown mastery. When you do get the gem I recommend swapping to a bow filter and farming until you get a bow with damage and preferably crit and a quiver with the same stats.
You can farm lower tier maps and use essences to craft these items.

Best Bases for Bow & Quiver:
Ivory Bow + Broadhead Arrow Quiver (Primal Arrow Quiver also works well)

EARLY MAPS
**********************************************
As soon as you make the BAMA swap drop your curse and buy Snipers Mark and swap Flesh Offering for Spirit Offering
When you switch to BAMA drop the dual wield nodes. When you want to start farming your gear for the bow and quiver swap use "Early Bow Mapping Filter 3.22" from my profile. This includes all of the bow and quiver bases and also DEX/INT bases & STR/DEX Bases
When you go EB you should be able to fit 2 x 50% auras into the build along with a level 20 Vitality. I would recommend since we get 3 free auras from the ascendancy you either go Grace & Determination OR Determination & Purity of Elements.

GEMS TO BUY AND LEVEL:
Grace & Added Cold Damage & Snipers Mark

That is as far as I have got so far... POB will be fleshed out further with more notes once I progress through the Atlas. If you get to the point you want an annoint on your amulet it will be Fearsome Force