22 months ago
 Level 97 LL MoM Scorching Ray Hierophant3.23
Life: 2,586146%
ES: 508
Mana: 13689%
eHP:
157,177
Resistances: 83%/79%/79%/64%
Block: 57%
Spell Block: 50%
Armour: 38,068
DPS: 30,550,038
Speed: 3.52
Hit Chance: 100%
Config: Pinnacle, Covered in Ash
Bandit: Kill All
Pantheon: Soul of Solaris
Gear




Gems
Scorching Ray
Empower
Awakened Elemental Focus
Awakened Burning Damage
Awakened Controlled Destruction
Awakened Swift Affliction
Infernal Cry
Tempest Shield
Vaal Molten Shell
Herald of Ash
Hex Bloom
Arrogance
Flammability
Flame Dash
Second Wind
Arcane Surge
Searing Bond
Enhance
Controlled Destruction
Multiple Totems
Petrified Blood
Righteous Fire
Malevolence
Determination
Tree Preview
- 100% increased Armour from Equipped Boots and Gloves
- 10% of Armour also applies to Chaos Damage taken from Hits
- 3% increased Spell Damage per 5% Chance to Block Spell Damage
- Regenerate 1 Life per second for each 1% Uncapped Fire Resistance
- +50 to maximum Life
- Skills Cost Life instead of 30% of Mana Cost
- 12% increased Mana Reservation Efficiency of Skills
- +1% to all maximum Elemental Resistances if you have Reserved Life and Mana
- +1% Chance to Block Attack Damage per 5% Chance to Block on Equipped Shield
- 5% of Damage from Hits is taken from your nearest Totem's Life before you
Notes
The Build

The endgame setup should look like this:
You max out on your Scorching Ray totems and then add as much Searing bond bois as you can alongside them without replacing the Scorching ray totems.
The reason for this is because every additional totem active adds 5% mroe damage to everything and since searing bond comes with +3 to additional totems
and we can add multiple totems on top of it they are the perfect choice in a build that relies on DoT damage which simultaneously buffs them.
You need to hit an enemy with Flame dash or cast it twice to apply Arcane Surge.
Additionally the build uses Petrified blood that makes us low life allowing us to use Pain attunement for even more damage but also requires to have as much
Life regeneration as is humanly possible, dots are lethal for this build (once you hav Petrified Blood so make sure you get chaos res and ignite mitigation through "Annointed Flesh" on the tree.

DO NOT RUN NO REGEN MAPS.
YOU CAN RUN ALL CURSE MAPS BECAUSE OF THE SOUL MANTLE/SELF-FLAGELLATION SHENANIGANS.
Recommended running essences to easily craft SSF gear.

-----------------------------------------------------------------------------------------------------------------------------------------------------------
Leveling

Tips: Corrupt every Viridian Jewel you find. You are looking for Self-flagellation (ilvl doesn't matter).
Chance every "Spidersilk Robe" you find and try to get the Soul Mantle (ilvl doesn't matter).

Level with Holy Flame Totem + Flame Wall + Scorching Ray until you get to your first Ascendancy.
You plop down Flame Wall, Totems inside it and then Scorching ray to shred fire res.

Try to get a 3L Holy Flame totem and a 3L Flame wall so you can clear easily,
Scorching ray is there to apply the debuffs and give you something to do but you can also make it a 3L.

At around lvl33, after the first Ascendancy, you can only use totems because of the "Ancestral Bond" keystone.
Drop Flame Wall and use a 4L Scorching ray with Spell totem and a 4L Searing bond.
You max out on your scorching ray totems and then you add a searing bond next to it because Searing Bond inherently comes with +1 totem.

At around lvl55, after the second ascendancy, you want to add Multiple totems to the searing bond totems so it increases the damage of your scorching ray totems even more,
since for every additional totem active you get 5% more damage.

-----------------------------------------------------------------------------------------------------------------------------------------------------------
Swapping to another Skill

If you wish to swap to another skill, all you need to do is:
- change the Fire DoT nodes on the tree into the type of damage that suits your new skill
- change the element you're looking for on gear
- use something else instead of Herald of Ash/Flammability if the new element isn't fire
- change the ascendancy from Illuminated Devotion to Conviction of Power if you are going for crits
- change the gems so they suit your new skills
- keep searing bond as it just gives 5% more damage per additional totem you got summoned so it will buff your main totems regardless of it not dealing damage

Ofc you should apply all of these changes in PoB as well to calculate the proper numbers.

-----------------------------------------------------------------------------------------------------------------------------------------------------------
Tree

Focused on: Ailment Immunity, Resistances, Armour, Life, Mana cost reductionm Mana reservation and Fire DoT damage.

Early - 16: Elemental Damage, Life and Elemental Resistances. Make sure you have a shield equipped.
Normal Lab - 33: Rushing for the Totem stuff and some mana reservation. Take Ancestral Bond ONLY if you already have the ascendancy.
Cruel Lab - 54: Going for more mana reservation, mana cost reduction, Life, Resistances and some damage through Iron Will and the ascendancy.
Merc Lab - 67: Respeccing the early nodes, a metric ton of Life, Armour mastery (make sure your boots and gloves have as much armour as possible) and the ascendancy for damage through Arcane surge.
Eternal Lab - 78: You want to combine the last ascendancy with Annointed flesh for Ailment mitigation.
Going for Pain attunement and Petrified blood. Reserve some of your life with Herald of Ash + Arrogance to trigger the Low Life condition.
Endgame - 94: A bunch of chaos res, curse resistance (needed for Soul Mantle and Self-flaggelation combo, Life and jewels.

-----------------------------------------------------------------------------------------------------------------------------------------------------------
Skills

Scorching Ray: Primary damage skill, cast it first and max out the number of totems you can have.
Searing Bond: Cast after you have maxed out on Scorching ray totems for additional 5% damage more per totem (scales with same damage type as scorching ray).
Auras: Malevolence, Determination and Petrified blood. Petrified blood makes you take a bunch of damage done as a DoT, that's why you need a lot of life regeneration to get it back.
If you lack mana reservation stuff (enlighten, helm implicits, etc.), just drop Malevolence and replace it with Summon Skitterbots.
Flame Dash: Culling and Arcane surge, both supports at lvl1, no need for quality.
Molten Shell: Best defensive, place on left click or use it proactively when you need it most.
Infernal Cry and Flammability: Making tough enemies vulnarable.

-----------------------------------------------------------------------------------------------------------------------------------------------------------
Items

Armour bases.
If you're capped on elemental resists go for chaos resists instead.
The build needs some reservation from items and gems (Helmet and Enlighten) if you don't get it, drop one of the auras and problem solved.

IMPORTANT
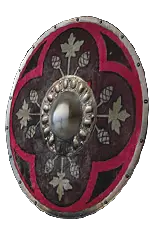
Shield needs to be Shaper influenced to get the +1 totem or 30% mana reservation on socketed gems. If you get BOTH you win at life.
If you get mana reservation on your shield, slap your most expensive auras inside and you will be golden.
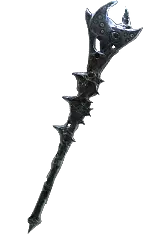
Weapon: A good rare sceptre with +1 to fire skill gems, spell damage, fire damage, damage over time, whatever you can get your hands on.
Helmet: Armour based helmet with good eldritch implicits one of the implicits needs to be mana reservation. Craft it with at least Screaming Essence of Loathing (stronger the better).
Body Armour: Soul Mantle is by far Best in slot as it's basically a 7L, additionally gives the nice combo with self-flagellation for even more damage and forces you to build into curse resistance which is good for survivability.
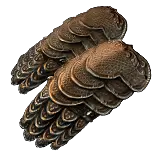
Gloves: As much Armour as possible for the Armour mastery that doubles the armour of Gloves and Boots, aim for good Eldritch implicits.
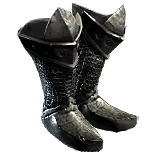
Boots: As much Armour as possible for the Armour mastery that doubles the armour of Gloves and Boots, aim for good Eldritch implicits.
Belt: Leather or Stygian Belt - Life > Armour > Resistances > Chaos Res
Ring: Kikazaru - By far the best in slot ring for this build, curse resistances for Soul Mantle and a lot of Life regen for petrified blood
Ring: Opal, Coral, Vermillion, Amethyst are all excellent base choices
Jewels: Life > Damage > Attributes > Resistances
Abyss Jewels: Life > Armour > Attributes > Resistances

-----------------------------------------------------------------------------------------------------------------------------------------------------------
Pantheon

Solaris + Yuugul upgraded. Solaris best damage mitigation and Yuugul for curse resistance if you have Soul Mantle.

If you don't have Soul Mantle go for Shakari instead of Yuugul.