16 months ago
 Level 94 Detonate Dead of Chain Reaction Necromancer3.23
Life: 5,284163%
ES: 475
Mana: 7
eHP:
83,620
Resistances: 75%/75%/75%/75%
Evade: 73%
Block: 45%
Spell Block: 45%
Armour: 26,264
Evasion: 22,608
DPS: 2,173,724
Speed: 3.60
Hit Chance: 100%
Config:
Pinnacle, 20% Shock, Frenzy, Custom Mods
Bandit: Kill All
Pantheon: Soul of the Brine King, Soul of Ralakesh
Gear
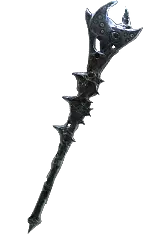


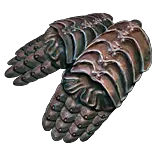



Gems
Vaal Detonate Dead of Chain Reaction
Energy Leech
Fire Penetration
Combustion
Intensify
Hypothermia
Flammability
Elemental Weakness
Bone Offering
USE BONE OFFERING UNTIL YOU FEEL TANKY ENOUGH!
Shield Charge
Faster Attacks
Determination
Grace
Tempest Shield
Defiance Banner
Cast when Damage Taken
Vaal Molten Shell
Divine Blessing
Haste
Wave of Conviction
USE WoC UNTIL IMPLICIT THEN HASTE BLESSING
Spell Cascade
Flame Dash
Faster Casting
Desecrate
SWITCH FASTER CASTING TO ARC. BRAND ON BOSSES!
IF YOU HAVE EXPOSURE ON GLOVES, REPLACE
WAVE OF CONVICTION!
Tree Preview
- Exposure you inflict applies at least -18% to the affected Resistance
- Regenerate 1 Life per second for each 1% Uncapped Fire Resistance
- Critical Strikes do not inherently Ignite
- 100% increased Damage with Hits against Ignited Enemies
- +50 to maximum Life
- Auras from your Skills have 10% increased Effect on you
- Chance to Suppress Spell Damage is Lucky
Notes
Link to the video for people needing a reference/explaination step by step:


Preliminary words:

This is very easy build to assemble and 100% league-startable (although you will need to farm the DD gem, so lab haters - im sorry. But lab is great place to gear, so time isn't wasted!).
 This is made from an SSF HC perspective, but all the trade lovers - there's not much gear you would get on trade for this build anyway, but I'll get into what you could in the early stages.
 There's also a twink levelling section, so that you know which uniques to use :)

As for softcore - let me tell you one thing - not dying is a great way to make money in SC. Why?
Because you have higher efficiency, you don't waste time and this build has plenty enough damage, so you might as well invest it into the defences.
As for hardcore players - this is NOT an immortal build! We need to play carefully, especially during the first days where it's easiest to die for Witches.


> IMPORTANT, READ THIS <
When you switch to Detonate Dead you want to do the following:
1. Equip a Raise Spectre gem
2. Raise a Kitava's Herald/ Auric Champion/ Auric Collossus from Cathedral Rooftops(Both the act 5 and act 10 versions work, other in A3 Solaris temple)
3. Throw away the Raise Spectre gem
This permanently adds Kitava's Herald(a high hp monster) to your Desecrate pool, it persists even if you logout.
Having Kitava's Heralds or others in our Desecrate pool is where a lot of our damage comes from, do not forget to do this.

For more advanced tips PLEASE WATCH THE VIDEO!

> FAQ <

When should I farm for DD of Chain Reaction?
It's the best to farm for it when you get through the campaign and want to complete Merciless Lab. Get Darkshrines, try to get Twice Blessed and pray. Should take around 15-20 runs max.
This is the best time to get it, because you need to get some better gear anyway when entering maps!

Where does the 148.000 corpse life in the config come from?
This is around the amount of life a Kitava's Herald corpse will have in a level 84 zone.

I don't have enough energy shield to cast Haste, help?
First of all: if you're having issues you can keep your Divine Blessing gem at level 1, this reduces the cost of Haste.
After that make sure you use maybe 1 or 2 other pieces(usually gloves and/or boots) with energy shield on it. Make sure you get Melding node on the tree!
You can also invest in some %reduced mana cost on tree.

What's that "suppress chance is lucky" mastery all about?
This build can have some issues getting suppress early on, that mastery really helps if you have some suppress, but not 100% yet.
You don't want to rely on it for endgame bossing in HC, and as soon as you get 100% suppress this mastery becomes useless.

I feel like I'm dealing "literally" 0 damage, are there easy mistakes to make?
Not leveling up your Desecrate, this causes your corpses to be lower level, and this means they'll have less life. Make sure to level your DD, too.

Hypothermia support only AFTER you get Corpse Pact from Ascendancy, don't use it before! Afterwards its one of your best links :)

Some people use Wave of Conviction, and some don't, what do I do?
The easiest way to apply Exposure is to do this is through the Eater of Worlds implicit on gloves.
Since this implicit can be annoying to get really early on you use Wave of Conviction instead until you get this implicit, all your Eater of Worlds currency should go into getting this implicit though.

Why don't you take Elemental Overload on the endgame tree?
We get Elemental Overload from our sceptre, if you don't have an EO sceptre yet you'll have to pick up EO on the tree.

Is the 15% increased life when your body armour has no life mastery worth it?
Yes, but only if you have a chest that gets a good amount of armour and evasion in return, or if you have a Cloak of Flames.

> LEVELING <
Leveling this build uses the classic Magma Orb into Arma Brand + Cremation. We only switch to Detonate Dead in act 10, while you can technically use it before then it just feels much worse than Arma Brand + Cremation.
For weapons you ideally either want to use sceptres or the wand bases that give flat fire damage to spells. Any wand base is kind of fine though cause while leveling the implicit doesn't matter too much for you to worry about it a lot.

We start out with Rolling Magma, Holy Flame Totem and Flame Wall. For most packs you'll only need Rolling Magma, and you can leave a Holy Flame Totem to finish up some packs behind you.
For situations where more damage is required you place your Flame Wall so that both your Holy Flame Totem and Rolling Magma go through it before hitting the boss/pack.
A slightly more advanced strategy when using Rolling Magma would be aiming slightly before the feet of mobs(mainly useful for bosses) and NOT namelocking on them, this causes Rolling Magma to hit twice, doubling your damage.

After talking to Dialla in the Solaris Temple level 2 in act 3 you should walk to the little side area right next to her and pick up the recipe for "added fire damage to spells". Try to craft this on both your weapons for some great extra damage.

At level 28 we switch to Armageddon Brand + Cremation. Most stuff will die with just your Arma Brand, some blue packs might require you to throw a Wave of Conviction in there as well, and some rares and all bosses will require you to cast Desecrate + Cremation(3 times).
Don't get baited by the Controlled Destruction support, this causes your Elemental Overload to basically never proc, making the support kind of useless for this build.
Placing Flame Wall in the middle of your Cremation gives your Cremation a bit of extra damage, pretty neat!

We switch to Detonate Dead around level 68-70. Try to get a sceptre with cast speed cause this will make it feel much better to play.

> PLAYSTYLE <
For clearing we shield charge around casting Desecrate + Detonate Dead to blow up packs, some tanky rares might require a Wave of Conviction(if you don't have exposure gloves).

For bossing you should make sure you use an Arcanist Brand setup!! This lets it spawn corpses and you just spam DD and have insane damage uptime. You also want to keep your Haste Divine Blessing up all the time.


> UNIQUE ITEMS <

This build doesn't require any specific uniques, but there are couple of early game alternatives you could pick up almost for free on trade and drop easily on SSF:

- Cloak of Flame - insanely good body armour, solves your phys mitigation early game. You can equip it early game during levelling and use Grace until maps and you are good to go. Arguably it's enough to stick with it even throughout the red maps.
- Elevore - easy to cap suppress with it, gives you very good recovery, too.


PATCH 3.24 CHANGES:

- Nothing very major! Build progresses similairly. Nerfed couple of mechanics.
- Harder to get quality on flasks/armour.
- Mana sustain is a bigger problem when tansitioning into the mid/lategame setup (Elreon crafts will help here).
- Easier to target farm, especially Jun, but HARDER to get essences early.
- Maybe consider going harvest way earlier now, but it should all still be okay :)