19 months ago
 Level 99 Crit Blazing Salvo Mine Deadeye3.22
Life: 4,569117%
ES: 711
Mana: 57
eHP:
44,629
Resistances: 77%/77%/77%/62%
Evade: 72%
Evasion: 21,995
DPS: 49,257,364
Speed: 4.63
Hit Chance: 100%
Crit Chance: 83.16%
Crit Multi: 400%
Config:
Pinnacle, 15% Shock, 17% Scorch, 3% Brittle, 11% Sap, Frenzy, Power, Custom Mods
Bandit: Kill All
Pantheon: Soul of the Brine King
Gear
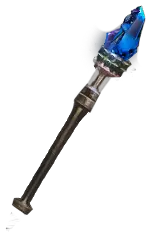
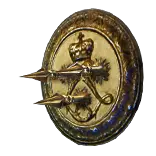
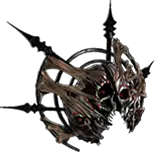
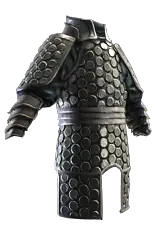
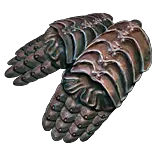
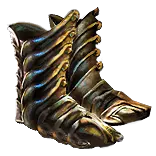


Gems
Blazing Salvo
High-Impact Mine
Minefield
Charged Mines
Awakened Fire Penetration
Trap and Mine Damage
Shield Charge
Faster Attacks
Flame Dash
Arcanist Brand
Flame Wall
Flammability
Grace
Defiance Banner
Herald of Ash
Summon Skitterbots
Molten Shell
Cast when Damage Taken
Sniper's Mark
Bear Trap
Anger
Divine Blessing
Inspiration
Increased Duration
Tree Preview
- +25% to Critical Strike Multiplier against Unique Enemies
- You take 30% reduced Extra Damage from Critical Strikes
- +50 to maximum Life
- Regenerate 2.5% of Life per Second if you've Detonated a Mine Recently
- Each Mine applies 2% increased Damage taken to Enemies near it, up to 10%
- Each Mine applies 2% reduced Damage dealt to Enemies near it, up to 10%
- You gain 5% increased Area of Effect for each Mine
- Auras from your Skills have 10% increased Effect on you
- 8% increased Damage for each of your Aura or Herald Skills affecting you
- You have Phasing if you have Suppressed Spell Damage Recently
- +8% chance to Suppress Spell Damage while Phasing
Notes
Link to Guide Video: https://youtu.be/0gijxxI9ZlM
This PoB was last updated on 12/6/2023 for the 3.23 Affliction League.
Credit for the original idea for this build goes to Zlayge.  See my guide video for a link to his build.

REMEMBER - When first opened, this PoB is configured for the Endgame Setup.  If changing to the lvl86 Setup, you'll need to remove the values for Scorch,
Sap, and Brittle, and make any other needed configuation changes.  See guide video for how to configure this (and YOUR) PoBs.

--------------------THE CAMPAIGN - GEAR & SKILLS:--------------------

Before starting your Ranger, create a Witch, run the first zone, and get Raise Zombie as the quest reward from Tarkleigh.  Put EVERYTHING in your stash, then make
your Ranger.

ACT 1:

GEAR: Get ANY 3-link G-G-G item you can ASAP for your main bow skill that you'll use through about level 8.  This can be a bow or any armour piece.
While working your way to the Axiom Prison (~8th zone) you'll also want to pick up 2 other 3-link items that are B-B-G and R-B-G that you'll use once you get to the
prison.  These can be armour or wands.  Don't use other weapon types though, as wands are needed for the ballista totem setup we'll be using.
For Flasks, you'll generally be using 1-2 healing flasks, 2 mana flasks, and 1-2 quicksilver flasks for the first several acts.  Keep updating the healing and mana potions,
but don't worry about crafting any mods on them for the first 5 acts unless you have extra orbs (see Act 3 below) or are using beastcrafts.

SKILLS: Level 1 until Lower Prison use bows with the following skill setups:
	Main Attack: Ice Shot -  Mirage Archer (after Tidal Island) - Momentum
	Support Attack: Shrapnel Ballista - Chance to Bleed (after Breaking Some Eggs)
	Curse: Sniper's Mark  (after Breaking Some Eggs)
	Support: Raise Zombie (muled from a Witch)
	Movement: Frostblink (buy from Nessa after Breaking Some Eggs.  You'll probably need to buy an Int amulet to use it.)
Equip a Fireball gem muled from a Witch and level it up, but don't bother using it at this point.

Lower Prison (~lvl8) until Library in Act 3:
	Main Attack: Fireball (Replace with Blazing Salvo @lvl12) - Blastchain Mine - Lesser Multiple Projectiles (replace with Swift Assembly if using Blazing Salvo)
	Support Attack: Kinetic Bolt - Ballista Totem - Added Cold Damage (you'll need to use Wands as your weapons for this setup to work)
	Curse: Sniper's Mark
	Support: Bear Trap and Raise Zombie (get rid of the zombies when they keep dying too much, usually around the end of Act 1)
	Movement: Frostblink (can add Smoke Mine after Brutus)
	Auras: Clarity (after Brutus for mana sustain)

REMEMBER - Rangers can't buy Blazing Salvo from Nessa, so you'll need to get it from another character, beg in town, ask in trade channels, etc.
If you don't want to or can't do that (SSF Leaguestart) then just use Fireball until you get to the Library in Act 3.

ACT 2:

Throughout Act 2, focus on getting rare items in all slots, and work on capping your elemental resistances at 75% each for Fire, Cold, and Lightning.
Sell unidentified magic items and identified rares to get Shards and Orbs of Transmutation until you have at least 10 Orbs, as you'll need them in Act 3.
Craft needed resistances onto your gear once you have your hideout, but don't use Orbs of Transmutation if it would drop you below the 10 you need to save.
You'll also need 2-3 Orbs of Chance and a couple of extra Scrolls of Wisdom saved up for the Library.

After the Chamber of Sins, add Summon Skitterbots and Herald of Ash.  Get rid of Raise Zombie if you haven't already.
Optional - after the Weaver's Chamber, replace Lesser Multiple Projectiles/Swift Assembly with Trap and Mine Damage.

ACT 3:

As soon as you're in Act 3 start shopping at Hargan and looking for 4-link loot items.  Top priority is a 4-link B-B-B-G or B-B-B-R item for your
Blazing Salvo set-up, ideally in your chest piece.

You'll also want to loot or purchase 2 Copper Kris Rune Daggers that have an open prefix, and don't have any mods that add flat elemental
(fire, cold, or lightning) damage to spells.  White items are perfectly fine.  Base item type doesn't matter much, but the higher the global crit chance the better.
Nice if one of the daggers has linked G-G sockets for Whirling Blades once you get to the Library.  If you aren't finding any from Hargan, you can
also shop Gruest in Act 2, since he can also sell them.

After the Crematorium, purchase Grace and Purity of Elements gems and level them up in your weapon swap.  You'll use them later.
Place Summon Skitterbots in your weapon swap as well, and instead use the following auras:
	Auras: Clarity - Anger - Herald of Ash

Once you reach lvl2 of the Solaris Temple, be sure to go into the Eternal Laboratory off to the side of Dialla, and get the crafting recipe.  Time for a BIG dps upgrade!
Use your crafting bench to add the prefix mod that gives flat fire damage to spells to both weapons you found as instructed earlier, then use an
Orb of Augmentation and hope to get something useful.  No big deal if you don't. Go ahead and drop the Kinetic Bolt setup - you won't need it anymore,
and it won't work anyways now that you aren't using wands.

Library - purchase the following gems once you complete Siosa's quest: Flame Wall, Charged Mines, High-Impact Mines, Faster Attacks, Defiance Banner,
Fire Penetration, Molten Shell, and Whirling Blades.  This shopping list will cost you 2 Scrolls of Wisdom, 3 Orbs of Chance, 1 Orb of Alteration, and 2 Orbs of Transmutation.

Keep following the campaign quests until you're level 31, at which point you'll want to use the following skill setup:
	Main Attack: Blazing Salvo - High-Impact Mines - Charged Mines and either Trap and Mine Damage OR Fire Penetration based on the sockets of your 4-link.  If you have room, go
		ahead and level up the alternate gem in your weapon swap, as you'll add it to a 5 or 6-link setup later.  You can also use Swift Assembly if you prefer that support.
	Curse: Sniper's Mark
	Support: Bear Trap, Molten Shell, and Flame Wall.  Try to send your Blazing Salvos through the Flame Wall for added DPS on bosses and tough rares.  Use Molten Shell
		as a panic button whenever you're taking lots of damage.
	Movement: Frostblink and Whirling Blades
	Auras: Clarity, Anger, and Herald of Ash.  Add Defiance Banner once you have enough mana to not gimp your ability to throw plenty of mines, likely at some point in Act 4 or 5.

IMPORTANT NOTE:  If you used Fireball until you got to the Library, do not switch straight over to Blazing Salvo, as it will be way under-powered due to it's low gem level.  Instead,
either keep using Fireball or switch to Pyroclast Mines until your Blazing Salvo gem is levelled up a bit.  If using Pyroclast Mines, swap High-Impact Mines for Increased Critical Strikes
Support or Increased Critical Damage Support (use PoB to figure out which is better for your setup).

Don't forget to run the Labyrinth to ascend to the Deadeye, and get the Gathering Winds node, as Tailwind will really speed up the rest of campaign.
With your ascendancy locked in and your skills set up, you'll be able to blast through the next few acts!

ACT 4-5:

For gear, keep your eyes out for a good chest piece that has 4-B linked sockets, as you'll be switching to that at some point after you reach Act 6.  Other than that, work on getting
your resistances over-capped to 105% for each element so that you'll be ready for Act 6.

Go ahead and grab a Golem as a quest reward for Breaking the Seal, and like the zombies earlier, use it until it starts to die too often or you need the socket for
something else.  I usually go for Flame Golem, but any of them are fine.
After de-un-deading Kaom and Daresso, talk to Dialla again in town, then buy Cast When Damage Taken from Petarus and Vanja, and link it with Molten Shell.
IMPORTANT - Keep Molten Shell no higher than level 11, and keep CwDT at level 2, otherwise the combo won't work / won't go off often enough.

These last two acts of the first half of the campaign should ge by pretty fast.

ACT 6-10:

GEAR: Your primary gear focus throughout the rest of the campaign is first capping your resistances, and then getting them overcapped again so that you're ready for maps.
Remember - when you kill Kitava at the end of Act 5 your resistances get dropped by 30, and that happens again at the end of Act 10.  Go ahead and use the Purity of Elements
aura as a stopgap measure if your resistances are below cap, but then take it back off when you are capped for the content you're doing.  Once your resistances are sorted,
shift your focus to upgrading each armour piece to higher tier bases, generally favoring AR/EV bases for Gloves and Boots, and either ES or AR/ES bases for your body armour
and helmet, as you'll need good energy shield to run your Anger - Divine Blessing setup.

Beyond that, at some point you'll want to drop your off-hand weapon in favor of a shield that has good defensives stats, and eventually replace your main-hand dagger with a
good scepter, replacing Whirling Blades with Shield Charge.  Use PoB with your own character to see if something you find is a DPS upgrade.

SKILLS: As you progress through Acts 6-10, work on getting your skills set up as listed in the PoB Skills page for Early Endgame, and shoot to have all these skills up and
running by Act 8 or 9, with the following key points in mind:
- Divine Blessing - Anger: This setup can be tricky to get functioning, as you need a LOT of Energy Shield and Mana.  If you need more energy shield, focus on getting higher
tier armour bases that provide good ES.  You can leave out Increased Duration to reduce the casting cost, but try to make it so you can cast Anger using only Energy Shield, and
keep Divine Blessing at level 1 until much later in endgame when you have plenty of ES to spare.
- Auras are meant to be very flexible with this build, so feel free to shift around between the different options as needed, adding or removing auras to maintain your ability to
throw at least 7-10 mines with Minefield before you run out of un-reserved mana.
- Minefield - Speaking of this support gem, it first becomes available after the first quest in Act 6, but you are welcome to wait to start using it until later, as the throw speed
penalty feels pretty bad once you start using it.  Totally up to you, but I would definitely switch to Minefield by Act 8.
- Arcanist Brand - Wait until you have the Whispers of Doom passive skill before using the Arcanist Brand - Flamewall - Flammability setup.  Before that, just use Flame Wall.

Enjoy blasting through the rest of the campaign!

--------------------CALCULATING # OF BLAZING SALVO HITS:--------------------

See guide video for demonstration, but in short:
  1 - Find total number of Blazing Salvo projectiles, and add 1 for the single double hitting projectile.
  2 - Find the number of Splits from Sniper's Mark, and multiply by increased Mark/Curse Effectiveness.  1.75 if you only have Focal Point, 1.8 if you also have the Curse Effect
       passive skill leading to Whisper's of Doom.
  3 - Add those two numbers together, and then multiply by 5 for minefield, and enter that number in the "Count" box for Blazing Salvo on the skills page.


--------------------ENDGAME GEAR AND CRAFTING:--------------------

Most of your endgame gear can be crafted using what I call the Essence on Fractured Base (EFB) Crafting Method, which consists of the following steps:
  1) Identify a mod you want that can be obtained from an Essence.
  2) Identify a second mod you want that can be purchased on a good fractured base.
  3) Spam the essence until you get a 3rd or even 4th useful mod.
  4) Benchcraft a final useful mod if you have an open affix.

This method will let you craft all sorts of gear that will see you through the vast majority of endgame content.  As a general rule, your weapon will be focused on offensive mods,
but everything else will be focused on defense (life, resistances, spell suppression, increased AR/EV/ES, etc).  When you first start running maps you'll want to prioritize getting
Spell Suppression passive skill nodes, as they'll really help for your defense.  You can remove these nodes as you get good gear with spell suppression mods.  And as with the
second half of the campaign, use your Auras to suit your playstyle.  If you want to be extra tanky, run Grace - Determination - Defiance Banner, and if you have enough mana
available, add in Herald of Ash.  But if you want more DPS, you can drop Determination in favor of Summon Skitterbots.  Feel free to experiment!

In terms of defensive stats, your top priority is to always maintain your elemenetal resistances at cap, and try to get chaos resistance to at least 30%, higher is better.  You also
need to remain spell suppression capped, but feel free to adjust your suppression masteries as needed.  "Chance to Suppress Spell Damage is Lucky" works great if you are
below cap, but you can also use a Quartz Flask and the mastery that gives you phasing if you have suppressed and +8% chance to suppress while phasing.

Once you have resistances and phasing, shift to increasing your life and other defensive stats, like Evasion (gear and passive skill tree), and Armour (mostly from gear).

For Eldritch Implicits, the only specific ones we really want are on our gloves: "Inflict Fire Exposure on Hit, applying -#% to Fire Resistance" for Eater, and "#% increased Mine
Throwing Speed" for Exarch.  All other Eldritch Implicits can be whatever you want - offense, defense, utility, etc.

Beyond that, here are some crafting tips and specific modifiers you might look for for each gear slot:

WEAPON:  A decent self-crafted weapon can easily be obtained by buying a fractured base with a T1 mod "Adds # to # Fire Damage to Spells" aka Flat Fire Damage to Spells.  From
there spam a high tier Essence of Woe until you get something else good, and then bench craft Mine Throwing Speed on an open suffix.

For an even better weapon (but that costs several Divines if you get lucky, more if you don't) follow these steps (recipe comes from Zlayge's Guide).  Note that the success chances
on the different steps is based on the very bold assumption that I set things up right in Craft of Exile.  Please correct me if I did anything wrong!
	1 - Buy a fractured T1 Flat Fire Damage to Spells Opal or Void Scepter. These are generally super cheap as Flat Fire Spell Damge isn't good for most builds.
	2 - Make sure it is Rare (use a Regal Orb if it is Magic), then hit it with a Deafening Essence of Woe until you get a good roll AND have an open prefix and an open suffix.  It's about a
		33% chance to get both an open Prefix and Suffix.  If both aren't open, either keep spamming (probably preferred) or YOLO with an Annulment Orb until you have the open affixes,
		but go back to Essences if you remove the Essense mod.
	3 - Benchcraft the Meta Mod - Cannot Roll Attack Modifiers (this costs 1 Divine Orb).
	4 - Harvest Craft using the "Add a new Fire modifier and remove another mod...", aka Add/Remove Fire option, which costs 15k Red Lifeforce, and 1 Sacred Lifeforce.  This costs
		several Divines, but it guarantees "+1 to Level of all Fire Spell Skill Gems".  However, it has a 25% chance to remove your Essence Spell Damage mod.  If you remove the
		Essence Mod you can continue or restart, depending on how much currency you have.
	5 - Benchcraft the Meta Mod "Prefixes Cannot Be Changed" for 2 Divine Orbs, then use a Veiled Chaos Orb, and hope that you still have an open suffix (90% chance you will).  If
		you don't have an open suffix, you can either keep this weapon (for now), or YOLO Annul and hope to remove a suffix.  If you hit a prefix, you'll probably want to start over.
	6 - BEFORE YOU UNVEIL, Benchcraft the suffix that adds +Dex/Int and Increased Attack Speed.  If you can't craft that, Benchcraft any Damage Over Time suffix mod, and then
		unveil the item, hoping for an option of Chance to Deal Double Damage.  If you don't get that, hopefully you got Increased Damage per Power or Frenzy Charge.  It's about a 57%
		chance to get one of those three, but if you got none of those options, pick the best of what you did get, and use that scepter until you have the currency to try again, preferrebly
		with a different base item in case you aren't successful on the next attempt.
	7 - Once you've got an ideal weapon, Benchcraft Mine Throwing Speed, then use the Harvest Bench to "Enchant a Weapon" so that quality increases Elemental Damage.
		If you still have an open suffix, YOLO an Exalted Orb.

Chances are your best weapon will come from self-crafting it, unless you're willing to pay a TON more for something only slightly better.  You can also probably get someting slightly
worse from Trade for a guaranteed upgrade at less cost.  Use PoB's "Trade for these items" function on the item page (refer to the guide video to see how to do this) or manually
search for the mods you want.  Good offensive mods for weapons (and the rest of your gear, in no particular order) include the following:
	Prefixes:
		+1 to Level of all Fire Spell Skill Gems
		+1 to Level of all Spell Skill Gems
		#% increased Spell Damage OR #% increased Fire Damage (they are in the same mod group, so you can't have both)
		Adds # to # Fire Damage to Spells (Flat Fire Damage to Spells)
	Benchcrafted Prefixes:
		Any version of the above (Spell Damage, Fire Damage, Flat Fire Damage to Spells), though it will be inferier to a high natural tier roll, as well as...
		#% increased Mine Damage
	Suffixes:
		#% increased Critical Strike Chance for Spells (if it doesn't say "For Spells" it is only for attacks and is worthless)
		+#% to Global Critical Strike Multiplier
		#% increased Fire Damage
	Benchcrafted Suffixes:
		#% increased Mine Throwing Speed (BEST!)
		Any version of the above natural suffixes, though again they will be inferier to a high tier natural roll
		#% chance to deal Double Damage
		Increased Damage per Power / Frenzy Charge

SHIELD:  Go for whatever base item has an implicit you need/want more of, such as resistances, spell suppression, spell damage, movement speed, etc, and then use EFB to craft.
Good mods will vary based on base type, but in general go for defensive mods.  Good essences are Loathing for Life, or Scorn for Spell Crit Chance.

BODY ARMOUR: Get a six-link as soon as you can once you are in maps.  Initially you'll probably go with an AR/ES base (i.e. Elegant Ringmail, Saint's Hauberk, or Saintly Chainmail)
OR an ES/EV base (Blood Raiment, Sadist Garb, or Carnal Armour) as these are much easier to get the right socket colors.  Later try to pick up an AR/EV base (Full Dragonscale,
General's Brigandine, Triumphant Lamellar) with the right sockets for better EHP.  Best socket colors are generally B-B-B-B-R-G, but the last two can be other colors as well.
Refer to the skill gems listed in the PoB for other options.  To get the right socket colors, be sure to use the Vorici Calculator (just google that), and for an AR/EV base, Benchcraft
3-B sockets, hoping for a 4th, and then use a T4 Research Vorici in the Betrayal mechanic if you still don't have the right colors.

For mods, get good defensive stuff, and if possible, shoot for the suffix "#% additional Physical Damage Reduction" and the benchcrafted prefix "(5-6)% of Physical Damage from Hits
taken as Fire Damage, (5-6)% of Physical Damage from Hits taken as Lightning Damage".  Good essences to craft with are Greed for Life, Hatred / Anger / Wrath for Cold / Fire /
Lightning resistances, or Horror for Phys Damage taken as Cold.

HELMET: For endgame, The Devouring Diadem unique helm with unveiled Mine Throwing Speed is AMAZING for the build, as it gives lots of energy shield and mana reservation so you
can more easily use your Divine Blessing - Anger and run more auras, as well as Eldritch Battery allowing you to free up a few skill points.  This is a high priority upgrade, but can
be expensive at 2-3 Divines in early league, but usually 1 Div later.  For early endgame, an Elevore is pretty nice, as it really helps with your spell suppression, and Alpha's Howl is also
pretty decent for some extra mana reservation efficiency and freeze immunity.

If you go for a rare helmet, you can craft a decent helm on a Fractured Base using an Essences of Loathing for increased Mana Reservation Efficiency, then Benchcraft Mine Throwing
Speed.  For the fracture, go with any good and cheap defensive mod, but as you upgrade the rest of your gear, try to keep your resistances capped without your helmet so you can
more easily transition to  The Devouring Diadem later.  Whatever helmet you're using, it can be nice to hit it with a Vorici Research bench to get some white sockets added to it,
so you can more easily swap between auras as needed.

GLOVES: Preferred base type is mostly a function of what you need.  If you're good on ES from your other gear, go with AR/EV bases and try to get spell suppression, as well as a
high Life roll and any resistances or attributes you might need.  Self-Craft using EFB or buy on trade as needed.  As noted earlier, you really want two specific Eldritch Implicits on
your gloves - Inflict Fire Exposure for Eater, and Mine Throwing Speed from Exarch.

BOOTS: Pretty much the same as gloves in terms of mods, except you want as much Movespeed as you can get, and at least 25%.  AR/EV are also preferred, and get any good
implicits.  Because your mines do the killing instead of you, don't bother with Onslaught on Kill, as it will never proc.

AMULET: Early endgame go with whatever you need for resistances, attributes, etc, but as with your helmet, work on getting your defenses sorted without your amulet so you can
upgrade to the Leadership's Price unique amulet from the unique Heist contract, The Twins.  This amulet has big offensive and defensive benefits, but it requires that your top two
attributes are equal to each other.  To do that, add +30/+10 attribute nodes as needed to get your chosen attributes within range of each other, and then get just enough additional attributes
on one of your items to make them equal.  You can also benchcraft the needed attribute, and if you are just a few points off, use Intrinsic Catalysts on a Ring or your Belt to close
the final gap.  You could also buy a fractured base that has exactly the attribute amount you need and go from there with Essences using EFB.  I haven't tried this, but you could also
try using an Inertia or Fertile Mind jewel to both boost Str or Int and convert all Dex in the jewel's radius into Str or Int respectively.

Note that Leadership's Price can have adjustments to your max elemental resistances ranging from -3 to +3.  Definitely save up for one that doesn't have any reduced max resistances,
but higher rolls of increased resistances of +2 or +3 can get pretty expensive.

Refer to the Guide Video on how to configue your PoB for your Scorch, Brittle, and Sap values, and here are the custom modifier lines you'll need to paste into your configuation as
discussed in the Guide VIdeo:

	50% increased effect of brittle
	50% increased effect of sap
	50% increased effect of scorch
	100% chance to deal double damage

Just be sure to remove the lines once you've entered the relevant values for Scorch, Sap, and Brittle, otherwise you'll be GROSSLY overstating your DPS, and remove Scorch,
Brittle, and Sap if you're comparing to the lvl86 setup.

For an annointment, use PoB to determine what gives you the most bang for your buck, sorting the options by Full DPS, but remember that if you're using Leadership's Price you'll
also need a Corrupted Oil to add an annointment.  If you're still using a rare amulet, Divine Judgment is a pretty good budget option.

RINGS: Use a base type that gives you want you want more of, with good options being Amethyst Rings for Chaos Resistance, Vermillion Rings for more Life, or Opal Rings
increased elemental damage.  If using EFB to craft, good essenses include Essence of Woe if you need more Energy Shield, Essence of Anger for increased FIre Damage, or
other essences to boost attributes, Anger for Stregth, Spite for Intelligence.

BELT: Best bet is a Stygian Vise that has been crafted with an Essence of Zeal for increased Mine Throwing Speed.  Life of course is good, and if you have enough resistances
from your other gear, Flask related mods can also be nice.

JEWELS: I always like to get a corrupted jewel that gives Corrupted Blood Immunity ASAP in endgame.  Although mines tend to insulate you from getting Corrupted Blood from mobs
with Corrupting Fever, there are enough other sources of Corrupted Blood that I prefer to just not mess with it.  Beyond that, use PoB's Trade for these items function to find good
jewels, and adjust the search weights if you want them to be more offense vs defense oriented.  When you can afford it, get a good Watcher's Eye with good mods for your preferred
auras, and later you can also add a Stormshroud if you want to go for ailment immunity.