2 years ago
 Level 61 Reap Ascendant3.21
Life: 2,450103%
ES: 83
Mana: -292
eHP:
7,117
Resistances: 75%/75%/75%/-22%
Block: 76%
Speed: 1.64
Hit Chance: 100%
Config: Frenzy
Bandit: Alira
Pantheon: Soul of the Brine King, Soul of Ryslatha
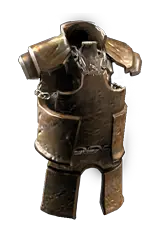
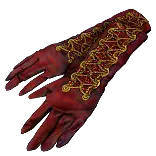
Gear


Gems
Reap
Life Leech
Brutality
Spellslinger
Spellslinger
Efficacy
Chain
Exsanguinate
Corrupting Fever
Brutality
Efficacy
Steelskin
Flame Dash
Decoy Totem
Frenzy
Maim
Lifetap
War Banner
Shield Charge
Lifetap
Faster Attacks
Vulnerability
Tree Preview
- Regenerate 1 Life per second for each 1% Uncapped Fire Resistance
- Skills cost Life instead of 30% of Mana Cost
- +50 to maximum Life
- 40% increased Physical Damage with Skills that Cost Life
Notes
---Required Links---

	Travel Setup As Soon As Possible:
		Lvl 4-9: Frostblink (B) or Dash (G) before Leap Slam depending on what color you have available, preference towards Frostblink
        Lvl 10-37: Leap Slam (R) - Faster Attacks (G) - Lifetap (R) if you have open red linked ot Leap Slam-Faster Attacks [*Can supplement Leap Slam with Frostblink (B) if you want some additional speed]
        Lvl 38 and Beyond:
               Shield Charge (R) - Faster Attacks (G) - Lifetap (R) whenever you can fit it
               Flashdash (B) for Gap Traversal

	Lvl 1 to Lvl 11:
        Clear: Frost Blades (G) -Ancestral Call (R) - Whatever Support
        Single Target: Spectral Throw (G) - Any reasonable damage support - Any reasonable damage support

    Lvl 12 to 37:
         Spectral Helix (G) - Chance to Bleed (R) - Cruelty (R) - Lifetap (R)... Can substitute Faster Attacks/Momentum in for 1 of the reds... Added Lightning for Blue
         Once you can afford Life cost of Lifetap on Spectral Helix (usually in like A3), start using Corrupting Fever
         Corrupting Fever (R) - Efficacy (B)

	Lvl 38 and Beyond (One of Reap/Exang needs to have Life Leech Support Linked To I):
         **** ONLY PUT LIFE LEECH SUPPORT ON ONE OF SLINGER SETUPS, DO NOT PUT ON BOTH ****
         Exsanguinate (R) - Spellslinger (B) - Chain (G) - Life Leech Support (R) OR Any reasonable low mana multiplier damage support, such as Efficacy
         Reap (R) - Spellslinger (B) - Brutality (R) - Life Leech Support (R) OR Any reasonable low mana multiplier damage support, such as Efficacy
         Corrupting Fever (R) - Efficacy (B) - Brutality (R)

	Auras and Utility:
        War Banner (R)
                Lvl 4 to 37, always have war banner as a reservation
                Lvl 38 and beyond, Banner will not always active. Because slinger cost is so high early on, you will likely not have Banner active again until you get mana reservation nodes and spellslinger levels up reducing the mana cost

     Curse:
        Lvl 16 to 37: Poacher's Mark (G) to help with single target/sustain on Helix
        Lvl 38 and beyond: Vulnerability (R) - Ideally figure out a setup to get Lifetap linked to this to avoid mana issues, usually it gets linked in 4L with my movement setup of Shield Charge (R) - Faster Attacks (G) - Lifetap (R)

---Flexible Links---

    Wand Attack for Slinger Proc:
        Frenzy - Maim (R) - Lifetap (R)/Culling Strike(G)

    Utility:
        Lvl 16 to 37: Bloodrage (G)
        Lvl 38 and Beyond: Drop Bloodrage (G) once you start using Frenzy (G) for proccing slinger OR if your life drain/costs are too great once you start slinging while clearing

    Totem:
		Lvl 4 to 37: Ancestral Protector (R) - Maim (R) - Any Dmg Support You Can Fit - Any Damage Support You Can Fite
        Optional - Lvl 38 and Beyond: Decoy Totem (R)

	Reservations:
        Lvl 10 to 37: Vitality (R)
        Lvl 16 to 37: Herald of Ash (R) / Can use Herald of Purity (R) if you prefer, but Ash is better for clear and Scion leveling needs the help
        Once you have sufficient HP sustain Pre 37 to manage Life costs and sustaining Corrupting Fever, you can drop Vitality for Herald of Purity (R) or you can just keep jamming Vitality

    Whenever you have free sockets:
		Add left-click steelskin (R). Can add CWDT if you have a free socket, I typically would not though.

---Notable Pathing---
Very important to pair (4) and (5) together to allow for a much better end of A1 and A2 without having to use Lifetap as early Lifetap will make life hard
and it forms the basis of getting through A2 which is a bit of a struggle bus as the Scion tree dies in terms of worthwhile points as everything takes
forever to get to

(1) Scion Phys Damage Start (3pts - Lvl 4)
(2) Path of the Warrior (1pt - Lvl 5)
(3) Relentless (8pts - Lvl 11 w/ Dweller and Fairgraves Pts)
(4) Skills Cost Life Instead of 30% of Mana Mastery on Path of the Warrior/Consitution Cluster (1pt - Lvl 12)
(5) 40% Increased Phys Damage with Skills that Cost Life (1pt - Lvl 13)
(6) Constitution (1pt - Lvl 14)
(7) Attack Speed and Dexterity Scion Start Node (1pt - Lvl 15)
(8) Sanctity (6pts - Lvl 20 w/ Way Forward Pt)
(9) Precision (2pts - Lvl 22)
(10) Discipline and Training (2pts - Lvl 23 w/ Busts Pt)
(11) Retribution via Attack/Cast Speed Small Node (2pts - Lvl 25)
(12) Expertise [30 Dex Node] (2pts - Lvl 27)
(13) Magmatic Strikes (3pts - Lvl 29 w/ Piety Pt)
(14) Life Regen Per Uncapped Fire Res Fire Mastery (1pt - Lvl 29 w/ Ascendant Passive Point Notable from Path Towards Gladiator)
(15) Ancestral Knowledge [30 Int Node] (1pt - Lvl 30)
(16) Vanquisher via % Inc Phys Nodes on Left Side(5pts - Lvl 34 w/ Deshret Pt)
(17) Veteran Soldier (2pts - Lvl 36)
(18) Purity of Flesh (7pts - Lvl 41 w/ Miasmeter and Torments Pts)
(19) Ironwill (1pt - Lvl 42)
(20) Sovereignty (5pts - Lvl 45 w/ Tukohama and Abberath Pts)
(21) Righteous Army (4pts - Lvl 48 w/ Ryslatha Pt)
(22) Spitirual Aid (2pts - Lvl 49 w/ Ralakesh Pt)
(23) Phys Damage Over Time Multi Small Notables on Right Side of Vanquisher Cluster (2pts - Lvl 50 w/ Gruthkul Pt)
(24) Tireless (5pts - Lvl 53 w/ Kishara's Star and Respecced Pt from Ancestral Knowledge [30 Int] after getting 2nd lab)
(25) Glancing Blows (2pts - Lvl 54 w/ Tolman Pt)
(26) Sanctuary via Attack Block Bottom Node (3pts - Lvl 55 w/ Gemling Legion and Yugul Pts)
(27) Combat Stamina via % Life / % Armor Top Node (3pts - Lvl 57 w/ Shakari Pt)
(28) Small Life Node Above Discipline and Training (1pt - Lvl 58)
(29) Phys Damage and Minion Dmg Templar Nodes (3pts - Lvl 60 w/ Garukhan Pt)
(30) Redemption (2pts - Lvl X w/ Resspecced Point [B] the Scion Attack Speed/Dex Starter Node and Vilenta Pt)

    Respecs:
    (A) Respec 30 int node after getting 40 Int node from Witch Ascendancy
    (B) Respec +5dex node for last minion notable on big minion wheel if can afford the attribute loss


---Notes on Gear---
Try to get a stone axe for early A1 on your first town trips on both mule and main character. Check again when returning for first town after Hailrake on Scion if you don't have one yet, if one isn't available, buy corroded sword. If neither Stone Axe nor
Corroded are present, can check for Driftwood Maul.

You want to try to aim for a fair amount of dexterity which is why we take some passives that give us dex and will use jade amulet. We take the 30 Intelligence node to help us early with intelligence requirements before pathing towards Spiritual Aid.
You will want a normal jade amulet before lvl 16, so you don't have any issues with accuracy and so you can equip/level bloodrage and green gems like faster attacks.
Take Rare Jade Amulet from Act 3 Quest - The Ribbon Spool - to help with dexterity requirements.
Take Turquoise Amulet in A7 if you end up doing the Gruest Necklace quest. Otherwise, can essence/alch a turquoise if your intelligence situation is bleak

Your preference on whether to do den for second QS. Its not relevlant when we are leaping from 10 to 37, but it becomes relevant again once we start shield charging.

---Gem Acquisition---
Please note that due to currency contraints from run to run, you may not be able to always buy the gems as listed here exactly when they are listed. Likewise, due to color/link constraints, you might not be able to
fit the gem into your gear when you buy it or use it period if proper colors/links do not become available at some point. It is important, however, to start having things level in the offhand after Library/Once you have Levels
to equip reap at 28, so that when you make Slinger swap, your gems are not underleveled. In particular, you should have Exsang, Reap, and Corrupting Fever leveling in offhand. I also like to have 2 spellslingers leveling
in offhand, but this is not strictly required as you can simply buy a partially level matched one from Clarissa if you need to.

    Duelist Mule Hillock Reward:
		Take Whatever
        Mule over Chance to Bleed (R)
        Buy Frostblades (G)
        [Not a gem, but priortize trying to buy/look for Stone Axe at first vendor]

	Main Character Hillock Reward:
		Take Whatever. I usually take Lightning Tendrils (B) to have a blue gem to vendor with an iron ring later for a Sapphire Ring

	Hailrake/Submerged Open Reward:
		Take Ancestral Call (R)
        Buy Ancestral Protector (R) and War Banner (R)
        Optional: If have an open green socket either linked to Frostblades or Spectral Throw take Momentum (G) if you have a spare wisdom
        Take Decoy Totem (R) from First Submerged Quest Reward via Tarkleigh (level in weapon swap or keep inventory for later)
        Take Frostblink (B) or Dash (G) depending on which color you have available. Prefrence towards Frostblink (B) if you have both an open blue and green

	Lower Prison Enter Reward:
		Take Faster Attacks (G)
        [Not a gem, but buy a Jade Amulet if you can to help with accuracy issues and attribute issues that come down the line]
        Optional: Buy Maim (R), only buy if you an extra transmute now. Otherwise, you can wait until A1 return for Way Forward Skill Point. Typically, I end up waiting as I forgo buying this so I can make sure I have a transmute for
        Vitality and to buy a Bastard Sword from vendor later

	Brutus Kill Reward:
		Take Leap Slam (R)
        Optional: Buy Vitality (R). If not bought here, buy shound buy when returning from Fairgraves Skill Pt. If you can't buy there, buy when returning to A1 for Way Forward Skill Point

	Merveil's Caverns Enter Reward:
		Take Spectral Helix (G) [Drop Frostblades/Spectral Throw after Merveil as Spectral Throw farms Merveil given her relatively stationary nature]
        Buy Vitality (R) - Its important to try to get this here to manage life cost from mastery we pick it up. If you cannot get here, you can log after Merveil to try to buy it or you will have to wait until A1 return for Way Forward Skill Point

	Fidelitas/Baleful Gem Reward:
		Take Herald of Ash (R)
        Buy Poacher's Mark (G).  If you don't have alteration for it now, buy it after returning to town after Weaver Kill
		Buy Bloodrage (G). If you don't have alteration for it now, buy it after returning to town after Weaver Kill
        Pseudo-Optional: Buy Corrupting Fever (R). While this gem is a REQUIRED gem for the build, we don't actually need/want to equip it until we can refresh its duration which will typically require Lifetap on main skill.
                                                                               As a result, you can wait until you put Lifetap on mainskill to buy it, but you will be being it at some point. Typically Lifetap goes on main skill at some point in A3. Thus,
                                                                               given that we already need a fair number of alterations in A2, Corrupting Fever buy is usually delayed until alteration situation is a little better towards A3.

	Weaver Kill Reward:
		Take Cruelty (R)
        If you don't have it yet, buy Bloodrage (G)
        If you don't have it yet, buy Poacher's Mark (G)
        Pseudo-Optional: Buy Corrupting Fever (R) if you don't have it yet and have spare alteration, see note above

	Way Forward Skill Point Act 1 Retrun:
       Buy Vitality (R) if you haven't yet
       Optional: Buy Efficacy (B) for when you start using Corrupting Fever (R)
       Optional: Buy Exsanguinate (R) to level in offhand weapon swap if you have spare transmute. Elsewise can buy at Library OR can buy from A1 town after making Spellslinger Swap at 38

	Clarissa/Tolman Quest:
		Take Vulnerability (R)
        Optional: Buy spellslingers (B) now to level in offhand. Can just wait until your about to make swap at 38 though and buy partially level matching ones then from Clarissa

    Library:
        Buy Shield Charge (R)
        Optional: Buy Life Leech Support (R) for Spellslinger swap later (Can delay until when you make actual swap)
        Optional: Buy Herald of Purity (R) to swap for Vitality (R) only do so if you are managing your life costs well. Can also wait until like second half of A4 or so to make swap when you need damage for all the
        bosses
        Buy gems to fill out supports that you may need

	Gravicius Quest:
		Take Reap (R)

	Open Mines Quest:
		Preference to take Stone Golem (R), but whatever golem you want is fine. If you want to grab something else instead, go for it. Stone golem is helpful if you need extra life regen and have open red socket

	Open Belly Quest:
		Take Chain (R)
        Buy Brutality (R) whenever you have spare alch to link to Reap and to Corrupting Fever. Getting 2 Alchs by second half of campaign should be reasonably doable. If you can only afford one Brutality, fit it wherever
        you can which might just be on Corrupting Fever early if Reap Slinger reservation cost too high until slinger levels a few more times/mana reservation nodes are specced on tree.

    Slinger Swap:
        Buy Frenzy (G) from A2 or Library. I will typically go to A2
        Buy as many Efficacy (B) as needed from A1 or Library. I will typically go to A1 to buy partially leveled ones.

	Other:
		I like using steelskin if I have an open red socket. Will not always happen. As result, I will usually either keep one in inventory OR have it leveling in weapon swap for when I do have free red socket.
        It can be quite easy to forget this step though. If you're really swimming in red sockets and have a spare alch, steelskin + CWDT is great. Having a steelskin is an important defensive layer on Phys Dot Ascendent as
        you cannot afford to use a defensive reservation given how hard slinger reservation costs can be to counter in campaign

---Weapon Choice Pre-Spellslinger---
You are going to want to try to find either a Stone Axe or Corroded Blade early. I usually prefer the Stone Axe and will use it until I get a Bastard Sword at 12 which I will hunt for from the vendor. In case you get a 2h drop
of a Longsword, Tribual Maul, or Jade Chopper, you should swap to that and then transition to Bastard Sword at 12. I would not, however, check vendor for a Longsword, Tribual Maul, and Jade Chopper as they
cost a blacksmith whetstone which is not worth the trade off. Instead, you can get a Bastard Sword for a transmute which is a fantastic early speed leveling base for melee. You can check the vendor twice for Bastard Swords
with new Vendor Changes, once after Brutus and once upon return to town from Fairgraves skill point. After you swap to the Bastard Sword at 12, I will continue to try to priotize using swords over all bases as we need the help with accuracy. It
is possible to use other bases especially if you get a nasty 2h axe of some sort, accuracy just becomes a pain with the best solution being a low level precision (ie like Lvl 3 or Below) to allow for it to fit without bricking your mana and your mana
reservations.

---Spellsling Wand Progresssion---
So one the that happens with this run setup is that you have to pay attention to your attack speed to avoid weird proc rates for spellslingers, such as attacking way faster than slinger can proc or way slower. Ideally, with slinger you want your attack
speed to be just ever so slightly slower than proc/trigger rate on slinger. If you end up with very slight faster attack speed, you can self-adjust for this by doing stutter stepping/click moving between each wand attack to ensure you never have too
much deadtime between procs as you are attacking too fast. In other words, if you attack faster than proc/trigger/slinger CD what can happen is lets say sligher proc rate is .65, your attack speed is .55, to get your second slinger trigger, with .55
you would have to attack three times as during your second attack slinger CD would not be up yet. Thus, we have to worry about over attack speed and how it lines up with slinger CD window. We can use a number of things to modulate this
such as the Frenzy attack itself as it has attack speed bonuses per frenzy, Frenzy charges, and either momentum or faster attacks.

You first wand when you swap at 38 should have about 1.2 base attacks per second. You can use Frenzy right away to attack to get Frenzy Charges. However, your attack rate will be slightly faster than your proc rate, so
in single target scenarions you will need to stutter-step/click move between attacks to avoid badly mistiming slinger procs. By 42ish and some XP through it (ie enough for your slinger to level up to Lvl 7 gem level), your attack rate will be just slower than
proc rate which is perfect for slinger.

At level 50 like midway through the level, you should swap to a 1.3 base attack speed wand as your slinger will level up to Lvl 10 and your attack rate will be just slightly faster again, so you will need to stutter step. At level 56ish, you no longer need
to stutter step once your slinger levels up to Gem Lvl 13.

If you are interested here is a table I made where you can see slinger proc rate and attack speed with various scaling and weapons we can use follow link: https://docs.google.com/spreadsheets/d/1TSS56VneN_t56D39RqnMLJoH0Ab2186Jg8epobFgQ68/

---Bandit Choice---
Alira or Kill All. Alira provides the most QoL through its resistance bonus and mana regen. Kill all is a good option as well just makes mana management and gearing more annoying. I would invest the 2 extra points into resist right near Scion start and
change 2 points on passive tree to something else to allow for pathing to Sentinel. Consequently, you would end up with more resistance than you would with Alira. It should be noted that even though we end up with lifecosts for pretty much everything
towards end, mana regen for example with movement skill, curse, totem, and frenzy attack, can be annoying to manage when your slinger reservations are so high. Fortunately, the slinger proc cost themselves are paid in life. Regardless, this one
is 100% a preference choice as either Alira or Kill All are good. If you're planning to continue on to maps, Kill All will be vastly, vastly, vastly superior to Alira. So the trade off choice really is do you want to spend 20 regrets for a couple hours of
QoL in campaign or suffer a little more to have a better tree for mapping. If I had to do run again, I would probably Kill All and not take Redemption to allow for those 2 points to instead go to Sentinel much earlier.K

---Pantheons---
Major: Brine King is a good option to prevent stun lock scenarios and its an easy to just click and forget. Take some other major if you're taking Iron Reflexes.

Minor:  Ryslatha. Other lessers can be taken for improvements to quality of life, but Ryslatha will typically be best for additional comfort via flask sustain. Gruthkul or Tukohama are good alternatives if you want damage reduction instead of sustain.

---Muling---
Muling Duelist is recommended gives Chance to Bleed (R), allows Scion to take Momentum (G) from Hailrake, and finally, the extra currency allows for a better shot at getting a Stone Axe,
good links/colors, and/or iron rings/rustic sash which can greatly improve damage of scion early. You can do this run perfectly fine without muling, your early game currency/consistency will not be as good however. Ultimately,
it is likely that muling will either improve quality of life enough or allow for enough extra gear to allow catch up from mule time such that muling at worst would be a slight time loss, but would most likely even out.

---Movement Skills---
You will use either frostblink or dash until Lvl 10. At level 10, you will swap to Leap Slam (R) - Faster Attacks (G). You can use frostblink as a supplemental movement source with Leap Slam if you have a spare socket. At 38
when we slinger swap, you will switch to Shield Charge (R) - Faster Attacks (G) and will want either Flamedash (B) or Frostblink (B) for gap traversal. Flamedash (B)

---Totem---
We will use ancestral protector until we swap to spellslinger at 38. There is no point in using Warchief as Warchief does not apply to Helix damage which is what we use from 12 to 37. After we swap to slinger for a bit of extra utility, you can use
a decoy totem to help keep you safe in more dangerous single target scenarios.

---Library, Lily, Both or None---
You are going to want to do Library as it will allow you access to Shield Charge (R) for the Slinger swap at 28. Also gives access to Life Leech Support (R) which provides large QoL and sustain when you make the Slinger swap and a very affordable
link for the slinger swap in terms of mana multiplier to slinger. You can wait until Lily, but if you do, I would just wait to swap to slinger until I do Lily. So you'd swap roughly at 42, instead of 38. An additional reason to Library over Lily is
doing Library early helps smooth out your XP curve for rest of first half of campaign and also helps provide a slight damage boost to Scions dmg given that you can get an extra passive or two from the additional XP of running Library
to help with Piety and first lab.