2 years ago
 Level 100 Boneshatter Juggernaut3.21
Life: 5,797149%
ES: 77
Mana: 35
eHP:
176,927
Resistances: 81%/79%/79%/75%
Supp: 98.56%
Armour: 70,277
DPS: 3,272,109
Speed: 4.28
Hit Chance: 100%
Config: Pinnacle, Focused
Bandit: Kill All
Pantheon: Soul of Solaris, Soul of Ralakesh
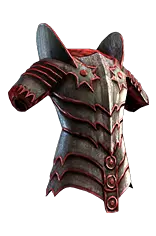
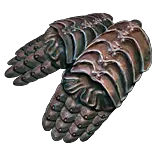
Gear


Gems
Boneshatter
Melee Physical Damage
Brutality
Close Combat
Ruthless
Impale
Leap Slam
Lifetap
Frostblink
Faster Attacks
Anomalous Vulnerability
Cast when Damage Taken
Lifetap
Vaal Molten Shell
Ancestral Warchief
Ancestral Cry
Blood Rage
War Banner
Divergent Pride
Determination
Phantasmal Ancestral Protector
Multiple Totems
Culling Strike
Maim
Tree Preview
 Call to Arms
 Precise Technique
 Armour Mastery
- +1% to all maximum Resistances if Equipped Helmet, Body Armour, Gloves, and Boots all have Armour
 Attack Mastery
- Non-Vaal Strike Skills target 1 additional nearby Enemy
 Axe Mastery
- Attacks with Axes or Swords grant 1 Rage on Hit, no more than once every second
- Enemies Killed by your Hits are destroyed
 Fortify Mastery
- Melee Hits Fortify
- -3 to maximum Fortification
 Life Mastery
- +50 to maximum Life
 Physical Mastery
- 10% more Maximum Physical Attack Damage
 Reservation Mastery
- Auras from your Skills have 10% increased Effect on you
 Spell Suppression Mastery
- Chance to Suppress Spell Damage is Lucky
 Two Hand Mastery
- 10% increased Armour per Red Socket on Main Hand Weapon
- 10% increased Evasion Rating per Green Socket on Main Hand Weapon
- 40% increased Damage with Hits against Rare and Unique Enemies
Notes
						LEVELING
--------------------------------------------------------
Marauder leveling is pain. Clear is fine before the boneshatter swap, single target sucks. After you make the swap to boneshatter it's smooth.

1-12

main links: ground slam - ruthless. There isn't really a good third link. You can consider muling momentum from ranger but if you're going to mule you might as well mule splitting steel because it's better.
Alternatively - mule splitting steel - chance to bleed from duelist and level with splitting steel - chance to bleed - maim. This is more comfortable but was 30 seconds slower when I tested it (only did one run and I am not a fast leveler. Don't trust me on this).

Auras - war banner + precision

Movement - dash + leap slam

utility: ancestral protector

Swap to sunder at 12.

Level 12 - cruel lab

Main links: sunder - ruthless - close combat - brutality (use melee phys before brutality). Some people like using faster attacks over either close combat or melee phys (usually melee phys). It makes the clear feel nicer but the single target is worse
due to how sunder works. Follow your own preferences. I prefer not to use faster attacks.

Auras: precision + herald of ash + war banner until normal lab. Shouldn't need much if any accuracy after normal lab for the rest of the campaign. Check character page to monitor and use low level precision if needed.

after normal lab: war banner + herald of ash + determination. If spamming mana pots (you will need to do this a LOT - I used two mana pots for most of the campaign because boss damage is bad) is annoying you, drop determination for
something like vitality. It gets slightly less annoying after picking up reservation efficiency nodes, but not by much.

after swapping melee phys for brutality: swap herald of ash for herald of purity as herald of ash will no longer work.

After getting mana leech from a jewel or passive tree node: swap herald of purity for pride

movement: dash (swap to frost blink once you have the minimum intelligence) + leap slam - faster attacks. If you have an extra 4 link, you can link both to lifetap so your mana is less annoying.

utility (in order of importance):  blood rage, vulnerability, ancestral protector,  cast when damage taken - molten shell, link maim to ancestral protector


Boneshatter swap

Swapping to boneshatter is not recommended until you have all the strike range nodes, left click warcry, +1 strike target mastery, endurance charges on hit to avoid killing yourself, and cruel lab for regen. If you really want to swap earlier you can
rush the strike nodes and accept you're going to kill yourself a lot while attacking.

Gem links are the same for boneshatter and sunder. Just swap out sunder for boneshatter and you're good to go. Remember to buy the gem when you have extra currency early in the campaign (available at level 28 after act 3 gravicious) and level
it in your weapon swap sockets.


Lab order: 1. undeniable 2. untiring 3. unbreakable 4. unstoppable
Bandits: Kill all. You can help alira if you need res and it makes your mana slightly better but you'll have to respec it later.
Pantheons: Major - solaris (lunaris is fine too - slightly better for mapping, solaris is better for surviving) minor - ralakesh (use garukhan plus reduced shock on flask suffix or ring/glove craft until you have 100% avoid shock from tree / eldritch implicits /
abyss jewel).


								Tips / FAQ
----------------------------------------------------------------

You can start off using any two handed weapon but you want to start using axes as soon as possible due to taking axe nodes near marauder start. When you're leveling, pick up each new tier of axe base from the vendor or from the ground.
You can keep your weapon up to date by doing the rustic sash vendor recipe (rare rustic sash, weapon base, whetstone - gives blue weapon with %phys). Make sure you do all the essences you come across, even the bad ones, just to have currency
that you can use to make rustic sashes yellow.

Allocate 30 dex and int nodes as needed to use your skills. Having frostblink and blood rage below max level is fine and expected because they require attributes you don't easily have access to. Just keep them underleveled. Only take dex / int if you
need it to use things like your auras, support gems, or totems.

Mana is super annoying for this build. There's really no good workaround other than playing with less auras or spamming your pots. I used two mana pots for most of the campaign because sunder takes forever to kill bosses and I would prefer not to
use scrolls to go to town for mana flasks. Don't always use the highest level mana flasks. You want mana flasks that restore enough mana that you can keep attacking but their effects aren't removed because they fill your mana too quickly.
If you have excess alterations, use them on viridian jewels to try to get mana leech on a jewel. Once you have that, your mana issues should be mostly fixed. You can path to a leech node earlier on the passive tree if you're desperate but a jewel
socket costs less points since you're not going all the way to precise technique that early.

If you're struggling with accuracy in the early game before you have accuracy on gear you can allocate resolute technique. This is only recommended if you have no accuracy on gear as one or two accuracy rolls and undeniable usually gives enough.

When fighting pinnacle bosses, swap the attack mastery from +1 strike target to intimidate and the axe mastery from enemies are destroyed on kill to 30% inc damage in blood stance (you're in blood stance by default).

If you're struggling with accuracy you can use precision - arrogance to get a nice accuracy boost. I don't recommend this unless you really need it because this build doesn't have a lot of life nodes to start with so reserving more life for a stat you can
get on items is not very worth it in my estimation. If you have extra sockets and realy need the accuracy you can go for it, but I prefer to avoid doing this.

Leap slam and frostblink work very well together because frostblink can be used to cancel the annoying animation that leap slam has, massively extending its range when the cooldown is up. Optimizing movement is a huge part of playing melee builds
and if you don't do it correctly it will feel much slower than any ranged build. The key to moving quickly is understanding the interactions between close combat support and leap slam and leap slam and frost blink. Close combat massively increases the
speed of your next leap slam after you cast boneshatter. Frostblink can be used to cancel the leap slam backswing and extend the range of it instantly. If you're playing well, you want to position yourself so that when you leap slam in, each pack is
a leap slam or a leap slam + frostblink away from each other. Optimal movement means that you're never leap slamming without having close combat support up and you're using frostblink to extend your leap slams if you're not quite at the next pack yet.
If there's considerable downtime between packs, it means that you're doing maps that don't have good layouts / density or your movement needs work.

Why jugg over slayer?
Jugg is better for normal gameplay. Slayer is faster (slightly more ms and as) and has a little bit of extra strike range from ascendency. Jugg is considerably tankier and has more damage. The PoB numbers for damage between jugg and slayer are
similar but in reality jugg damage is higher because slayer has to stop attacking periodically on essences / bosses to avoid killing themselves while jugg can just hold down right click forever. Slayer is slightly better for map blasting / xp racing, jugg is better
as an all-around build. In softcore you should choose according to your goals; in hardcore there's very little reason to be slayer other than exp racing or being a carn disciple.

Why vuln over warlord's mark?
The advantage of using warlord's mark is berserk. In the early game I use warlord's mark and berserk because I rely on berserk to increase my damage enough to kill essence monsters and map bosses in a timely manner. Once I have a good weapon
and a 6 link I don't need berserk anymore so I use vuln because it's more dps overall since you'll have your rage the entire map unless you stop for an expedition or something. When you fight pinnacle bosses you should always use vuln over mark.

Why don't you take the totem passives and mastery?
The totem passives are less damage per point than comparable damage nodes. If aisling unveils phys / impale chance on my weapon then I no longer need harpooner and I would prioritize those nodes. For general mapping your totems aren't out
so those nodes provide no value. I spec into them for pinnacle bosses that kill my totems such as maven so I have to resummon them less.

Help I'm dying a lot
The most common ways people die on this build are due to phys overwhelm (armor is your primary defense) or chaos damage. Be very careful clicking expedition remnants with phys overwhelm or essence monsters with phys overwhelm or always crits.
Before you have good vermillion rings, run double amethyst rings and try to craft the ele res / chaos res split mod on gear pieces. A good bench mark for chaos res is -60 for white maps, -20 for yellow maps, and +15 for red maps. If I'm at those
benchmarks I feel comfortable with chaos damage. Obviously there's degrees to it though, at -60 chaos res yellow harvests and aisling betrayal encounters slap even if it's fine for general white mapping.

What map mods do you avoid?
Reflect phys is impossible to run. Tough mods that I like to avoid are reduced recovery, reduced effect of auras, no regen, no leech, multi proj, crit chance / crit damage, and more than 1 damage mod (phys as extra, %damage, -max res, and cursed
by vuln are mods that I group in the damage mod category). Cursed by enfeeble can also be quite annoying because it reduces your damage and also reduces your accuracy, so if it puts you out of precise technique range your damage feels awful.

Why do you have so much extra elemental resists in all of the gear sets?
Overcapping resists is important in hardcore. If you play softcore you don't need to worry about doing this and just capping your res alone is fine. I like to stay around 35 res over cap if I can because that accounts for monsters cursing you with
a combination of elemental weakness and exposure. This isn't mandatory but it makes me feel a lot safer so I do it when possible.

Why do you have _____ on your item in your endgame realistic gear set?
The items in that gear set are just directly imported from my character in crucible. I deleted the crucible tree from my axe because crucible trees will be gone in the upcoming league. The gear I have is not optimal and could be improved but I play hcssf
so it was what I had. I killed 7/7 ubers with that gear so it's viable for all content, but ubers are not comfortable with that level of gear.

Should I use armor / evasion hybrid bases or pure armor bases?
The reason to use hybrid bases is that a base must have evasion on it to be able to roll spell suppression. Spell suppresion is a very valuable stat for defense, but it's extremely difficult to roll on hybrid bases because the mod pool is so large. In the
early game I prefer to use pure armor bases and rely on the entrench wheel and lucky suppress mastery with instinct annoint to give me a base level of suppress because the armor bases are easier to roll due to not having the evasion mods.
Once I start going for higher quality items I prefer the hybrid bases to get more suppress. Pure armor bases are worse, but easier to craft. The exception is the chestpiece - you always want a glorious plate for your body armor because you get triple
armor from body armor due to ascendency so you want as much armor as possible on your body armor.

Why don't you use cluster jewels?
The only cluster I would consider using would be an ilvl 84 12p physical damage cluster and just rolling it for small nodes. That would be an extreme late game choice because the damage it provides over tree nodes isn't much better. I haven't included
it in the pob because I've only played this build as a starter / as a challenge to do all ubers on so I don't know enough about hyper min maxing it to feel comfortable speculating on that topic and sharing it with you.

Why frostblink over flame dash?
Flame dash is great too and I swap in flame dash when I fight pinnacle bosses because the charges are more important. Frostblink is slightly better than flame dash while mapping because the cooldown is lower than the cooldown per charge on flame
dash. The downside of frostblink is that it isn't repeatable so if you're in a dangerous spot you have to use leap slam. It's also harder to play with optimally because if you aren't using it every time the cooldown is up (meaning you're blasting pretty quickly)
It's just worse than flame dash. If you're not confident in your movement skill useage I would recommend just using flame dash all the time. If you're a more experienced player frostblink is better but still swap it out for flame dash on pinnacle bosses.


							Gear and how to craft it
---------------------------------------------------------------------
All crafting guides provided are from my own experience. I don't claim that this is the most optimal or cost efficient way of creating these items, this is just how I did it with the resources that I had available to me in ssf. I know absolutely nothing
about the trade economy so I make no claims about these crafting methods being efficient or "worth it" from a raw cost / benefit scenario. I hate randomness so I've tailored every crafting method to be "deterministic" in the sense that you aren't just
slamming thousands of fossils into a weapon until all the prefixes say tier 1, because that method is not even remotely attainable in ssf. Resistances are lower in the item stat priority list than other stats because I am assuming you're able to cap your
resistances. If your resistances are uncapped, resistances are the highest priority. These crafting methods assume you know the basics of crafting - mainly harvest, essence, metamods, and aisling.

 Axe

This is probably the most important slot for damage. Boneshatter gets most of its damage from trauma and gem links so it isn't as important as it is for other weapon builds, but a big weapon still gives a good amount of damage.

Item bases: Despot axe > ezomyte axe >>> vaal axe > all other bases

Stat priority: Attack speed > % phys > flat phys > hybrid phys. You always want good attack speed on your weapons for boneshatter because more attack speed = more trauma = more damage. After that, just maximize the pdps of the weapon.

ilvl breakpoints: 83 is ideal. tier 1 of phys mods without including extra ilvl 84+ suffixes and elemental prefixes. ilvl 77 gives t1 flat phys and t1 attack speed  with t2 hybrid and % phys. ilvl 73 gives tier 2 %phys, flat phys, hybrid, and attack speed.

Crafting guide

Starter axe - expected pdps 550-600

Use screaming+ zeal or contempt on the base until you hit good rolls on 2 of the following mods - Attack speed, % phys, flat phys.  If you hit hybrid in addition to those, great, but it isn't required. Craft the remaining mod from that list of 3 at the highest
available tier on the crafting bench. See starter axe in items tab for example.

endgame axe - no fracture - expected pdps 700-750

Use shrieking+ essence of zeal on the base until you hit an acceptable tier of hybrid phys - you can make this determination yourself, higher is better, I deem 3+ as acceptable. If you hit above 40 flat phys or above 130% phys in addition to the hybrid,
 you can craft the remaining modifier and you're done. If you don't, isolate the hybrid phys (annul the remaining prefixes so you have an axe with hybrid phys as the only prefix, attack speed, and whatever suffixes came with it. Farm an aisling tier 4
(watch a guide on betrayal if you don't know what this means). Put the axe in raw and gamble it with the aisling bench. Depending on how much you invested in getting the base, it may be worth crafting prefixes / suffixes cant be changed  to protect
your hybrid / attack speed mod. When I simmed this step in craftofexile it was only worth it when I had a 4 mod axe (hybrid attack speed and 2 dead suffixes) but you can do what you want. Use the bench and pray it removes anything except the attack
speed and hybrid AND it adds a prefix. If the bench removes the hybrid or attack speed, start over. If it adds a veiled suffix, annul the veiled suffix and do it again. (tip: when you unveil the suffix, choose one that doesn't have an attack tag if possible.
This lets you craft "cannot roll attack modifiers" and annul it. The crafted mod protects your hybrid and attack speed so the annul can only hit your crafted mod or the undesired veiled mod - recraft cannot roll attacks if it removes the crafted mod. This
does not work if the unveiled modifier has an attack tag.) If it adds a prefix, unveil it, choose the %phys option (you will always get a % phys option, %phys and impale chance is ideal), and then craft flat phys. Hillock in transportation for quality.
This method is the highest variance of the three axe crafts. Getting a fractured base is highly preferable - it allows for a significantly better craft while also carrying far less RNG in the crafting process.

Aspirational axe - requires fracture - expected pdps 900-960

Get a despot axe with fractured 27+ attack speed. If you're ssf you can do this craft with any fractured physical mod of high tier but it's more complicated so I'm not going to write it here. DM me in game or on reddit / whatever if you want the walkthrough

Spam deafening essence of contempt until an acceptable tier of hybrid (3+). Annul any remaining prefix (you can use the cannot roll attack mods trick if the remaining prefix doesn't have an attack tag) leaving you with an axe that has flat phys
 (from deafening contempt), high tier hybrid, and t1+ attack speed (fractured) and 1 empty suffix slot (ideally 2). Craft prefixes can't be changed and scour the axe (skip this if attack speed is already the only suffix). This will leave the fractured attack
 speed as the only remaining suffix. Farm an aisling 4. Craft prefixes cannot be changed and use aisling 4 bench on the axe. If it adds a suffix, craft prefixes can't be changed, scour the axe, farm another bench and do it again. If it adds a prefix,
unveil % phys (% phys / impale chance is best) and then craft chance for double damage while focused. You can exalt the remaining suffix and pray for accuracy or something if you wish. Don't expect to hit anything remotely useful. Hillock in
transportation for quality.

Helmet

Helmet is a premium accuracy slot because the only modifiers with the atttack tag that can roll on helmet are accuracy mods.

Item base: pig faced bascinet

stat priority: suppress > accuracy > life > resists

Ilvl: 85 for t1 suppress and accuracy, 84 for t1 resists,  81 for t1 chaos res, 72 for t2 resists.

Crafting guide

Starter / decent helmet

Use screaming+ essence of greed on the base until acceptable tier of suppress (You need t1 to cap, but for a mid game item 8+ is fine, lucky suppress carries). Craft a resist.

Endgame helmet

Get a base with a fractured resist or fractured spell suppress. Use red harvest juice to spam reroll attack until t1 accuracy and a third desirable suffix (a resist or t1 suppress, whichever you didn't have the fracture for). Every reroll will always include an
accuracy roll because accuracy is the only modifier with an attack tag that can roll on helmets. Craft life or lock suffixes and reforge life (2 divs per attempt) or eldritch chaos orb for life if you want a higher tier than crafted.

Body Armor

Body armor is where a huge amount of your armor comes from. This is probably the most important slot other than the weapon.

Item base: glorious plate

Stat priority: armor (3000+ is the goal) > PDR (physical damage reduction) > life > resists

ilvl: MUST be ilvl 86 for an endgame craft because tier 1% armor and t1 PDR can only roll on ilvl 86. You can get the base easily enough by just buying it from gwennan rerolls. For lower tier crafts, breakpoints are 86 for t1 % armor, 84 for t2 %armor,
74 for t3% armor. 77 for t1 flat armor. 86 for t1 PDR, 77 for t2 PDR.

Crafting guide

Starter chest

Use screaming+ essence of greed until you hit high flat armor with open prefix. PDR would be nice but not required. Craft % armor.

Harvest reroll defense (blue juice) until good armor roll. Craft life or use the 15% inc life mastery on tree if no life.

Endgame chest - expected 3200+ armor, PDR, crafted life and suppress

Harvest reroll defense until t1 % armor t1 flat armor and open prefix. Prefixes can't be changed + scour. Craft multimod, prefixes can't be changed, and highest tier of life possible. Use harvest aug physical (only possible phys suffix is PDR).
If the aug removes prefixes can't be changed, craft suppress. If it removes multimod, recraft multimod, suppress, and life. This is not anywhere close to a perfect item but it's good enough for all content. You can save a lot of currency with a good fracture.
(either PDR, life, flat armor, or % armor fracture would allow you to make a better item). Hillock in fortification for quality.


Gloves

Gloves aren't too exciting. They have some good things like focus craft for attack speed, potential accuracy roll (can't target it because there's tons of attack tag prefixes) and just stats.

Item base: dragonscale gauntlets

Stat priority: Suppress > life > resists > focus craft > accuracy > attack speed

Ilvl: 85 for t1 suppress and accuracy, 84 for t1 resists,  81 for t1 chaos res, 76 for t1 attack speed, 72 for t2 resists.

Crafting guide

Greed essence the base until suppress and other desirable suffix. Craft remaining suffix. A fractured suffix is nice but you can get a decent gloves without it. If you have fractured life, use a resistance essence until you hit suppress. Craft focus mod
if your gear is already good, craft accuracy or a resist if it's not.

Boots

Item base: two-tone boots (armor / evasion) or dragonscale boots. Even when replacing the implicits on the two tones, they have more armor / evasion than dragonscale so they are still preferred.

Stat priority: Movespeed > suppress > life > resists

ilvl: 86 for t1 ms, 85 for t1 suppress, 84 for t1 resists, 81 for t1 chaos res, 76 for t2 suppress, 72 for t2 resists.

Crafting guide

Starter boots

greed or resist essence until you hit acceptable tier of life or ms with a resist. Craft the missing life or resist.

Endgame boots

Resist essence until you hit spell suppress and another desirable suffix (usually another resist). Much easier to do with a fracture. Craft suffixes can't be changed and aisling (or veiled chaos the boots if you're okay with risking 6 mod) to add a veiled
prefix (note: the suffixes must be full). Unveil movespeed (veiled prefix guaranteed to contain a movespeed mod) and craft life.

Rings and amulet

You generally need a good amount of accuracy on your rings and amulet. There isn't a good way to target it because there's a lot of attack tag prefixes. The good news is, a veiled prefix almost always gives 55-59 life so we can target suffixes.

item base: amethyst / vermillion ring, turquoise amulet.

Stat priority: Accuracy > resists > life > mana leech > attack speed

ilvl: 84 for t1 resists, 81 for t1 chaos resist, 75 for t1 accuracy.

Crafting guide

Yellow juice reforge chaos to guarantee chaos resist on the base until you hit accuracy + another desirable stat leaving you with 3 good suffixes. Craft suffixes can't be changed and aisling 4 it to add a veiled prefix (suffixes must be full). Unveil life and
craft -mana cost.

Belt

Jewelry including belt is a very easy slot to get chaos res on. You definitely want chaos res on belt because it's easiest to hit a good belt when targeting chaos resist.

Item base: leather belt or stygian vise

Stat priority: Life > resist > armor

ilvl: 86 for t1 armor, 84 for resists, 83 for t2 armor, 81 for t1 chaos resist, 72 for t2 ele resist.

Crafting guide

Decent belt

Chaos resist essence the base until t2+ life and another resist along with the chaos res. Craft a third resist or armor.

Good belt

Get a hunter influenced 86 stygian vise. It cannot be elder for this method because elder has a chaos tag suffix. Use harvest reroll life or pristine fossils until t1 life and t1 % life. Craft prefixes can't be changed (annul a suffix if necessary) and reforge
chaos (yellow juice) for guaranteed chaos resist and try to hit another high tier resist with it. Craft third resist or armor.

Abyss jewel for belt

Reforge life or reforge lightning with harvest until you hit some combination of life / accuracy / avoid shock that you're happy with. More is better for life and accuracy, but you only need ~40 avoid shock to cap even if you're using tier 1 eldritch implicits on boots
and only have 2/4 of the thick skin wheel.

Viridian jewel

For the endgame build you want a jewel with life and mana leech on it, preferably with some good suffixes too but even without them a jewel with 7% life and mana leech is better than a tree node for leech and a 5% life node. When you swap to enlighten
with arctic armor to support divergent boneshatter you need the 3% reservation efficiency to fit all your auras. You need 3 -mana crafts so your skills all cost 0 (except the ones supported by lifetap) to make this work.

Crafting guide

Reroll life (red juice) until % life and other required prefix (either mana leech or reservation efficiency). Hope it comes with useful suffixes. If not, exalt suffixes and pray.