17 hours ago
 Level 100 CI Bane of Condemnation Occultist3.28
Life: 1
ES: 9,790
Mana: 128
eHP:
208,565
Resistances: 75%/75%/76%/75%
DPS: 19,735,688
Speed: 2.29
Hit Chance: 100%
Config:
Frenzy, Power, 15x Wither, Custom Mods
Bandit: Kill All
Loadout
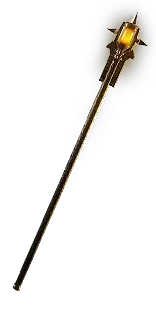
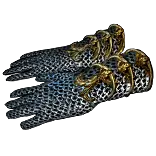
Gear









Gems
Bane of Condemnation
Despair
Temporal Chains
Punishment
Controlled Destruction
Efficacy
Essence Drain
Void Manipulation
Controlled Destruction
Blight of Contagion
Swift Affliction
Efficacy
Contagion
Increased Area of Effect
Intensify
Faster Casting
Withering Step
Automation
Phase Run
Immortal Call
Malevolence
Flesh and Stone
Tempest Shield
Flame Dash
PACT OF GHORR
Tree Preview
Runegraft of Treachery
15% increased Reservation Efficiency of Skills
Auras from your Skills which affect Allies also affect Enemies
Limited to 1 Runegraft of Treachery
Tattoo of the Ngamahu Firewalker(x3)
+6% to Fire Resistance
 Chaos Inoculation
 Minion Instability
 Wicked Ward
 Zealot's Oath
 Armour and Energy Shield Mastery
- 100% increased Armour and Energy Shield from Equipped Body Armour if Equipped Helmet, Gloves and Boots all have Armour and Energy Shield
 Caster Mastery
- Gain a Power Charge each second while Channelling a Spell
- 6% increased Cast Speed for each different Non-Instant Spell you've Cast Recently
 Charge Mastery
- 3% increased Damage per Endurance, Frenzy or Power Charge
 Damage Over Time Mastery
- 15% increased Duration of Ailments on Enemies
- 15% increased Skill Effect Duration
 Energy Shield Mastery
- 100% increased Energy Shield from Equipped Helmet
 Mana Mastery
- 12% increased Mana Reservation Efficiency of Skills
 Staff Mastery
- 30% increased Defences while wielding a Staff
Notes
CHAOS DOT NOTES

EARLY LEVELING
	-Best way to early level is probably Kinetic Bolt into Kinetic Fusillade until 28 (Searing Heat + fire mastery is good early but more respec points)
	-Check vendors for Chaos Multi & +Chaos Gems for later on. You're much more likely to see them early on than later.
	-You can rotate two Kinetic Fusillades early game.
	-At 28 Slinger comes online, Wandslinger nodes + reservation is important. Mana also becomes more annoying, so start heading towards EB/MoM + Vile Bastion from first Lab.
	-You can drop the Cold nodes at start whenever you want to save a few points.
	-Early Slinger DMG is mostly multiple skills + Decay + Serpentine Spellslinger
	-Slinger is good for all of the campaign, and early white maps - this build will be swapping to Self-Cast in early maps.
	-If you can find Alleopathy, Blight will be insane at level 41.
	-Get Bane of Condemnation ASAP for single target.

EARLY SPELLSLINGER SETUP + SUSTAIN
	-First Spellslinger with Contagion + Essence Drain.
	-Second Spellslinger with Cold Snap + Soulrend.
	-Add supports whenever you can.
	-Sustain comes from EB + Vile Bastion + MoM

SELF-CASTING ONCE YOU GET CANE OF UNRAVELLING
	-Once you get to maps you can swap off Spellslinger. (or whenever it falls off)
	-Cast Speed + AoE is the main bottleneck to swap.
	-Cane grants a lot of extra cast speed once you start power charge stacking - so you can wait until Uber lab before swapping to Staff

SHIELD CHARGE VS STAFF MOBILITY
	-Mobility is a lot worse on Staff, however, it becomes good endgame with Badge (CDR for mobility) + Automation + Phase Run (or Withering Step)
	-You can Shield Charge + Wand if you want, but Staff does significantly more DPS after the patch, they are massively buffed.
	-Cane of Unravelling is also a very strong early option, but you will need to rely on walking + Flame Dash until later. (You can try Leap Slam or Frostblink of Wintry Blast - but results may vary)

POWER CHARGE STACKING
	-You may be wondering why this build Power Charge stacking when Chaos DOT can't crit.
	-This build uses Forbidden Power & Charge Mastery to stack up %damage increase & AoE from charges.
	-Later on Millitant Faith + Inner Conviction is used to gain 3% more spell damage per Power Charge.
	-Ralakesh (FRENZY VERSION, NOT POWER!) comes into play after that in order to make use of Badge of the Brotherhood, for massive Frenzy gain.

BATTERY STAFF OR EB POWER CHARGE GAIN
	-If you use EB or Battery Staff, you may need to use Power Charge chest implicit + Power Charge Channel node to generate Power Charges on Single Target.
	-Early on the Power Charge per 200 mana spent is the main way to generate, but if you spend ES instead, it won't work.
	-Power Charge on kill will keep you topped off for mapping.