12 months ago
 Level 100 Boneshatter of Complex Trauma Champion3.26
Life: 6,280138%
Mana: 105
eHP:
91,486
Resistances: 78%/77%/77%/75%
Evade: 64%
Armour: 38,320
Evasion: 14,714
DPS: 45,154,448
Speed: 5.65
Hit Chance: 100%
Config:
Frenzy, Custom Mods
Bandit: Kill All
Pantheon: Soul of the Brine King
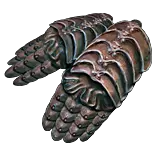
Gear












Gems
Boneshatter of Complex Trauma
Multistrike
Awakened Brutality
Awakened Melee Physical Damage
Volatility
Close Combat
Cast when Damage Taken
Culling Strike
Hydrosphere
Vaal Molten Shell
Frostblink
Vulnerability
Lifetap
War Banner
Pride
Flesh and Stone
Arctic Armour
Enlighten
Leap Slam
Faster Attacks
Corrupting Fever
Lifetap
Second Wind
Blood Rage
Tree Preview
Tattoo of the Ramako Shaman
+2% chance to Suppress Spell Damage
 Magebane
 Resolute Technique
 Unwavering Stance
 Armour Mastery
- +1% to all maximum Elemental Resistances if Equipped Helmet, Body Armour, Gloves, and Boots all have Armour
- You take 30% reduced Extra Damage from Critical Strikes
 Attack Mastery
- Non-Vaal Strike Skills target 1 additional nearby Enemy
 Axe Mastery
- Enemies Killed by your Hits are destroyed
- 30% increased Damage while in Blood Stance
- 15% increased Area of Effect while in Sand Stance
 Charge Mastery
- 100% increased Charge Duration
 Evasion Mastery
- +15% chance to Suppress Spell Damage if Equipped Helmet, Body Armour, Gloves, and Boots all have Evasion Rating
 Impale Mastery
- 10% chance on Hitting an Enemy for all Impales on that Enemy to last for an additional Hit
 Physical Mastery
- 10% more Maximum Physical Attack Damage
 Rage Mastery
- +7 to Maximum Rage
- Inherent loss of Rage is 20% faster
 Two Hand Mastery
- 40% increased Damage with Hits against Rare and Unique Enemies
Notes
Boneshatter swap
Swapping to Boneshatter in A4 as you get Multistrike might be a little rough. If you don't mind playing Sunder a little longer (I do, it's very boring after a year of the same leveling) wait with swapping to Boneshatter until you have a
two-handed axe with decent attack speed. Do not use regular Boneshatter, farm out Boneshatter of Complex Trauma in normal lab instead. There aren't that many transfigured strength gems, so it shouldn't take too long.

Ascendancy order
1) First to Strike, Last to Fall - Make sure you have a Corrupting Fever setup socketed to trigger the adrenaline by yourself.
2) Master of Metal - Large amount of flat physical damage, particularly useful early.
3) Fortitude - Free fortification for yourself and your mercenary
4) Inspirational or Worthy Foe - The damage is more or less the same, but Inspirational requires a bit of ramp-up for Pride in exchange for making banners more consistent.

Early refunds
Make sure you use gold to refund Martial Experience, Destroyer, and Butchery once they stop being useful (around Act 6).

Why Resolute Technique instead of Precise Technique?
With the removal of passive accuracy from banners and higher player life totals, reaching the accuracy required for PT is a big task, especially for ascendancies that aren't jugg/slayer. Resolute Technique allows for running more
map mods (we don't care about less accuracy, enfeeble, evasive monsters), saves us a big gearing headache with getting flat accuracy, and saves some skill points. PT is still doable and good with a similar setup, but I will not be
pobbing this because it's too annoying to do so.

Why Divine Shield?
Sustain on this build is pretty bad before overleech from an Ahuana timeless jewel, so it helps a lot with living through degen effects and our own trauma self-damage.

Belt options
Use a rare belt with life and resists until you can get either Perseverance or Ryslatha's Coil. Perseverance is weaker, but far easier to get. Ryslatha's gives an obscene 47% more damage in this setup thanks to Perquil's on a merc,
you can farm it out fairly reliably through Gravicius in a Transport safehouse. The divination card set "The Offspring" which gives a Ryslatha's Coil can reliably drop there with sufficient farming.

Volatility + Ryslatha's Coil
This combo is the build's way of abusing mercenaries. Use Perquil's Toe on a mercenary for an absurd amount of damage. If playing in any other league, use Ruthless support and the Perseverance belt instead.

CWDT+Hydrosphere
Hydrosphere gives cleave (hitting the same enemy twice with Tribal Fury) and consistent culling. Our attack speed is high so it isn't a particularly significant amount of extra damage. You can use Frost Bomb in this gem socket
instead to give enemies -75% life regeneration rate, it's niche but more practical. Make sure you aren't leveling up the gems linked to CWTD above the levels shown in the skills page, so that you can proc it as often as possible.

Timeless Jewel
Any Lethal Pride with good passives is the simplest option and gives the most damage. However, I would suggest using an Ahuana Glorious Vanity instead for the overleech keystone, as sustain is the only real issue with this build.

Amulet anointment
A few options here.
Forceful Skewering - Cheap option, slightly weaker than Merciless Skewering
Merciless Skewering - The most damage we can get from an anoint, suggested to use before swapping to suppression
Entrench - Cheap option to cap out your suppression
Inveterate - More expensive and stronger option for capping out suppression
Sione's Ambition - My personal favourite. Once you have enough suppression and damage from your gear you can anoint this for a significant boost to clear speed and boss damage uptime.

Important Mercenary items
Perquil's toe - Lucky damage for the player
Blood Price - Nearby enemies have their life reserved
Kaom's Binding - Converts enemy physical damage to fire
Additional curse - Either through a hunter influenced chest, Windscream, or Doedre's Damning
Temporal Chains / Enfeeble curse on hit gloves
Vulnerability synthesized ring - Not necessary, but helps with cursing enemies while mapping, since this build manually casts it's own lvl20 vulnerability

Item Crafting tips for SSF
Axe - If you're poor you can reforge phys in a harvest bench to get something usable. Try to recombinate a T1 flat phys and T1 attack speed despot axe as soon as you can. When you have more currency, recombinate T1 flat phys,
T1 hybrid phys and T1 attack speed, then multimod hybrid ipd/impale and double damage.. If you end up with any unnecessary mods, you might be able to craft on Cannot Roll Attack and annulment orb them off. There are probably
dozens of guides to recombinating physical weapons online, so look for some of those if you're unsure.

Armour - Early on use Rog and Memory Strand items, when you have a lot of excess currency to throw around recombinate your armour as well.

Jewelry - Reforge chaos in your harvest bench or Rog.

Jewels - Reforge life in your harvest bench, vaal orb for corrupting blood immunity if you get two or more good mods.