2 years ago
 Level 67 Toxic Rain Pathfinder3.24
Life: 2,241106%
ES: 259
Mana: 133
eHP:
5,889
Resistances: 75%/31%/52%/-20%
Evade: 51%
Evasion: 8,973
DPS: 115,714
Speed: 2.12
Hit Chance: 60%
Config: Pinnacle
Bandit: Kill All
Pantheon: Soul of Lunaris, Soul of Ryslatha
Gear
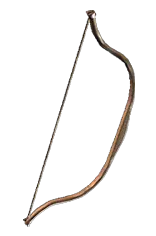
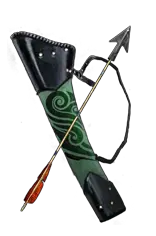



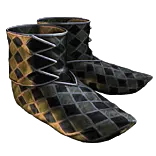







Gems
Flame Dash
Summon Stone Golem
Withering Step
Toxic Rain
Void Manipulation
Increased Duration
Vicious Projectiles
Efficacy
Mirage Archer
Burning Arrow
Blink Arrow
Artillery Ballista
Grace
Purity of Elements
Despair
Frenzy
Tree Preview
 Eldritch Battery
 Magebane
 Bow Mastery
- 20% increased Area of Effect while wielding a Bow
 Damage Over Time Mastery
- 15% increased Duration of Ailments on Enemies
- 15% increased Skill Effect Duration
 Duration Mastery
- 10% more Skill Effect Duration
 Flask Mastery
- Recover 4% of Life when you use a Flask
 Spell Suppression Mastery
- Chance to Suppress Spell Damage is Lucky
Notes
---------- EXTREMELY IMPORTANT INFO ----------

-Leaguestart Regex
Copy this into the Tarkleigh's search bar in Lioneye's Watch to highlight useful 3-link items

g-g-b|g-[gb]-g|b-g-g|nne|rint

-Area of Effect
You want 37-43% Increased AoE to make all five of your Toxic Rain pods cleanly overlap. You get 20% from the Passive Skill Tree, and the rest from a combination of helm, glove, and amulet prefixes.
You can also get Area of Effect as a corrupted belt implicit or a corrupted jewel implicit.

It's not a big concern during the leveling process.

-Should I do the Siosa quest? (A3 Library)
You don't have to, and it is out of the way, but it lets you buy Flame Dash and Malevolence before Act 6, so yeah, probably.

-How to Fix Mana in the Campaign
Make a beeline to Primal Spirit while doing the campaign. It really helps solve mana early on.
Use your mana flask liberally in early acts, and spec toward Eldritch Battery at the top-right corner of the passive tree.

Note: If you use Eldritch Battery, Manaforged Arrows will not work, because you're spending Energy Shield, not Mana.
You will need to use Ballista Totems with Focused Ballista Support for bossing, or Caustic Arrow with Arrow Nova Support setup for clearing.

-Fixing Mana at Endgame
Stick with Eldritch Battery. Craft -7 Mana Cost of Non-Channeling Skills prefixes on your rings and amulet.
The Belt Suffix that grants Regenerate 150 Energy Shield per second while a Rare or Unique Enemy is Nearby is very good early on for maintaining your ES pool.
The Life Mastery that grants Skills Cost Life instead of 30% of Mana Cost also works well.

Mana and Hybrid Flasks can roll up to 29% reduced Mana Cost of Skills during Effect.
When combined with the prefix 66% reduced Amount Recovered, Effect is not removed when Unreserved Mana is Filled, Effect does not Queue, this can fix mana costs for Toxic Rain and Manaforged Arrows.
The downside is that you lose a flask slot, and you have to consistently hit a Mana Flask in addition to your Life Flask.
Hybrid Flasks have terrible uptime and Life recovery rate, so they aren't a great option.

Devouring Diadem is a unique helm that drops from Catarina, the end boss of Betrayal. It's extremely good at fixing mana problems.
It grants Eldritch Battery, which saves at least 2 Passive Points. It also massively reduces the difficulty of meeting reservation requirements.
It doesn't have Evasion, so hitting the Spell Suppression cap becomes more challenging due to the Evasion Mastery no longer functioning.

You can use Lifetap Support in your Manaforged Arrows setup to set its mana cost to 0 and make it trigger as often as possible.

-When can I swap out of Eldritch Battery?
Dropping Eldritch Battery requires sacrificing our Divine Blessing Support setup, so maybe never.
It is possible with a lot of setup, and will re-enable the use of a Manaforged Arrows 6-link.
It requires a significant amount of investment.
You have to give up Purity of Elements and fix your Elemental Ailment Avoidance elsewhere. Stormshroud or Ancestral Vision can help.

As for mana, you will need to combine Ring & Amulet prefixes that grant -7 Mana Cost of Non-Channeling Skills with a Watcher's Eye that grants Non-Channelling Skills have -10 to Total Mana Cost while affected by Clarity.
You will also need to use Clarity, which requires more Increased Mana Reservation Efficiency & applies some socket pressure.
Searing Exarch's helm implicit modifier X% Reduced Mana Cost of Attacks is huge, as well, and getting a high rank of that implicit by using Orbs of Conflict is really important for fixing mana at higher gear levels.

-How do I fit in all these auras?
We take two Reservation wheels. They help a lot. After that, you can use some combination of the following:
-Mana Mastery that grants 12% Reservation Efficiency
-Enlighten Support linked to Auras
-Mana Reservation Efficiency helm suffix from Essence of Loathing
-Mana Reservation Efficiency helm implicit from Eater of Worlds
-Small Reservation Efficiency Cluster Jewels with a notable for Grace (Sublime Form) or Haste (Frantic Aspect).
-Anointing Sovereignty (Silver Oil x3) from the Templar side of the tree.
-Devouring Diadem (Energy Shield helmet that drops from Catarina)

-What is the best anointment?
Potency of Will.
You can reach it with a Very Large Thread of Hope in an endgame build.

Sovereignty is the best option once you have a Thread of Hope.

If you are using a Devouring Diadem and Sovereignty, you can use Beastcrafting to apply Aspect of the Spider onto a piece of gear as a suffix.
Aspect of the Spider slows enemies by 30% & increases their damage taken by 5-10%.
It's not bad.

-What kind of flasks should I use?
Life Flask is a given. You want a prefix that grants increased life recovered and reduced recovery rate so that you don't have to hit the keybind as often to keep it active. I bind my life flask to my mouse.
Make sure your Life Flask has a "Grants Immunity to X" Suffix. Bleed/Corrupted Blood immunity is best. This will allow you to drink it even while at full health.
Topaz is a great flask for this build because it helps offset the massive downside of Lightning Coil, and overcaps your Lightning Resistance so that you can safely farm Blue Eldritch Altars.
Prior to acquiring Lightning Coil, it's not really necessary. Jade and Quartz Flasks are both good alternatives during the campaign.
Silver adds both movement speed and attack speed. It's a no-brainer.
Quicksilver adds movement speed. It's not required, but it's pretty close.
This leaves room for one other flask. Jade and Quartz are good options during the initial gearing process, but they aren't all that competitive at higher gear levels.

Unique Flasks such as Taste of Hate or Progenesis far outperform the competition. You can use both, but this will require sacrificing one of the four other flasks listed above.
Topaz is probably the best option to drop, just compensate with lots of Lightning Resistance on your gear. You can drop the Quicksilver Flask if you don't mind being slow. BUT WHY?

-Which flask suffixes are important?
T1 % Increased Attack Speed is a huge DPS increase.
% Chance to Avoid Being Stunned will prevent you from being stunlocked to death.
% Reduced Effect of Curses is great for QoL.
% Chance to Avoid Being Shocked is excellent for becoming Elemental Ailment immune if using Stormshroud.

-Tattoos are back! Which ones should I use?
This was unexpected, but good!
The Tattoo of the Tawhoa Herbalist replaces Dexterity small passive nodes and grants 4% increased Flask Effect Duration.
They aren't mandatory, but they are *VERY* good. You can use other tattoos to solve problems in your gear, but no others are this generically useful.

-Is the new Tides of Time belt from Uber Shaper good?
Very. It's not Mageblood-level, but it shouldn't be as expensive as a Mageblood, either.
It will easily grant permanent flask uptime and significant increased flask effect, enough to outperform even the juiciest rare flask belts, and unlike a Mageblood, it applies to Unique flasks.
You can push into the 2500+ Life/sec range with a Tides of Time belt. That's an absolutely preposterous amount of life regen.
The implicit modifier is not great, so there's a real incentive to double-corrupt it and try to get attack speed or skill effect duration.

-Should I use Ballista Totems or Caustic Arrow as my second six-link?
Toxic Rain Focused Ballista Totems are a bit of a throwback. They help out with single-target damage by debuffing enemies, and are generally only used while fighting bosses and tanky rares.
Caustic Arrow is better for clearing maps, but requires a two-button playstyle. Try playing with both, and see which you prefer (probably Caustic Arrow)!

-How should I use Immortal Call & Withering Step? Is Automation Support the play?
Maybe!
We're going to have to test it out and see if self-casting Withering Step & keeping Immortal Call on the Cast When Damage Taken Support setup is better.


---------- LEAGUE START INFO ----------

-What skill should I use in Act 1?
Caustic Arrow is very good for most of Act 1.
Its main source of damage is the pool it leaves on the ground, and it doesn't overlap, so you don't have to spam it on bosses.
Puncture helps a lot on Brutus. That's its only use.
Swap to Toxic Rain at level 12. You can continue using Caustic Arrow against Merveil if you have a socket for it, but its value falls off pretty quickly.

-Early Leveling Tips:
Look for movement speed boots, quicksilver flasks, and 3 green-link items.
Don't waste time killing rares unless you can do so really efficiently.
Focus on killing magic packs for XP and white mobs to keep your flasks full.
Keep moving! Leveling in Path of Exile involves a lot of walking!

Get a Sapphire Ring (or two) before fighting Merveil.

Finding a 4-link is your first big gearing goal (level 25+).
You either want 4g or 3g1b. Use Efficacy as your Blue Support Gem.
3g1r or 2g1b1r can work, but it's not as good. Use Increased Duration Support or Damage on Full Life Support as your Red Support Gem.

NOTE: If using Damage on Full Life Support, be sure to take the Life Mastery that grants "You count as on Full Life while at 90% maximum health or above."

-Auras
Summon Skitterbots is the best aura available once it becomes available, but it quickly drops in value compared to alternatives like those listed below.
   (Use it for a while, but be prepared to drop it when the time comes. Continue leveling it in your offhand.)

Haste is the best aura in the campaign because it makes you move faster. It's not amazing for fighting bosses.

Switch to Malevolence for more single-target damage.

Purity of Elements helps with capping resists and being ailment immune.

Grace is a great defensive aura, and you can use it to massively increase your tankiness if you find yourself struggling defensively at any point.
It's mainly just for not dying to random packs of magic and rare monsters, which is very useful, but swapping auras during the campaign will make the experience faster and smoother.
Grace won't make you faster or add damage, and it's mostly worthless against most bosses.


---------- EARLY ENDGAME ----------

-Kitava's dead. What now?
Level up in Blood Aqueducts until you are around level 68.
Start progressing your atlas.
Farm currency in easy content. Your damage will stink a bit, but you move very fast, so Heist is great. Labrunning is also good if you're willing to do it.
Farming Alva & Bestiary in low-tier white maps is a really strong, easy strategy early in a league.
Alch-and-Go Expedition Farming is great, too.
Betrayal is a profitable league mechanic early, and it can create some really useful gear at leaguestart.
I will most likely farm Betrayal and Expedition as my league start currency setup.

Try to get a Quill Rain or a 6-link Short Bow from The Porcupine Divination Cards. This will help your damage out a lot!
Craft the Short Bow using Shrieking Essence of Dread for +2 bow gems. Craft Attack Speed, or Chaos DoT Multi if you get Attack Speed on the bow.

Farming Betrayal for the -7 Mana Cost of Non-Channeling Skills ring prefix craft from Elreon and Devouring Diadem from Catarina is extremely valuable.

Get a Lightning Coil as soon as you can, it will really help you deal with Physical damage.

Fix your stats, get your flasks set up, keep your resistances up, level your gems, and start saving to craft a +3 Thicket Bow & buy an Empower Support.


---------- ENDGAME FAQ ----------

-What Cluster Jewels Should I Use?
Large Chaos Damage Cluster Jewels with 8 mods. The preferred notables are Unholy Grace, Unwaveringly Evil, and Wicked Pall.

Medium Projectile Damage Cluster Jewels with Shrieking Bolts and Repeater are the best option for maximizing damage.

Medium Chaos Damage Over Time Cluster Jewels with Wicked Pall and Student of Decay are a good alternative that can help with Chaos Resistance. The difference in damage is pretty small.

-Will Crafted +1 to Socketed AoE Skill Gems, (9-10%) Increased Area of Effect Prefixes on Helm and Gloves work?
Absolutely. Going for +2 to Socketed AoE Skill Gems is an endgame optimization, and not required for the build to function effectively.
You can use a crafted +1 to Socketed AoE Skill Gems mod on gloves and a +10% Increased Area of Effect mod on amulet and kill Uber bosses while wearing a Devouring Diadem.
I've done it, it's relatively budget-friendly, and it works well.

-Do I need specific Jewels?
Nope! Jewels and Rare gear are about solving problems. You need a certain amount of resistances, stats, and spell suppression to make the build function safely.
Acquire them across all those pieces of gear as you are able.

-Is the Thread of Hope necessary?
No, but it is a potential endgame optimization that lets you anoint Sovereignty without losing the massive damage from Potency of Will.

-Do you need a Despair curse-on-hit ring?
No, but it's convenient! Many players self-cast Despair on rares and bosses, but that's tedious.

-Do I need Forbidden Flesh/Flame?
No! They're a super expensive flex, and a really bad investment unless you can get lucky and buy them cheap.
They do add a lot of damage/speed, though!

-What Watcher's Eye mods should I use?
Phasing while Haste is Active is pretty good, and surprisingly cheap. You can get Phasing elsewhere, but this is a really easy spot for it that costs very little.
% of Physical Damage Taken as Fire/Cold/Lightning While Affected By Purity of Elements is extremely valuable as a defensive layer, and is a major reason why we like Purity of Elements.
Increased Damage Over Time Multiplier While Affected By Malevolence adds a ton of damage, which is great, but it is insanely expensive with other useful mods.
If you are trying to transition out of using Eldritch Battery, using a Watcher's Eye that grants Non-Channelling Skills have -(10-5) to Total Mana Cost while affected by Clarity is extremely useful for fixing mana costs, but beware, it can be expensive!

-Why not use Headhunter?
You can, it's really great!
Mageblood makes you consistently zoomy!
Headhunter can add tons of projectiles and attack speed, which may make the game perform poorly if using Toxic Rain MTX.

-Why not run Defiance of Destiny?
Damage! A +2 neck grants ~25% more damage than a Defiance of Destiny.
Defiance of Destiny is a great amulet, arguably better than a super-expensive +2 neck. It will make you UNREASONABLY tanky, and it is much cheaper, it just comes at the expense of some damage.
It also makes fixing mana more difficult.

-Why not all 3 Ele Res Flasks?
Same reason! It's a super-tanky setup that works great (even after the 3.24 nerfs), but you have to give up some damage & speed for it! No thanks!

-Do I really need to use a Life Flask?
Defiance of Destiny is an effective substitute, but you will need to account for DoT effects and find another way to deal with Bleed & Corrupted Blood.
Corrupted Blood immunity through Corrupted Jewels will work, but for Bleed you will probably want to run Steelskin instead of Immortal Call or switch to Ralakesh for your Minor Pantheon.