16 months ago
 Level 94 Volcanic Fissure of Snaking Chieftain3.24.ruthless
Life: 4,16798%
Mana: 51
eHP:
52,678
Resistances: 90%/90%/90%/5%
Armour: 34,351
DPS: 2,131,246
Speed: 1.48
Hit Chance: 100%
Config:
Pinnacle, Frenzy, Custom Mods
Bandit: Kill All
Gear


Gems
Volcanic Fissure of Snaking
Lifetap
Pulverise
Elemental Damage with Attacks
Fortify
Intimidating Cry
Infernal Cry
Lifetap
Seismic Cry
Second Wind
Consecrated Path
Vaal Ancestral Warchief
Lifetap
Combustion
Flammability
Determination
Blood and Sand
Herald of Ash
Purity of Fire
Blood Rage
Molten Shell
Cast when Damage Taken
Tawhoa's Chosen
Tree Preview
Tattoo of the Kitava Blood Drinker
0.5% of Attack Damage Leeched as Life
Tattoo of the Tukohama Warcaller(x3)
8% increased Warcry Cooldown Recovery Rate
- +1% to all maximum Elemental Resistances if Equipped Helmet, Body Armour, Gloves, and Boots all have Armour
- 5% increased Attack Speed per Enemy in Close Range
- Gain 2 Rage on Hit with Axes
- Fire Exposure you inflict applies an extra -5% to Fire Resistance
- Critical Strikes do not inherently Ignite
- 100% increased Damage with Hits against Ignited Enemies
- +30 to maximum Life
- 12% increased Mana Reservation Efficiency of Skills
- Auras from your Skills have 10% increased Effect on you
- 40% increased Damage with Hits against Rare and Unique Enemies
- Recover 15% of Life when you use a Warcry
- Warcries Debilitate Enemies for 1 second
- Remove all Damaging Ailments when you Warcry
Notes
Credit to Woolfio for the original basis for this build - https://www.youtube.com/watch?v=M4jxy3Ket1E

IMPORTANT UPDATE

DESPITE THE CALL TO ARMS REVEAL VIDEO CLEARLY SHOWING MULTIPLE WARCRIES TRIGGERING SIMULTANEOUSLY MARK SAID ON A RECENT INTERVIEW THAT THEY CHANGED IT AND IT ONLY WORKS WITH ONE WARCRY

THIS SUCKS FOR QOL

BUT IT'S NOT AS BAD AS IT LOOKS

BUILD HAS BEEN REWORKED SLIGHTLY

TAKE ADMONISHER

PUT SECOND WIND SUPPORT ON WARCRIES (WE NOW HAVE MORE FRONTLOADED DPS BIG POG)

PUT CWDT ON MOLTEN SHELL + BLOOD RAGE IN THE FULL BUILD

BUILD NOW HAS MORE BUTTONS TO PRESS, SO PUT FLAMMABILITY AND WARLORD'S MARK AS CTRL + WHATEVER KEYBINDINGS AND THEN REBIND THEM IN OPTIONS TO OTHER KEYS

Why play this build?

- Your skill automatically targets packs of enemies around you, will go off-screen, you can blow up everything around you without paying much attention.
- Mapping-focused build for a mapping-focused league (the new t17 maps will be out of most ruthless players' reach until they can make a dedicated bosser)
- Smoothest levelling I've ever experienced, and having a crafting league makes it easier to improve your weapon if you get bad drop rng
- Tasalio node makes it easy to cap res and frees up suffixes for chaos res, attributes and IIR. Gearing has never been so easy.
- You get to say you're playing 'melee' while in practice it feels like the furthest thing from it
- If you want to play another kind of melee, strike skills (boneshatter etc.) have shit levelling now due to the removal of lmb + CTA keystone warcry for ancestral cry. So this is the next best thing.

What are the downsides?

- Best common unique that we build around is a relatively slower weapon, this synergizes with our focus on warcries and exerted attacks but you will have to get used to speed of it in practice.
- Single target should be fine for map bosses and guardians/conquerors etc. but a lot of our damage comes from rage so any boss with prolonged invuln phases without adds will mess with it.
- Recovery isn't amazing, we stay alive by preventing damage more than we do by recovering it so degens and such will be rough.
- No freeze/chill immunity from Jugg but 90% cold res should mostly alleviate this in the long run
- We have to selfcast our warcries because Mark decided to change how CTA works a couple of days before league start

General levelling notes

- Start with a Duelist mule for Blood and Sand (Mud Flats) and Vitality (kill Brutus), this should take 30-40 minutes if you know what you're doing and a bit longer otherwise, either way it's essential.
- For act 1 you can take molten strike or ground slam, the former lets you use all weapon types (big advantage) but is a bit more clunky for clear, the latter is more limited but you can kite stuff while slamming
- You will only take Resolute Technique towards the end of a2 so go through Versatility as you level, it will also give you some ms and much needed attributes
- You can start using Vitality from your mule at level 10 so you can fight Brutus with some health regen which makes him a million times easier in my experience.
- The regular version of Volcanic Fissure can do the job for the whole campaign, but Snaking is a lot better if you can get it.
- Seismic Cry's aoe isn't important early and using it just slows you down, while Warlord's Mark gives you rage which is a lot more valuable.
- Around the time you get the '100% inc damage to ignited enemies' mastery you should get access to Siosa (you can go there before killing Gravicius if he is being a pain), so for your first uncarved gem take Flammability to get some chance to ignite.
- Volcanic Fissure needs to be aimed but you will get used to it quickly, it's basically a ranged skill.
- The damage of this build becomes really strong once you get Tawhoa from Normal Lab, you should crush bosses for a long time even if your weapon rng sucks.
- We use multiple lifetap support gems because there is no good way to leech mana from fire damage aside from anointing Clever Thief which costs us an anoint, and our mana pool ends up too tight to use mana for our main skill anyway.
- Keep Warlord's Mark at level 1 so that it costs less mana. Selfcast it on normal mobs as you clear for easy rage. Can swap it for quickstep when doing a pinnacle boss or maven invite.
- Molten Shell can be put on Automation support, this costs less mana than having it on CWDT.
- The final build does not use Berserk as we build around Kaom's Primacy which incentivizes us to keep our rage high instead of spending it on a burst window.
- The final build uses Blood Rage for frenzy charges while mapping but you probably need a source of fire leech if you want to use it after dropping vitality for other auras, otherwise you will degen.
- Prioritize saving items with good fire res as you level, this will help you sort out your res better later.
- We do not use suppression, suppression is for people who don't have 90% all max res.
- Run a mana flask until you anoint clever thief, then run clever thief until you have all your auras and lifetap gems and can get the full final build going.
- Remember that consecrated path is a slam so it will consume exerted attacks and fist of war


Ascendancy order

If your res feels pretty good going into a8

Tawhoa, Forest's Strength -> Tukohama, War's Herald -> Tasalio, Cleansing Water -> Valako, Storm's Embrace

If your res feels bad going into a8

Tawhoa, Forest's Strength -> Tasalio, Cleansing Water -> Tukohama, War's Herald -> Valako, Storm's Embrace

Gem progression

/Quest Rewards/

Don't level Warlord's Mark.

- Molten Strike/Ground Slam after Hillock
- Ancestral Protector from Breaking the Eggs
- Intimidating Cry after Brutus
- Volcanic Fissure from Merveil WP
- Warlord's Mark from Intruders in Black
- Infernal Cry from Lost in Love
- Flammability from 1st Siosa gem
- Ancestral Warchief after Gravicius (swap to this totem)
- Blood Rage from 2nd Siosa gem
- Consecrated Path from 3rd Siosa gem

you can grab seismic cry with the 2nd or 3rd siosa gem as well or get it later

/Other mule options/

- Molten Shell from a Marauder (Mud Flats)
- Enduring Cry from a Marauder (Brutus) if you are playing Hardcore or something
- Siphoning Trap from a Shadow (Brutus) if your name is ShakCentral
- Frost Bomb from a Witch (Mud Flats) if Oak is still trying to reach you about your extended warranty

/Support Gems/

- You don't need to start lifetapping until you have all your auras, determination will take a while to get usually so get all your other supports first.
- Pulverize is a very important support for Volcanic Fissure and is usually less in-demand than the other supports listed so it might be cheaper to trade for early on.
- You need multiple totems support before you get Dawnstrider boots. You'll have the sockets for it early, once you have all your auras you won't.

/Auras/

- You can drop vitality once you get enough of your other auras to the point that it's making your mana pool too small
- Purity of Fire is top priority once you have uber lab, but getting Herald of Ash for dps and clear qol will be more important early
- If you want to focus more on defense, swap Herald of Ash for Arctic Armour.
- If you're SSF, Lucid Dreams could help you farm for Purity of Fire as it has a vaal version.
- Before getting determination, if you're comfortable getting the full aura setup online you can run anger instead

/Vaal gems/

- Vaal Ancestral Warchief is our main priority.
- The Vaal component of Vaal Volcanic Fissure of Snaking cannot be exerted so it sucks ass.
- Vaal Impurity of Fire is actually a dps loss with all our exposure and penetration in the final build.

Gear Progression

/Weapon/

- Can use 2h mace in early acts until you commit to axe nodes. Axe nodes are too good.
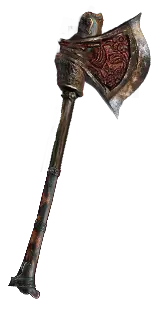
- Use the best axe you can get until you can grab a Kaom's Primacy, this is basically our GG weapon unless you get something absolutely insane somehow.
- Kaom's Primacy is a relatively slow weapon but this aligns with our warcries better overall, and rage + the attack speed nodes we take on tree will help make it smoother to use. It also gives free culling strike.
- If you can get a 2nd Kaom's Primacy you can work on trying to 5 link it so you can fit the full warcry setup.

/Helmet/

- Make sure armour value is higher than ev value if using hybrid and the bleed immunity mastery.
- Rare with life and fire/chaos res early
- Hrimnor's Resolve is a unique option for a bit of damage and freeze/chill immunity, with enough max res freeze/chill shouldn't be too big an issue though.
- If you want to farm Destructive Play bosses with Maven lategame you will probably want the %reduced life regen rate eldritch implicit. Endgame rare helm can also have chaos res, rarity, attributes.
- Echoes of Creation is now an Uber Shaper drop so it's basically off the table.

/Body/

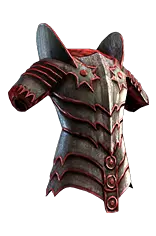
- Nothing special here early on, life, fire/chaos res and armour. If using hybrid here you need to spend a point for Iron Reflexes, though we are not jugg so it is less effective unless you get a really good hybrid.
- On a good 5+ link you can use ichors/embers to get extra max fire res while near a unique, to help with ruby flask not doing enough during boss fights and maven invites.
- A usable corrupted 6 link would take priority over the above, however.

/Gloves/

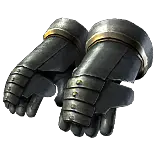
- Life, fire res, chaos res, rarity, etc.
- On a good pair, choose between fire leech or fire exposure for one eldritch implicit and rage for the other. Rage implicit will hlep you ramp rage a lot faster during bosses.
- Leech on gloves should only be a stopgap for getting it from another source, exposure takes priority for pushing dps.
- Once you have fire exposure from gloves you could take the fire mastery for an extra 5% and go avatar of fire instead.

/Boots/

- Armour, fire/chaos res, etc., 30% ms
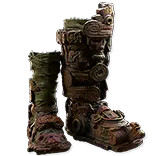
- Dawnstrider boots are a must for endgame because we have no room for multiple totem setup, and also pressing 2 totem buttons sucks.

/Rings/

- Amethyst rings for chaos res, get life res and attriubtes here
- Could use mokou's embrace as part of a combo for inc damage, attack speed and leech.
- This combo also lets you take the mastery for 'damaging ailments cannot be inflicted on you when you already have one' and become poison and bleed immune.
- If running Herald of Ash, you might be able to get a Circle of Anguish to boost dps further. You can get a max fire res mod here, very useful.

/Amulet/

- Whatever you can find early with the usual good stuff
- Eye of Innocence is an option with the ring mentioned above.
- Replica Karui Ward is really nice, the aoe and ms is awesome. Not too uncommon in heist so should be accessible without breaking the bank or losing your sanity farming for one.
- Xoph's Blood/Heart is another lategame option if you want to farm breach for it. I would rate Replica Karui Ward above it though due to the aoe and ms.
- Anoint Clever Thief on your best amulet as a stopgap ASAP, this gives life leech from fire damage and also mana leech which lets you drop mana flask.
- Forces of Nature is best dps anoint but Divine Fury is a good budget alternative. Or you can anoint life, Crystal Skin, etc.

/Belt/

- Lots of good common unique options here. Run the best rare you can otherwise with the usual good stuff.
- Immortal Flesh is a nice option since we can cap res more easily, even the mana regen is handy for making our non-lifetapped skills a bit smoother.
- Bear's Girdle is a different endgame option if you have another source of leech, provides +20 max rage which is huge.

/Flasks/

- I usually prefer full bleed + CB immunity from passive tree masteries when playing melee instead of relying on flask mod but for the sake of points I would only run this early on and use a flask later.
- Poison removal on divine life flask, instant use when low life prefix
- I would run a 2nd life flask because our recovery isn't amazing, can put bleed/cb removal on this one.
- Ruby flask pushes you to 90% max res while it's up, it's like a 2nd guard skill. Use when charges reach full to automate, or use it manually if you prefer.
- Granite flask with use when charges reach full. Get inc armour suffix here or on ruby flask.
- QS flask for obvious reasons.

/Jewel(s)/

-We have one jewel socket on final tree, put whatever you can get here. Useful for fixing attributes.
-Not an amazing place for the new Perandus Pact but might be something worthwhile from that.
-Not many watcher's eye mods that are worth it for this , but maybe the stars align and you drop a useable one.

Skill mechanics

- Volcanic Fissure gets +1 eruption at 20% quality. This is very high priority as it also gives Tawhoa's use of it +1 eruption.
- With one target it should always hit the same target twice, with correct positioning it can hit the same target 3 times.
- https://www.youtube.com/watch?v=wxpoXqEeIQY&t=75s for explanation from CaptainLance9
- Therefore we estimate full dps based on 3 hits of volcanic fissure and 2 hits from tawhoa's use of the skill (as tawhoa has no idea what he's doing)
- As the skill can hit multiple bosses at once, despite not being a good 'bossing' skill it should perform relatively well in Maven invites.
- Reddit tells me that knockback can potentially make every eruption hit the same target, so stacking tattoos for that effect might be a way to boost dps further

Warcries

- THIS BUILD INITIALLY BUILD AROUND THE NEW CALL TO ARMS SUPPORT BUT IT DOESN'T WORK THE WAY THEY SAID IT WOULD SO RIP.
- The upside is that we can now take the 15% life and remove damaging ailments masteries
- Another upside is that we get more damage from using second wind support, which offsets the downside of casting them
- lv 20 cries with admonisher take 0.37s to cast which is manageable
- Intimidating Cry and Infernal Cry are our two best cries for dps. Seismic cry is less important as we have Tawhoa doing extra slams and 4 eruptions per slam, but we will want it later as pack density increases
- Echoes of creation no longer a regular shaper drop so we can't really plan to get it, but it would be an ultra endgame chase item.
- Need two 5 links in order to use 3 cries in final build, as you need to lifetap all of them to offset the increased cost and you want to add Second Wind Support as well
- before adding all auras you can use 3 cries + second wind without lifetap but you need mana leech or mana flask
- Get quality on all your warcries for the CDR.
- You can use Tattoos of the Tukohama Warcaller for even more cdr

Leech

- Leech is valuable because we will use life to attack and cast our warcries/curse/etc. in the endgame setup, on top of being an important recovery method.
- Anoint Clever Thief on your best ammy as a stopgap (clear verdant indigo), get 3 oils and harvest swap until you have what you need
- Tattoo of the Kitava Blood Drinker will be the easiest way to solve your leech as long as you can get one to drop (run Kitava tribe embers)
- Some uniques can also solve this, Doryani's Invitation among them but this character cannot kill Atziri unless you become ele reflect immune.

Max res

- Once you have done uber lab, easy to get to 85% all max res with purity of fire and max res nodes on tree, then new ruby flask gives you 90% all max res while up
- Later on you can get implicits on chest + 10% aura effect mastery that can give another 4% all max res while fighting a unique enemy, to solve for not having ruby flask uptime. May take a long time to get it, but very worth it if you are pushing the build.

Clusters

- Can run a cluster setup if you drop some nodes, means losing the destroyed on hit axe mastery but you can gain a lot of good things from warcry mediums such as perma onslaught and frenzies while bossing.
- You also get 2 jewel sockets.