a day ago
 Level 89 Hybrid Crit Exsanguinate Mine Trickster3.25
Life: 2,898117%
ES: 1,36125%
Mana: 53
eHP:
20,292
Resistances: 75%/59%/28%/42%
Evade: 69%
Evasion: 18,380
DPS: 2,884,350
Speed: 18.18
Hit Chance: 100%
Crit Chance: 96.68%
Crit Multi: 541%
Config:
20% Shock, Frenzy, Power, Custom Mods
Bandit: Kill All
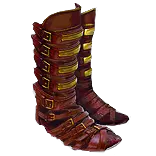
Gear

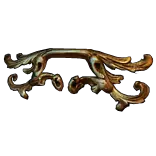
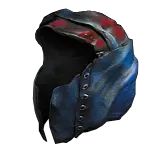
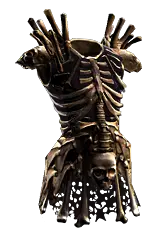
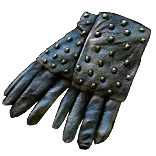


Gems
Shield Charge
Momentum
Faster Attacks
Detonate Mines
Automation
Grace
Summon Skitterbots
Hatred
Exsanguinate
Charged Mines
Minefield
High-Impact Mine
Physical to Lightning
Exsanguinate
Charged Mines
Minefield
High-Impact Mine
Increased Critical Damage
Assassin's Mark
Lifetap
Frostblink
Bear Trap
Tree Preview
- 40% of Physical Damage Converted to Cold Damage
- 50% increased Effect of non-Damaging Ailments you inflict with Critical Strikes
- Hits have 25% chance to treat Enemy Monster Elemental Resistance values as inverted
- 30% of Chaos Damage taken does not bypass Energy Shield
- +15% chance to Suppress Spell Damage if Equipped Helmet, Body Armour, Gloves, and Boots all have Evasion Rating
- 15% increased maximum Life if there are no Life Modifiers on Equipped Body Armour
- 12% increased Mana Reservation Efficiency of Skills
- Each Mine applies 2% increased Damage taken to Enemies near it, up to 10%
- Each Mine applies 2% reduced Damage dealt to Enemies near it, up to 10%
- 8% increased Damage for each of your Aura or Herald Skills affecting you
- Auras from your Skills have 10% increased Effect on you
- Chance to Suppress Spell Damage is Lucky
Notes
BEFORE YOU START -- This doesn't have as many guard rails as I normally write into a build guide because its for an event.
There is a major transition late in maps that if you aren't sure what you are doing is easy to fuck up.  If this is your first time ever playing PoE this isn't a good first build.


IMPORTANT
---------------------------------------------
Don't level up the Brine King pantheon that reduces the effect of chill.  You want all the chill.


Leveling
---------------------------------------------
Leveling from 1-31 will be Rolling Magma with Fire Trap for additional single target.  Or level with whatever you prefer.  We'll be transitioning
to Power Siphon Locus Mines at level 31 as soon as we acquire Charged Mines.


Off-hand gems
---------------------------------------------
Level Exsanguinate in every offhand socket you have.  You will want to corrupt them for a level 21 the moment you can, as every gem level
is an important power jump.  If you remember to do this early you won't have to wait as long later.


Vendor Search Strings
---------------------------------------------
Movement speed boots + BBB / GGG / GGB + gem levels
"b-b-b|g-g-b|g-[gb]-g|b-g-g|nne|rint|ll g|Earn"


Pre-Mine Gem Progression
---------------------------------------------
Level 4:  Buy Rolling Magma + Elemental Proliferation after Tidal Island.  Buy Flame Wall.  Shoot your Magma balls through the flame wall to get additional flat fire dmg.
Level 8:  Get an added damage support for whichever links you are able to find, either Added Cold Damage or Added Lightning Damage, then once you kill Brutus grab Combustion from vendor
Level 12:  Pick up Fire Trap for single target.  Link it with Trap and Mine Damage as soon as you complete Yeena's quest in A2


Act 2:
--------------------------------------------
Your links at this point should be Rolling Magma + Elemental Proliferation + Combustion for clear and Fire Trap + Trap and Mine Damage + Swift Assembly


Bandits
---------------------------------------------
In 3.25 the Bandits have changed and you have some flexibility.  I personally will be taking the 8% movement speed buff from Kraityn, but there isn't a wrong choice
here in my opinion.  If you'd like to be tankier, take +40 life from Oak.  If you find gearing up resistances more difficult, Alira is still a fine choice.  Choose the one
most likely to make your campaign experience more enjoyable.  If you are a new player, I'd recommend taking Oak and the +40 life.


---------------------------------------------
Transition to Power Siphon Locus Mines at level 31 when you acquire Charged Mines
---------------------------------------------


Act 4:
---------------------------------------------
Make sure you grab Grace and equip one from here on out.  You'll feel too squishy as you make progress into late campaign without it.  Periodically you'll want
to fish for better EVASION and/or ENERGY SHIELD bases as you can off the ground, prioritizing your Chest Piece.  This will keep you comfortably alive during the
remainder of the campaign.


White / Early Maps
--------------------------------------------
1) Fix your flasks, they are probably terrible.  You probably want Ignite immunity from a flask as I find this the most annoying damaging ailment.  Get a Jade flask,
this is crucially important, and ideally find one more flask with Increased Evasion During Effect.
2) Look for better bases.  The gear you had in campaign is almost certainly really bad.  T1/T2 bases have a lot of Evasion/ES since they reworked them.


ASCENDENCY ORDER
-------------------------------------------
1.  Ghost of the Deep  (go fast...)
2.  Stormy Seas
3.  Brine Bound (defense)
4.  Glacial Wave (defense + offense)
5.  Changing Seasons once you are able to self-chill (replace Glacial Wave)

Changing Seasons still felt good to me EVEN IF YOU AREN'T SELF-TRIGGERING.  I tested it by just wearing around a Winterweave + CotV in Settlers and
every time you get hit you will be chilled and instantly get 15-30% MORE damage / movement speed / attack speed.  I played for about an hour with this
just having a Winterweave on and it felt excellent every time it happened.  The other option is dmg/dr from Glacial Wave then transitioning once you get
a trigger setup going.


FREEZE - IMPORTANT
-------------------------------------------
Freeze is a critical thing to get right here or it will feel like dogshit to play.  Freeze duration is calculated based on the size of the hit relative to the
target's ailment threshhold, and as long as you are critting you will get Freezes guaranteed.  You need a 0.3s Freeze for it not to be discarded,
however you can get Freeze Duration from the tree (Winter's Embrace and  Elemental Focus) or from cluster jewels.  If you aren't reliably freezing
mobs path up to Winter's Embrace and take the whole wheel.


Critical Strike Chance
-------------------------------------------
Crit will be crucially important as it will gate your ability to Freeze and deal damage.  I wouldn't transition over to Exsanguinate unless you have Pob'd
that you will be getting at least 70% crit chance or you just won't be freezing enough.  Early on take Winter's Embrace to make this more comfy.  There
are excellent Critical Strike medium clusters available for cheap to help, and you can take or annoint really strong Crit nodes like High Voltage, bench or
get gear with Increased Critical Strike Chance for Spells (shield / caster weapons), Diamond flasks for conditional crit chance, Hatred Watcher's eye mods
with base critical strike chance, Assassin's Mark, and so on.

If you are having a hard time crit capping, use Hrimsorrow gloves and Increased Critical Strikes support to ease the transition.


Endurance Charges
-------------------------------------------
These are a really excellent defensive layer and will be important, particularly because we don't have Trickster's Spellbreaker/Escape Artist.  Get them from
either an Enduring Composure small cluster (probably what I will do) or from the Endurance Charge implicit on chests.  If you get it from the Chest you WILL
NEED the 100% charge mastery uptime or something like a Restless Ward to keep charge duration up.


IMPORTANT
Transitioning from Power Siphon to Exsanguinate
----------------------------------------------------------
Before transitioning you want to have acquired:
- Heatshiver
- a 5-Link minimum
- at minimum level 19 Exsanguinate, ideally 20 or 21.  gem levels are a massive amount of damage for spells.
- Ideally the correct spell modifiers on gear (+1 gem on weapon, +1 gem or high spell dmg on shield, spell crit chance)
- Kikazaru -OR- enough life regen that you don't kill yourself (250-300+)
- 100% Physical Conversion to Lightning AND/OR some Cold.  You get 50% from the Physical to Lightning support gem, another 25-60% from
  gloves, 40% from the Cold mastery, and 40% from Watcher's eye mods.  If you don't convert your damage to
  elemental Exsanguinate will do very little damage.

MAKE SURE YOU POB THIS TRANSITION FIRST.  It's not a straight forward swap and you don't want to drop from 100% -> 50% crit strike chance with
exsanguinate because you are trying to make it work with attack based gear that doesn't help out a spell.


IMPORTANT
Skill Tree Transition to Exsanguinate [88-93]
----------------------------------------------------------
You need Freeze Duration in order for Freeze to be an effective damage mitigation layer, particularly when
you get to late maps.  I've allocated Winter's Embrace and Physical Conversion as part of the transition
to Exsanguinate becuase YOU NEED 100% conversion combined (whether thats Lightning+Cold or pure Lightning)
for Cold damage to be effective.  At lower damage levels, particularly right when you transition, you will want Freeze
Duration.  This reduces the amount of damage needed to get the 1s Freeze from the ascendency

For example, to get the minimum 0.3s freeze on a mob you have to deal 5% of its health pool in a single hit.  With 100% increased
freeze duration (or ailment duration), you only have to deal 2.5% of its health pool to get the 0.3s freeze which is enough to
give you a full 1s with the Surfcaster ascendency.


IMPORTANT
Transitioning to Self-Chill
----------------------------------------------------------
There are a few things you HAVE to get correct or self-chill will feel terrible.  Don't skip any of these:

1) You need a trigger wand or sceptre.  Either base is fine, you want access to Caster mods on the item (spell damage, crit chance for spells,
+1 gems, etc).  You can use the benched mod in A9, this will work fine but your uptime will be 50%
2) You want to socket a level 1 Forbidden Rite + Lifetap in the trigger weapon
3) You HAVE to have a reasonable amount of chaos resists.  55%+ is ideal.  Otherwise you will kill yourself
4) You HAVE to have some amount of life regeneration or you will slowly kill yourself with FR damage.  Kikazaru is great for this, you can get
high flat life rolls on chests, shields, etc
5) You want Lethe Shade on the tree.  At 4s intervals this will give you 100% uptime.