23 months ago
 Level 98 MoM Crit Ball Lightning of Static Totem Hierophant3.23
Life: 3,50499%
ES: 625
Mana: 3,104263%
eHP:
92,073
Resistances: 75%/75%/75%/75%
Armour: 8,974
DPS: 23,488,010
Speed: 1.42
Hit Chance: 100%
Crit Chance: 88.82%
Crit Multi: 541%
Config:
Pinnacle, 45% Shock, 15% Sap, Frenzy, Power, Custom Mods
Bandit: Kill All
Pantheon: Soul of the Brine King, Soul of Garukhan
Gear

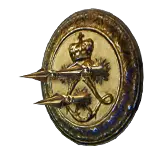
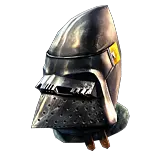
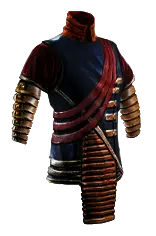
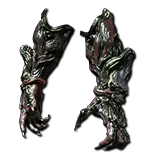
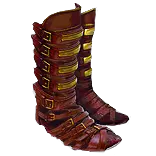


Gems
---------- ENDGAME ----------
Ball Lightning of Static
Spell Totem
Awakened Lightning Penetration
Increased Critical Strikes
Increased Critical Damage
Cruelty
Arcane Cloak
Arcane Surge
Sigil of Power
Increased Duration
Decoy Totem
Multiple Totems
Determination
Vitality
Creeping Frost
Arcanist Brand
Faster Casting
Assassin's Mark
Shield Charge
Faster Attacks
Flame Dash
Wrath
Divine Blessing
Inspiration
---------- LEVELING ----------
Summon Volatile Anomaly
Tree Preview
- 100% increased Charge Duration
- +25% to Critical Strike Multiplier against Unique Enemies
- Hits have 25% chance to treat Enemy Monster Elemental Resistance values as inverted
- +15% chance to Suppress Spell Damage if Equipped Helmet, Body Armour, Gloves, and Boots all have Evasion Rating
- 15% increased maximum Life if there are no Life Modifiers on Equipped Body Armour
- Increases and reductions to Maximum Mana also apply to Shock Effect at 30% of their value
- Recover 10% of Mana over 1 second when you use a Guard Skill
- 12% increased Mana Reservation Efficiency of Skills
- 60% increased Global Critical Strike Chance if you've Summoned a Totem Recently
- 5% of Damage from Hits is taken from your nearest Totem's Life before you
Notes
Build made by Tatiantel2
If you have any questions/suggestions - feel free to ask in chat on Twitch (streaming every day):
https://www.twitch.tv/tatiantel2


------ LOWER BUDGET / SSF VERSION OF THE BUILD ------
The lower budget pob:
https://pobb.in/IS8YzprB0-KW


------ HOW BALL LIGHTNING OF STATIC WORKS ------
This version of Ball Lightning has a cooldown of 1.5 seconds by default, with 3 Uses it can store.
This adds cooldown to your ability to summon Totems, and each Totem will have their own separate cooldown for casting the Ball Lightning skill, also we 3 Uses stored.
As soon as you summon a Totem, it will immediately have all 3 Uses available to spend. After spending all the Uses, Totem will have to wait for the cooldown until it can cast again.
The lower the cooldown is, the more DPS totems will do after initial 3 balls. This is why for this build we want to get a lot of "increased cooldown recovery rate" stat.
Normally cooldown of the skill starts after we cast the skill. But for Ball Lightning, because this skill has multiple Uses, the cooldown keeps refreshing while casting the skill.
For that reason, we don't need to invest in Cast Speed at all. With no Cast Speed investment, the Cast Time of each Ball Lightning from Totems is 0.69s (we still have 69% increased Cast Speed from tvaling nodes on tree and from Arcane Surge).
But the cooldown will definitely be longer than 0.69s (even with a lot of cdr investment).
So this cooldown is a downside of this build, but we build around this downside by not investing into Cast Speed at all, and going for other damage-scaling modifiers.

Also when Totem casts 1 Ball Lightning, the ball will exist for approx. ~2 seconds, and it will hit enemies in radius every 150ms, so it's a total of 13 hit per ball. The duration of the ball, or the hit rate of it CANNOT be affected by any modifiers.
This is why we DON'T need to over-invest in skill effect duration, or cast speed. It's always will be 13 hits per ball no matter what.
All less duration multipliers also doesn't affect BL of Static, so in theory it's also possible to use Less Duration Support with no downside, but we use better supports.


------ PLAYSTYLE ------
Mapping.
In maps we don't need to press many buttons, totems will do all the work.
Place totems in front of you, closer to the pack of monsters.
When encountering bigger pack of monsters - place Decoy Totems in the middle of a pack. Decoys have big AoE Taunt, so monsters will group around Decoys, and you and your BL totems will not get hit.
Against tankier Rare mobs (or when you need more damage) cast Assassin's Mark and Wrath Aura (temporary aura linked to Divine Blessing Support) after you placed all the totems.

Bossing.
Against tougher enemies the "rotation" of skills is as follows:
1. Place Ball Lightning Totems
2. Place Decoy Totems if not on cooldown (to not get hit and lock Boss in place)
3. Cast Assassin's Mark
4. Place Sigil of Power
5. Use Wrath aura (temporary aura linked to Divine Blessing Support) while inside of Sigil of Power circle - to improve it to the next stage

Arcane Cloak (or Steelskin while leveling) - just put it on Left Mouse Button, so that it automatically activates once it's not on a cooldown.

How Sigil of Power works:
Your char has to be inside of the circle created by Sigil of Power in order for totems to have extra damage. It doesn't matter where your totems are. The timing also doesn't matter - whenever you are in the circle ALL totems get
extra damage (all totems summoned before or after placing the Sigil). So you can freely walk out and back in the circle if needed - the extra damage is automatically reapplied once you're back in the circle.
Getting to maximum stages of Sigil of Power is fairly easy, because each cast of Divine Blessing Aura or Arcane Cloak immediately triggers +1 stage.


------ LEVELING ------
In "Tree" section at the bottom you can select different trees for different Levels to see which passives to take at each stage.
In "Skills" section you can see which skills to use at each Level. You don't need to use all the gems here if you don't have enough sockets in gear. Gems that are ok to not use marked with "(not important)" in "Skills" section.

As shown is Skills section we level with Holy Flame Totem and Flame Wall, this combination of skills can clear early acts pretty easily.
It is also possible to mule Sniper's Mark curse, which will increase damage of Holy Flame Totem even more. "To mule" means - you create a Duelist, and get to Submerged Passage waypoint with it, then Sniper's Mark will be offered
as a quest reward.

Switching to Ball Lightning of Static Totems - at around Level 32, once first Labyrinth is completed.
It is important to use exactly transfigured version of Ball Lightning - Ball Lightning of Static! In it possible to buy that from trade. If you play SSF - you can run Normal Labyrinth over and over again, at the end you use a Divine Font,
and sacrifice any blue skill gem for a random Transigured version of blue gem. Keep doing it until you get Ball Lightning of Static.

We're switching to full crit instead of Elemental Overload at around Level 67, after we complete 3rd Labyrinth, where we get perma Power Charges. When switching to crit, we stop using Conductivity Curse, and use Assassin's Mark instead.


------ IMPORTANT GEAR ------
The most important items in the build are: Shield with Shaper Influence and Boots with Shaper or Crusader influence.
On the Shaper Shield ilvl70+ it's possible to have a "+1 to maximum number of Totems" prefix. This gives us 35% more damage, and good QoL.
On the Shaper of Crusader Boots ilvl80+ it's possible to have a "15% increased Cooldown Recovery Rate" suffix. This also gives a very solid dps boost, since totems will cast Ball Lightning more frequently.
On your Belt it is important to bench-craft "12% increased cooldown recovery rate". In order to unlock this craft for your bench, you need to keep doing Jun missions, kill Syndicate members, drop veiled Belts from them,
and eventually after unveiling few Belts at Jun, you'll unlock the craft.
On Body Armour we need to have Eldritch implicit "Gain a Frenzy Charge every 15 seconds". In order to get this modifier, we need to spam Lesser Eldritch Embers on a Body Armour until we get the mod. We need this mod in order to have
permanent Frenzy Charges. Because in combination with the "100% increased Charge Duration" mod from Charge Mastery on passive tree, Frenzy Charges will last 20 seconds, and we get a new one every 15 seconds.


------ EXTRA DEFENSIVE LAYERS FOR HARDCORE ------
Since the damage on this build is very high, it is ok to switch the Curse from Assassin's Mark to Enfeeble - it will add a great amount of survivability.
Also we can add additional Elemental Ailment mitigation - we can roll on Gloves implicit (with Eldritch Embers) "Chance to Extinguish enemies oh hit" instead of chance to Unnerve. Extinguished enemies cannot apply any elemental ailments.


------ FAQ ------
Q: Which Pantheon power, Bandit choice?
A: Bandits: kill all. Pantheon: Soul of Brine King, Soul of Garukhan.

Q: Is it ok to use Multiple Totems Support in main totem link?
A: No. The Support itself will provide only 20% more overall damage, but will reduce hits of each totem, which reduces Shocks they apply. So in comparison this Support is a big dps loss over any other option.
    Also using Multiple Totems Support in main skill link reduces mapping speed, because we can place totems only in 3 different spots (3x2 totems), instead of 4 different places (4x1 totems), so overall coverage of damage reduces.

Q: (3.23) What about using Spectres from Corpses that we can buy from Wildwood?
A: These Spectres can provide a lot of powerful buffs, so using them can be really good. But I personally don't like managing Spectres life, being worried about them not dying, resummoning them from consumable corpse. So I just don't use them.
    But, like I said, if you feel comfortable with Spectres - it's a good idea to use them of course.

Q: Soul Mantle with Self-Flagellation is a good option?
A: Combo of Soul Mantle, Self-Flagellation, Viridi's Veil and Coward's Legacy with Pain Attunement from tree. It gives total of 50% more damage, and 55% less Effective Hit Pool. Right now the build has very good damage, and good defences.
    Swapping to Soul Mantle will make it into: great damage and bad defences. I think it's not worth it, since instead of well-rounded build we're gonna get closer to glass-canon'ish build.

Q: Can we use Eternal Blessing Support for Determination Aura to not reserve mana?
A: We use Divine Blessing Support on Wrath Aura. It's only possible to use 1 Blessing.

Q: Do we really need Determination? It doesn't improve "Phys Max Hit", and we only have 10k Armour anyway.
A: Armour is more effective versus smaller / medium phys hits. And in maps smaller phys hits is the most common type of damage. While Determination doesn't help vs big one-shots, it is extremly effective for mapping, and vs Bosses auto-attacks.
    Determination also gives out Totems (and Decoy Totems) more Armour, so it makes them more durable too.

Q: How does Sigil of Power work - do my totems need to be in the circle?
A: Your char has to be inside of the circle created by Sigil of Power in order for totems to have extra damage. It doesn't matter where your totems are. The timing also doesn't matter - whenever you are in the circle ALL totems get
    extra damage (all totems summoned before or after placing the Sigil). So you can freely walk out and back in the circle if needed - the extra damage is automatically reapplied once you're back in the circle.
    Getting to maximum stages of Sigil of Power is fairly easy, because each cast of Divine Blessing Aura or Arcane Cloak immediately triggers +1 stage.


Build made by Tatiantel2
If you have any questions/suggestions - feel free to ask in chat on Twitch (streaming every day):
https://www.twitch.tv/tatiantel2