21 months ago
 Level 100 Crit Flicker Strike Berserker3.22
Life: 4,042120%
ES: 146
Mana: 53
eHP:
59,457
Resistances: 81%/80%/81%/82%
Armour: 91,031
DPS: 90,855,720
Speed: 29.08
Hit Chance: 100%
Crit Chance: 60.14%
Crit Multi: 426%
Config: Pinnacle, Frenzy, Power
Bandit: Kill All
Pantheon: Soul of Lunaris, Soul of Gruthkul
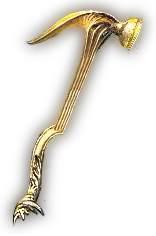
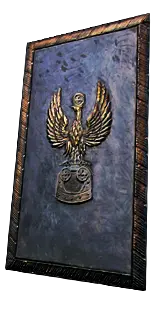
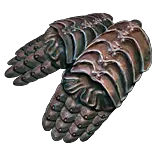
Gear


Gems
Divergent Flicker Strike
Divergent Rage
Increased Critical Damage
Impale
Awakened Brutality
Divergent Trauma
Divergent Determination
Anomalous Pride
Anomalous Malevolence
Enlighten
Phantasmal Vengeance
Culling Strike
Anomalous Power Charge On Critical
Blood Rage
Anomalous Cast when Damage Taken
Enhance
Anomalous Assassin's Mark
Arrogance
Anomalous Precision
Berserk
Phantasmal Leap Slam
Faster Attacks
War Banner
Unhinge
Divergent Rage
Increased Critical Damage
Impale
Awakened Brutality
Divergent Trauma
Tree Preview
- You take 30% reduced Extra Damage from Critical Strikes
- Immune to Bleeding if Equipped Helmet has higher Armour than Evasion Rating
- Immune to Poison if Equipped Helmet has higher Evasion Rating than Armour
- Nearby Enemies are Intimidated while you have Rage
- Non-Vaal Strike Skills target 1 additional nearby Enemy
- You take 30% reduced Extra Damage from Critical Strikes
- 10% chance on Hitting an Enemy for all Impales on that Enemy to last for an additional Hit
- 10% more Maximum Physical Attack Damage
- Corrupted Blood cannot be inflicted on you
- +1% to all maximum Elemental Resistances if you have Reserved Life and Mana
Notes
Alternative Gearing Options:
	Some of these options are really good for gearing but are ultimately not used for one reason or another.
		[Amulet] Defiance of Destiny
			The best defensive option available. Originally this build was drafted around it but there's no confirmation if it will go core just yet. Defiance of Destiny makes the build immortal for anything short of a one-shot. For Juggernaut, Defiance of Destiny comes with a huge damage penalty due to forced mana reservation annoint.
		[Amulet] Ashes of the Stars
			Stacking quality for Divergent Flicker Strike is amazing but that hardly justifies the price. Mana reservation efficiency of at least 12% allows you to switch up the annoint which helps Juggernaut the most.
		[Amulet] Aul's Uprising
			Provides the ability to slot an additional 25-35% reservation aura that can provide a decent amount of damage or utility. More expensive than Dragonflight's, but cheaper than Ashes.
		[Amulet] Replica Dragonflight's Fang
			Cheap option that provides damage (+3 to Flicker Strike gems), reduced attribute requirements for easier gearing, and mana reservation efficiency. Best budget option.
		[Gloves] Tanu Ahi
			A good choice for single target damage and being unique gloves they are easy to double corrupt in bulk. The main problems with Tanu Ahi are the lack of life rolls, and the fact that the gloves get completely shut down if the map rolls "Cannot Leech".
		[Helmet] Abyssus
			Probably the best melee damage helmet in the game. The main reason Abyssus gets dropped is not because of the increased damage taken, but because there's an option to become Poison immune through a Armour/Evasion mastery. Reflected self-poison is a very real problem and switching to a rare helmet makes gearing easier in the long run.
		[Weapon] Frostbreath
			Frostbreath is good for trauma builds that struggle to sustain trauma, but what really kills the item is the low critical strike chance. If the build used Precise Technique it would be a more interesting choice.
		[Armour] Farrul's Fur
			Farrul's Fur becomes obsolete too quickly to recommend it. The investment is better spent rushing for a Watcher's Eye with "Unaffected by bleed while affected by Malevolence" and The Red Trail, which should only cost a fraction of the price of a 6-linked Farrul's Fur. It's still a decent option for the Default and Lategame version.
		[Armour] The Fourth Vow
			A popular choice for armour stacking builds that use Divine Flesh. Ultimately, Doppelganger's Guise is the armour of choice because it allows the build to push more damage while still interacting positively with Divine Flesh.
		[Flask] Progenesis
			Great defensive option, but expensive. The build has just enough room to fit Progenesis if you are willing to trade damage (Lion's Roar, diamond flask, or quartz flask). The magic finding version in particular could make good use of it, so don't hestitate to grab it if you can afford it.
		[Gloves / Helmet / Shield] Spell Suppression Gear
			Spell suppression is a really good stat to have, specially for bossing, but pursuing 100% comes with an opportunity cost. Since this is primarily a speed mapping build, the choice is made against it.

FAQ:
Can I leaguestart as this build?
	Yes, kinda. This build leaguestarts as a generic boneshatter build, and only swaps to flicker strike once a stable source of frenzy charges is obtained (lvl 51 Terminus Est, or lvl 70 Ceaseless Feast). Most flicker strike variants always leaguestart with a different skill gem, so no surprises here.

What kind of build is this?
	This build is a speedmapper. It's meant to clear maps as fast as possible. It can also used for hybrid magic finding (40-50% quant / 60-120% item rarity) in T16 heavily juiced content.

What content is it good for?
	Alch-and-go strategies, strongboxes, shrines, expedition, abyss, breach, harbinger, ritual, mirror of delirium, harvest, incursion, lab running. The more expensive versions can eventually scale and excell at more difficult content such as uber lab running, 5-way timeless conflicts, wave 30 simulacrum, or 100% delirious maps with Wandering Path.

What content is it bad with?
	(Uber) Bossing, beasts, essences, legion, blight, delve, or anything that requires you to attack in place, follow a path, or kill a target in an instant. The more expensive versions can attempt some of this content, including guardian boss farming for Maven invitations, but uber bosses remain outside of the scope of this build.

Can this build do Uber bosses?
	Nope, you've been warned.

Is this build SSF friendly?
	Not really. Juggernaut comes close, but the build drafts a very specific Watcher's Eye mod and the Red Trail for the expensive options.

How does this build work?
	This build uses the Trauma support gem to add absurd amounts of flat physical damage by combining Juggernaut's Untiring recovery and Berserker's Blitz attack speed. With damage solved, the build is free to invest into more defensive options, resulting in an incredibly tanky Flicker Strike build.

Can I play this build as a Raider/Slayer/Jugernaut/etc.?
	You can only play this build as Berserker (with Untiring) or Juggernaut (with Blitz), provided you have the appropiate Forbidden Flesh/Flame jewels. Slayer and Raider would have to solve the attack speed / recovery problem in a very different manner. Charge stacking Slayer has so far showed really good results.

What's the difference between Juggernaut and Berserker? Which is better?
	Juggernaut has better defenses in general, but is constantly lagging behind Berserker in terms of damage. To compensate, Juggernaut has to invest more resources into [Increased Skill Effect Duration], which ends up increasing the time spent ramping up. Berserk does not have this problem, and easily fixes its low EHP numbers with elemental flasks (ruby/topaz/sapphire), or trades them for even more damage than Juggernaut.

Why is trauma self-hit damage so low/high?
	This build locks trauma damage to about 50% of unreserved life as a design choice to avoid problems with the common monster mod "Cannot regenerate life above 50%". Ideally you'd lower the gem one level further just to be on the safer side, especially if some of your defenses come from flasks.

How do I use this guide?
	Check the Tree, Skills and Items tabs and make sure you match the passive tree sets, skill sets, and item sets. If you see your DPS "jump" up or down drastically there's something wrong and you probably mismatched the sets. If you are struggling with Trauma, make sure you constantly check [Calcs] -> [Flicker Strike] -> [Skill type-specific stats] -> [Self hit damage] and double check that you are not taking over 50% of your unreserved life in damage.

What pantheons should I use?
	For major god use Brine King for freeze immunity until you can get ailment immunity from gear. Switch to Lunaris afterwards for the reduced elemental damage taken if hit recently. For minor god use Grukthul in general, as it is a very reliable source of physical damage reduction.

What enchants should I use?
	For helmet enchant use either "increased Berserk buff effect" or "increased Assassin's Mark curse effect", the former is usually in high demand. For gloves, "Commandment of Ire" is absolutely amazing and borderline mandatory to make the build not feel clunky, the extra hits help with self-bleed and allow for Blitz charges to stack faster. For boots, mana cost reduction is great to have, and becomes mandatory if you are trying to magic find with Ventor's Gamble rings.

Why only X total life? Are all Flicker Strike builds complete glass canons?
	The default and lategame variants rely on a lot of uniques to facilitate gearing and frenzy charge sustain. That said, this build eventually becomes incredibly tanky against all forms of damage by stacking sources of reduced and less damage taken, gains a regeneration rate of "yes", and can withstand a lot of punishment compared to other glass canon flicker strike variants. It's not quite immortal but it comes very close to it.

Why does this build not use Awakened Multistrike? Isn't it good for flicker strike?
	Multistrike is a necessary evil at low investment. It's used for frenzy charge sustain and trauma handling. Awakened Multistrike would just be a very expensive DPS loss.

Why does the build not use Ancestral Protector/Warchief in the more expensive setups? Why use them in the first place?
	Totems are very useful early on to boost the attack speed and damage of the build when using superior Trauma, however once the build drops swaps to Divergent Trauma it's better to just drop them entirely.

Can I use "Damage recouped as life" instead of the Forbidden Flesh/Flame jewels?
	You'd need 100% damage recoup to substitute the Forbidden jewels. This is incredibly difficult considering the gear options available. Anything less and the build would not work. Stacking recoup is not particularly useful if you are already using Untiring properly.

Why do I sometimes stop attacking entirely?
	You are running out of frenzy charges or mana. Minimum Frenzy charges don't count. There's several situations that can contribute to your build not generating enough charges, including enemies being "Evasive" or blocking your attacks, you being blinded, monsters stealing charges on hit, etc. It's recommended to keep a fully leveled 20/20 Frenzy gem with you to deal with these situations as the damage of this gem matches Flicker Strike damage profile.

Why not use Farrul's Fur?
	Farrul's Fur represents a big investment that is ultimately not needed. The cost of a 6-linked Farrul's fur is better spent on The Red Trail boots and a random Watcher's Eye with unaffected by bleeding.

Why do I sometimes run out of mana?
	With the CWDT + Mark setup enemies attacking you can sometimes trigger the mark too often causing you to go out-of-mana before you start attacking. This should not be a problem 99.9% of the time, specially after you invest into damage recouped as mana from the passive tree. You may also need mana cost reduction in your flasks and boots enchant if you are playing a magic finding versions which lacks the craft on their rings.

Why do you use hydrosphere on the CWDT Default setup?
	Hydrosphere can potentially generate frenzy charges vs. marked targets. Flicker strike can also hit the sphere every 1 second, for an additional shot at a frenzy charge. It's not much but it helps.

Why switch from Hydrosphere to Enhance support then?
	A level 4 Enhance gives Poacher's Mark an additional +6% chance to gain a frenzy charge on hit vs. marked targets. The extra chance is way more consistent than hydrosphere. Eventually this gem will be repurposed to provide utility through alternate quality gems, so it's very useful to get anyway.

Can I use a level 3 Enhance support?
	Yes. You can start with a level 3 Enhance if you can't afford the higher level gem. It's better than Hydrosphere, but a level 4 Enhance is still worth the long term investment.

Why is Vaal Molten Shell / Immortal Call / Phase Run slotted but not enabled?
	To avoid padding DPS or EHP. Immortal Call, for example, drastically lowers self-hit damage, which is good but if you where to balance trauma self-damage around it you would die whenever it goes on cooldown. Berserk buff effects on trauma can be safely ignored until the build reaches the attack speed cap without it.

Can this build sustain "permanent" Berserk buff?
	It's possible but not passively, unlike Kaom's Spirit would. The choice of gloves enchant (Commandment of Ire) paired with Crave the Slaughter and Phantasmal Vengeance, can enable a rage generation rate of +4 rage per second with minimal interaction. Attacking with Divergent Rage can further boost rage generation to +7 rage gained per second, for a total of +11 rage/s. This ends up being enough rage generation to use Berserker as soon as it comes off cooldown.

Why swap Vaal Molten Shell for Divergent Immortal Call?
	Vaal Molten Shell is nice as it provides both an active and a passive guard skill, but it becomes less useful when you drop multistrike because most of the guard skill will be consumed blocking self-hit damage. Without multistrike, it's better to make the switch to (divergent) Immortal Call.

Why do I randomly die during maps?
	Either trauma damage or elemental damage, most likely. You can read the death message to confirm if it was trauma self-damage (it will mention sudoku). With that in mind, here's a long list of stuff that can contribute to your death:
		* [Map mod] Reflects physical damage
		* [Map mod] Cannot regenerate
		* [Map mod] Reduced life recovery
		* [Map mod] Reduced aura effect
		* [Map mod] Less armour
		* [Map mod] Monsters can steal charges
		* [Map mod / Debuf] Temporal Chains (more effect duration = more trauma stacks)
		* [Map mod / Debuff] Vulnerability (increased physical damage taken)
		* [Debuff] Increased damage taken (multiple sources, notably Delirium, Beyond, and Essences)
		* [Monster Mod] Reduced life regeneration (certain essences and redbeasts)
		* [Monster Mod] Cannot regenerate life above 50% (common mod)
		* [Monster Mod / Boss Mechanic] Cannot regenerate life
		* [Altar] Reduced flat armour and evasion
		* [Altar] Reduced physical damage reduction
		* [Altar] Reduced defenses per frenzy charge
		* [Altar] Reduced recovery per endurance charge
		* ... And of course, just large amounts of incoming damage.
	The reason as to why has to do with how the build interacts with trauma. If anything upsets the mitigation, recovery, and self-damage balance you'll (very) quickly notice it. Some of this problems can be built around (ie: unaffected by curses, shock immunity), but some have to be consciously avoided, like map mods.

How can I lower trauma damage?
	Sometimes, missing a little bit of armour (from bad gear rolls) can result in the build not being able to use the recommended settings. Assuming you follow the build guide correctly, the only real option you'll have left is to lower the level of the Trauma support gem. This guide provides the recommended Trauma gem levels, but if you are struggling with self-damage lower the gem further by vendoring the gem with one orb of scouring (the support gem cannot be corrupted). Remember that flasks contribute a decent amount of armor to your build but are unreliable, so you shouldn't plan around them.

How important is Fortify? Should I use the fortify gem or passive tree nodes if I can't get it on my weapon?
	It's very important. Reduced damage taken is a more damage multiplier for this build because it allows you to use higher Trauma gem levels. If you have to, swap a support gem over taking the passive points. The Fortify gem gives 19% more melee damage at max level, making it a solid gem choice. You can also use a large mace/scepter cluster jewel to provide fortify on hit if you are using a mace.

Help, how do I level this build past level 93? (I keep dying)
	Use the Wellspring of Creation atlas notable, stop juicing your maps, stop clicking altars, and lower the max level of your trauma support by 2 or 3 gem levels. Wellspring of Creation in particular helps a lot and does not drastically affect your mapping time because the build.

Can I use Headhunters / Inspired Learning / Behead with this build?
	No, the moment you steal Soul Eater you'll be dead within a second. Soul Eater extra attack speed scales Trauma stacks way too high and the build can't handle it.

Can I use Taste of Hate / Lightning Coil / Dawnbreaker and convert physical damage to elemental damage and increase my defenses?
	Short answer is you should avoid it. In practice you can use a little bit of physical damage taken as element (8-15% per element) as pseudo "physical damage reduction". This helps armour to be more effective against big hits. However do note that Untiring only works for physical damage and the elemental damage conversion will end up getting you killed if you stack it high enough.