3 months ago
 Level 96 Crit Rage Vortex Berserker3.25
Life: 5,782120%
ES: 65
Mana: 32
eHP:
99,105
Resistances: 90%/90%/90%/60%
Evade: 61%
Armour: 55,174
Evasion: 10,355
DPS: 45,010,600
Speed: 12.71
Hit Chance: 100%
Crit Chance: 86.58%
Crit Multi: 490%
Config:
Frenzy, Power, Custom Mods
Bandit: Kill All
Gear
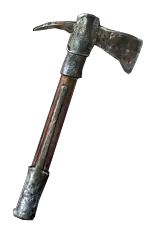
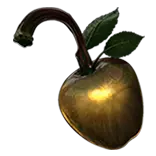


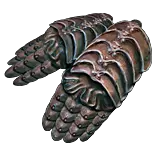
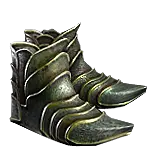


Gems
Rage Vortex
Increased Critical Damage
Overexertion
Awakened Melee Physical Damage
Pulverise
Fortify
Leap Slam
Arrogance
Precision
Pride
Blood and Sand
Determination
Berserk
Ancestral Cry
Intimidating Cry
Infernal Cry
Enduring Cry
More Duration
Vengeful Cry
Forbidden Rite
Assassin's Mark
Vulnerability
Battlemage's Cry
Tree Preview
Tattoo of the Kitava Blood Drinker
0.5% of Attack Damage Leeched as Life
Tattoo of the Tasalio Warrior
5% chance to Blind Enemies on Hit with Attacks
Tattoo of the Tukohama Warcaller(x2)
8% increased Warcry Cooldown Recovery Rate
- +1% to all maximum Elemental Resistances if Equipped Helmet, Body Armour, Gloves, and Boots all have Armour
- 30% increased Damage while in Blood Stance
- 15% increased Area of Effect while in Sand Stance
- +25% to Critical Strike Multiplier against Unique Enemies
- 10% more Skill Effect Duration
- +15% chance to Suppress Spell Damage if Equipped Helmet, Body Armour, Gloves, and Boots all have Evasion Rating
- Warcries grant 1 Rage per 5 Enemy Power, up to 5
- +7 to Maximum Rage
- Inherent loss of Rage is 20% faster
- +1% to all maximum Elemental Resistances if you have Reserved Life and Mana
- Warcries Debilitate Enemies for 1 second
- Warcries cannot Exert Travel Skills
Notes
Build Overview (2 trees/gear sets for Armor & Suppression versions)

	This build primarily aims to maximize the buff effect of Vengeful Cry, which requires taking a savage hit in order to activate
		We force it's activation via forbidden rite (and having less than 65% chaos res with Aspect of Carnage, 62% without) which counts as a savage hit on ourselves (automated through Battlemage's Cry)
		Using the Chieftain's Sione, Sun's Roar Forbidden combo, or using minimum power warcry mastery, this always pushes us over 100 rage and crazy rage regen
		Because we're already investing in Warcry buff effect, Auto Exertion is a waste (since it removes the buffs). Therefore we use the Eternal Apple shield
		To properly trigger warcries with the shield, you need to use the Enduring Composure cluster jewel notable, which generates an endurance charge every second if you've been hit recently (including hitting ourselves)
		You also need 2 sources of minimum Endurance Charges so that your minimum is only 1 lower than your maximum.

		With all of our warcries/buff effect, we use:

			Ancestral Cry: +6% all max res as well as extra over cap resistance (in the upper left socket so it procs first)
			Enduring Cry: 25% life regen
			Intimidating Cry: +45% movespeed
			Infernal Cry: 60% phys as extra fire damage (can swap for Seismic Cry to add 60% MORE armour, but loses dps)
			Battlemage's Cry: +6% to BASE Critical Strike Chance


Ancestral Cry, Intimidating Cry, and Infernal Cry are placed in the shield to proc once every 4 seconds each (warcry cooldown must be below 4 seconds, achieved through one cd passive in the warcry wheel, or 2 tattoos)

Battlemage's Cry is linked to a lvl 1 forbidden rite (this must be the first link clockwise from the Battlemage's cry gem so it procs on your first hit), vulnerability, and anything else you'd like (I do assassin's mark with whispers of doom anoint for more dps)

Enduring Cry and Vengeful Cry are linked with More Duration Support and are self cast. Vengeful Cry will be able to be cast every 3rd hit via your Battlemage's Cry Forbidden Rite trigger.
		You can either link Urgent Orders Support here (preferable if you don't have the duration wheel/going pure Armor), or War Banner for 20 seconds of 20% more damage (but also another button)
		Enduring Cry is important to self cast so you can force your shield to proc warcries (ancestral cry) without needing an enemy to hit. This allows you to keep up the max res during boss phases.


WHY RAGE VORTEX

		Besides the obvious synergy for rage and Rage Vortex, Rage Vortex also synergises with War Cries and duration
		The Rage Vortex only counts as a single attack for the purposes of exerts, so even though our intimidating cry only grants 2 exerted attacks double damage every 4 seconds (it's proc rate), we still reliably get the bonus every attack
		Rage Vortex also lasts longer with the duration wheel, which gives the skill basically 100% uptime and allows you to manually dodge or sit on the opposite end of the screen
		Rage also scales AoE for Rage Vortex, so it feels very good for clear.


PURE ARMOUR (starter) VS SUPPRESSION ($$$)

	The Armour version of this build has:
		MUCH CHEAPER GEAR
		20% more dps
		A bit more phys max hit (from pure armour bases)
		10% more HP
		Easy source of Ignore Phys Damage Reduction (with 2 large clusters)
		Many extra suffixes, jewels, and megalomaniac options (though, it will be difficult to convert these suffixes into damage).

	Suppression Version has:
		Suppression
		Decent Evasion (better than it seems since we have literally no other avoidance)
		HUGE QoL via the duration passives by Magebane (much longer duration of warcries and banner)


AURAS

		I highly recommend using Determination and Blood and Sand, and Precision linked with arrogance. Then you can take either Pride or Grace (if you're suppression). Pride makes pob look better but during actual boss fights, I'm not sure how much of the time you're in range.
			Since you can often throw the Rage Vortex and then run away, it might make less sense to run Pride and should instead swap to Grace, which gives the huge benefit of damage avoidance (our only defensive weakness).

		There is a third option, which is to run Herald of Purity and Flesh and Stone, swapping in Rallying Cry instead of a different Warcry (or just adding it if you want to press another button).
			This is the highest dps set up but requires 1 or 2 additional sockets and be in super close range to the boss. Might be best if you have an unset ring or using war banner is bad

MANA VS BLOODMAGIC

		I used bloodmagic for a long time. The most annoying part of the swap is that you needs rings with BOTH - mana cost of non-channeling skills AND +1 to minimum Endurance Charges.
			You can find rings that are unveiled and therefore have an open slot to craft the other mod (much easier to do this when you are doing the Pure Armor version of the build as you care less about other ring suffixes)
			Alternatively, you can use homemade rich man Kalandra Jewellery with 1 doubled mod on each ring and other good stats (definitely the long term plan).

		Other than using more auras, swapping away from bloodmagic gives you access to the +1% max res from the aura mastery.


DEFIANCE OF DESTINY

			This amulet is very good to have, but not essential. Since we lack any avoidance, it's difficult to deal with rapid hits. Before I got this amulet I hit a leveling wall around lvl 93 (though, this was before swapping to suppression, jade flask, and upgrading armor)
					After getting the amulet I immediately leveled to 95. Swapping to suppression meant I only died to uber bosses and bad T17 map mods.
			You can try a different amulet if you have a jade flask/evasion scaling or lots of life gain on hit, but I wouldn't recommend it otherwise (for pushing ubers, I mean).


FLASKS AND HUNTER BELT

		We can get 100% uptime on utility flasks with the mod "gain a flask charge on critical strike". This mod shares a global cooldown with all other sources of this effect (including those that can roll as a flask prefix).
				The cooldown is 0.100s, or 10x per second. Since our hit rate is so high, this should be stacking very reliably, generating 8-ish charges per second. With 50% charge recovery on each flask, this should be enough to keep flasks basically always up
				You can use a tincture to supplement your flasks if you have a source of phys damage leeched as mana (jewel is easiest). this will help the flask uptime. However, regular old phys damage gets shafted by tincture options so there's not a ton of good choices.

		Crafting the belt:
			1) buy a stygian with T1 life, 2 open prefixes, and 1 open suffix (this is a 3 mod belt, so it's normally easier to find one with T1 life and 3 suffixes and then anul 1 suffix). This step costs like 10c
			2) slam a Hunter Exalt after using the crafting bench to craft a random suffix. If it hits T1 % life, keep. Otherwise, sell it for 99% the cost of the Hunter Exalt and repeat Steps 1 and 2.
			3) craft "prefixes cannot be changed" and use harvest reforge crit. This is always result in the flask charge on crit mod
			4) craft "prefixes cannot be changed" and use harvest to reforge chaos (chaos res, keeping in mind you must have below 65%) or phys (ignore PDR)
			5) craft "can have 3 crafted modifiers" and "prefixes cannot be changed" and use a veiled orb, hoping it doesn't remove the previous craft (if it does unveil and exalt slam. if it doesn't look good, repeat Step 4)
			6) block trap throwing speed and unveil (aiming for hybrid resistance). If you don't get resistance, pick cooldown reduction and sell the belt to some CoC build for mega cash.
			7) craft on your final chosen suffix


CHANCE TO IGNORE PDR
I have this in 4 different spots in pob, but you only need in 2 sources total. This mod is important if you want to do bosses or tackle extra map mods (though I think getting close to 90% is good enough given budget constraints)

	You will always get 50% from Iron-Breaker Large cluster notable.
	The other will come from
		1) Your Megalomaniac with a second Iron-Breaker node
		2) Eater of Worlds Glove implicit
		3) Hunter Stygian (reforge phys has 50% chance to give ignore PDR)
		4) Tincture Suffix
		5) A second Large Cluster Jewel with Iron-Breaker