2 years ago
 Level 12 Hybrid Absolution Occultist3.23
Life: 7080%
ES: 5440%
Mana: 114
eHP:
2,173
Resistances: 6%/6%/0%/13%
Evade: 35%
DPS: 331
Speed: 1.84
Hit Chance: 100%
Config: Boss, 15x Wither
Bandit: Kill All
Pantheon: Soul of the Brine King, Soul of Gruthkul
Gear



Gems
Rolling Magma
Elemental Proliferation
Holy Flame Totem
Flame Wall
Arcane Surge
Flame Dash
^^^^^^^^^^^^ GET RID OF THIS AT LVL 12 ^^^^^^^^^^^
Absolution
Added Lightning Damage
Minion Damage
Frostblink
Arcane Surge
Clarity
Notes
Guide by Allie
https://www.twitch.tv/Allliee_
https://www.youtube.com/c/Alliee

There will be a Midgame Upgrade guide on how to go from this to a 30-50 Div budget released on my Youtube shortly after 3.23 launches.


Useful Uniques while leveling:

Mark of Submission IF its less than 3-5 Chaos
Praxis only before Eldritch Battery swap

Act 1


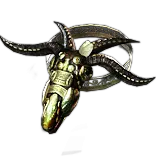
Look for MS boots in town & use 2 wands. 3.21 Changed wand base types, Goat's Horn are now the best due to the added fire implicit.
Look for BBR & BBB on anything in town before going to Coast. If no BBR or BBB then BB 2 link minimum.
Look for BBR on anything for Absolution swap at level 12. Just keep it with you if you cant use it until then.
If you can obtain a Vaal Summon Skelleton it would make leveling a lot faster. You save up the charges for every Act Boss and they will melt.

Take Rolling Magma  from Tarkleigh after killing Hillock, link it to Arcane Surge. Leave Arcane Surge at Level 1.

>>>>Please make sure you have 2 mana flasks before Brutis and Merveil or you might have a bad time with mana<<<<
>>>YOU WILL NEED 2 TRANSMUTES FOR LEVEL 12 MAKE SURE YOU SAVE TWO TO BUY ABSOLUTION & ADDED LIGHTNING DAMAGE<<<

>>Note on Rolling Magma usage<<
Dont hover on the enemies when casting, instead cast it with your cursor right infront of the monster.
This will make the bounces super tiny allowing for 2 hits per mob depending on their hitbox.
This is effectively a 2x dmg increase. Its not always easy to do but should be easy on Brutis due to his large hitbox.

Level 4
After Mud Flats is over and you are in The Submerged Passage, waypoint back to The Coast waypoint and go get the medicine chest from Tidal Island.

Take Flame Wall from the Egg quest reward and buy Holy Flame Totem from Nessa.
Take Frostblink. Keep Arcane Surge at Level 1 and link it to Frostblink and Flame Wall.
Take Elemental Proliferation and link it to Rolling Magma and Holy Flame Totem. Prioritize Rolling Magma first.

Use Flame Wall then cast Rolling Magma towards enemies, make sure it goes through the Flame Wall to gain its bonus damage.
Use Holy Flame Totem on any Rare mobs and on Bosses, no need to cast it on anything else.

~Level 8-9

Killing Brutus: Put Holy Flame Totem down and make sure there is a Flame Wall for the projectiles to go through before they hit Brutus.
Put your cursor close to your character and spam Rolling Magma through the Flame Wall. Dont namelock onto Brutus, you want to make the projectile do small bounces.

In town: Take Minion Damage Support and start leveling it for level 12.
Buy Clarity from Nessa.

Level 12

>>>Make sure you have upgraded Mana Flasks before the end of Act 1.<<<
The Absolution mobs are a bit squishy at Gem Level 1 & your cast speed is low so maintaining high uptime on 3 Sentinels while fighting Merveil will be mana intensive.

Buy and swap to Absolution once you hit level 12.
Buy Added Lightning Damage from Nessa.
Keep Clarity at Level 1.

Your links are now Absolution - Minion Damage - Added Lightning Damage

Drop Rolling Magma, Elemental Proliferation, Flame Wall, Holy Flame Totem. You just need Absolution & its links, Flame Dash, Arcane Surge, Clarity.

Start looking for wand upgrades, ideally use the Added Lightning Implicit wands but if you find a good upgrade on a different base it is fine as Absolution has 200% Effectiveness of Added Damage.


Act 2

BANDITS: Kill all, +2 passive points is the only option you want in this build.

Level 16
Buy Herald of Purity & socket it anywhere, dont link anything to it.
Take Concentrated Effect as your quest reward and keep it for when you get a 4-link.

Level 20
Start looking for the Calling Wand basetype that starts dropping at Level 20. This wand can roll minion modifiers and is worth picking up to ID.
If you find yourself having a very large amount of Alterations you can try to use a few on a Blue Quality Calling Wand to try and get a low tier Minion Damage or Minion Cast Speed roll.
Dont use Alterations until the start of Act 4 as you will need a lot of them to buy gems in Act 3.

Level 25
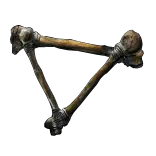
At Level 25 you also can start dropping Bone Rings.
Look for the Minion Damage and the hybrid Minion Attack & Cast Speed rolls on Bone Rings.

Go pew pew Act 2.


Act 3

Start looking for:
RBBB for Absolution - Minion Damage - Added Lightning Damage/Physical to Lightning - Concentrated Effect
RGG for Shield Charge - Faster Attacks - Momentum by the end of Act 3.
Pick up all Yellow items, you are going to need lots of Alterations.


Level 24
Take Purity of Elements from the quest reward.
Buy Convocation & Conductivity from Clarissa.

Put Convocation on your Left Click, this will cause all of your minions to be summoned to your position every few seconds.
The Sentinels of Absolution tend to AFK and attack mobs off-screen as you are running. This ensures they will always be near you attacking what is on screen.

Use Purity of Elements along with Herald of Purity. If you feel like you have mana problems, you can drop Herald of Purity.
Cast Conductivity on any Bosses for more damage.


Go to the Library and do the quest for Siosa
From Siosa buy: Determination, Vitality, Divine Blessing, Generosity, Wrath and Physical to Lightning. Start leveling them.
Get rid of Added Lightning Damage and replace it with Physical to Lightning on Absolution.

Buy Shield Charge & Faster Attacks + Momentum. Use this as your main mobility tool and you can use Frostblink to cancel out of it early & for gaps.
Momentum does work with Shield Charge.

You should swap to a Shield now as Spell Damage doesn't benefit your Minion's Absolution cast and their damage will start taking over.
Ideally, use a Bone Shield base over other bases if you can find one to benefit from the Minion Damage implicit.
Swapping to a shield is going to allow you to Shield Charge which is the fastest mobility you can get.

Optional Gems from Siosa:
Buy Steelskin and put it on left click or right click depending on how you prefer to use Convocation for a defensive layer.


Act 4

Take Spell Echo as a quest reward at the end of Act 4.
Replace Concentrated Effect with Spell Echo. This will lower your mana costs by 50% but you might be animation locked sometimes, but you can break out of the animation lock with Frostblink.

Buy Arcanist Brand in Act 4 & Added Lightning Damage in Act 1.
Link Arcanist Brand - Wave of Conviction - Conductivity - Added Lightning Damage
Arcanist Brand is now your 1 stop button for a large damage amp when needed.

Do lab at Level 31 when your gems upgrade.
Pick up Vile Bastion as your first node.


Act 5-10

Determination, Vitality & Wrath can be used as soon as you pick up Eldritch Battery ~Act 6 AND do your first Lab for Vile Bastion.
You are linking Wrath - Divine Blessing - Generosity. You can skip the Generosity if you do not have the socket space for it until you do.
>>>Make sure to equip at least 1-2 ES base somewhere to have enough ES to be able to cast Absolution & Wrath.<<<

Get rid of Arcane Surge as soon as you make this swap.
Buy Molten Shell and use it instead of Steelskin from Lilly in Act 6. This is a BIG defensive layer.
Vitality can be used once you pick up Sovereignty as you will not have enough mana left over before then.

Labs 2 & 3 will not be very useful and dont do much until the swap to Arakaali.
You can still make use of some of the ascendancy points later on once you get to maps and buy a Mark of Submission.

Mark of Submission will make Profane Bloom & Unholy Authority work which will give you better clear and allow you to use a 2nd curse on bosses.
Once you get Mark of Submission, replace Conductivity with Elemental Weakness and socket Conductivity in the ring.


Follow the rest of the Passive Trees, feel free to deviate and pick up nodes in any order youd like.
All that is happening with the tree from Acts 5-10 is picking up all of the Minion Nodes that are nearby then picking up Life nodes.

>>>At some point, you are going to want to fix the pathing at the start of the tree by pathing through the int nodes and respecing all of the Spell Damage nodes.<<<
>>>I'd recommend to do this by Act 6 at the latest. All it requires is 2 passive points to pick up the left side then 4 respec points.<<<


Endgame Pre-Arakaali

You will have to play Absolution until you can afford Arakaali. Most seasons this is anywhere between 150-250c Day 1 and quickly dropping to ~100-200c by Days 3-4.
Please keep in mind that prices can change and based on the popularity of Arakaali it might go up or stay at a constant price for the first week.
Saving for Arakaali should be your #1 priority.

Id recommend taking a look at the Skill Gems required for Arakaali in the Skills tab on PoB under the "Arakaali Gem Swap" section and buying the gems from a vendor to level them ahead of time.

One option to afford Arakaali ASAP is to do Day 1 Heist to farm ~100-150c in the first few hours of the season.
I have a guide on this here: https://youtu.be/xmCEKQfeVBg

As for Absolution, you will want to upgrade your gear with generic rare gear with any life/resistances you need if you feel that you are not tanky enough.
Generic gear and a Mark of Submission should be all you need to make it to red maps with relative comfort.

Some things to point out that might make your journey a bit easier and will be cheap effective upgrades before Arakaali would be:

A good minion shield with "+1 to Level of All Physical/Lightning/Minion Spell Skill Gems"
A bone ring with Minion Damage/Minion Attack & Cast Speed/Life
Any "+1/+2 to Level of all Minion Skill Gems helmet"
Rare gloves with the Searing Exarch "x% chance to Unnerve Enemies for 4 seconds on Hit" implicit modifier
Level 21 Absolution
A rare amulet with "+1 to Level of all Lightning/Physical/Skill Gems"


Arakaali Swap

Once you are ready and have the dagger you can swap to Arakaali.
You WILL NEED to also buy the flask The Writhing Jar. This flask is always 1c and useless for all builds but Arakaali.
This is the only 100% mandatory item to make the build work. Everything else is either nice to have or an upgrade.

>>>PLEASE SWAP THE ITEM SETS AT THE TOP OF THE ITEMS TAB FROM ABSOLUTION PRE-ARAKAALI TO THE ARAKAALI ITEM SET<<<
>>>PLEASE SWAP THE ITEM SETS AT THE TOP OF THE ITEMS TAB FROM ABSOLUTION PRE-ARAKAALI TO THE ARAKAALI ITEM SET<<<
>>>PLEASE SWAP THE ITEM SETS AT THE TOP OF THE ITEMS TAB FROM ABSOLUTION PRE-ARAKAALI TO THE ARAKAALI ITEM SET<<<

There are 2 other unique items that are also important but are by no means needed to be able to map.

Ancient Skull is a 1c unique from Ritual and has never been worth more than that on day 1 since its release.
It is the BIS helmet for this build and I would highly recommend to go buy this as your next purchase immediately.
Ancient Skull causes your spiders to hear The Voices when they crit while also giving them a very large amount of extra crit from your max power charges.
The Voices would normally cause them to degen very heavily and die quickly but, Raise Spider is actually immune to all damage making the downside nonexistent.
The reason we want this helmet is that when the spiders do hear the voices, they gain 50% increased attack speed which is the single best stat for this build.
This is just a plug and play helmet and it very nicely also comes with minion.

Gravebind are a pair of gloves that give you Quality of Life but are 100% NOT needed.
Typically, Gravebind go for 30-50c week 1 and are pretty stable at that price all season.
These should not be a priority but will make mapping much smoother. The reason these are nice to have are due to them making your minion's kills count as yours.
Arakaali has a line which says "Trigger level 1 Raise Spider on Kill" but your minion's kills do not count as yours unless you specifically use Gravebind.
This would allow you to continually resummon new spiders as your spiders kill mobs in a map making you not have to stop and resummon them manually.
Sometimes this will not work due to Profane Bloom being a bit too efficient and deleting all of the corpses in a pack as Raise Spider does require at least 1 corpse but it's not really a problem.


Swapping:

Make sure you swap the PoB Item set to the Arakaali set, swap the skills to the "Arakaali Gem Swap" & swap the passive tree to the "Arakaali Swap Level 90" tree.
There are a few minor changes to the tree requiring ~10 Respec Points in total. The major change being dropping Ravenous Horde & Eldritch Battery and reannointing Ravenous Horde on an amulet.
Otherwise, make sure you have all of the skills required, none of them need a minimum level to work and you should be fine to start off with level 1 skill gems and level them as you go.

All of your old Absolution gear will work just fine to start off.
The biggest differences being that you now do not need a +Skills Shield and instead are opting to use a armor heavy shield & you will need a Redeemer amulet to be able to fit all of the auras.

Three important things to keep in mind when swapping:

1. Make sure you stay Attack & Spell Block capped, this is essential to your defensive layers.
Spell Block cap requires a Spell Block Eater of Worlds Eldritch Implicit on your chestplate. Even the lowest tier is enough.

2. You WILL need to run the pantheon Soul of Ryslatha on bosses.
This build requires Writhing Jar to spawn Spiders on bosses and the flask generation from Ryslatha is required to have charges on longer fights.

3. If you want substantually better clear and are not going to be fighting any endgame bosses, I recommend swapping out Melee Physical Damage Support for Melee Splash.
This will give you substantually better feeling clear and will be an overall dps boost as it will cause a pack to explode from Profane Bloom quicker.


Getting enough reservation to turn on all auras & curses:

Mana is going to be very tight in this build to start with and I tried to keep it very very budget.
To turn on all of your auras and curses you will need:

3x Jewels with "x% increased Mana Reservation Efficiency of Skills"
A Redeemer amulet with a "x% increased Mana Reservation Efficiency of Skills" roll
You need a total of 16% increased Mana Reservation Efficiency of Skills between the 3 jewels and amulet roll.
One way to get this would be to get a max roll on the 3 jewels and then a T2 max roll on the amulet.

Once you can put more money into the build, we will be picking up Charisma, adding in an Enlighten & swapping to an Impressence to be able to fit more auras.
Until then, 3 jewels & 1 amulet roll is the cheapest way to fit it all.
If you are worried about Corrupted Blood, you don't ever actually attack anything outside of the occasional Whirling Blades through an enemy which can be taken care of by the Bleed Immune roll on your flask.


Your main playstyle is:

To get your Spiders summoned and your build going you just need to do a simple 2 step combo to get everything going.
If you do NOT have Gravebind, you will need to stop every ~50 seconds to resummon your Spiders. They have a very long duration but are not infinite.
With Gravebind, as your Spiders kill mobs they will passively resummon themselves unless Profane Bloom deletes too many corpses.

Step 1: Channel Divine Ire - This will cause the Cast While Channeling to trigger Desecrate under you. Do this for ~1 second until 2-3 activations happen.
Step 2: Use your Writhing Jar - This will summon a few worm monsters which the Divine Ire will kill as they spawn, triggering the Raise Spiders from the dagger.

The way Arakaali works to summon Spiders is simple and requires 2 things.
1. Is for you to have killed something.
2. For there to be a nearby corpse to summon Spiders from.

This is why you want to channel first to create corpses and then use the flask to generate killable monsters.

Another option is to use Cyclone instead of Divine Ire but it is just straight up worse.
You have no Accuracy in this build meaning when you spawn the worms you have a big chance to miss and not kill them.
Cyclone also has a smaller radius than Cyclone meaning you could possibly have to run to the worms.
This is also further compounded by Cyclone potentially missing while there is an AoE or Degen under you from a mob or boss which could kill the worms before Cyclone does.


Further Upgrades:

As 3.23 starts, I will be releasing a followup guide & PoB to this one talking about how to upgrade this build in great detail.
Everything here should be enough to get most people through all content and through anything you'd want to do on Week 1.

You will be able to find it on my YouTube channel linked at the top of the notes section.
Until then, I will talk about some potential upgrades you can make that are Plug&Play that you should be able to make with no problem.

Aegis Aurora - This should be your next most important upgrade and you should save money for this.
Aegis is a shield that provides an ungodly amount of recovery and safety with its only requirements being that you are Attack & Spell Block capped which this PoB aims to do preemptively.
The only thing to keep in mind is that you might need to change some of your rare items to make up for any resistance you might have on your current shield.

Impressence - This amulet lets you cast one of your curses as a free aura meaning you can fit in an extra aura.
You want to get the chaos version which has "Despair has no Reservation if Cast as an Aura"
This will let you fit in Discipline when you add on an enlighten or a high level Vitality.
Later on with a Charisma annoint you can fit in both.
Another option is to add in Tempest Shield instead which would let you drop some of your Spell Block passive points.

Darkness Enthralled - Darkness is a great midgame and potential endgame option for this build.
This belt gives you access to 2 more Abyss Jewel slots which will be important later on when we upgrade to Amanamu's Gaze.
This is a jewel that scales based on how many Abyss Jewels you have up to a cap meaning we will need plenty of open slots.
In Darkness, I'd recommend to look for Ghastly Eyes with the following stats:

"Minions deal x to x additional Physical Damage"
"Minions deal x to x additional Chaos Damage"
"Minions have x% increased Attack Speed"
"Minions deal x% increased Damage if you've used a Minion Skill Recently"

You can look for Life or any stats you might be missing, you do not need to go for pure damage but it is recommended as the jewels put inside of Darkness can easily be 5% or more dps each.

Brass Dome - This is a great upgrade AFTER you get Aegis Aurora as it will push your Armour extremely high while also giving you a large amount of Max Res and crit immunity.
Brass is usually decently expensive for a well rolled one but it is a worthwhile purchase. Make sure you drop all of your Crit Reduction Nodes on the passive tree once you obtain it.
It is well worth the upgrade even though it has no life mods on it as the armor will supercharge Aegis and the Crit Immunity is one of the best defensive layers in poe.

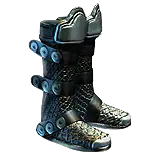
The Stampede - This is a hit or miss with people. These boots are great because it lets you drop your Quicksilver while maintaining the same speed at all times.
This means you can fit in whatever other flask you want giving you quite a lot of flexibility.
Stampede can also be anointed allowing you to anoint Ravenous Horde & Charisma at the same time.


.