12 months ago
 Level 93 Summon Reaper Necromancer3.25
Life: 4,602142%
ES: 864
Mana: 129
eHP:
124,405
Resistances: 85%/84%/84%/75%
Armour: 5,515
DPS: 61,425
Speed: 1.26
Hit Chance: 100%
Config: Boss
Bandit: Kill All
Pantheon: Soul of the Brine King, Soul of Ryslatha
Gear
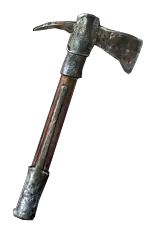

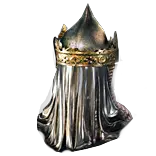

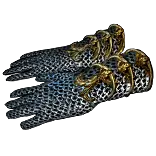



Gems
Enduring Cry
Purity of Elements
Arrogance
Clarity
Precision
Summon Chaos Golem
Feeding Frenzy
Maim
Culling Strike
Cast when Damage Taken
Desecrate
Flesh Offering
Punishment
Automation
Steelskin
Flesh and Stone
Petrified Blood
-----
Summon Reaper
Brutality
Cruelty
Meat Shield
Predator
Summon Phantasm
Raise Zombie
Brutality
Cruelty
Meat Shield
Predator
Summon Phantasm
Summon Skeletons
Brutality
Cruelty
Meat Shield
Predator
Summon Phantasm
Energy Leech
Absolution
Cruelty
Meat Shield
Predator
Summon Phantasm
Summon Raging Spirit
Added Fire Damage
Cruelty
Meat Shield
Predator
Summon Phantasm
Energy Leech
Brutality
Dominating Blow
Meat Shield
Predator
Summon Phantasm
Tree Preview
- You take 30% reduced Extra Damage from Critical Strikes
- +1% to all maximum Elemental Resistances if Equipped Helmet, Body Armour, Gloves, and Boots all have Armour
- You take 20% reduced Extra Damage from Critical Strikes
- 10% of Leech is Instant
- Minions Recover 5% of Life on Minion Death
- 20% increased effect of Offerings
- Minions Hits have 50% chance to ignore Enemy Physical Damage Reduction
- +1% to all maximum Elemental Resistances if you have Reserved Life and Mana
Notes
In Path 1, I played zombies almost all the time. I love that playstyle of walking around, surrounded by minions that rush at enemies for you. But sometimes I'd be in the mood for a little more of 'this', or a little extra of 'that'. In Path of Exile 1 it was pretty inconvenient to change builds; not having the perfect socket colours or min/max support skills to "try out a skill" kept getting in the way of trying to scratch 'that itch' for what I was in the mood to play. So, in 3.25, I decided to design a build that let me play any (but all) of the minions I occasionally had a craving for. So this build is not min/maxed specifically for a specific type of minion. The build will be slightly weaker than a build tailored for a specific minion. Nonetheless, I fell in love with this build. It was so fun to crave Skeletons, then swap to the Reaper for the next map, and do Absolution the next...so good. But I also didn't feel weaker in gameplay. Obviously, I was weaker than a typical build specifically designed around a specific minion, but I couldn't really tell in-game. So, the following is what I came up with, and it scratched every single minion itch I ever had (which, obviously, doesn't include every minion that exists) with only one or two gem swaps for every switch. It still caters to my playstyle preference of the fewest button presses possible, along with being able to use any gear you want. So if neither of those things matter to you, you can maximize the build much further. The build carried me through all the content I wanted. Some T17 mods don't suit my defensive style or minions in general, but in the majority of cases, T17s were a blast. I hope you enjoy it as long as you stick with Path 1! You rock!


ALL OF MY BUILDS ARE DESIGNED TO BE:
  - SSF HC savvy.
    - So that means, defence before offence, life before glory, /deaths = 0 before damage.
  - As Stress-Free (to me) as possible, which means:
    - Having only ONE MAIN BUTTON/skill to press, with (maybe) an occasional secondary button/skill.
    - Having a defensive setup that ALLOWS SLOW REACTION TIME or slow character movement. We should be able to zone out, take damage, and react slowly with our flasks, to easily survive.
    - ITEM FREEDOM. I like Path of Exile to be a game of discovery and excitement. I want every item that I ID to have the potential to be better than what I have equipped. I also don't like "needing" a specific fancy mod or item for my build to actually function. So, I design my builds not to require specific gear or mods. I think of gear as a bonus to the build. (Obviously, we want good gear, but we won't be crippled until we get it. SSF, am I right?)


TAKE NOTICE:
- Pay attention to the skills and notables when you're allocating them to the build. It's on YOU to remember the requirements of your selections as YOU'LL be the one equipping, modifying, and playing the build. TAKE YOUR TIME within the game to get used to the differences of each addition as they come. The build's details are easier to remember that way.

Everything else, besides what's mentioned below, should be straightforward; I don't think anything else needs a comment. Hopefully, I haven't forgotten anything. I hope the build suits you and that you have a great time!


BUILD SUMMARY:
- Offence:
  - Details are obviously dependant on the minion you choose to play.
  - Walk/stand around. Occassionally press, or just hold down, Enduring Cry. Use minion skill.
- Defence (all before equipping items):
  - 85/84% Elemental Resist cap.
  - Lots of flat permanent physical damage mitigation.
    - Further automatic defensive skills (some temp. perks).
  - Immune to elemental ailments.
  - 80% reduced crit. damage taken.
  - Insane leech.


BUTTONS:
- Enduring Cry.
- Your minion skill.
  - (When you're playing the Reaper, she'll occasionally consume the Golem. Keep an eye on it.)
- Signal Prey for the pesky enemies.
- Flasks are up to you. I go automatic except for my life flask.


JUST FYI:
- Zombies will die lots in Act 1. You'll want SRS (Breaking Some Eggs) or Skeletons (The Caged Brute) to get through Act 1.


ITEMS:
- Shields are not required, but the extra 20% 'reduced Extra Damage from Critical Strikes' we're missing (which would make us "immune" to crits. (30+30+20(from the tree)+20 (from the shield)=100)) only rolls on shields.
- If you're adding Dominating Blow to the mix, you'll need a melee weapon instead of a wand.
- For all other items, use anything you want. Just have fun with what you find or think of. Play YOUR way.
- If you wish to forgo the shield for more damage, good luck. May the Leech be with you.
- DAMAGE mods, in order of offensive power:
  - 1) 100%+ Increased Minion Damage.
  - 2) +1+ to Spell or Minion Gems. Lots of combined increases to Minion/Spell gems will stack to be way more powerful that 100% increased damage, but not 3ish or less. At +4, it's pretty close to equal.
    - (Increasing the gem level of a minion gem doesn't do as much of a damage bonus as adding "100% increased minion damage", but it does improve all other aspects of what improves when the gem levels. That always includes life, but GGG doesn't always let us know what else improves.)
- Just a reminder, you can level gems you're not using in your second weapon set. I'll list those gems below.


THE PASSIVE TREE:
- The Passive Tree takes you to character level 93 (if you kill the bandits).
- We need 119 Dex. but we only get 44 Dex. from the tree.
  - Don't be shy to use the +30 Dex. nodes until you find some gear that gets you to 119 Dex. (I like amulets for that.)
- Levelling is easy with this build. There's no wrong to do it. (If you like to be told how to level, select every passive tree node as they come, without skipping any. Deal with the "dead-end" branches first, then move on. The tree is quite linear that way.)

Plaguebringer vs. Mistress of Sacrifice:
- I know blocking in this game is strong, but I hate mitigation that isn't consistent. So I don't bother with Bone Offering even though many like it. As a result, with the exception of Movement Speed (fast characters make me nauseous), Flesh Offering will only impact me specifically occassionally (depending on the minion I choose to play). So I opted for the bonus offence and mitigation of Plaguebringer as it matches all gem combos in this build.
  - Yes, Plaguebringer is circumstancial, which I dislike, but so is Mistress of Sacrifice. So when choosing between two circumstancial perks, I like Plaguebringer more.


SKILL GEMS:

Predator Support (Signal Prey) & Flesh Offering:
- These are tagged as a minion skills. So any perks from "using a minion skill recently" will be proc'd by using either.

Brutality:
- Just a reminder that Brutality gets rid of ALL non-physical damage to its linked skills. Don't forget that when gem swapping to certain minions.

Empower and Cruelty:
- On my 6-link I have an Empower gem. So I use that instead of Cruelty in all situations Cruelty is mentioned here.
- Cruelty support DOES work with minions that Hit. Minions cannot gain the cruelty buff, but the "more" damage the support gives for all hits linked does apply to minions that Hit.

No Spectres?:
- Spectres are really strong but are a massive pain in the butt to deal with if they die. Because I like the Reaper, Spectres don't really work out with this build (and I'm totally fine with that ;) ).

Summon Phantasms:
- They give way more damage than people give them credit for. They are worth working around. Path of Building, at the time of this post, doesn't know how to calculate the support's damage properly. So don't be discouraged by the PoB numbers or common misconceptions. They're great.

Predator Support?:
- I know, I know. It's an extra button. And, on top of that, I honestly prefer Energy Leech Support instead! But this game can be SUCH a pain in the butt sometimes. In many of those circumstances I find that being able to tell your minions who to focus on is too valuable to exclude.

Reservations:
- Purity of Elements:
  - I know a lot of people consider Purity of Elements of waste. Though there are many valuable ways to spend 50% Mana reservation, keeping your minions free of elemental ailments is a pretty big deal especially the fewer minions you have (such as with the Reaper). The aura becomes even more valuable and worth while once you start doing T17s.
- Precision:
  - Precision is in the build because I opted to add more Endurance Charges to the build in lieu of the accuracy from the Gravepact cluster on the tree.
- Flesh and Stone:
  - Flesh and Stone has insane damage mitigation (against Hits), but only with enemies within its AoE.
  - If you haven't played lots with Flesh and Stone, I recommend forgetting that your can swap the aura into an offensive stance for a while. Get used to "rushing" to the enemies so they're within the skill's radius. You'll really get used to how enemies (especially bosses) work and begin to recognize danger easily. After you get so familiar with the game that it's boring, you can switch to the offensive stance of Flesh and Stone if you like ;-).
  - Once Flesh and Stone is activated, you have to unsocket it to turn it off.

Here's a list of each grouping of swappable gems. Don't forget to level some of these gems in your second weapon set if you can/want to:

- Option 1:
  - Reaper(s)
  - Brutality
  - Cruelty
  - Meat Shield
  - Predator
  - Phantasms

- Option 2:
  - Add Zombies (replace Reaper)

- Option 3:
  - Add Skeletons (replace Reaper)

- Option 4:
  - Add Energy Leech (replace Reaper)
  - Add Absolution (replace Brutality)

- Option 5:
  - Add Summon Raging Spirits (replace Reaper)
  - Add Added Fire (replace Brutality)

- Option 6 (requires a melee weapon):
  - Add Energy Leech (replace Reaper)
  - Add Dominating Blow (Replace Cruelty)


WHERE TO UNLOCK EACH GEM:
- Act 1: Raise Zombie: Reward for Enemy at the Gate.
- Act 1: Summon Phantasm Support: Reward for Mercy Mission.
- Act 1: Summon Raging Spirits: Reward for Breaking Some Eggs.
- Act 1: Clarity: Reward/buy for The Caged Brute.
- Act 1: Summon Skeletons: Reward for The Caged Brute.
- Act 1: Precision: Buy after The Caged Brute.
- Act 1: Flesh Offering: Reward for The Siren's Cadence.
- Act 1: Absolution: Buy after The Siren's Cadence.
- Act 2: Desecrate: Buy after Intruders in Black.
- Act 2: Cruelty Support: Reward/buy for Sharp and Cruel.
- Act 2: Predator Support: Reward/buy for Sharp and Cruel.
- Act 2: Culling Strike Support: Buy after Sharp and Cruel.
- Act 3: Purity of Elements: Reward for Lost in Love.
- Act 3: Automation: Buy after Lost in Love.
- Act 3: Summon Reaper: Reward/Buy for Sever the Right Hand.
- Act 4: Summon Chaos Golem: Reward for Breaking the Seal.
- Act 4: Cast when Damage Taken: Buy after The Eternal Nightmare.
- Act 6: Added Fire Damage Support: Buy after Fallen from Grace.
- Act 6: Arrogance Support: Buy after Fallen from Grace.
- Act 6: Brutality Support: Buy after Fallen from Grace.
- Act 6: Dominating Blow: Buy after Fallen from Grace.
- Act 6: Enduring Cry: Buy after Fallen from Grace.
- Act 6: Energy Leech Support: Buy after Fallen from Grace.
- Act 6: Feeding Frenzy Support: Buy after Fallen from Grace.
- Act 6: Flesh and Stone: Buy after Fallen from Grace.
- Act 6: Maim Support: Buy after Fallen from Grace.
- Act 6: Meat Shield Support: Buy after Fallen from Grace.
- Act 6: Petrified Blood: Buy after Fallen from Grace.
- Act 6: Punishment: Buy after Fallen from Grace.
- Act 6: Steelskin: Buy after Fallen from Grace.

(You're the best.)