10 months ago
 Level 97 Crit Hexblast Ascendant3.24
Life: 4,444132%
ES: 1,067
Mana: -323
eHP:
34,487
Resistances: 62%/70%/75%/-17%
Evade: 63%
Armour: 5,871
Evasion: 11,290
DPS: 11,700,714
Speed: 2.25
Hit Chance: 100%
Crit Chance: 100.00%
Crit Multi: 715%
Config: Pinnacle, 50% Shock, Frenzy, Power, 15x Wither
Bandit: Kill All
Pantheon: Soul of Arakaali, Soul of Ryslatha
Gear





Gems
Hexblast
Increased Critical Damage
Increased Critical Strikes
Power Charge On Critical
Awakened Added Chaos Damage
Awakened Void Manipulation
Wither
Spell Totem
Multiple Totems
Faster Casting
Impending Doom
Void Manipulation
Despair
Assassin's Mark
Zealotry
Divine Blessing
Steelskin
More Duration
Withering Step
Flame Dash
Grace
Determination
Enfeeble
Awakened Blasphemy
Tree Preview
Tattoo of the Tawhoa Warrior(x19)
5% increased Chaos Damage
- 3% increased Damage per Endurance, Frenzy or Power Charge
- 50% increased Effect of non-Damaging Ailments you inflict with Critical Strikes
- +25% to Critical Strike Multiplier against Unique Enemies
- 150% increased Critical Strike Chance against Enemies that are on Full Life
- +50 to maximum Life
- 15% increased maximum Life if there are no Life Modifiers on Equipped Body Armour
- Auras from your Skills have 10% increased Effect on you
- Chance to Suppress Spell Damage is Lucky
- 30% increased Defences while wielding a Staff
- Recover 2% of Energy Shield when you Block Spell Damage while wielding a Staff
- Recover 2% of Life when you Block Attack Damage while wielding a Staff
Notes
Before I go into the process of guiding you, I need to make something clear:

This build requires quite alot of respec points and I think that the 20 you get from the campaign should be enough to make the transition from Act 10 to mapping work.
If for whatever reason it doesn't and you're stuck with something, hit me up and I'll provide you with some Orb of Regrets, if you need them.

I point that out  because this wasn't my first build this league and I ended up leaving my Reap Ascendant at level 92 so I had some currency to work with and I also had leveling gear (like a good Staff I 4-linked and just slapped some
increased Spell damage with the benchraft on it and used it with level 48-ish onwards to maps).

This "guide" is still wonky and if something doesn't fit in the leveling process or in the transitions I did, feel free to message me so I can be aware of that and solve the problem.
I also changed some things I actually did while leveling. For example: I don't get the additional curse node (Whispers of Doom) as I noticed using Assassins Mark is a total waste because you don't crit anyways.

I left the tree that I used myself while leveling in the "BEFORE TRANSITION" tree, for if you want to have a look what I changed as a whole.


Levels 1 - 12
I used Rolling Magma as my main damage and Holy Flame Totem + Flame Wall for bosses rares or magic packs. Combustion Support is the best support gem as the first one (I think). I added some links into the Skills section of the PoB for an example.
I used Flame Dash for movement, but that's just my personal preference.
I always pick up Steelskin as it's good for countering bleeds early and even later down the line. I don't like Molten Shell as this build doesn't have alot of armor to work with.
As my weapons I like to dual wield wands.

I would path first into the life mastery cluster and then afterwards to Path of the Savant.


Levels 12 - 23
Nothing much to say here. I like to pick up life nodes first.
Also pick up Wave of Conviction and use it on tanky monsters.
Also pick up Herald of Ash for some more damage.

BANDITS:
I help Alira first, because I really like the +15% increased Elemental Resistances for leveling, as it's quite annoying to deal with it.
I change that later for 2 Skill Points, but only after leveling really slows down and I got alot of resistances overcapped.


Levels 23 - 32
For Offensive Auras you want to change Herald of Ash into Anger, if you have the mana for it, because it's just much more damage output.
For defensive Auras I only choose Determination first and later Grace when you have enough mana to use 3 Auras.

When you want to level as Hexblast I HIGHLY recommend socketing Faster Casting Support, as Hexblast is really fucking slow. It just doesn't feel good to play without faster casting. I only dropped this support gem later down the Mid- to Endgame
because I got better gear and some more Faster Casting nodes on the skill tree. Also make sure to get Wither with Totem Support for boss damage.

Make sure to pick up the right curses for your damage type.

If you are playing Hexblast absolutely get Impending Doom Support (from the library quest) because it fits really good into this build.

For the first LAB points I like to path into the Ranger part and pick up Dexterity and the 1 Skill point.


Levels 32 - 47
So the Eldritch Battery Keystone isn't necessary if you don't have enough Energy Shield for example. But I like picking it up.
Be aware that it make you squishier!

If you don't level with Hexblast just switch the Chaos Damage nodes with their respective Elemental Damage nodes while leveling. But please be aware that the transition to Hexblast will take more respec points! You could run into problems and I
didn't test it myself as this tree is mostly build for leveling with Hexblast (or any suiting Chaos skill TBH).

From this point just add fitting support gems for your desired skill gems and follow the trees.

Also make sure to first path down the whole Ranger ascendancy tree and pick up Raider and the last one before going up to Occultist.
At least that's what I did as I don't find the Occultist Ascendancy very useful early on, except for the stun immunity, because you will always have Energy Shield with Eldritch Battery.
Your damage should be fine without Assassin's Mark while leveling.


If you don't have enough respec points for whatever reason just wait with the transition as it requires quite some points. The nodes you are switching to are anyways mostly only Crit nodes so you aren't missing out on anything. Just make sure
to switch when you are feeling comfortable doing so.

If you're done later with UBER Lab you will want to switch to the Witch starting point as the first node from this side of the tree is more beneficial, but it's noway build defining and mostly min max at first. But later you really want to say goodbye to the
lower right side of the tree (like when you got Ralakesh boots). Just make sure your Character can handle the Dexterity loss.


Some quite important notes to this build:
When you are still have the node "Charisma" allocated, you can definitely run Zealotry without Divine Blessing.
If you are having Energy Shield problems you can put in a Discipline and switch Zealotry for it. Make sure to have enough sockets for it. (Just use Zealotry with Divine Blessing instead then.)

The node "Melding" is very important early on for ES. I noticed that it really fucking sucks to not have it, so make sure that if you are respeccing points and leave this node consider to annoint it for some time to make your life easier. When you do
use Discipline you mostly won't need it I think and you can switch annoints for something more useful. Like Crit multi or increased crit chance, anything your build really needs at this point.

Using Enfeeble with Blasphemy is only something I started doing when having Ralakesh because I got the points to allocate "Whispers of Doom". Before that I just ran Discipline for ES sustain.


ANNOINTS are very much changeable at the point you don't use "Melding" for it. I like crit multi as of right now, but just look what fits you the best :)


JEWELS: They should be the very last points you get as you reach endgame.


PANTHEON: I don't think that theres 1 perfect solution to this. I really like having less DoT damage as we don't really have life reg. And I like having life flask charge regenerate for when I'm in a sticky situation and need to kite and aren't
able to do damage.


Make sure to get Spell Suppression, as this build really needs it. We are really squishy and every damage reduce helps out alot.

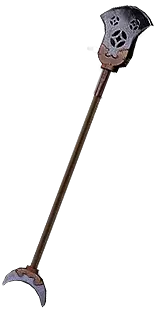
Get a +3 Chaos Skill gems Eclipse Staff as early as possible. I got my first with the Harvest bench, just slap some increased Spell Damage with the benchcraft on it and youre fine.

Also I can't stress enough that Faster Casting Support should be used as long as you don't have enough from you Gear, or a combination of it from Gear + Skill tree.

If you are having spare points for your Impending Doom Support damage: Make sure to socket something from the Skill section from it that isn't enabled.


I really hope that this PoB has everything it needs for you to have a good experience with this build. Please consider messaging me for when you have problems/something is unclear/isn't as efficient as it could be or anything alike!

I'm sorry for it being so long and I'm sorry if something sucks. This is the first time I ever did something like this so please don't be mad at me for not having some things not as good as a YouTube content creator for example.

At the end of the day this is not something I would consider anything near the meta. It's just my first little build and also the first time I'm sharing this with someone.