a day ago
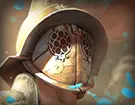 Level 100 Leap Slam Gladiator3.25
Life: 5,05193%
ES: 55
Mana: 57
eHP:
2,089,621
Resistances: 76%/75%/75%/75%
Armour: 19,892
DPS: 9,281,003
Speed: 2.30
Hit Chance: 100%
Config: Frenzy
Bandit: Kill All
Pantheon: Soul of the Brine King, Soul of Ralakesh
Gear







Gems
Leap Slam
Faster Attacks
Lifetap
Vulnerability
Lifetap
War Banner
Eviscerate
Awakened Brutality
Maim
Blood and Sand
Ruthless
Awakened Melee Physical Damage
Multistrike
Volatility
Awakened Brutality
Lacerate
Molten Shell
Lifetap
Blood Rage
Automation
Summon Skitterbots
Enlighten
Pride
Herald of Purity
EnemyExplode
Tree Preview
Tattoo of the Kitava Warrior(x15)
5% increased Physical Damage
Tattoo of the Tukohama Warrior(x2)
Melee Hits which Stun have 5% chance to Fortify
- Bleeding you inflict deals Damage 15% faster
- 10% more Damage with Hits and Ailments against Enemies that are on Low Life
- 30% increased Damage while in Blood Stance
- 15% increased Area of Effect while in Sand Stance
- +3% to Damage over Time Multiplier for Bleeding per Endurance Charge
- +1% Chance to Block Spell Damage per 5% Chance to Block Attack Damage
- Skills Cost Life instead of 15% of Mana Cost
- +30 to maximum Life
- 12% increased Mana Reservation Efficiency of Skills
- 10% more Maximum Physical Attack Damage
- +1% Chance to Block Attack Damage per 5% Chance to Block on Equipped Shield
Notes
CRAFTING RECIEPE FOR PHYS WEAPONS - White Weapon of any quality + (1) Blacksmiths Whetstone + (1) Magic or Rare Quality Rustic Sash.  Sell to Vendor for a weapon with the % Physical Increased damage mod. Augment orb for a suffix
and ONLY if you have extra Whetstones, use them to further quality the item for more damage.  This reciepe is used sometimes each act to keep up with the latest weapon so your damage can improve.

Selling early magic items

GENERAL NOTES -
1. Do you best to keep your main 4L (Lacerate) on something other than your body armor. Youll want to keep updating that piece as much as possible to help with defenses, preferably armor base.
2. Check vendors as you level up in each Act to fish for new weapons to upgrade too.  Keep atleast one blacksmith whetstone and one rustic sash on hand to be able to upgrade whenever you need to. Excess whetstones can be used to quality
     said weapons.
3. All items in the gear section of each Act is just an example of what I got in my SSF testing playthrough. You may get way better luck with items or worse.  They are there as a guide for newer players to look at and visualize.
4.  Selling items early game -- ID'ed Magic = Transmute Shards
												UN ID'ed Magic = Alteration Shards
												ID'ed Rare = Aleration Shards
												UN IDed Rare = Transmute Shards
												Any item with all the colors that are LINKED = Chromatic Orbs
												Any six socket item = Jewelers Orbs
	Getting early transmutes will ensure youll have all the skills you need to progress your build early on in the game.

Act 1 Notes -
1. Lacerate...is great...but not great until like mid Act 4+.  I prefer to level with it cause frankly, it trivializes alot of bosses with it being "ranged" melee.  Feel free to use another physical/bleed skill until then if youd like.
2. Act 1 has ALOT of cold damamge, like a whole lot.  Pick up any blues and rares and sell them for transmute orbs so you can craft cold res on your gear, it makes the entire Act alot eaiser and comfortable to play.
3. I leveled with Splitting Steel till I got Lacerate at level 12.  IMO, splitting steel is 100% the way to go from 1-12 but use what you like at the end of the day.
4. Dewller of the deep can be VERY VERY VERY rippy.  The best way to do it in my opinion is attack it till it bleeds, then run around so it chases you and takes more bleed damage. You can still die pretty easy but this is the best way I've found to do it.  Or over level a bit and come back, either way works.

Links to look for: 2 Green - Red - Red / Sockets to look for: 3 Red and 1 Green

Quest 1 - Ruthless
Quest 2 - Dash (Until you can by leap slam + faster attacks)
Quest 3 - Faster Attacks (To be used with Leap Slam)
Quest 4 - Lacerate (Your final skill until you "beat" the game or try a new build)

Act 2 Notes -
1. Bandits are KILL ALL.  You can possibly go for the +15% All Res but I just KILL ALL personally.
2. Thinking about upgrading your weapon before killing the spider on the left side of this Act, stay as mobile as you can and try to not get surrounded. I almost died with a crappy axe that was white so you should be just fine.
3. PICK UP ALL Linked red/blue/green items and sell them for chromatic orbs...make this a priority and you will thank me later.

Quest 1 - Eviserate - (Secondary skill we use only on rares and bosses whens its up)
Quest 2 - Melee Phys Dmg Support (To be used at a later in the build)

Act 3 Notes -
1. Act 3 is probably one of the more sluggish acts.  Mainly because we are on the cusp of getting multistrike in act 4 and we just dont have the attack speed for the build too "feel good" just yet. It worth pushing though.
2. Act 3 Phase 1 deal ALOT of lightning damage, so plan your resistances accordingly. Phase 2 is mainly physical damage, be sure you have some updated life flasks w/ bleed immunity mod OR some portal scrolls to hop in and out when you need a refresh.
3. I prefer using a Lapis Amulet to start to help with some of the minor INT requirements we have early on but if possible grab a nice DEX/INT amulet when you can as we require both stats as well level and our tree is mainly focused on strength.

Quest 1 - Pride (Used later in the build)
Quest 2 - Pick anything, we arent using these skills

Act 4 Notes -
1. Feel free to use some of your refund points to refund the chance to bleed nodes for the bleed multi nodes on the Bloodletting wheel when ever you feel like. Once you get all the other bleed wheels, drop chance to bleed support and do your second lab, you won't need those 2 %chance to bleed nodes to reach 100% chance.
2. At this point the build should pick up considerably given that we're now using multistrike.
3. Single Target is and will still feel a bit meh but my main objective is for a smoother run through the campaign, no dying, or atleast minimial deaths.  Damage will come soon enough.
4. As always, please be sure to keep up with your gear, resistances, crafting on your gear to make you stronger, etc.
5. Act 4 as a fair about of bleed/physical damage in it, be very careful to not get melted by some random bleed.
6. There are 3 bosses youll need to get organs from.  1. Deals chaos damage 2. Deals Physical damage and 3. Deals lightning damage and can 100% wreck your face off if you aren't careful.
7. Do your lab in Act 4 whenever you feel confident enough, I did mine on a 3 link lacerate...zero issues.

Quest 1 - Any Golem will do, we dont use them so you can choose anything
Quest 2 - Multistrike (This is when the build starts to "feel" smoother")

Lab Notes (FIrst Lab)
1. Dont use multistrike, we don't yet have the attack speed needed and Izaro will 100% pound your face while you sit there in your swing animation.
2. Skip bad mod rares, its not worth dying to fullfill your OCD to kill an annoying and deadly rare.
3. Two options...full damage going bleed explode first then aggro bleed second and block third, then lucky uber. OR Go more defense early and save aggro bleed for uber.
    personally, I like going aggro bleed as I play softcare to the max and dont rly care if I die here and there.  Thats the route I went in 3.25 and it work out just fine.
4. Pick up small rare gear for alts and trans orbs.
5. MAKE SURE YOU HAVE ATLEAST SOME RESISTENCE BEFORE GOING IN AND PREFERABLY FLASK IMMUNITY TO BLEED.

Act 5 Notes -
1. We have quite a few auras in this build.  We cant use all of them right away and will need a level 3 enlighten to make them ALL work.  See the skills sections for what to use and what not to use.
2. At this point all your resistences should be atleast 50+, ideally 75+ because after Act 5 our res is cut by 30%, so its important to over cap as much as we can so we arent screwed going into Act 6.
3. Upgrade your gear and weapons here if you can.  It will help alot going into Act 6. Feel free to use swords or axes at this point, whatever has the most damage.
4. We should start smoothing sailing at this point, moving forward we will be specing more into block, life, and some other odds and ends to get us preped for mapping.
5. Should you need more DEX or INT as you level, feel free to craft some on your gear or pick up a 30 stat nodes in the passive skill tree until you get some better gears.

Quest 1 - Any ring to fix your res
Quest 2 - Armor or Evasion flask, either will be fine
Quest 3 - Red Jewel


Act 6 Notes -
1. Moving forward into Acts 7+ we will probably start specing some point into the axe specific nodes on the skill tree so its going to be important to use axes over any other weapon, full stop.
2. Act 6 also see our resistances cut by 30%.  If you check the loadout dropdown and go to Act 6, you can see the gear im wearing up to this point on the test run I did for this build, decent resists but not amazing.
3. The early part of Act 6 is alot of fire and cold damamge, then moving into all three elements. Resists Resists Resists, I cannot stress how important keeping up with resists is!!!!
4. At this point I am picking up and IDing alot of the ground loot, esp on pieces i know need to be replaced.

Be sure to do Lilys quests in the shore to get access to most all gems at level 1. This is where you can freely start to min max your skills and sockets.
Most quests from here on out give skill books, flasks, and jewels so feel free to pick whatever suits your fancy.

Act 7 Notes -
1. Keep on looking for your gear upgrades and try and get as much as possible so you can go into mapping with no issues.
2. If you end up getting lucky in Act 7 with a good weapon, youll likely not upgrade till Act 9 or 10 but still continue to pick up and ID items.
3. Other than that this act is very straight forward, keep on with the keep on.

Lab Notes - (Second Lab)
1. Be weary of traps and such.
2. I would 100% have bleed immunity by now
3. Dodge Izaros attacks at all costs, bleed him and clean up adds if there are any.
4. Just as easy as the first lab tbh.

Act 8 Notes -
1. This is a weird Act, youll find once you start on the left side youll be extremly overleveled compared to the zones your in, I almost always end up leap slamming my way past this side of the Act and just rush to
     to the boss and move on to Act 9.
2. These laters acts are really just a reiteration on the previous one.  Resists, Weapon Upgrades, Gear Upgrades, Fitting in more of your end game skill setups. EZ PZ.
3. You really should be fly by this point. Block is look solid, and its about to get even better come finishing the third LAB.
4. At this point I am rarely using a mana flask and our leech is ACTUALLY doing something. This is also because I am still only running Herald of Purity and Vitality, so I have alot of extra mana to spare.
    if you are using skitterbots as well or even pride, I recommend keeping atleast one mana flask so you arent hindered.  This will change once we get to maps if you go the option of more auras.
5. Act 8 is where you start finding alot of Divine life and mana flasks, pick those up and make sure you get bleed immunity mod.  As well as sell all 6 socket items you find.

Act 9 Notes -
1. This Act pretty well finishing the attribute highway and from here on out its pure def/damage nodes moving into maps. All the boring stuff is done!
2. Things start hitting a bit harder in Act 9, so do youself a favor a re-up your chest piece for that flat armor.  You can still die fairly eaisly if you aren't careful.
3.  In my playthrough damamge was feeling solid so moving into maps getting damamge nodes should feel quite nice.
4. Once we finish out our mana reservation wheel I end up slotting in skitterbots as my mana leech feels pretty solid.  This will vary per playthorughts, adjust accordingly.

Lab Notes - (Third Lab) - Do this lab after youve done the last trial to open it and do not kill Kitava until youve done this lab
1. If I am feeling pretty tanky, with decent damage and have bleed immunity and good res, I almost 100% of the time skip the perma buffs in Lab 3.  If not, grab as many as you can.
2. Stay mobile and TAKE YOUR TIME.  This third lab can be a step up for new players so it worth taking to easy and slow to make sure you one shot it.

Act 10 Notes - !!!!DO YOUR THIRD LAB BEFORE KILLING KITAVA!!!!
1. Now that you are in Act 10, you now have access to all gem (minus drop only and vaal gems) in the game. All are level one and you can buy them from Lily.  YAY
2. DO NOT KILL THE ACT 10 BOSS BEFORE DOING YOUR THIRD LAB!!!!!! If you kill Kitava in Act 10 your Resists will be cut by ANOTHER 30%!!! This is VERY VERY important.
3. Re-Read note two above ^^^^^^^^^^^^^^^^^^^^^^^^^^^^^^^^^^^^^^^^^^^.^7
^xADAA474. Once you do your third lab you can now spec into Versatile Combatant.  This gives us all the spell block we'll ever need. We lose max attack block but gain full 68/65 max block, before maps! Love it!
4. Act 10 is very easy and very simple, kill 3 bosses and thats about it.  EZ PZ and we're into maps!


GENERAL MECHANICS OVERVIEW

This build is fully capable of doing ANY AND ALL POE mechanices in the game....except for Legion. Do not do Legion with this build, its not made for it. Everything else is A-S Tier.