2 years ago
 Level 90 Boneshatter Juggernaut3.22
Life: 4,073141%
Mana: 31
eHP:
35,136
Resistances: 79%/78%/78%/40%
Armour: 55,809
DPS: 1,855,662
Speed: 4.86
Hit Chance: 100%
Config:
Pinnacle, Custom Mods
Bandit: Kill All
Pantheon: Soul of Solaris, Soul of Tukohama
Gear


Gems
Boneshatter
Ruthless
Impale
Fortify
Close Combat
Ancestral Protector
Vaal Ancestral Warchief
Culling Strike
Multiple Totems
Maim
Determination
War Banner
Pride
Blood Rage
Leap Slam
Faster Attacks
Ancestral Cry
Frostblink
Cast when Damage Taken
Vaal Molten Shell
Vulnerability
Lifetap
Tree Preview
- +500 to Accuracy Rating
- -2 to Accuracy Rating per Level
- 20% increased Armour per second you've been stationary, up to a maximum of 100%
- +1% to all maximum Elemental Resistances if Equipped Helmet, Body Armour, Gloves, and Boots all have Armour
- Non-Vaal Strike Skills target 1 additional nearby Enemy
- Enemies Killed by your Hits are destroyed
- Attacks with Axes or Swords grant 1 Rage on Hit, no more than once every second
- 25% of Damage taken Recouped as Life if Leech was removed by Filling Unreserved Life Recently
- 15% increased maximum Life if there are no Life Modifiers on Equipped Body Armour
- +50 to maximum Life
- 10% more Maximum Physical Attack Damage
- Buffs from Active Ancestor Totems Linger for 3 seconds
- 40% increased Damage with Hits against Rare and Unique Enemies
Notes
------------------------------------------------------------------------------------------------------------------

If you use this guide please make sure to Like the video you came from and Subscribe to Big Ducks on YouTube! It helps me to reach more people
and provide better content.

If you want to help support me further consider Subcribing to my Patreon for special perks!

If anything is missing from this section or you want to discuss the build feel free to join my Discord and look for the Dedicated Thread in the ducks-builds section

Discord Linked here -> https://discord.gg/WusyaTYXwA

------------------------------------------------------------------------------------------------------------------

THERE ARE MULTIPLE VERSIONS OF THIS POB, THE NOTES ARE DIFFERENT IN EACH VERSION.
SWAP TO THE POB YOU ARE CURRENTLY HEADING TOWARDS AND FOLLOW THE INFO THERE.
THEY WILL BE LINKED UNDER THE LEAGUE START VIDEO.

 - Cheap Early Endgame PoB <- You are here

 - Midgame Spell Suppression PoB

 - Endgame 4th Vow PoB (shoutout to tripolarbear (or whoever he got it from) for the 4th vow idea)

NOTE: I do not have a SUPER crazy investment PoB as I did not have the time due to health issues etc before league start. I suggest going to poe.ninja for the last week
of Crucible and look at top end Juggernaut PoBs and trying to put something together from there. It involves auras, Ashes of the Stars and stacking duration to get super high
trauma stacks. That will not be covered in these PoBs.

Configuration is set to match the PoB you are opening, I've looked around and most Boneshatter PoBs are inflating their actual damage pretty
significantly early on. It is unrealistic early on to hit much more than 20~ stacks of trauma while fighting and dodging boss abilities without berserk and level 19 gems is the highest
you will get reasonably by Eater / Exarch. You need pretty significant defenses to be able to stand still and stack trauma against pinnacle bosses. This starts happening at around
the Endgame PoB.


Things To Remember / Frequently Asked Questions / Concerns
------------------------------------------------------------------------------------------------------------------


If your damage is lacking it is almost assuredly your Axe PDPS -> Links -> Totem Use. Crafting an Axe is VERY important for this builds damage. There is a section
dedicated to Axe crafting in the Gear section below. After that focus on getting main links and off links. Ancestor totems are a HUGE part of the damage of this build.
You need to make sure that you are placing them before fighting difficult enemies. This build struggles with single target but has excellent clear. Totems make the
single target not atrocious.

Berserk should be used frequently while mapping as your rage should top off quite consistently. Warlord's mark on CwDT is good for topping rage consistently.
Use Vulnerability for bosses.

Frostblink will interrupt duration stationary mechanics but you will technically stay stationary while using it, you can also use it in the middle of using other abilities.
It is VERY good for avoiding abilities of bosses.

Ancestral Cry (or any warcry) can be put on left click when you Call to Arms.

Keep the level of your Cast When Damage Taken low to make sure you are maintaining rage with Warlord's Mark while clearing. We don't use Molten Shell for
the implicit armour, we use it for the % of our armour shield, so it being a low level doesn't matter too much.

Keeping your accuracy above maximum life is important. You can do this through the tree, accuracy on gear, or using Precision Linked to Arrogance. If you are
going to use Precision then you should remove things like Totem cull/maim but this will heavily reduce your single target.


List of Important Stats / Items
------------------------------------------------------------------------------------------------------------------


Enough Accuracy to be above your total Maximum Life, this build uses Precise Technique.
- Nodes on the Tree, stats on gear, Abyss Jewels, Precision Linked to Arrogance (remove maim/cull/frostblink/etc)

A way to generate Endurance charges, you can use Inexorable OR the Stun mastery but Inexorable is much more reliable IMO.

75(more for max res+) All Elemental Resistance (A little more doesn't hurt for ele weakness maps or altar mods)
- Nodes on the Tree, stats on gear, jewels, flasks, endurance charges

0+ Chaos Resistance (Get as much as you reasonably can but 0 + an Amethyst flask is enough early on)
- Stats on Gear, Flasks

Enough Armour to hit 90% Phys damage reduction while stationary, this is typically able to be covered by only a good chestpiece

Enough Dexterity and Intelligence to use your gear / skills
- Nodes on the Tree, stats on rings / gloves / boots / amulet, jewels

Enough Mana Reservation Efficiency to use all of your auras
- Nodes on the Tree, Eldritch helmet enchant, Jewels, Mana Mastery, Tattoos

Enough -mana cost to be able to cast your abilities as well as any small source of mana leech.
- Crafted on Rings, you can also take the life mastery for 30% of cost goes to life if you really are struggling early, and the small mana leech node near duelist.

Properly rolled and enchanted flasks, they are VERY important for mapping survival.
- Check the Trade website or roll with alterations / augments on 20% qual ilvl 84 base flasks


------------------------------------------------------------------------------------------------------------------


Gearing

	NOTE: This gearing section is VERY DIFFERENT depending on which level of investment you're at PoB wise Cheap, Mid, Expensive)

	Weapons:

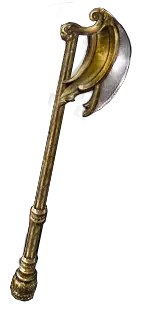
		Sinvicta's Mettle         - Easy, Cheap, Provides Rampage, replace with a higher DPS axe whenever you can.

		Budget Crafted Rare - Grab any Despot Axe off the ground as you level and identify, if it needs just one modifer then craft that mod and be done. Otherwise attempt to find a
											cheap fractured base with any good mod (listed below) fractured besides added phys and use an essence of contempt, craft the third missing mod.

											Mods to look for: % Physical Damage, Hybrid %Physical Damage and Accuracy(ideal as this is not craftable), Attack Speed


	Helmet:

		Rare	- Probably just buy on Trade website. Looking for Armor, Life, and any resists you need, or open suffix to craft resist or %dmg taken as elemental.

			Eldritch Implicits - Physical Damage Recouped as Life (Important!), Increased Mana Reservation Efficiency or Physical Damage taken as Fire

			Enchants 		  - Anything works here but don't worry too much about helmet enchants on your budget tier items. Save them for later more expensive pieces.


	Body Armour:

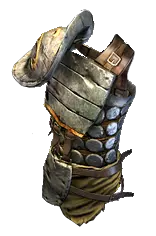
		Tabula Rasa		  - The true homeless hero of leveling.


		Rare					   - Probably just buy on Trade website.  Looking for 6 Link, Big Armour, Either NO life for Life Mastery or BIG life, any resists you can get.
									    You can craft this on a 6 Link base with Resist Essences if you want. Bench whatever is missing. If you have room you can craft take damage as elemental.

			Eldritch Implicits - All Non-Curse Aura Effect(Important!), Determination Aura Effect or Pride Aura Effect


	Gloves:

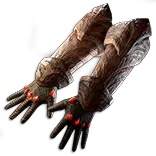
		Tanu Ahi - Extremely powerful on this build as we are constantly damaging ourselves and leeching, make sure to keep Blood Rage going to make the proc chance higher.
						 Onslaught will most likely be up constantly and Adrenaline should be like 75%+ uptime while fighting.

		Rare	    - Probably just buy on Trade website. Looking for Life, Armour, and any resists you need, can craft attack speed or stats.

			Eldritch Implicits - Non-Vaal Strike Skills hit 1 Additional Target


	Boots:

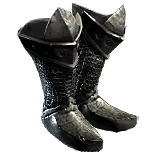
		Rare	- Probably just buy on Trade website. Looking for Life, Armour, 25%+ Movement Speed, and any resists you need.

			Eldritch Implicits - Action Speed, Any you find useful


	Amulet:

		Rare	- Probably just buy on Trade website. Looking for Life, Resists, Accuracy, Stats/

			Anoint - Early on Harvester of Foes if you have 100% Impale chance and Wrecking Ball if you don't.


	Rings:

		Thief's Torment - Super powerful early leveling / mapping ring that can carry you into t16s.

		Rare 				 - Probably just buy on Trade website. Looking for Life, Resists, Int, Dex, Accuracy, and an open Prefix to craft -7 mana cost of non-channeling abilities. Upgrade to this
									when you feel too squishy. Base implicit can be Life, Chaos Res, Ele Res.


	Belt:

		Rare 			 - Can be any solid base, Life, Phys Dmg, Abyss Socket. Go for Life, Res, any tertiary stats you need.

		The Magnate - Can be expensive early on but feels VERY good while mapping.


	Flasks:

		Enchant all utility flasks with Use on Reaching Full Charges when possible, you only have to press them every once in a while for bosses or hard mobs.


		We use (4) Utility Flasks and (1) Life Flask

		Non-negotiable flasks					    - Granite
		Other Flasks in Order of Importance - Jade(If using Iron Reflexes), Amethyst (Until Chaos Res hits 50~), Quicksilver, Sulphur, Basalt.

		All Utility Flasks should use the Gained Charges on being Hit Prefix, +3 ideally but +2 or +1 is okay early, you need ilvl80 base to hit +3 on hit and ilvl84 to hit max on most suffixes.

		Suffixes can go on any of the flasks, you should look for in order of importance, %Armour, %Evasion (If using Iron Reflexes), %Reduced Effect of Curse, %Attack Speed, %Movement Speed.

		Your life Flask should be an Instant flask, ideally one that is Instant while on low life. Use an anti-bleed / corrupting blood suffix until you can become immune to those effects
		through a jewel corruption or masteries.


	Jewels:

		Watcher's Eye 				- +2 Impale if you have 100% Impale chance, otherwise grab from other mods listed below or defensive ones you need that fit your auras.

												  Good 2nd or 3rd Mods are:
												  Pride - Intimidate(Replace Node on Tree) / Phys Damage
												  Precision - AS / Attack Damage
												  Determination - Phys Dmg / Armour / Reduced Phys Dmg Taken

		Forbidden Flesh / Flame - These can be GIGA expensive, and realistically not many are worth that aren't going to be INSANELY expensive.

												  Tukohama could be interesting as it is 10% more damage and would remove need for the Tribal Fury wheel. Needs testing.
												  Tawhoa needs testing to see if it got updated at all, if not probably stay away.
												  Tasalio and Valako could be interesting but need building around and will most likely be expensive.

												  None of the Juggernaut ones are worth IMO.

												  Aspect of Carnage is insane damage, but giga expensive and will make you die.

		Timeless Jewels 			  - Not much useful here, can grab Lethal Pride for double damage if you randomly have one laying around or go for the Vaal one in the later PoB.

		Impossible Escape		   - Imbalanced Guard is the only choice here, it is INSANELY expensive.

		Rare								 - Grab Life% and then ANY other 2 damage modifiers, they are all extremely similar. Attack Speed tends to be best.

------------------------------------------------------------------------------------------------------------------

Leveling

	Gameplay:

		Make sure that once you have Precise Technique that you are keeping track of your Accuracy and keeping it higher than your Max Life. Grab nodes on the tree or Accuracy on your
		gear. If you have to run Precision but it is not ideal.

		Boneshatter does more damage the more you use it, but it also does more damage to YOU. Make sure you are properly managing your defenses and recovery to deal with this mechanic.

		Place both of your Ancestor Totems down before fighting bosses and keep them up when they die, stand still and beat the boss in the face until it falls over. Use frostblink to dodge abilities.

	Auras:

		For Auras you will want War Banner, Blood & Sand, Flesh & Stone, until you swap to Boneshatter where you will swap to War Banner and Determination. Pride once you can fit it.

		As for running Auras on your life, only do so if you feel extremely confident in not dying, as typically this will be a bad move since your life total will be small.

	General Tips:

		Make sure that if you are dying you check your Life, Resistances, Flasks, and Links. Update these frequently and keep on top of things.

		Use the bench in your hideout frequently to craft resistances or life on rare pieces.

		Use essences you find on gear as you level.

		Check vendors occasionally for links you need.

		Remember to grab your gems as you level and level up gems for endgame in your offhands.

	Skill Swapping:

		Start with Ground Slam or your favorite early Marauder Skill. Suffer until 12 and enter Merveil's Cavern to grab Sunder from town. This ability will feel MUCH better and carry you until
		you feel comfortable swapping to Boneshatter.

		You can effectively swap to Boneshatter ONLY if you have this set of criteria checked off:
			Untiring Ascendancy Allocated
			Tribal Fury and Attack Mastery Allocated
			Inexorable Allocated

		It is VERY important that you do not try to swap until you have these things and are ready, or Boneshatter will shatter YOU instead of the enemy.


------------------------------------------------------------------------------------------------------------------

Thanks for reading, if you try the build and enjoy it be sure to let me know! If you have any improvement ideas feel free to talk about them in the designated channel on my discord for this build.

Follow me on all of my Socials

	BigDucks on YouTube - For Video guides about Path of Exile and other ARPGs
	BigDucks on Twitch - Livestreams of me testing all of the stuff for my guides
	Big_Ducks on Twitter - Roast my terrible takes, mostly me complaining about stuff
	bigducks on Patreon - Special Perks and early access to PoBs

------------------------------------------------------------------------------------------------------------------