2 years ago
 Level 97 Hybrid Crit Spark Inquisitor3.20
Life: 4,725129%
ES: 1,81940%
Mana: 133
eHP:
35,569
Resistances: 75%/75%/75%/65%
Supp: 60%
Spell Block: 26%
Armour: 7,270
DPS: 22,068,638
Speed: 7.46
Hit Chance: 100%
Crit Chance: 100.00%
Crit Multi: 557%
Config:
Pinnacle, 50% Shock, Frenzy, Power, Custom Mods
Bandit: Alira
Pantheon: Soul of the Brine King, Soul of Garukhan
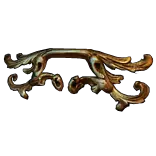
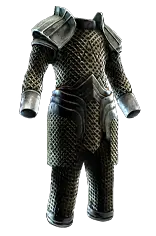
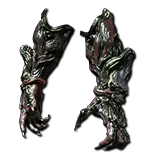
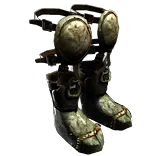
Gear




Gems
Determination
Tempest Shield
Frost Shield
Vaal Molten Shell
Zealotry
Shield Charge
Faster Attacks
Flame Dash
Tornado
Arcane Surge
Cast when Damage Taken
Anomalous Vaal Spark
Awakened Spell Echo
Inspiration
Pinpoint
Increased Critical Damage
Awakened Added Lightning Damage
Forbidden Rite
Vaal Cold Snap
Sniper's Mark
Inspiration
Divine Blessing
Vaal Haste
Tree Preview
- Spells which can gain Intensity have +1 to maximum Intensity
- +25% to Critical Strike Multiplier against Unique Enemies
- 10% more Skill Effect Duration
- 10% increased maximum Life
- 10% reduced Life Recovery rate
- +50 to maximum Life
- 10% reduced Mana Cost of Skills
- 10% of Damage taken Recouped as Mana
- Critical Strike Chance is increased by chance to Suppress Spell Damage
Notes
https://www.youtube.com/watch?v=2v2tblTWPxA

CHANGES FOR 3.20

TREE slight tree change from 3.18 version, dropping Purity of Flesh, Arcane Potency, and Soverighty (aura reservation) in favor of Magebane (suppression), and more duration/damage on the tree.
	-this results in us dropping Tempest Shield and running Garukhan lesser pantheon for reduced shock effect, and/or using new jewels for reduced shock
	-grace reservation mastery allows us to eventually run Defiance Banner eventually if mana allows
	-the extra duration theoretically gives us an extra Spark hit, and duration is in general really good for Molten Shell, Tornado, and Frost Shield.


ORB OF STORMS early on especially while leveling in the campaign OOS helps a ton!
	-use Ice Bite + Ele prolif for early frenzy charges and self clearing with freeze
	-can use Herald of Ice over Grace or Determination early on if you are confident!


PIOUS PATH is getting a slight nerf, this is a bit annoying but it isn't a huge deal and doesn't really change anything that we do with the build.
	-it does make using RF for free a bit harder if you want to go that route eventually (this build isn't using it currently)


MANA a lot of people have talked about having mana issues with this build the main fix for that is on the tree or gear.
	-Alira + Mana flasks for the campaign should solve any early mana issues. Clarity can be used if you really hate using mana flasks. Especially if you chose to drop either grace or determ for Herald of Ice early.
	-Dreamer Nodes + Caster Mastery should fix any mana issues you have in early maps.


TRICKSTER vs INQUIS
	-Trickster potentially clears maps faster, and safer
	-Trickster has a much harder time getting damage, and resistant mobs and bosses are quite a bit more annoying. The Archnemesis nerf might help with this though?
	-Both are good, but if you plan on only doing maps Trickster might be the way to go. Inquisitor is a bit more versatile and can do Pinnacle bosses earlier and easier.


THE AMOUNT OF BUTTONS YOU PRESS
	-Focus helmet allows you to combine most of the actives into one button press (focus) Tornado, Sigil, and Sniper's Mark can be placed here. I personally self cast Sniper's Mark but this can get APM intensive.
	-I would recommend you self-cast Frost Shield, this one is a bit more important and its necessary for you to facetank, you really don't want to have to wait for Focus cooldown to be up to use it, or move it.
	-We are right next to the +1 Curse Mastery, so if you REALLY like pressing buttons we can theoretically can curse Temp Chains or Enfeeble next patch with high value...


AS A LEAGUE STARTER this build is still quite strong, spark is just good at leveling, and OOS can carry campaign and early maps nicely. This build does have a lot of buttons to press though...
	-DPS is increased heavily by using buttons correctly, this is mostly in regards to Pinnacle Bosses, for mapping its very easy to just hold down Spark, and occasionally use OOS/Frost Shield/Focus.

Self chill later: https://www.youtube.com/watch?v=Q4_z5zD8FFg

LEVELING NOTES


-----------Crafting your leveling sceptres--------

Lvl 8 craft: 1 magic sceptre + 1 alt + 1 white topaz ring
Lvl 14 craft: 1 magic sceptre + 1 alt + 1 magic topaz  ring
Lvl 20 craft: 1 magic sceptre + 1 alt + 1 rare topaz ring

iron ring (any rarity) + green gem  ---> normal topaz ring


------------------------ACT1---------------------------
-Make a Ranger first, to mule Pierce support to our Templar character
-Favor using sceptre over wand, to enable Leapslam from Act 2 onwards


Spark - Pierce - Added Lightning (B-B-G)

Frostbomb - Onslaught (B-G) [cast into packs as you frostblink thru them]

Frostblink - Arcane Surge (B-B) [leave arcane surge at level 1]

Holy Flame Totem (Optional) (R) [regen + extra damage, used for bosses]

Flame wall (Optional) (B) [used for bosses]

Clarity (B)


------------------------ACT2----------------------------

[Bandits: Help Alira]

Leap slam - Faster Attacks (R-G) [this is our main movement skill]

Spark - Pierce - Faster Casting (B-B-G)

Herald of Thunder (B)

Herald of Ice (G)

------------------------ACT3----------------------------

Spark - Pierce - Faster Casting - Inspiration (library) (B-B-G-R)

Orb of Storms - Ice Bite (library) - Elemental Proliferation (library) - Onslaught (B-B-G-G) [stand inside OOS and cast spark, in order to generate Frenzy charges and freeze enemies][we can drop Frostbomb and Flame Wall]

Snipers Mark (library) [cast on bosses only]

Determination (library) [drop herald of ice]

------------------------ACT4----------------------------


------------------------ACT5----------------------------

Sigil of Power [stand inside these for bosses]

------------------------ACT6----------------------------

[Notes: Cap your elemental resistances right now.  Teleport to your hideout and manually craft resistances onto all open suffixes via the crafting bench.  If you are dying it is due to your res not being at 75%]

Tornado [used for bossing]


------------------------ACT7---------------------------

[Notes: After Completing cruel lab and speccing into the Sovereignty passive, you should drop Herald of Thunder for Zealotry.  You will likely have to drop Clarity as well because it will be too high a level.  Feel free to grab a level 1 Clarity and level it up a few times to help with mana, if you need]

Zealotry


-------------------Wand and Shield Swap---------
Look out for a strong ES based shield with good offensive stats.  You can drop 1 sceptre at any point for a shield, and continue to leap slam with scepter + shield combo.

If you find a powerful wand while leveling, you will drop leap slam and frost blink and start using shield charge.  You must have a shield before you swap over to wand.

Shield Charge - Faster Attacks

Flame Dash - Arcane Surge


-----------------Final Links For Leveling---------------

Spark - Faster Casting - Pierce - Inspiration (B-B-G-R)

Orb of Storms - Ice Bite - Onslaught - Elemental Proliferation - (B-B-G-G)

Sigil of Power - Tornado

Frost Shield

Snipers Mark

Tempest Shield - Zealotry - Determination [Don't worry about Tempest Shield until you are far into maps.  You will need to have specc'ed into the Influence passive wheel which is quite late in terms of priority, and ideally want to have the Eater of Worlds helmet implicit for Mana Reservation]

Shield Charge - Faster Attacks

Flame Dash - Arcane Surge

Molten Shell - Cast When Damage Taken  (R-R) [Optional, if you have sockets available]


-----------------Skill Tree Swap into Crit---------------

Throughout the entire leveling process, we have specced into the Elemental Overload Keystone and the Lightning Mastery 'Lightning Damage with Non-Critical Strikes is Lucky'

This is strong and can carry us past leveling and even through early maps if we want.  Remember to unspec BOTH of these points when you decide to swap to the endgame crit tree.

By the time you're doing uber lab, you should probably be swapped over.  I would NOT switch before 3rd lab or before having at least a 5 link.