7 weeks ago
 Level 12 Hybrid Blade Trap Trickster3.24
Life: 23015%
ES: 2,0790%
Mana: -73
eHP:
8,506
Resistances: 66%/80%/69%/-60%
Evade: 45%
Evasion: 6,984
DPS: 1,877
Speed: 1.73
Hit Chance: 47%
Config:
Pinnacle, 10% Shock, Frenzy, Power, Custom Mods
Bandit: Kill All
Pantheon: Soul of Lunaris, Soul of Gruthkul
Gear



Gems
Blade Trap
Added Cold Damage
Swift Assembly
Added Lightning Damage
Bear Trap
Steelskin
Frostblink
Arcane Surge
Whirling Blades
Faster Attacks
Summon Skitterbots
Grace
Elemental Weakness
------------------ Act 7 --------------
Anger
Notes
Guide by Allie
https://www.twitch.tv/Allliee_
https://www.youtube.com/c/Alliee

Leaguestart Guide for this PoB - https://youtu.be/8qZPhvuXs-s

>>>>VERY IMPORTANT<<<<

You will need ~30-40 Chaos to actually be able to swap to Splitting Steel.
This can either be obtained in White/Yellow Maps while playing Blade Trap, or by doing 1-2 Hours of Heist on Day 1 which would make you ~200 Chaos.

I HIGHLY recommend you do Heist and have a whole video on how you'd do this here - https://youtu.be/v4PBenCGMIo
This will allow you to swap to Splitting Steel with substantially better gear and a 6-Link allowing you to have no issues to Red Maps.

IF YOU END UP GETTING 1-2 CHAOS WHILE LEVELING:

Buy an Ephemeral Edge ASAP. This will double your DPS while leveling and make your experience super smooth with Blade Trap.
Even with low Energy Shield amounts, Ephemeral Edge will beat all other Swords & will scale harder as you get more and more Energy Shield.
This will also get you into the mindset of stacking Energy Shield just like you would once you swap to Splitting Steel.

Once you have Ephemeral Edge, stop Dual Wielding and find an ES Shield ASAP as it will give you a big DPS boost.


Act 1


Look for MS boots in town & use 2 wands.
Look for GGG or GGB on anything in town before going to Coast. You will use Added Cold Damage or Added Lightning Damage based on the color.

Make sure you have ANY 2 swords ready to go for Level 12 when you swap to Blade Trap.
You are looking for a large Flat Damage number on them and it doesn't matter what kind of damage it is, whether it's Cold, Lightning, Fire or Physical.

>>>>Note on Explosive/Blade Trap usage<<<<
Ideally, keep throwing the Traps a little bit infront of you as you are running through zones.
Traps have a slight delay before they Arm and Explode.
If you throw them ahead of you while moving forward, any mobs following you will trigger them as soon as they are Armed.
You don't need to do this, it's just something to keep in mind if you want to rush as fast as possible.

Level 1
Take Explosive Trap from Nessa & link it to Chance to Poison.

Level 4
After Mud Flats is over and you are in The Submerged Passage, teleport back to The Coast waypoint and go get the medicine chest from Tidal Island.

Take Bear Trap & Frostblink from Tarkleigh.
Take Swift Assembly from Nessa and replace Chance to Poison in Explosive Trap.

From Nessa buy Arcane Surge.
Keep Arcane Surge at Level 1 and link it to Frostblink.
Make sure to keep Frostblinking for the Arcane Surge buff to not have Mana issues.

From now on use Bear Trap as a way to debuff Rares and Bosses every 3 seconds so they take more damage then, just spam Explosive Trap.

~Level 8-9

As soon as you enter the Prison:
Go back to town and take Added Cold Damage or Added Lightning Damage based on if you have a Blue or Green 3rd link for Explosive Trap.
Ideally, you want to find GGG as Added Cold Damage is slightly better. This is a MINOR difference.

Your Links are now Explosive Trap - Swift Assembly - Added Cold Damage or Explosive Trap - Swift Assembly - Added Lightning Damage

Later on while leveling/changing gear: You can ALWAYS swap between Added Cold Damage or Added Lightning Damage.
They are VERY close to eachother the whole way to Act 10. This means that you can look for both GGGR and GGBR as your 4-Link.

Killing Brutus: Use Bear Trap every 3 seconds and just spam Explosive Trap, keep Frostblinking for Arcane Surge and he should die quickly.

In Town: Buy Whirling Blades & Faster Attacks.
Put these somewhere to Level them for now or just keep them in your inventory.

Level 12

In Town: Buy Blade Trap from Nessa, replace Explosive Trap with it.

You are now playing an Attack build. Blade Trap will summon 2 copies of your Weapon and spin them in a circle 4 times for a total of 8 Hits, 4 per Weapon.
You are going to want to Dual Wield 2 Swords now. This is due to Blade Trap's +1 Rotation if you are Dual Wielding meaning it will do 25% More Damage.
The downside here is that it will now make 1 copy of each weapon meaning both of your Weapons need to be as good as each other.

From now on you are simply going to be looking for Swords as your main DPS upgrade. All you care about on them is going to be the raw Flat Damage roll and nothing else.
The Attack Speed on the sword doesn't matter & while good, % increases in Damage are not going to be anywhere close to Flat Damage.

If you can, every time you get a new Sword that looks like an upgrade, if it has an Open Prefix, go to your Hideout and craft "Adds x to x Lightning Damage" to the Sword if possible.
This will be a major DPS boost and will make leveling even faster.

Start using Whirling Blades now and link it to Faster Attacks. This will give you a substantial boost to your overall Mobility.
Whirling Blades does not share a cooldown with Frostblink meaning you can use both together for some crazy Movement Speed.


Act 2

BANDITS: Kill all, +2 passive points is the only option you want in this build.

Level 16
Take Summon Skitterbots from Greust. Socket it anywhere there is space.

Buy Herald of Thunder & Herald of Ice from Yeena.
Use both Herald of Thunder & Herald of Ice. We will be getting rid of them in Act 3 so don't get too attached.

Go pew pew Act 2.


Act 3

Start looking for:
GGGB for Blade Trap - Swift Assembly - Added Cold Damage - Added Lightning Damage.
If you happen to get a Red or another Green socket, you can also play around with using Elemenal Damage to Attacks or Trap and Mine Damage as they are both fine as a 4-Link until you get GGGB.
That means that GGRB and GGGG are good options too as a 4-Link.
Pick up all Yellow items, you are going to need lots of Alterations.


Level 24
Take Elemental Weakness from Maramoa.
Buy Grace & Discipline from Clarissa.

Remove Herald of Ice & Herald of Thunder and replace them with Grace & Elemental Weakness.
Use Elemental Weakness on Bosses but you can also use it on Rares if you'd like.

Put Discipline in your Off-Hand to gain Experience for the Splitting Steel swap.


Act 4

Once you pick up Influence in the middle of Act 4, stop using Herald of Ice and use either Grace or Hatred.
Pick up Ghost Dance as soon as you can put on Grace.

You now want to look for Energy Shield & Evasion bases, ideally using Evasion/ES Hybrid Items but this comes secondary to the stats on the items while leveling.

Do lab at Level 31 when your gems upgrade.
Pick up One Step Ahead as your first node.


Act 5-10

Keep upgrading your gear and try to get as much Evasion as possible.

Act 6

From Lilly buy: Splitting Steel, Sniper's Mark, Steelskin, Automation & Wrath.
Link Steelskin & Automation for a nice defensive layer. Put the rest of the gems into your Off-Hand or into spare sockets to gain Experience for the Splitting Steel swap.

Act 7

~Act 7 is when you will get Charisma. Once you do unlock it, go back to Act 6 and buy Anger from Lilly.
Remove Summon Skitterbots and replace it with Anger. This will be about a ~80% DPS increase.

Ideally, as you get towards the end of Act 7 you want to make sure you are running a pure Evasion Chest and a pure Energy Shield Helmet if possible.
Ghost Dance will become the majority of your defensive layers and with Escape Artist being picked up on your 2nd Lab, you want to make sure you are playing around it.

Lastly you will want to pick up Soul Drinker on your 3rd Lab. This is MANDATORY to make the Splitting Steel swap work as otherwise you will have next to no recovery.

Otherwise, follow the rest of the Passive Point Trees all the way to Act 10.


Endgame Pre-Splitting Steel

You will want to play Blade Trap until you can afford all of the items required for the Splitting Steel swap. This will require ~30-40 Chaos worth of gear in total to accomplish.
You can either go into White/Yellow maps and make the money while progressing or (what I recommend you should do) is do ~1 hour of Heist.
This will be discussed further in the section below.

If you wish to continue into Maps, make sure to keep upgrading your gear with Evasion and Energy Shield.
You will lean very heavily into Ghost Dance as your defensive layer so keep stacking as much Energy Shield as possible.


Splitting Steel Swap

You will need ~30-40 Chaos to be able to afford everything you need to swap.
You can either just go into White/Yellow maps with Blade Trap or go do 1-2 Hours of Heist to make ~200 Chaos which would be enough to make a very comfortable setup all the way to Red Maps.

I HIGHLY recommend you do Heist and have a whole video on how you'd do this here - https://youtu.be/v4PBenCGMIo

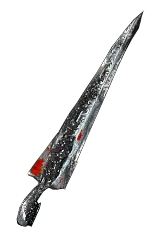
The bare minimum to swap is obtaining an Ephemeral Edge.
This while build is based around it and its conversion of Energy Shield into Added Lightning Damage.
Just having this by itself is NOT enough to be able to swap.
You will need to make sure you have ~3-4k Energy Shield at a MINIMUM to make it feel comfortable.

To accomplish this, there are some other super cheap Uniques we can use as well as using a Pre-Leveled Discipline.
If you don't have one, go to Act 2 and buy one. This won't be as good as a Discipline you would've leveled manually but it will be better than a Level 1 Discipline.

The uniques you will also want alongside Ephemeral Edge are as follows:
(Prices are subject to change and fluctuate with popularity)

Crown of Thorns - This should be a 1 Alchemy - 2 Chaos helmet that was super buffed to give a large amount of Energy Shield.
While providing no other useful stats, this will still beat most other 10-20 Chaos helmets early on in raw Energy Shield which is all we care about.
Eventually, you will want to upgrade out of this ASAP but, for now it is too efficient to not use.

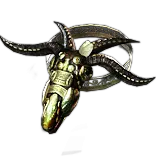
Carnage Heart - This should be a 2-5 Chaos amulet that is simply too good to not include. Since we will always be leeching due to Soul Drinker, we can always benefit from its Damage Increase.
Due to this build having a lot of Flat Damage and very little % Increased Damage, Carnage Heart just gives too much DPS to skip.
Not only that but, it also provides a lot of All Attributes allowing you to not worry as much about it on the rest of your gear and some All Elemental Resistances making Res Capping easier.

Bated Breath - There are pretty much no good Energy Shield belts available early on especially with Stygians being very expensive.
This belt is pretty much always 1-2 Chaos making it a very strong option for a lot of DPS immediately.
Eventually, you will want to replace this with a Stygian that has Energy Shield on it as it will give you substantially more EHP and DPS.

Optional:

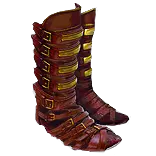
Sin Trek - These boots are perfect for our build offering a large amount of both Evasion and Energy Shield with a very high Movement Speed roll.
These are usually 5-10 Chaos but if you can afford them AND deal with having 1 less item to Resistance Cap with, get them.

Ondar's Clasp - With us always being at Full Life, we can always benefit from the "30% increased Attack Speed when on Full Life."
Not only that but, we will also not be immediately Accuracy Rating capped meaning that these gloves will be a big DPS increase.
The issue with these gloves is that you will have 1 less slot to use to Resistance Cap yourself.
Only use these if you can get to Resistance Cap without your Gloves.


>>>VERY IMPORTANT<<<

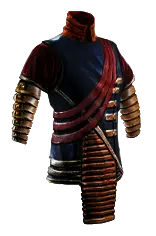
The final thing that will be VERY important for swapping will be a good Evasion/Energy Shield Hybrid Body Armour.
Ideally, you want a Sadist Garb as it is the best base but any Hybrid Body Armour works.

The only stats you will care about on this Body Armour to start off will be a high Evasion and Energy Shield roll.
Ideally, you want to find one with a Tier 4 or higher Flat and % Hybrid Evasion/Energy Shield roll on it.
If possible, craft "+x to Evasion Rating" on it if you have an Open Prefix.

This will probably cost ~5-10 Chaos for a half decent one and will be crucial to you having enough Energy Shield.
If you can, buy a 6 or 5 Linked Non-Corrupted Evasion/Energy Shield Hybrid chest and use a few Woe Essences on it.
Hitting something decent should be easy and you will then also have a 6-Link for more DPS.

Other Gear

Fill the rest of your slots with gear that Resistance Caps you first and foremost.
If possible, try to get Energy Shield rolls on them but it is not needed, making sure you are Res Capped is more important.

MAKE SURE you get yourself an ES Shield that is not a Hybrid base and is just Pure Energy Shield.
This alone will easily be a ~10% DPS increase alone.


Swapping

>>>PLEASE READ THIS<<<
>>>PLEASE READ THIS<<<
>>>PLEASE READ THIS<<<
>>>PLEASE READ THIS<<<

DO NOT SWAP TO SPLITTING STEEL UNTIL YOU DO YOUR 3RD LAB AND HAVE SOUL DRINKER
PLEASE DO NOT ATTEMPT IT YOU MUST DO 3RD LAB FIRST

>>>PLEASE READ THIS<<<
>>>PLEASE READ THIS<<<
>>>PLEASE READ THIS<<<
>>>PLEASE READ THIS<<<


Make sure you swap the PoB skills to the "Level 70 Splitting Steel Swap" & swap the passive tree to the "Level 70 Splitting Steel Swap" tree.
There are a few minor changes to the tree requiring ~22 Respec Points in total. You will get 12 of these for free from leveling.
You can go back to Act 1, 2 & 10 and do the quests there for an additional 6 or just get 10 Regret Orbs.
If you ended up doing Heist, you should have plenty to spare making this a non-issue.

Important
If you do not have a 5-Link or a 6-Link the Splitting Steel setup you want to use goes as follows: Splitting Steel - Returning Projectiles - Energy Leech - Volatility
Your 5th Link would be Lightning Penetration & 6th would be Elemental Damage with Attacks.

If you don't have enough Respec Points thats fine, just make sure you pick up the Leech Mastery, Acuity & Elemental Overload.
If you need to save points then dont go over to Sovereignty and pick it up later. This will mean you will have to run a lower level Precision to have enough Mana until you can pick it up.


Your main playstyle is:

While clearing you will simply just use Splitting Steel as normal while running around with Frostblink and Shield Charge.
It will automatically Split towards enemies doing most of the work for you.

This will change a bit on Bosses:

Due to us having Returning Projectiles, if we were to stand on top of a monster, every single Split of Splitting Steel would return to us once it reaches its full travel distance.
These Returning Splits can then also hit the target we are standing on top of. This means, if you were to be on top of a Boss, you would hit the boss 1 Base + 5 Splits + 2 Sniper's Mark or 8 Times.
Now, these splits will do 61% Less Damage due to Returning Projectiles which will eventually be taken care of by Nimis as a future upgrade.

Otherwise, make sure to keep up your Arcanist Brand on Bosses only once you have Anathema to benefit from the additional curses and put down your Ancestor Totem.
I need to make this obvious - You DON'T NEED to use Ancestor Totem on anything else other than Bosses.


Getting Spell Suppression Cap

As you move further into the build, your first challenge will be to get to Spell Suppression cap. We will be at 61% with Inveterate and Instinct and will have to get 39% on our Gear.
This will be accomplished by getting the following rolls on your gear:

A Tier 2 or higher roll on your Body Armour
A Tier 2 or higher roll on your Boots
A crafted roll on your Helmet

This will give you 94% chance when not at full ES and a 106% chance at full ES. In a higher budget setup we will make this 100% at all times but for now this is fine.
Getting a high roll on your Body Armour will be difficult while at the same time getting a high Energy Shield & Evasion roll.

You can supplement this by getting a pair of Evasion gloves and getting Spell Suppression on those.
This will mean you will have less ES due to you not using ES gloves but if needed, you can go that route.
You can also replace the Attack Speed Crafted Mod on your Shield with Spell Suppression chance which would be another option if you don't wish to replace your Gloves.


Getting Ailment Immunity

Ailment Immunity is something that is not immediately important in this build due to One Step Ahead making us immune to Chills & Freezes which are the 2 really bad Ailments.
With that said, being Immune to Ignites, Shocks & all of the Delirium Ailments is a very important defensive layer.

Immunity cannot happen until you first fix Spell Suppression as we will be utilizing that to get to our Ailment Immunity.
This is due to the jewel Ancestral Vision which gives us 50% of our Spell Suppression as Chance to Avoid Elemental Ailments meaning we get 50% of it solved with Spell Suppression cap.
Ancestral Vision will be a pretty pricey upgrade as it typically is worth ~1-2 Divine most seasons meaning it won't be an immediate upgrade.

Once you do have it, the last 50% will be obtained from the following rolls:

20% Chance to Avoid from the Shield Mastery at Arcane Guarding
A Tier 4 or higher Eater of Worlds Eldritch Implicit on your Boots with Greater Ichors
A Chance to Avoid Elemental Ailments Crafted Mod on your Shield

You will need to make sure to use Blessed Orbs to roll the Boot Implicit to 20% otherwise it will NOT stop ground ailments from affecting you.


Further Upgrades:

As 3.24 starts, I will be releasing a followup guide & PoB to this one talking about how to upgrade this build in great detail.
Everything here should be enough to get most people through all content and through anything you'd want to do on Week 1.

You will be able to find it on my YouTube channel linked at the top of the notes section.
The Midgame Item Set and Tree will have most of the immediate upgrades you will be looking to make such as Voice of the Storm.
Until then, I will talk about some potential upgrades you can make that are Plug & Play that you should be able to make with no problem.

Anathema is a powerful Ring that will pretty much double your DPS against bosses as it will allow you to apply up to 4 curses at once.
The important thing to keep in mind here is that you WILL have to swap your Elemental Mastery from the "Inverted Resistance" to the Exposure one.
Keeping the Inverted Mastery will actually end up being a ~5% dps loss due to you bringing enemy resistance into the negatives meaning it's actually inverting it to a positive value.
Make sure to also pick up the Power Charge by Ghost Dance to allow you to apply all of your curses. Until you can, don't use Punishment.

The single best way to keep scaling this build is through stacking more and more Energy Shield.
You are going to want to keep upgrading your gear with higher rolls where possible.

Eventually, you will want to also look for a Harvest Attack Speed enchant on your weapon. This will give you a decent amount of extra attack speed making the build feel overall snappier.
You can then use a Craicic Vassal to safely corrupt it to 28% Quality to gain a little bit of extra Attack Speed on top.

A Watcher's Eye with Wrath Increased Lightning Damage would also be a great short-term DPS upgrade due to it being considered "bad" for most builds.
Due to this build having very little % Damage and most of it being in the form of Added Flat Damage, the % Increased Lightning Damage ends up being a ~10% DPS increase.


.