2 years ago
 Level 95 Blade Vortex Pathfinder3.21
Life: 4,357153%
ES: 835
Mana: 20
eHP:
46,837
Resistances: 76%/75%/75%/75%
Evade: 41%
Supp: 99.19%
Armour: 21,651
Evasion: 6,219
DPS: 4,188,722
Speed: 3.02
Hit Rate: 7.50
Hit Chance: 100%
Config:
Pinnacle, 10x Wither, Custom Mods
Bandit: Kill All
Pantheon: Soul of Arakaali, Soul of Ryslatha
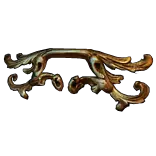
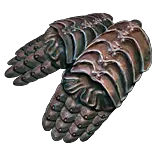
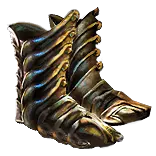
Gear


Gems
Vaal Blade Vortex
Unleash
Deadly Ailments
Void Manipulation
Unbound Ailments
Efficacy
Herald of Agony
Determination
Defiance Banner
Haste
Malevolence
Divine Blessing
Inspiration
Despair
Temporal Chains
Arcanist Brand
Hex Bloom
Shield Charge
Faster Attacks
Flame Dash
Plague Bearer
Steelskin
Cast when Damage Taken
Withering Step
EnemyExplode
Tree Preview
- 5% chance when you inflict Withered to inflict up to 15 Withered Debuffs instead
- 15% increased Duration of Ailments on Enemies
- 15% increased Skill Effect Duration
- 100% increased Energy Shield from Equipped Helmet
- +15% chance to Suppress Spell Damage if Equipped Helmet, Body Armour, Gloves, and Boots all have Evasion Rating
- Life Flasks gain 1 Charge every 3 seconds
- Mana Flasks gain 1 Charge every 3 seconds
- 15% increased maximum Life if there are no Life Modifiers on Equipped Body Armour
- Skills cost Life instead of 30% of Mana Cost
- +50 to maximum Life
- 40% increased Physical Damage with Skills that Cost Life
- Poisons you inflict deal Damage 20% faster
- 8% increased Damage for each of your Aura or Herald Skills affecting you
- Chance to Suppress Spell Damage is Lucky
Notes
CHECK OUT THIS SPREADSHEET IF YOU PREFER A BETTER, MORE ACCURATE LAYOUT: https://docs.google.com/spreadsheets/d/1HuaMyTcX6TYt0klk5AqxpbjKCHhZyM4ZJ2lh6aaGHvg/edit?usp=sharing

                          ---------ACT I-----------
Kill Hillock -> Caustic Arrow
Check for Movement Speed Boots and GGG (nn)

Pierce - Nessa after Submerged
Buy Mirage Archer and Frostblink
Shrapnel Ballista from Tarkleigh
Dash from Tarkleigh
Check for Lapis Amulet

Caustic + Pierce on 2 Link

Void Manip -> Prison
LMP -> 1 Trans after reaching Prison

Buy Lapis -> 1 Trans

Priority: (2-3 Trans required for Act I)
1. Lapis Amulet (1 Trans)

Puncture for Brutus - 1 S.O.W.

Precision Brutus Reward
Withering Step -> 1 Trans buy

TAKE PRIMAL SPIRIT BEFORE HEART OF OAK YOU NOOB!

Merveil's Cavern -> Get Poisonous Concoction from Nessa

For Merveil -> Buy Sapphire Ring for Cold Res (can sell 1x Iron + Blue Gem or just  buy for 3 SoW)

Drop Caustic Arrow for Toxic Rain Setups

Level up a BV in your offhand from act 1 so you can swap to it in act 6

Poisonous concoction at Merveil's Caverns
Swapping to P.Concoction -> UPGRADE FLASKS! VERY IMPORTANT. 2x Greater Life Flask cos 6 Scrolls of Wisdom Total and require level 12

TURN OFF AUTOEQUIP!

3 to 1 your old flasks

                          ---------ACT II-----------
2 Alts Required

Herald of Agony -> After Save Helena (Gruest)
Buy Blood Rage -> 1 Alt
Buy Skitterbots -> 1 Alt

Drop Shrapnel Ballista
Can use Dash instead of Frostblink if you dont have a blue socket

                           ---------ACT III-----------
Grab Despair reward
Check for 4 links around level 24

Despair from Maramoa after getting Tolman's Bracelet
Buy Plaguebearer from Clarissa too (1 Alteration)
Alchemist's Mark is optional for flask sustain during bosses - 1 Alt

Library
Shield Charge (Trans), Faster Attacks (Trans), Lifetap(Trans), Malevolence (1 Alt -not as important), Clarity (1x Trans)


ACT V - Quartz Flask - TAKE THIS!

ACT VI - Charisma use Clarity frees up mana flaskff

ACI VII - Starts feeling good using BV after allocating Growth and Decay and mastery. Clarity removes need for mana flask

ACT VIII - Feels AMAZING after reaching around level 58 and doing second ascendancy

Auras: Clarity, Herald of Agony. Then, either use Malevolence for damage, or Purity of Elements if you need resistances.
_____________________________________________________________
MOST IMPORTANT INFORMATION:
>Eldrich Battery - Use this after acquiring Dendrobate and have an Energy Shield pool of at least 470
>Allocate the "15% increased Maximum Life if there are no Life Modifiers on equipped Body Armour" Life Mastery after equipping Dendrobate
>Focus Modifier on Helmet - 61-70% increased Duration of Ailments you inflict while Focused
>Regenerate 150 Energy Shield per second while a Rare or Unique Enemy is Nearby
>Make sure you assign the "Skills Cost Life instead of 30% of Mana Cost" Life Mastery, before assigning the "40% increased Physical Damage with Skill that Cost Life" Physical Mastery
_____________________________________
Early Maps:
Upon reaching maps, make sure that your Fire, Cold and Lightning resistances are capped (75%).

Auras:
Make use of Herald of Agony, Clarity and then either Purity of Elements (if you need resistances) or Malevolence for damage.
For killing map bosses you can swap Purity of Elements for Malevolence to kill it faster if you feel you need more damage

I recommend Purity of Elements here as your damage should be fine without Malevolence and Purity of Elements provides elemental ailment immunity (freeze/shock/ignite)
_____________________________________
>>>>>>>>>>Early Map Flasks: IMPORTANT!<<<<<<<<<<<
Eternal Life Flask - Try to roll for the modifier that says "Instant recovery when on low life"
Jade Flask
Granite Flask
Quicksilver Flask
Quartz Flask - This is important as it grants phasing, which we need to travel through monster packs comfortably

Try to also roll for modifiers that grant immunity to curses, bleeding/corrupted blood and freeze immunity if you aren't running Purity of Elements
Other suffixes that are nice are increased armour or increased evasion during flask effect
Increased charges/reduced charges per use are nice prefixes. Increased effect/reduced duration is also nice but will consume charges rapidly

I'd recommend also buying some Instilling Orbs and Glassblowers Baubles when you can afford them.
 Use 4x Glassblower's Baubles on a Normal-Rarity flask, or 10 on a Magic Rarity flask to improve its quality to 20%
After this, at your crafting bench, apply the enchantment "Reused at the end of this Flask's effect" on the crafting bench

This should mean that you only need to push your utility flasks once at the start of the map to have them active for most of it (keep an eye on it in case they run out of charges!)
___________________________________________________________________
When can I use Eldritch Battery?
Once we acquire Dendrobate and a helmet with a decent amount of Energy Shield, we can run Eldritch Battery

>Make sure to allocate the Energy Shield Mastery: 100% increased Energy Shield from Equipped Helmet
>Also make sure to allocate the Life Mastery: 15% increased Maximum Life if there are No Life Modifiers on Equipped Body Armour
>Also, try to find the unveil for belts: Regenerate 150 Energy Shield per second when a Rare of Unique enemy is nearby. (SUFFIX)
>Make sure you have both the Charisma and Influence Passives Allocated to fit in Herald of Agony
IMPORTANT: Link Divine Blessing with Malevolence or Haste and have the other aura run permanently. Push this button to gain the aura effect temporarily

Note from aer0: Running Haste permanently with Malevolence on Divine Blessing feels smoother. We recommend this option. https://twitch.tv/aer0__ to confront him about this
___________________________________________________________________
Bossing VS Mapping

Bossing:
We want to equip Cold Iron Point instead of Obliteration to deal more damage to bosses. The explode from Obliteration doesn't matter as much for bossing which is why CIP is better here
You want the unveiled helmet modifier 61-70% increased Duration of Ailments you inflict while Focused to deal more damage over time to bosses.
After you have unveiled this modifier on a helmet with Jun, you can craft it onto a helmet. After doing this, a new skill will appear on your skill bar called Focus. Pushing this button will
activate this effect for 4 seconds, after which it will have an 8 second cooldown.
You may find that you struggle to find a place for this on your skill bar - you can use your middle mouse, or assign it to your second skill bar (CTRL+<button>) to activate it

Mapping:
For mapping, we want to use the Obliteration wand which will improve our clear because of its explode modifier.
You won't really need to make use of the focus modifier for mapping, but you might want to push it when you reach the map boss

___________________________________________________________________
TREES EXPLAINED:

1st Tree:
Assign Primal Spirit first, then Heart of Oak, then Toxic Strikes

*****************After*************
2nd Tree:
This is when we start using Poisonous Concoction and we will need to sustain Life Flask charges to use the skill.
Make sure to update your life flasks to the highest tier available as often as possible as this will improve your damage hugely!
Make sure your Life Flasks do not have modifiers that reduce the amount of Life recovered, and try to find ones that increase the amount of Life they recover

Assign Replenishing Remedies along with the Flask Mastery, then Field Medicine, then Wasting

Make sure you have a mana flask to keep your mana replenished!

******************************
3rd Tree:
Assign Mana Siphon for more mana sustain, then Entropy, then Blood Siphon
Finally, travel to the right side of the tree to Blood Drinker, assigning the +50 to Maximum Life mastery, and finally over to Fatal Toxins

Do your Normal Labyrinth at the end of Act III and allocate Master Toxicist. Cap your resistances with the crafting bench first!

******************************
BV Swap Tree: Please also make sure to swap the Skills tab to the BV Swap Skill Set to see which gems to use!
After finishing Kitava and arriving in Act 6, we can start using Blade Vortex! If you are enjoying Poisonous Concoction, you can keep using that, but this is the point where Blade Vortex can be used
Make sure to use Clarity as this will help you sustain mana enough to not use a mana flask. However, if using a mana flask helps, keep using it for now.

Optional: Take note of the tiny Evasion and Phasing point and the bottom of the tree - this will grant 10% chance of Phasing on Kill which is useful for when our Quartz Flask goes down

You will need to unspec 8 points here, which you should have acquired during the campaign for completing the following quests:

Act III - Victario's Secrets (Collect the platinum busts in the Sewers for Hargan)
Act IV - Deshret's Spirit (Free Deshret's Spirit from the Mines Level 2 for Tasuni)
Act V - Kitava's Torments (Collect the three parts of Kitava from The Reliquary)
Act VI - Fallen from Grace

The 8 points you will need to unallocate are:
Replenishing Remedies and the Mastery
Soul Siphon
Precise Technique
Poison Mastery 300% increased Damage against Enemies who aren't poisoned

Take note of the added Chaos Mastery - 40% of Physical Damage converted to Chaos Damage

Important: Skills cost 30% of life instead of mana cost Life Mastery

Allocate Charisma to fit in your auras

Don't swap to BV or RESPEC your tree until you have a BBGG item

******************************
5th and End of Campaign Tree
Fairly self-explanatory. Don't forget to allocate the new Poison Mastery, Chaos Mastery, and Suppression Mastery

Make sure to do your Cruel Labyrinth just after arriving to the Act 8 Town (Sarn Encampment) - Assign Nature's Reprisal
Make sure to do your Merciless Labyrinth just before beating Kitava in Act 10 - Assign Nature's Adrenaline

******************************
Map Trees - 4th Ascendancy Tree
We allocate Eldritch Battery once we have acquired Dendrobate, as well as the Revenge of the Hunted wheel, Influence wheel and Careful Conservationist wheel
Make sure to allocate the Energy Shield Mastery: 100% increased Energy Shield from Equipped Helmet

Complete your Uber Labyrinth and allocate Nature's Boon

******************************
Level 95 Tree:

Here we pick up some flask nodes as well as change the Atrophy Notable at the top of the tree to Force Shaper.
Important: You must take the Physical Mastery "40% increased Damage with Skills that Cost Life" mastery as well as the Life Mastery that says "Skills Cost Life Instead of 30% of Mana Cost"
If you have enough Suppression on gear, you can swap Inverterate wheel for the Instict wheel at the top of the tree to save a point
If you have enough Strength and Intelligence on gear to make use of Obliteration and your auras, you can drop Primal Spirit and the Thief's Craft notable to save 3 points. These can be reinvested into life