3 years ago
 Level 96 Explosive Trap Saboteur3.19
Life: 4,333162%
ES: 1,041
Mana: 1
eHP: 44,149
Resistances: 79%/78%/69%/63%
Evade: 66%
Supp: 78%
Armour: 15,670
Evasion: 12,495
DPS: 1,266,436
Speed: 2.34
Config: Pinnacle, Focused, 15% Shock, Frenzy, 8x Wither
Bandit: Alira
Pantheon: Soul of the Brine King, Soul of Ryslatha
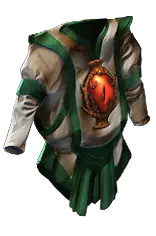
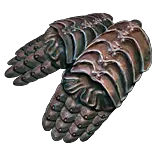
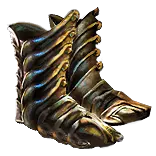
Gear


Gems
Explosive Trap
Awakened Void Manipulation
Awakened Unbound Ailments
Anomalous Deadly Ailments
Cruelty
Cluster Traps
Exsanguinate
Cluster Traps
Trap
Chain
Blade Trap
Cluster Traps
Withering Touch
Multiple Traps
Vaal Molten Shell
Cast when Damage Taken
Defiance Banner
Flame Dash
Anomalous Withering Step
Faster Attacks
Shield Charge
Summon Skitterbots
Grace
Determination
Herald of Agony
Malevolence
Inspiration
Divine Blessing
Despair
Tree Preview
- 20% increased Effect of Withered
- 10% more Skill Effect Duration
- Grace has 25% increased Mana Reservation Efficiency
- 10% increased maximum Life
- 10% reduced Life Recovery rate
- +50 to maximum Life
- 20% increased Poison Duration
- Auras from your Skills have 10% increased Effect on you
- Summon Skitterbots has 50% increased Mana Reservation Efficiency
Notes
########### LEVELING INTRO ###########
Leveling tl;dr
- Mule Splitting Steel & Chance to Bleed from Duelist
- 1-12 Splitting steel / bleed
- Swap to Spectral Helix after Pirate
- All gems already done by act 3
- remember to collect other gems on the way for swaps later
- expected to get all skill points and all regrets on the way, as well as lab trials

Leveling Uniques
If this is not your first character, you could use leveling uniques to help you on your way.
Point is, I learned how to level quickly without it and have little knowledge whats useful here. I would only pick up a pair of wanderlust and color it GGGG in order to have guaranteed movement speed, freeze immunity and a 4 link ready to go.
Other than that, you just run. Even for gear on the way, its enough to get some life in places and resistance. Taking a white base and just crafting res on it, is enough for leveling, the build is strong AF as it is.
Overall: stay res capped, get life if you can and make sure to upgrade your claws, you will be fine.

General Leveling
You will be using Claws for Spectral Helix, two of them. It is worth considering to swap to a shield around blood aqueduct.
A lot of your damage comes from proper Claw Progression.
Any additional damage on Claws is great if you can get it naturally. However, typically you want to upgrade your claws using the vendor recipe.
Sell 1 Claw + 1 Rustic Sash (Belt) + 1 Whetstone to a vendor to receive a physical claw.
The magnitude of the Craft depends on the rarity of the Belt used, the rarer the better (white < blue < yellow).  This does not influence the level requirement.
Make sure to look out for Rustic Sashes, Whetstones, as well as random essences to upgrade belts to rare for maximum effect.

########### LEVELING, STEP BY STEP ###########
### MULING ###
Start by creating a Duelist to receive Splitting Steel (Reward for first Quest) and Chance to Bleed. Put those into your stash, so your actual character can pick it up.
Check for GGG, GGR and Movement Speed
Now create your actual Character, a Shadow. Get to town and grab the gems from your stash.

### ACT 1 ###
You will be using Splitting Steel + Chance to Bleed + Onslaught with a 2h Sword until you kill the Ghost Pirate.
By the end of Act 1, we running GGG Helix (poison chance + onslaught) on 2 Claws.
Do lots of vendor checks for inks (GGR, GGG) and movement speed.
Any Claws (so you got two for Helix swap)
Rustic Sashes (to upgrade claws)
Enough currency to buy stuff (pick up any currency, as well as blue/yellow items)
Iron ring before brutus (by the time you arrive in the prison)
You get Spectral Helix after killing the pirate.
Spectral Helix will be your skill for the entire rest of the campaign.
Get cold res for merveil.

### ACT 2 ###
Do the Den for Quicksilver or rare Belt
Help Alira, helps a ton with resistance
Acquire Faster Attacks (for whirling blades)
Get Herald of Agony + Skitterbots

### ACT 3 ###
Pick the lapis amulet from Dilara.
Add Plague Bearer, Despair and get Grace (offhand)
Do the 28 Fire Dude to already get Seismic Trap (offhand)
Skip Library, unless you really want some gems for some reason.
Some Lightning Res for Dominus
You can start checking vendors for a 4 Link starting from level 24.

### ACT 4 ###
Acquire 4 Link [GGGG] (check vendors in A4 and A3 each time you level up)
Fix Resist to at least 50% each by using the transmute craft from you crafting bench.
Consider rolling a Bleed Flask
Do 1st Lab at Cristal Veins - delay if you don't feel confident.

### ACT 5 ###
Be prepared to take -30% Resistance penalty.

### ACT 6 ###
Do the Lily quest to have access to gems.
Consider buying VP and buying gems for later use to level in offhand.

### ACT 7 ###
You could go ahead and do the second Lab after or right before you kill the Spider (Arakali), however, if you don't mind not having the ailment immunities, there is no harm waiting the second Lab until A10.
Especially since the second lab doesn't do anything other than ailment immunity, as we are not a trapper yet.

### ACT 8 ###
Consider traveling to the rogue harbour to buy contracts every time you level up, starting at level 55.

### ACT 10 ###
DO NOT KILL KITAVA yet
Make sure you completed all skill and regret points
Consider running contracts you already got and get some more, this boosts your early currency a ton
Complete second (if not done yet) and third lab
Consider swapping to seismic now, depending on gear and availability of stuff.
Make sure you ready for -30% Resistance
Kill Kitava whenever you are ready to move on.

########### TRAP SWAP // PHASE 1###########
The main objective here is to make the transition towards actually using traps.
Doing that in the low 60s seems a good spot, as Spectral Helix kinda sucks in Maps. Running the Heist contracts really helps with getting a headstart on obtaining cheap items.
Stat wise, we will need 179 int, in order to use the unique wand. A lapis amulet is quite useful here.
We also want 155 Str, to be able to max out our Determination and Shield Charge gems. Heavy Belts are a nice option.
However, it is also perfectly fine to just no level those two gems too far for a while. Considering that you wont have level 20 gems that early anyway.

For unique item, ideally we want to acquire 4 of them:
- Obliteration Wand, helps a lot, but any rare weapon will do as well
- Deerstalkers, help a lot as well. If you can't get them, use any rare boots with life and movement speed, but use Trap instead of Trap and Mine Damage in the Exsanguanate links.
- 2x Coated Shrapnel Unique Jewels, as this is the easiest and straight forward way to reach 100% chance to poison.

Get 100% Chance to Poison if possible
In case you are unable to obtain the poison jewels, there are other options and workarounds to get poison chance:
- Herald of Agony replacing Skitterbots
- Alternate quality (Divergent) Herald of Agony is giving another 20% on top of the 20% it gives with normal quality
- magic/rare jewels with 5% chance to poison each
- annointing toxic strikes early on (very cheap annoint)
- using chance to poison in seismic trap links (can't do that for Exsanguanate, unless you got Deerstalkers, then replace Trap and Mine Damage with Chance to Poison)
- actually changing the tree to path to Toxic Strikes (can't recommend)
- accepting that Exsanguanate won't have 100% chance to poison for a while (85% really isn't the end of the world for the clear skill, especially this early on)
- eater of worlds implicic on gloves can give a large amount of chance to poison (however, competes with spell supression on the same spot)
- icefang orbit unique ring gives 25% chance to poison (with the downside of giving up a valuable ring slot)
- IMPORTANT: You might read/hear somewhere that getting chance to poison on your weapon will help for the traps. This is no longer true and will not work, but it used to in earlier leagues.

For the rest of the gear, look for Armour/Evasion pieces (good bases, pls).
The only stats you need/want on them is life and resistance. The gear in the example section has way more resistance that you need. Just make sure you cap your resistance.

Curse on Hit Ring/Focus Helmet
By no means necessary, but kinda neat if you happen to randomly get your hands on:
- are a curse on hit ring, as it automates your curse
- a helmet with increased ailment duration while focused modifier (comes from unveiling)

End of TRAP SWAP
You will probably end up around level 70, have 100% chance to poison, the wand, Flasks and your gem setups ready to go.
From the tree, we pick up some skill effect duration and chaos/elemental resistance, leaving us with positive chaos resistance just from the tree.
With this setup, I would expect you to run white and yellow maps with ease, completing the atlas bit by bit.

########### PHASE 1 ###########
There is no difference in gem setups during this phase. Your gear goals are still the same as well, I would just focus on somehow getting a curse on hit ring, while still staying res capped.
You might notice a steep level "requirement" of 90-96 on the tree here. This is just for orientation, I don't expect you to really go past 90 here already. Feel free to just cut the life nodes around "Bloodless".

The difference here is on getting levels, your last lab and investing those points on the tree to reach certain goals/milestones:
- We make sure to get spell supression capped just from the tree by picking two spell supression wheels, as well as a single point in the center, if needed.
- Note that the Revenge of the Hunted wheel is getting respecced
- Then we get a bunch more strenght, life and max res, as well as the oportunity to spec into corrupted blood immunity

End of PHASE 1
You will probably be around level 90, ideally have a curse on hit ring, stats sorted out (note that you might no longer need any strength on gear here) and you are well on your way through the atlas.
I would expect you to run lower red tier maps at this point. Essences, Expedition and Harvest seem like a good idea early on and work well with the build. Might also want to dabble with betrayel to get crafts and maybe even your helmet for later.

########### PHASE 2 ###########
This phase is all about preparing and the swapping into the Eldritch Battery version of the build.
Once that is done, we can look towards getting spell supression on gear.

Prepare your rares
The swap consists of 3 unique items:
- Unique Helmet, might be a bit expensive in the first days, but its a drop from catarina (betrayel boss), so should never get extremely hard to get or you could even get it yourself
- Unique Shield, should be cheap and easy to just pick up. If you can't get it, you would need to find another way to obtain enough energy shield.
- The unique ring is not required for the swap, but rather cheap, available and helps out a ton. Skip until later if you really can't get one.
Make sure to check for roles on the uniques. Especially on the helmet, make absolutely sure it has the skill effect duration while focused mod. Not all of them do!

Since we will equip two or three uniques, you first need to make sure, that your attributes and resistance will still be capped and OK if you unequip the rares you currently got in those spots.
If you are fine without those rares and you acquired the uniques, make the swap.
Note that this comes with gem changes as well. The helm allows for more reservation and Eldritch Battery allows for the use of Divine Blessing with Malevolence as well as getting rid of all the life tap supports.

Getting spell supression on gear
Next step will be to free up points on your tree, by moving spell supression onto your items.
We specifically aim to remove the "Inveterate" wheel and points leading to it.

Items to target:
- You could get some supression on your chest, however, i recommend to keep the chest easy and cheap until you are ready to commit fully on an endgame version, as any 6 Link with spell supression might be expensive.
- Your boots are a good replacement to get roughly 10% supression on as an intermediate step.
- It seem reasonable to target your gloves here, as we can already create our first endgame item here. Try to obtain a pair with enough spell supression (see items section), life, resist and the exarch/eater implicits.
The gloves will stay with you until the very end of this guide, so its worth to invest a bit here.

Any missing supression could be compensated with the Evasion wheel in the center.

Flasks
Latest here, you should really take care and properly roll your flasks.

Bossing Setup
For bossing and by that i mean pinacle bossing, it seems like a great option to swap your clear skill for Blade trap with withering touch.
The idea is, that you won't need your clear skill in these areas, but stacking more wither helps a lot.

You do this either by recolouring your boots for each swap, having a second pair of boots or by getting a white socket on your boots.
In addition, make sure to swap your weapon for a cold iron point unique dagger. Blade trap can't be used with a wand and cold iron point seems ideal and cheap for this job.
I also go ahead and unbind withering step with this setup, as it does little to nothing, but possibly have my flamedash on cooldown in a weird moment during a boss fight.l

When to use the bossing setup:
- Maven
- Uber Elder
- Chain Farming elder/shaper
- Doing fully height of hubris, release all, 55%+ quant rolled guardian invitations
- Sirus
- Eater/Exarch
- any other boss you feel like you struggle with at any moment in time

End of PHASE 2
By the end of this phase, I would expect you to be running all the uniques, the compatible gem setup, as well as having moved spell supression towards your gear.

########### PHASE 3 ###########
This phase is about cleaning up your gear, getting endgame version of the rares and cleaning up your passive tree to make room for a bit more damage, instead of filler and fixing notes you took on the way.

In regards to gear, you could improve on your ring and amulet, clean up other rares for life+tripple res or such, roll for eater/exarch implicits and most importantly, you can look towards crafting your very own fancy chest piece.

End of PHASE 3
By the end of this phase, you got nice an clean sorted out gear and should be easily able to complete your atlas fully, including all (non uberuber) bosses, getting all watchstones, all favorite slots and farming mechanics.

########### PHASE 4 ###########
This is getting towards min-maxing, witch is out of scope for the guide/build. However, I did include a few awakened gems and quality and +21 gems to give you ideas.