2 years ago
 Level 95 LL MoM Armageddon Brand Necromancer3.21
Life: 2,100137%
ES: 1,982
Mana: 1,166142%
eHP:
105,221
Resistances: 75%/75%/75%/34%
Block: 74%
Spell Block: 64%
Armour: 16,194
DPS: 1,266,603
Speed: 8.68
Hit Rate: 2.31
Hit Chance: 100%
Config: 15% Shock
Bandit: Kill All
Gear


Gems
Unearth
Arcane Surge
Greater Multiple Projectiles
Archmage
Vaal Molten Shell
Flame Dash
Determination
Shield Charge
Flammability
Divergent Bone Offering
Wave of Conviction
Armageddon Brand
Empower
Hypothermia
Elemental Focus
Arcane Surge
Awakened Fire Penetration
Petrified Blood
Arrogance
Enlighten
Volatile Dead
Detonate Dead
Awakened Fire Penetration
Combustion
Tree Preview
- 100% increased Armour and Energy Shield from Equipped Body Armour if Equipped Gloves, Helmet and Boots all have Armour and Energy Shield
- 3% increased Spell Damage per 5% Chance to Block Spell Damage
- Critical Strikes do not inherently Ignite
- 100% increased Damage with Hits against Ignited Enemies
- 15% increased maximum Life if there are no Life Modifiers on Equipped Body Armour
- +50 to maximum Life
- 10% reduced Mana Cost of Skills
- 10% of Damage taken Recouped as Mana
- 10% chance to Recover 10% of Mana when you use a Skill
- Life Recoup Effects instead occur over 3 seconds
- 20% increased Life Reservation Efficiency of Skills
- +1% Chance to Block Attack Damage per 5% Chance to Block on Equipped Shield
Notes
Hello, and welcome to the Notes section!  First, the important things to keep in mind!


Mapping Fluidly - It's a very simple process, you just right-click (Unearth bound here) in a steady motion.  Once you have Armageddon Brand, you can throw them in as needed to burst down more durable rares.  Armageddon Brand
isn't a terribly high amount of damage, but it's consistent and reliable, which is a lot for the build, and a million DPS isn't anything to sneeze at.


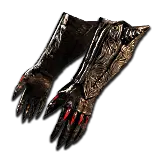
THIS BUILD NEEDS RITUAL GLOVES!  (Nexus Gloves, or Aetherwind Gloves if low level)  30% Chance to Refund Mana Spent makes the build 'go'.  There used to be a caster mastery that did a lesser variation of this, but it's gone now,
so you need to pick up a pair for leveling if you want to switch to Corpseblasting right away!


!!!IMPORTANT FOR LEVELING!!!
Forethought (increased mana cost) is a necessary node early when you have trouble getting to 100 mana cost per Unearth, and later.  The goal is to get as close to 100 Mana Cost without going under (reverse Blackjack rules).  Kitava's
Thirst will not proc if you fall below this mana cost, so don't switch until you can 4-link (Unearth, GMP, Arcane Surge, Archmage) and get to that magic number.


Before switching to Low Life, use Eternal Blessing with Determination to leave 100% of your mana available (for mana cost purposes).
There is a Pre Low Life skill gem setup to explain how to set up early on.


Trigger Weapon - This handles our Flammability Curse and Wave of Conviction, but more importantly, BONE OFFERING.  We have enough duration, and constantly generation corpses, so it's up 100% of the time.  You can solve exposure
and curse in other ways, but you will always need the trigger weapon to make Bone Offering a constant, so I recommend just using it instead.


Low Life should not be attempted early on.  You won't really feel the extra damage much till you're in red maps anyway, and you need the base mana from levels to get the cost of Unearth up to 100 after reserving for Determination.
Additionally, Mind Over Matter isn't all that useful if you don't have enough mana.


Get 10% Recoup on your ring (or more!).  This gives us 60% Recoup with nodes from the tree, which is enough alongside Mind Over Matter to basically give us 100% Recoup.  This is an insanely strong defensive layer, especially after
we go low life, as we have tons of effective HP outside of raw life that makes it even more potent.  Mana Recoup can be just as important, which is why we annoint Battle Rouse.


Understanding Recoup - This is a complicated stat.  It gives you Mana, Life, or ES Recovery based on damage taken from Hits.  It does not specify that you have to take that damage to a specific source, however.  This mean damage to
your ES and Mana will apply the full value to life, which means we only need 60% Life Recoup for it to be 100% (technically less if we have any ES, which is just a bonus).  In this same vein, because only 40% of the damage we're taking is
going to our mana, 20% Mana Recoupe more or less breaks even as well, so long as we don't take an insane amount of damage all at once (I.E., A one shot).  This combined with block makes us very, VERY tanky!


The priority stats for a shield can change based on your goals, but getting more Block + Spell Block will always be a good way to go.  With our automatic, constant Bone Offering up, we have 74% Attack Block and 64% Spell Block.  This
is why our no-boss EHP is over 100K without Molten Shell or Vaal Molten Shell up!


Crucible Value - Elemental Overload is the most important thing we can get, as it saves us a handful of skill points, of which we are always starved.  There are other valuable nodes, such as More Cast Speed and shield bonuses that
are quite useful, but EO is the only one I really insist upon.  There are also nodes that give us corpse life bonuses to Unearth + Desecrate.  I shied away from these, as they don't make up what was lost in prior patches.  A higher single
target can probably be attained by gunning for corpse life scaling mechanics, but the build will not clear as well as a result (at best, I would use this node for a different gear set up designed more for bossing).


Leveling Concerns: Just get Unearth and Volatile Dead.  Put a Detonate Dead aside for when you can switch to Kitava's Thirst, and just go.  Desecrate can be used instead, but I did it with Unearth the whole way to ~48 this time, and
it was honestly very comfortable because Unearth's base cast time is so low.  A +1 Fire Wand and +1 Fire Shield will last you all the way to Kitava (leave a prefix open on the wand to recraft spell damage as you go).  Once you're
using Kitava's Thirst, keep the best mana flask around that you can, and put a useful immunity on (Freeze early, Ignite or Poison later).


The 6 Link - In the past, this build didn't need this, and technically it still doesn't, but it's just so much value, and makes the build feel smoother at most points of progression by giving you an alternative damage option.  Additionally,
Armageddon Brand synergizes extremely well with our scaling cast speed mechanics from consuming corpses, and our cast speed is so high that placing the brands is more or less instant.


Gear Concerns - Get 10% Recoup on a ring, and cover your stat requirements.  Get a shield with lots of block, and whatever extra Damage and Life stats you can afford.

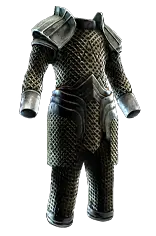
The Body Armour is Armour/ES Hybrid, with no life roll and as
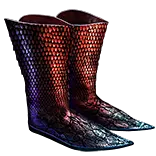
much Armour and ES as we can get.  We take the Life Mastery for 15% increased life, so we can stack a much higher armour and ES value in conjunction with the Armour/ES Hybrid Mastery for 100% Increased Armour + ES from
Body Armour if our gloves, boots, and helmet have Armour and ES.  This works because we save a crafted prefix on our Nexus Gloves, for which we use Flat Armour.

The Build can perform better than shown in boss fights if more suffixes
(on jewelry, most likely) are filled with %Mana Regeneration stats, or if a source of passive flask charge recovery can be gained for the mana flasks.  It still does fine, because the build is durable, but going 'all in' on damage without more
regen or our flask up can greatly diminish our EHP and leave us open to a 1-shot, so it's best taken a little slow.

Our Helmet is very important, and very cheap.  Leverage this!  Buy several, and get a good corruption (+2 Fire Gems is best, but +2 AoE Gems works about as well).  Get a Tainted Blessing so you can run Eternal Lab and put a +1 Volatile
Dead Orb enchant on your helmet next.  Because we're scaling spell hit damage, this is our best enchant by far, as it greatly increases our corpse consumption rate.  This, in conjuction with +1 on our weapon, shield, and amulet, leads to our
most effective overall increase in damage.  It's what takes the build from doing endgame maps well to blazing through them without a care in the world.  Setting this up in advance of even starting the character is recommended, but not at all
necessary (I didn't do it, but I recommend it in hindsight).


SSF - The build functions well enough if you can get the helmet and the gloves.  Those are the NECESSARY components.  If you don't have those, don't do it.  Getting the helmet with a good corruption will be VERY hard however,
so consider that before undertaking this even if you have the gloves and helmet.  Having a tainted blessing already lined up is a good idea s well.  If you can get the ideal helmet + enchant it, with the gloves, you're gonna be movin'
just fine (getting 21/20 Volatile Dead might be hard though (wanted for the AoE), as well as a 21 Volatile Dead, but that's a normal concern for all spell-based SSF builds).