16 months ago
 Level 95 Crit Lightning Strike Warden3.25
Life: 4,037120%
Mana: 64
eHP:
58,821
Resistances: 75%/75%/75%/-38%
Armour: 37,021
DPS: 2,298,406
Speed: 7.71
Hit Chance: 97%
Crit Chance: 85.51%
Crit Multi: 520%
Config:
Pinnacle, 2% Shock, 2% Scorch, Frenzy, Power, Custom Mods
Bandit: Kill All
Pantheon: Soul of Lunaris, Soul of Gruthkul
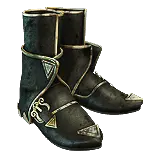
Gear
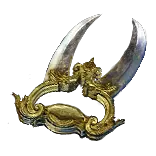
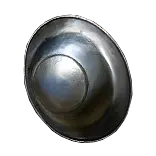

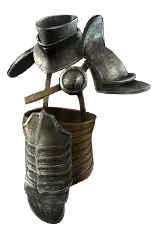
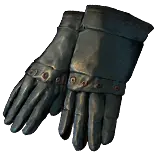


Gems
Assassin's Mark
Mark On Hit
Lifetap
Cast on Death
Portal
Enduring Cry
Blood Rage
Automation
Molten Shell
Lifetap
Vaal Lightning Strike
Nightblade
Trinity
Added Cold Damage
Multistrike
Elemental Damage with Attacks
Shield Charge
Faster Attacks
Momentum
Lifetap
Anger
Grace
Determination
Enlighten
Anger
Grace
Purity of Elements
UnboundAvatar
Tree Preview
Tattoo of the Ramako Shaman(x10)
+2% chance to Suppress Spell Damage
- Dexterity's Accuracy Bonus instead grants +3 to Accuracy Rating per Dexterity
- +500 to Accuracy Rating
- -2 to Accuracy Rating per Level
- Non-Vaal Strike Skills target 1 additional nearby Enemy
- 80% increased Critical Strike Chance against Bleeding Enemies
- Skills Supported by Nightblade have 40% increased Effect of Elusive
- +25% to Critical Strike Multiplier against Unique Enemies
- Elusive also grants +40% to Critical Strike Multiplier for Skills Supported by Nightblade
- Hits have 25% chance to treat Enemy Monster Elemental Resistance values as inverted
- +15% chance to Suppress Spell Damage if Equipped Helmet, Body Armour, Gloves, and Boots all have Evasion Rating
- Melee Hits Fortify
- -3 to maximum Fortification
- 10% of Leech is Instant
- 12% increased Mana Reservation Efficiency of Skills
- The first 6 Mana Burn applied to you have no effect
Notes
Guide by Allie
https://www.twitch.tv/Allliee_
https://www.youtube.com/c/Alliee


Order in which to buy Uniques if you get a few Chaos while leveling:

Carnage Heart - This amulet will be 2-3 Chaos at most and is an Earlygame monster. Will help with Resistance & Attribute Reqs.
Darkray Vectors - These will very quickly fall down to 1 Chaos and are just strong Earlygame boots. You can opt to not buy these and just run Rare boots.


Act 1

Look for MS boots in town & use a Bow. Try to buy a Flat Phys quiver and Iron Rings if/when you can afford them. Vendor Armor Scraps or Whetstones for more Wisdoms.
Look for GGG anything in town before going to Coast. If no GGG then GG 2-link minimum.
Also, look for GGGB on a 4-Link for Act 3 and beyond.

>>>>Please make sure you have 2 Mana Flasks before Brutis and Merveil or you will have a bad time with mana<<<<

Act 1 Regex (shows GGG, GG, MS Boots & Bows): g-g-g|g-g|nne|rint|s:.+bow

Level 1

Take Caustic Arrow from the quest and link it with Momentum. Get 1 Green socket anywhere to start leveling Burning Arrow for Brutis.
Use Caustic Arrow for all clearing up to Brutis.
Really try to look for a 1 Wisdom Quiver from the Town before you leave, it makes Act 1 so much easier once you can put it on at Level 4.


Level 4

After Mud Flats is over and you are in The Submerged Passage, teleport back to The Coast waypoint and go get the medicine chest from the Tidal Island.

Take Mirage Archer from Nessa and Sniper's Mark and Tarkleigh.
Buy Pierce from Nessa.

Link Caustic Arrow - Mirage Archer - Pierce
You can let the Mirage Archer do most of the work. Attack once to trigger it then keep moving forward, attacking as needed to keep it active.

Try to buy Iron Rings and a Rustic Sash when you can afford them Pre-Brutis.


~Level 8-9

Start looking for a Shield for Level 12 if you havent already.
Killing Brutis: Link your Mirage Archer to Burning Arrow from Caustic Arrow. Use Burning Arrow to kill Brutis.
Once Brutis is dead, put Mirage Archer back on Caustic Arrow and drop the Burning Arrow on the ground.

In Town: Take Precision from the quest reward. Socket it somewhere and DO NOT level it past Level 5. You will still keep Leveling all other gems as normal.
Buy Frostblink from Nessa and replace Dash. You will have enough Int to use it with Primal Spirit.
Buy Manaforged Arrows & Galvanic Arrow. Link these 2 together when you can. Galvanic Arrow will trigger on its own giving you Shocks.


Level 12

Swap to Rain of Arrows once you hit Level 12.
Nessa will give you a free Rain of Arrows once you enter Merveil's Caverns for the first time.

In Town: Buy Added Cold Damage & Lightning Strike from Nessa.
Your links are now Rain of Arrows - Mirage Archer - Added Cold Damage

Put Lightning Strike in your Off-Hand to start Leveling it for the Lightning Strike Swap in Act 10.
Drop Caustic Arrow, Mirage Archer, Pierce. You just need Frostblink, Sniper's Mark, Galvanic Arrow & Precision.
Use Sniper's Mark on bosses. Don't bother with it on anything else as its not worth the mana otherwise.


>>>>>Note on Rain of Arrows<<<<<
You will need to keep upgrading your Bow as you keep leveling.
Physical Damage is irrelevant as we aren't converting it to Elemental.
The only stats that are relevant will be any Added Fire/Cold/Lightning Damage & Attack Speed.

You DO NOT care about any Critical Strike Chance as we will not be able to crit due to Precise Technique.
This also applies to any Rings, Amulets, Gloves & Belts you find. The stat "x% increased Elemental Damage with Attack Skills" is also great but it will only roll on Bows, Rings, Amulets & Belts.


The easiest way to know if a Bow is an upgrade is:
1. Turn on your Awakened PoE Trade - Download Link: https://github.com/SnosMe/awakened-poe-trade
2. Use Ctrl + D while hovering a Bow as if you were trying to Price Check it.
3. Click on the "Hidden" Slider right below the Affixes.
4. You will be able to see the "Elemental DPS" of your Bow, if this number is bigger, it is an upgrade. Example - https://imgur.com/a/QPNTg8G

PLEASE NOTE - You can also go to your Hideout starting in Act 2 once you unlock it (when you get Herald of Ice) and use the bench.
You can Craft Added Fire/Cold/Lightning Damage for 4 Transmutes starting at Level 16 and Attack Speed for 6 Alterations starting at Level 24.

If you find a really nice bow such as one with 2 high Added Elemental Damage Tiers and 1 Open Prefix, crafting the 3rd Elemental type on it will most likely make it a good Bow for a long time.
The same goes for Attack Speed if your Bow has filled Prefixes.


Act 2

BANDITS: Help Alira, +15% Elemental Resistance is too good for Leaguestart. Later, we will swap to Eramir for +1 Passive Point once we are in Maps.

Level 16

Take Herald of Ice as your quest reward from Greust.
Buy Blood Rage from Yenna.
Turn on Herald of Ice and use Blood Rage as a way to gain Frenzy Charges.

Level 18 (After Weaver)

Take Trinity as a reward from Silk.
Socket it in your Off-Hand Weapon or in a Blue socket so it starts gaining Levels.
You will start using this whenever you get a 4-Link GGGB with: Rain of Arrows - Mirage Archer - Added Cold Damage - Trinity

>>>>VERY IMPORTANT PLEASE READ<<<<
Make sure you have a Lightning Strike gem BEFORE going to the final section of Act 2.
You can use the new Corruption Altar in The Vaal Ruins on your Lightning Strike as a free Vaal Orb.
Make sure you do this while you are there, if you manage to get lucky and get Vaal Lightning Strike you will then be stronger when you swap.
This isint required but, you shouldn't miss the opportunity.

>>>>>Note on Trinity<<<<<
(skip this if you know how Trinity works)

You will start using Trinity as soon as you can in a 4-Link with: Rain of Arrows - Mirage Archer - Added Cold Damage - Trinity
Trinity will give you "Elemental Resonance" which will be a Wheel in the Top Left of your screen that fills up.
This will give you More Damage based on your Lowest one meaning you want to Fill Up all 3 Bars.

Trinity will fill up the Bar of the 2 Elements that WERE NOT the majority of your attack's damage.
Example: You attack and do 100 Fire Damage, 70 Cold Damage & 40 Lightning Damage. Trinity will fill up the Cold & Lightning Bars but NOT the Fire Bar.

What we need to do is Alternate between at least 2 Elemental Damage types as the highest portion of our Hits.
This will be very easy to achieve in Act 3 once you get Anger. Anger & Herald of Ice + Added Cold Damage should ROUGHLY make both your Fire & Cold damage ranges close to eachother.
Due to Damage having a Range in which it can do damage in, your Fire & Cold Damage will natrually alternate between which one did the most damage.

KEEP IN MIND - This balance might be thrown out of whack as you upgrade your Bow.
If you happen to find a Bow with an exceptionally high Added Cold Damage roll for example, your Cold Damage could be so high that your Fire Damage can never beat it.
Just pay attention to your Resonance Bar after a new Bow ugprade and see if everything is ok. If you arent filling up the Cold Bar for example, turn off your Herald of Ice.
Other ways of fixing it could also include: Crafting Added Damage on a Ring/Amulet/Bow of the type you are missing or swapping Added Cold Damage for Added Lightning Damage (only if Cold is higher than Fire).


Act 3

Start looking for:
GGGB for Rain of Arrows - Mirage Archer - Added Cold Damage - Trinity
GGGB for Artillery Ballista - Added Cold Damage - Focused Ballista - Trinity
Pick up all Yellow items, you are going to need lots of Alterations to buy all of the gems.

Level 24

Take Grace from Clarissa's reward and buy Anger & Purity of Elements from her.
Use Anger alongside Herald of Ice as your 2 Auras. Purity of Elements will be added in later at ~Act 10 once you have the Mana Mastery & Leader of the Pack.
Grace will be used later on but its good to level it ahead of time. Until then, put both Auras into your Off-Hand to Level.

Level 28

Make sure you kill Gravicius.
Once you go back to town, take Artillery Ballista from Maramoa.
Go back to Act 1 and buy Added Cold Damage from Nessa.
Go back to Act 2 and buy Trinity from Yenna.

Link Artillery Ballista with Added Cold Damage & Trinity when you have space.
You can drop your Manaforged Arrows - Galvanic Arrow setup and run Artillery Ballista - Added Cold Damage if you don't have space for the full 3-Link.

You will use Artillery Ballista on Bosses for extra Damage. It will not be amazing until you get Focused Ballista but, it is still worth using.
Make sure you place all 3 Ballistas down, then just keep attacking with Rain of Arrows.

Level 31

Go to the Library and do the quest for Siosa.
Take Focused Ballista from the quest reward and link it to Artillery Ballista in: Artillery Ballista - Added Cold Damage - Focused Ballista - Trinity
Buy Steelskin, Nightblade & Automation from Siosa.

Link Steelskin & Automation together.
Turn on Automation, this will trigger Steelskin on cooldown for you providing a defensive layer.

Put Nightblade in your Off-hand to Level for the Lightning Strike swap.


Act 4

Do Lab after Level 31 when your gems upgrade.
Take Oath of Summer as your first Lab point.
It will not have good uptime while clearing due to the small point leading to it only having "10% chance to Ignite" but, it should keep 2 ~15% Scorches on every Boss drastically increasing DPS.

Level 38

Buy Mark on Hit from Perarus and Vanja if you have 1 Alchemy.
You can come back and buy this later or get it in Act 6 from Lilly.

Link Mark on Hit to Sniper's Mark.


Act 7

Take Avatar of the Wilds as your 2nd Lab point.
This will make it so all Ailments you apply will give you Unbound Fury stacks.
At 100 Stacks, you can use the new ability Unbound Avatar which you will gain for free.
This will give you 80% More Elemental Damage for 10 seconds. Use this on Bosses to burst them even faster & use it while clearing if you wish to.


Act 9

Around the beginning of Act 9, you will finish picking up Charisma, Leader of the Pack & Thrill of Battle + its Mana Mastery.
This should give you enough Mana Reservation to turn on Purity of Elements.


Mapping Pre-Lightning Strike


You will want to play Rain of Arrows until you can afford or find a decent Claw for the Lightning Strike swap. This will require ~5 Chaos or so if you are going to buy one.
You can either go into White/Yellow maps and make the money while progressing or, do 1-2 Hours of Heist to make ~200 Chaos which would be enough to make a very comfortable setup all the way to Red Maps.

I HIGHLY recommend you do Heist and have a whole video on how you'd do this here - https://youtu.be/v4PBenCGMIo
This will be enough to get you some Early Tamings which would make your Resistances super simple to fix & it would be a massive DPS boost, a 6-Link, & decent gear in all slots.

If you wish to continue into Maps, make sure to keep upgrading your Bow and try to find 1 Spell Suppression roll so you can cap your Spell Suppression later.


Lightning Strike Swap Requirements


The bare minimum to swap is obtaining a ~200 EDPS Claw with Attack Speed on it or an Open Suffix to craft Attack Speed.

>>>>>VERY IMPORTANT<<<<<
>>>>>VERY IMPORTANT<<<<<
>>>>>VERY IMPORTANT<<<<<
>>>>>VERY IMPORTANT<<<<<
>>>>>VERY IMPORTANT<<<<<

It doesn't matter the type of Added Elemental Damage on your Claw as long as it's NOT purely ONE ELEMENTAL TYPE.
If the Claw only has a Tier 1-3 Elemental roll on it, of ONLY 1 Type, your damage for that type will be too high and you cannot trigger Trinity.
Try to find one with 2 decent Fire/Cold/Lightning rolls on it.

For Example:

Claw with T1 Fire & T7 Cold - Bad
Claw with just T1 Lightning - Bad

Claw with T3 Cold & T5 Fire - Good
Claw with T2 Lightning T1 Fire - Good

>>>>>PLEASE READ THE ABOVE PARAGRAPH<<<<<
>>>>>PLEASE READ THE ABOVE PARAGRAPH<<<<<
>>>>>PLEASE READ THE ABOVE PARAGRAPH<<<<<
>>>>>PLEASE READ THE ABOVE PARAGRAPH<<<<<

Ideally, find one of the following bases: Gemini, Impereal, Eye Gouger or a Twin Claw.
There are all claws that have the Implicit "Grants x Life per Enemy Hit" which will go a long way to keeping you alive.

If you wish to look for a claw from the Trade website, here is a link for valid claws - https://www.pathofexile.com/trade/search/Necropolis/voEv5bMhE
Make sure you craft Attack Speed on your Claw if you buy one without it.

Alongside this, you will need a Leveled Lightning Strike & Nightblade.
If you didn't grab a Lightning Strike in Act 1 and Leveled it as you progressed, go to Act 1 and buy a slightly Leveled one from Nessa.
Nightblade will not come Pre-Leveled on Ranger and you will have to use a Level 1 version if you didn't have one. It will still be fine, it will just be a bit worse for a few Maps.

Lastly, if you could find a way to get a Vaal Lightning Strike, id highly recommend getting one ASAP.
Vaal Lightning Strike is an amazing skill that would aid with clearing faster & is a masive DPS boost on bosses.
Try to save 2 charges going into a Map Boss and just use both at the same time & the Boss should melt.

To add onto this, there are some other super cheap Uniques we can use that will give you a very nice boost.

The uniques you will want to consider are:
(Prices are subject to change and fluctuate with popularity)

Carnage Heart - This should be a 2-5 Chaos amulet that is simply too good to not include. Since we will always be leeching due to Mana Leech, we can always benefit from its Damage Increase.
Due to this build having a lot of Flat Damage and very little % Increased Damage, Carnage Heart just gives too much DPS to skip.
Not only that but, it also provides a lot of All Attributes allowing you to not worry as much about it on the rest of your gear and some All Elemental Resistances making Res Capping easier.

Optional:

Darkray Vectors - These Boots will be ~1 Chaos starting from Day 1 and they synergyze really nicely with Blood Rage.
The downside is that you will not gain any Movement Speed from your Boots on Bosses as these only give you Movement Speed while you have Frenzy Charges.
Since all of your Frenzy generation is from Blood Rage, these Boots might feel bad at times.
It's optional, but it would be a DPS increase with the downside being the clunkyness.


Swapping to Lightning Strike


Make sure you swap the Profile in the Skills Tab to the "Lightning Strike Earlygame Setup" & swap the passive tree to the "Mapping Level 70 LS Swap" tree.
There are a few minor changes to the tree requiring ~27 Respec Points in total. You will get 14 of these for free from leveling.
You can go back to Act 1 & 10 and do the quests there for an additional 4 or just get 13 Regret Orbs.
If you ended up doing Heist, you should have plenty to spare making this a non-issue.

GOLD RESPECING - With 3.25 respecing your Passive Points with Gold will now be a thing.
We do not know how expensive each respec will be at ~Level 70 nor do we know how much Gold you are going to get by Act 10 on average.
We have no need to buy things from the Auction House this early on so, use whatever Gold you have as much as possible to help with the respecing.
This can be done by talking to the Auction House NPC located inside the Tavern in Kingshore, the new 3.25 League Mechanic Town.
You can start the League Mechanic in the Act 1 Town if you skipped it.

Important
If you do not have a 5-Link or a 6-Link the Lightning Strike setup you want to use goes as follows: Lightning Strike - Nightblade - Trinity - Added Cold Damage
Your 5th Link would be Multistrike & 6th would be Elemental Damage with Attacks.


Your main playstyle is:

While clearing you will simply just use Lightning Strike as normal while running around with Frostblink and Shield Charge.
If you have Vaal Lightning Strike, use it whenever you encounter a room with high density or a mechanic such as Breach, Expedition, or Blight.

This will change a bit on Bosses:

On Bosses you will need to slightly be mindful about your positioning.
Due to us having the "Non-Vaal Skills Strike target 1 additional nearby Enemy" mastery at Multishot, we can abuse it to do ~75% More Damage to Bosses.
Lightning Strike has 2 forms, the Melee Hit & the Projectile that spawns and shoots out. An enemy can ONLY be hit by your Melee Hit or the Projectile Hit.

What we can do on Bosses is to stand slightly away from the Boss, hitting them with the Projectile.
If you do this, the clone spawned from "Non-Vaal Skills Strike target 1 additional nearby Enemy" will spawn on the Boss you are fighting and attack it with a full value Lightning Strike.
This extra Lightning Strike would hit the Boss with the Melee portion meaning that the Projectile from your Lightning Strike will also hit.

This is very easy and intuitive to master and it shouldn't be too dificult to learn. Just walk slightly away from a Boss and look out for the Red Clone that spawns when you attack.
After a few Bosses, you should get the hang of it and it should become second nature to do.

Lastly, we will need to take into consideration our Warden ability, Avatar of the Wilds. As you apply Scorches, Chills & Shocks, you will gain Unbound Fury stacks.
At 100 Stacks, you will be able to use your ability Unbound Avatar giving you 80% More Damage for 10 Seconds.
Simply use this ability every time you hit 100 Stacks & ideally try to save your Vaal Lightning Strike charges for when this is up to grant them 80% More Damage too.


Swapping from Precision to Grace


Once you are into Tier 16 Maps you will want to eventually stop using Precision and instead add in Grace.
To do this, we will need some Mana Reservation Efficiency to make it happen.

The Level 85 Passive Tree has Leader of the Pack allocated which is around the time I expect you to be ready to make this swap.
You will need to have both Leader of the Pack & an Eater of Worlds "9% increased Mana Reservation Efficiency of Skills" Implicit on your Helmet to make this swap.
Make sure you are using Grand Eldritch Ichors as we want the 9% roll to have enough Mana left over to comfortably use our Tincture.

You can also use a Lesser or Greater Ichor roll and it would be fine, you would just have slightly worse uptime on your Tincture as you want to have more than 8% Mana Unreserved.

The Level 95 Passive Tree removes Leader of the Pack.
By this point, it is assumed you will have a Stormshroud & a Level 3 Enlighten. With these 2 additions you can remove Purity of Elements and swap to Determination.
If you do not have both of these yet, keep Leader of the Pack and continue to use Anger - Grace - Purity of Elements until you can swap over.


Getting Spell Suppression Cap


As you move further into the build, your first challenge will be to get to Spell Suppression cap.
You want to make sure that your Helmet, Gloves, Boots and Chest all have Evasion on them to benefit from the "+15% Spell Suppression if all have Evasion" mastery at Revenge of the Hunted.
This will put you at 92% Spell Suppression chance while at Full Life. That means you will need a 8% roll on your gear to hit Spell Supression Cap.

Eventually, you will want to get a total of 18% on your gear so you are always at Spell Suppression Cap and not only while at Full Life.
For White - Early Red Map progression this is fine, but you will want to take care of this by the time you are in T16.

Finally, you will want to get another 17% Spell Supression Chance on your gear for a total of 35% across your gear.
This will be something you worry about as you push further and further into the build but, this will allow you to eventually drop Entrench saving 2 Passive Points.

Note - Due to this build eventually getting up to ~330 Dex due to all of the pathing nodes, you can always replace some of the +10 Dex nodes with "Tattoo of the Ramako Shaman."
These will be fairly expensive at the start of the season but, if you ever are 2-4% Spell Suppression off of 100%, consider using Tattoos instead of paying for a more expensive roll on an item.
Eventually, you will want to try and run as many "Tattoo of the Ramako Shaman" as you can to make space on your Suffixes for Chaos Resistance.


Getting Ailment Immunity


Ailment Immunity will initially come from Purity of Elements as it will also help with Early Mapping Resistances.
Eventually, we will want to swap to using a Stormshroud for Ailment Immunity as it will allow us to swap from Purity of Elements to Determination.

To properly use Stormshroud, we need to get to a combined 100% Chance to Avoid Shocks.

This will be reached with the following methods:

20% Chance to Avoid Elemental Ailments from the Thick Skin Wheel
46% Chance to Avoid Elemental Ailments from Boots
44% Chance to Avoid Shocks from an Abyss Jewel socketed into a Stygian Vise

This will give you a 100% Chance to Avoid Shocks which Stormshroud will turn into Chance to Avoid Elemental Ailments.
Making the Boots required for this is simple and there will be a crafting guide below.


Boots


For this build we will want to use an Evasion pair of Boots, ideally Slink Boots.
The ideal Boots are going to be ones with Life and Crafted Movement Speed for the Prefixes.
As for Suffixes, we will want a Fractured Resistance, ideally Chaos Resistance, and an Essence Chance to Avoid Ailments roll.


Boots Crafting Guide

Buy a Fractured pair of Slink Boots, ideally one with Fractured Chaos Resistance or Life.
The trade link below will have a few different Fracture options in the Filters.
Feel free to turn off some of them to narrow it down to a specific stat.

Due to the nature of Leaguestart, while Slink is the ideal base, the trade link will be for any Evasion base as Slink could potentially be too expensive.

(The trade link will still work in 3.25 even if it says Necropolis)
Trade Link to buy a Fractured base - https://www.pathofexile.com/trade/search/Necropolis/2va3dn0Fk


1. Use Shrieking Essences of Loathing to guarantee the "x% chance to Avoid Elemental Ailments" roll.

If you bought a Fractured Chaos Resistance pair of Boots, you are looking to keep rolling until you get Tier 2 or higher Life or Movement Speed with 1 Open Prefix.
If you bought a Fractured Life pair of Boots, you are looking to keep rolling until you get a Tier 2 or higher Movement Speed roll with 1 Open Suffix.
If you bought a Fractured Movement Speed pair of Boots, you are looking to keep rolling until you get a Tier 2 of higher Life roll with 1 Open Suffix.


2. Craft either "+x to Maximum Life," the Hybrid "x% increased Movement Speed, x% chance to gain Onslaught for 4 seconds on Kill," or any of the Hybrid "x% to Fire/Cold/Lightning and Chaos Resistances" Mod.
This is based on whichever you are missing between the three from Step 1.


Once you have your Boots:
Use "Greater or Grand Eldritch Ichor" on the Boots to get "x% chance to Avoid Elemental Ailments."

Using Grand is ideal as you will then need a smaller "x% Chance to Avoid Shocks" roll on your Abyss Jewel.
This could be very expensive at the start of a Season so it might be best to just use Greater and find a higher roll on your Abyss Jewel.

Use Blessed Orbs to reroll the roll once you obtain it to its Maximum Roll.

Use "Lesser Eldritch Ember" or "Grand Eldritch Ember" if you can afford it to hit "x% increased Action Speed."
Grand will be more expensive but yield a 5% roll while Lesser and Greater will both give a 4% roll.


Further Upgrades


As 3.24 starts, I will be releasing a followup guide & PoB to this one talking about how to upgrade this build in great detail.
Everything here should be enough to get most people through all content and through anything you'd want to do on Week 1.

You will be able to find it on my YouTube channel linked at the top of the notes section.
Until then, I will talk about some potential upgrades you can make that are Plug & Play that you should be able to make with no problem.

Awakened Added Cold Damage will most likely start off relatively expensive but should drop down in price quickly as the season matures.
This should be a ~5% DPS upgrade once it is leveled to Level 5 and is worth buying early on for you to be able to start leveling it.

Getting as many Tattoo of the Ramako Sniper as you can would be a great way to increase your clear speed.
You will have more Dex than you need allowing you to fit up to ~10-15 Tattoos in total depending on where you are in the build.

Crafting a Claw as mentioned below this section will cost ~7 Divine in total and will be a major boost to DPS.

With the 3.25 Season, new Weapon Enchants are being added to the Runecarving Bench in Kingshore.
One of these Enchants "Projectiles Return to You" is extremely powerful in our build offering 100% More Damage as the main Lightning Strike projectile would be able to hit a Boss twice.
I believe the 5 Sun Runes required for this Enchant are going to be common & the Devs have confirmed they will be tradeable.
If this Enchant can be put on a Claw & the Runes required to craft it are cheap, get this ASAP. I will have an update video on this on my YouTube channel as soon as I have tried it myself if this will be craftable on a Claw.

Upgrading your Tincture, especially if the "Rage on Hit" roll comes back into the game will be a MASSIVE DPS boost.
Unfortunately, we will not know any Tincture mods until they get Datamined the day of the League Launch.
It's difficult to speculate exactly what will be avaliable but, even the Tincture added into this PoB as a placeholder which is one of the Tinctures the Devs showcased us is already very strong.
Mind you, the Tincture in this PoB is missing 1 stat. Be on the lookout for good rolls and upgrade accordingly. I will have an update video on this on my YouTube 1-2 Days after the start of 3.25 on this topic.


Weapon

For this build, we will be using a Claw.
Claws have great base stats and allow us to abuse Nightblade and Elusive for a great way to scale Crit and Crit Multi but also abuse Elusive as a great defensive layer.

For this build, we will want a Claw with 1 Fractured Tier 2 or higher Elemental Prefix & the other 2 as an Essence & rolled mod.
As for the Suffixes, we will Craft Attack Speed.


Claw Crafting Guide

Buy a Fractured Tier 2 or higher Added Fire/Cold/Lightning Claw. If you have to settle for a Tier 3 Fracture, that is fine too.
Ideally we will want to use an Imperial Claw but due to the nature of Leaguestart, any "Grants x Life per Enemy Hit" Implicit Claw is fine.

The Trade Link will be for Imperial Claws specifically as this will cost ~2 Divine and you will ideally want to do this on a good base.
If they are too expensive, turn on the "Grants x Life per Enemy Hit" filter and remove the Imperial Claw from the search to look at all claws.

(The trade link will still work in 3.25 even if it says Necropolis)
Trade Link to buy a Fractured base - https://www.pathofexile.com/trade/search/Necropolis/EZRPrB4C5

1. Use Shrieking Essences of Anger/Hatred/Wrath to guarantee their respective Added Damage roll until you get the 3rd Elemental Added Damage roll you are missing at Tier 3 or higher.
Going for Tier 3 is ~1/60 while going for Tier 2 is ~1/150. Your goal is to have all 3 Added Elemental Damage rolls on your Prefixes.

The Essence you will use is based on which Fracture you have on your Claw.
You want to use 1 of the 2 Essences that give you a Roll you don't have on your Claw.
Check the price of both Essences and use the cheaper of the two.
Use Deafening Essences if you can afford it.

Essence Rolls:
Anger - Added Fire Damage
Hatred - Added Cold Damage
Wrath - Added Lightning Damage

Example: If you bought a Fractured Added Fire Damage roll you would want to use Essences of Hatred or Wrath.

2. You will need an Open Suffix or an Attack Speed roll.
If your Claw happens to roll Attack Speed on the same roll as you getting the correct 3 Prefixes, Craft "+x% increased Critical Strike Chance" if you have an Open Suffix.

If you didnt get Attack Speed as a Suffix and do not have any Open Suffixes, use an Orb of Annulment. If the Orb of Annulment removes a Prefix, start over from Step 1.

3. Craft "x% increased Attack Speed" on your Claw.


.