7 months ago
 Level 94 Arc Elementalist3.19
Life: 4,963142%
ES: 171
Mana: 172
eHP:
78,880
Resistances: 79%/79%/79%/75%
Block: 49%
Spell Block: 18%
Armour: 26,410
DPS: 2,402,799
Speed: 4.09
Config: Pinnacle, 65% Shock
Bandit: Kill All
Pantheon: Soul of the Brine King
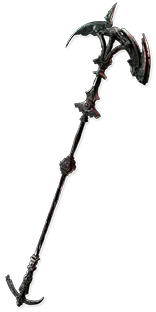
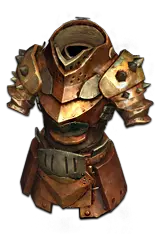
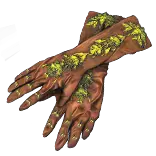
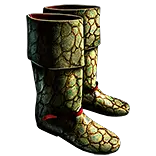
Gear



Gems
Arc
Lightning Penetration
Spell Echo
Added Lightning Damage
Inspiration
Arcane Surge
Galvanic Field
Elemental Focus
Added Lightning Damage
Lightning Penetration
Vaal Storm Call
Defiance Banner
Molten Shell
Cast when Damage Taken
Flame Dash
Wrath
Clarity
Summon Lightning Golem
Conductivity
Increased Duration
Summon Ice Golem
Summon Chaos Golem
Determination
Summon Stone Golem
Primal Aegis
Tree Preview
- 40% increased Effect of Non-Damaging Ailments
- +50 to maximum Life
- Lightning Damage with Non-Critical Strikes is Lucky
- Non-Projectile Chaining Lightning Skills Chain +1 times
- +15% to Maximum Effect of Shock
- Clarity has 100% increased Mana Reservation Efficiency
- Auras from your Skills have 10% increased Effect on you
- 30% increased Defences while wielding a Staff
Notes
-----------------------------------------------------------------------------------------------------------------------------------------------------------
-------------------------------------------------------- Enki's Arc Elementalist ---------------------------------------------------------------------
-----------------------------------------------------------------------------------------------------------------------------------------------------------

This POB includes all steps for the Passive Tree, Gems and Equipment to progress this build from Twilight Strand to Endgame.

Contents
- Act 1-10
  - Passives
  - Equipment
  - Gems
- Maps & Endgame
  - Passives
  - Equipment
  - Gems
  - Playstyle
  - Mapmods

-----------------------------------------------------------------------------------------------------------------------------------------------------------
----------------------------------------------------------------- Act 1-10 ------------------------------------------------------------------------------
-----------------------------------------------------------------------------------------------------------------------------------------------------------

Your character slowly comes together while progressing through the campaign, which can be seen as tutorial.
Take your time to read every passive skill, gem and item you take to understand what they do.
Holding ALT while hovering over them can sometimes give you additional information.

Here's some generic advice for new players to check out: https://poe.maxroll.gg/category/getting-started

A full act by act walkthrough can be found here: https://poe.maxroll.gg/getting-started/campaign-guide

Passives
Your passive tree progression can be found in the "Tree" section, with goals for each act and beyond.
Click on the drop-down in the bottom left corner that says "Finished Build" by default to choose between them.

Equipment
All your gear needs during the campaign is Life and Elemental Resistances, additionally Movement Speed on Boots.
Use two Wands and craft them at Level 8 and once again at Level 20 with the following recipes:

- Magic-rarity Wand + Normal-rarity Topaz Ring + Orb of Alteration (Level 8)
- Magic-rarity Wand + Rare-rarity Topaz Ring + Orb of Alteration (Level 20)

Get your Fire-, Cold- and Lightning Resistance capped at 75% by the end of Act 3.
Defeating Kitava in Act 5 / 10 gives you a -30% resistance reduction that you need to make up for with your gear.
Better resistance rolls on higher level gear, Essences and your Crafting Bench can help with that.

Keep your Life and Mana Flasks updated, By the start of Act 7 you shouldn't need the Mana Flask any longer.
Get the following Flasks from quests and use the Menagerie to craft the following Suffixes on them:

- Quicksilver Flask (Mercy Mission, Act 1)
- Quicksilver Flask (The Great White Beast, Act 2) - craft ..of the Lizard
- Granite Flask (The Key to Freedom, Act 5) - craft ..of the Deer
- Quartz Flask (The Silver Locket, Act 7) replaces Mana Flask - craft ..of the Conger
- Silver Flask (Safe Passage, Act 10) replaces Quicksilver Flask from Act 1 - craft ..of the Urchin

Gems
The gem setup mainly expands over the first four acts, where you unlock most gems through quests.
Some are directly offered as reward, the other gems can be bought from the towns gem vendor.

Below you can find which gems to use and which quest unlocks them.

Spark (Enemy at the Gate, Act 1) -> Arc (The Siren's Cadence, Act 1)
+ Arcane Surge (Twilight Strand, Act 1) -> Lightning Penetration (A Fixture of Fate, Act 3)
+ Added Lightning Damage (The Caged Brute, Act 1) -> Inspiration (A Fixture of Fate, Act 3)
+ Spell Echo (The Eternal Nightmare, Act 4)

This is your main skill. You start out with Spark, which you replace with Arc at Level 12.
Try to have a 4L by Level 38 to fit in Spell Echo, use Added Lightning Damage as fourth link until then.

It's important that Arcane Surge stays at Level 15!

-----------

Orb of Storms (Breaking Some Eggs, Act 1) -> Galvanic Field (Intruders in Black, Act 2)
+ Added Lightning Damage (The Caged Brute, Act 1)
+ Elemental Focus (Sharp and Cruel, Act 2)
+ Lightning Penetration (A Fixture of Fate, Act 3)

Orb of Storms gives some additional damage until you get Galvanic Field.
Galvanic Field is a buff that needs to be kept up manually and adds single target damage upon shocking an enemy with Arc.

-----------

Frostblink (Breaking Some Eggs, Act 1) -> Flame Dash (The Caged Brute, Act 1)

Frostblink / Flame Dash helps you move around quickly.

-----------

Steelskin (Breaking Some Eggs, Act 1) -> Molten Shell (A Fixture of Fate, Act 1)
+ Cast when Damage Taken (The Eternal Nightmare, Act 4)

Steelskin / Molten Shell expand your hitpool, Cast when Damage Taken triggers them upon reaching a damage treshold.
Once you use the Determination aura, replace Steelskin with Molten Shell.

Seperate these gems from any other gems within the same item to avoid any potential issues with CwDT triggers.

It's important that Molten Shell stays at Level 15 and Cast when Damage Taken stays at Level 10!

-----------

Wave of Conviction (Intruders in Black, Act 2)
+ Conductivity (Lost in Love, Act 3)
+ Hextouch (The Eternal Nightmare, Act 4)

Both of these debuff enemy resistances and are only needed for tougher rares or bosses.
Once you have Hextouch linked to them, Wave of Conviction will apply Conductivity for a smoother playstyle.

-----------

Clarity (The Caged Brute, Act 1)
Herald of Thunder (Intruders in Black, Act 2) -> Wrath (Lost in Love, Act 3)
Determination (A Fixture of Fate, Act 3)

These are your auras. Each reserves a portion of your mana to grant a buff.
Herald of Thunder gets replaced with Wrath to gain another damage multiplier.
Determination requires the Act 5 passive tree to fit in.

These gems don't have to be linked and can be socketed anywhere within your gear.

-----------

Summon Lightning Golem (Breaking the Seal, Act 4)
Summon Stone Golem (Breaking the Seal, Act 4)
Summon Ice Golem (Breaking the Seal, Act 4)
Summon Chaos Golem (Breaking the Seal, Act 4)

These golems provide a buff while they're alive and will resummon themselves after the first Labyrinth.
You can run Lightning Golem by default, Stone Golem requires Golem Commander in the Act 4 passive tree.
Ice Golem requires the first Labyrinth, Chaos Golem requires the second Labyrinth to be run.

These gems don't have to be linked and can be socketed anywhere within your gear.


-----------------------------------------------------------------------------------------------------------------------------------------------------------
--------------------------------------------------------- Maps & Endgame --------------------------------------------------------------------------
-----------------------------------------------------------------------------------------------------------------------------------------------------------

Before you jump into maps, you can farm Delve, Heist or the Blood Aqueduct in Act 9 to get currency and prepare your gear.

Passives
Besides the act passive trees, there are four additional trees to show how to progress the build further into endgame.
For the starting node change, put some points into the Intelligence nodes first, then remove the unwanted nodes.

If you don't need the Resistances from Sentinel and the nodes above it, you can go for Breath of Lightning at that point instead.

Equipment
The gear section includes multiple progression steps with their own example gear, and High Budget Options to push the build further.
Base Items and Resistance Allocation don't have to be taken too literal, it's alright to get something similar (E.g. Cold Res instead of Fire Res).
Use the Life values as orientation, don't use gear with Life values that are far below the listed values.

The Early Maps and Midgame setups are pretty basic gear that allow you to progress through the atlas while gaining currency.
Enchantments and Implicits don't play much of a role yet, as you will replace this gear later anyway.

The Endgame setup includes your final upgrades to finish the build and gain a massive power spike to take on most endgame encounters.
The main focus is stacking Elemental Resistances to fit in Annihilating Light, a staff that on its own will roughly double your damage.

Eldritch Implicits can be rolled manually on any non-influenced, non-corrupted and non-mirrored piece of gear.
While providing and overall power boost, they also allow you to change up your Gem Setup.
The Lightning Exposure glove implicit lets you replace Wave of Conviction + Hextouch, Conductivity has to be cast manually.
The Mana Reservation Efficiency helmet implicit lets you run Defiance Banner, which is especially good once you have Brass Dome.

Gems
The gem setups are directly tied to each gear progression step. Enable each setup of the according tier and disable the others.
To properly show your damage output, you also have to choose the right Arc setup under Main Skill on the left side.

The Early Maps and Midgame setups have no differences between them except for gem levels.

The Endgame setup comes with all changes based on Eldritch Implicits and shows which gems benefit from having quality as well as which Alternate Quality & Awakened Gems to aim for.

Activate Vaal Righteous Fire to see its impact on your damage, NEVER activate the regular Righteous Fire!

A few gems have to stay at certain levels to work properly:

Wave of Conviction needs to stay at Level 1 to be safe from Physical Reflect. You can buy a Level 1 copy of the gem from Lilly if needed.

Arcane Surge needs to stay at Level 15. This allows you to get the buff and maintain its uptime after four casts of Arc.

Cast when Damage Taken needs to stay at Level 10 to have its trigger treshold around 1/3rd of your life pool.

(Vaal) Molten Shell needs to stay at Level 15. This keeps its level requirement as the highest level that a Level 10 CwDT can trigger.

Playstyle
Arc has a fairly good range and chains between enemies and destroyable objects, try to get familiar with it and use it to your advantage.

Galvanic Field should be used against tougher enemies like Essences, Metamorphs or anything else that doesn't die quickly.

Wave of Conviction + Conductivity are just needed for tougher enemies until you replace them with the Endgame Gear setup.

Vaal Molten Shell can help soaking up a lot of damage from potentially tough situations such as Essences or Metamorphs.
Use your Granite Flask before using Vaal Molten Shell to increase the damage buffer you get.

Your Divine Life Flask is your panic button, use it once you're below 50% of your life to (almost) fully heal instantly.

Bossfights
Start the fight, debuff the boss with Wave of Conviction or Conductivity, use Vaal Righteous Fire (if you have it), use your Silver Flask and Galvanic Field, then burst the boss down with Arc.

Mapmods
Use Soul of Lunaris with its last upgrade to be safe against "Monsters' Skills chain 2 additional times".

Avoid: No Regeneration

Huge Damage losses: Can't inflicit Exposure, Suppress Spell Damage, + Elemental Resistance, Chance to avoid Ailments, Enfeeble, Temporal Chains

Minor Damage losses: reduced Aura Effect, Buffs expire faster, Hexproof, less Curse Effect, Endurance Charge on Hit