3 months ago
 Level 95 Crit Flicker Strike Antiquarian3.25.alternate
Life: 4,461144%
Ward: 22,704
Mana: 141
eHP:
390,280
Resistances: 78%/78%/77%/75%
Armour: 17,225
DPS: 42,111,084
Speed: 8.34
Hit Chance: 100%
Crit Chance: 100.00%
Crit Multi: 452%
Config: Frenzy, Power, 14x Wither
Bandit: Kill All
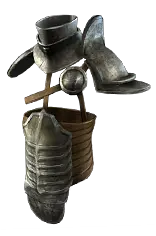
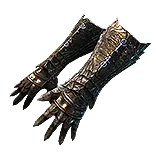
Gear






Gems
Shield Charge
Faster Attacks
Leap Slam
Purity of Elements
Enlighten
Tempest Shield
Increased Critical Damage
Awakened Void Manipulation
Increased Critical Strikes
Close Combat
Multistrike
Flicker Strike
Molten Shell
Automation
Withering Step
Enhance
Arrogance
Precision
Despair
Blood Rage
Assassin's Mark
Mark On Hit
Lifetap
Flesh and Stone
Tree Preview
Tattoo of the Kitava Blood Drinker
0.5% of Attack Damage Leeched as Life
Tattoo of the Tukohama Warmonger(x13)
5% increased Melee Damage
- +500 to Accuracy Rating
- -2 to Accuracy Rating per Level
- You take 30% reduced Extra Damage from Critical Strikes
- Non-Vaal Strike Skills target 1 additional nearby Enemy
- +1% Chance to Block Spell Damage per 5% Chance to Block Attack Damage
- You take 30% reduced Extra Damage from Critical Strikes
- +25% to Critical Strike Multiplier against Unique Enemies
- 15% increased maximum Life if there are no Life Modifiers on Equipped Body Armour
- 10% reduced Mana Cost of Skills
- Nearby Enemies are Intimidated while you have Rage
- 120% increased Critical Strike Chance with Swords
- -20% to Critical Strike Multiplier with Swords
Notes
Guide to crafing a chunky defense-only chestpiece:
	Single Dense Fossil -> just hit it

Guide to crafting Chaos Resistance Ring
	Harvest spam chaos until suffixes are done
	Suffixes Can't be changed -> Reforge Life
		Note that you can use Wild Bristle Matron to force this metamod

Guide to crafting Envy Essence Ring
	Spam Essence of Envy until suffixes are done
		Say that you'll never settle, settle anyway
	Suffixes Can't be changed -> Reforge Life
		Note that you can use Wild Bristle Matron to force this metamod

Guide to crafting a Hunter influenced helmet
	Purchase multiple hunter bases
	Harvest spam reforge chaos until you get the "Nearby enemies have -9% to chaos resistance"
		Annul extra suffixes
	Essence Spam for T1+ resistance and T1 Accuracy
		Annul extra suffixes
	Optional: Multimod + Craft 2 exclusive prefixes
	Recombinate and pray
	With the suffixes done:
		Block flat armour
		Exalt + Exalt + Suffixes can't be changed + Scour loop
			Do not fill prefixes!
			Look for high tier life or high tier defenses, craft the missing one
			Use Wild Bristle Matron to force the metamod

It's recommended that you level up as Ancestral Commander for the 120% cooldown recovery rate. At level 34 you'll be able to autoexert ancestral cry and get easy access to
double damage throughout the entire campaign.

You don't specifically need dexterity on your boots, it can also roll naturally on rings.

Gear upgrade priority assuming a [Lategame] setup (From most to least important):
	[Core] Nightgrip + Ynda's Stand with Quality + 3 Ascendancies from Antiquarian
	$$$ Chaos Pen Paradoxica with attack speed (ideally with attributes)
	$ The Light of Meaning (Chaos Damage)
	$$ Lethal Pride with melee damage / melee crit multi (NOT double damage)
	$ Ynda's Stand with defense catalysts
	$$ T1+ Dense Armour
	$ Flasks, specially iron flask with increased ward
	$ High accuracy + Mana reservation helmet
	$$ Ashes of the Star
	$$ Whispers of Doom annoint OR impossible escape
	$$$ Svalinn, if dying too much

Remember to use gold to optimize your passive tree before level 70 as gold costs start increasing drastically past that point.

Note that there's 3 types of tattoos in the passive tree:
	(10-12) Increased melee damage
	(1) Attack damage leeched as life
	(2) Melee hits that stun have a chance to fortify

xzxzxzxzxzxzxzxzxzxzxzxzxzxzxzxzxzxzxzxzxzxzxzxzxzxzxzxzxzxzxzxzxzxzxzxzxzxzxzxzxzxzxzxzxzxzxzxzxzxzxzxzxzxzxzxzxzxzxzxzxzxzxzxzxzxzxzxzxzxzxzxzxzxzxzxzxzxzxzxzxzxzxzxzxzxzxzxzxzxzxzxzxzxzxzx

	FAQ

xzxzxzxzxzxzxzxzxzxzxzxzxzxzxzxzxzxzxzxzxzxzxzxzxzxzxzxzxzxzxzxzxzxzxzxzxzxzxzxzxzxzxzxzxzxzxzxzxzxzxzxzxzxzxzxzxzxzxzxzxzxzxzxzxzxzxzxzxzxzxzxzxzxzxzxzxzxzxzxzxzxzxzxzxzxzxzxzxzxzxzxzxzxzxzx

What kind of build is this?
	This build is a speedmapper. It's meant to clear maps as fast as possible.

Can this version do Uber bosses?
	Not painlessly. Uber Maven and Uber Sirus can be a particularly bad match for flicker strike, so you may need to gem swap to Lightning Strike to attempt them.

Can this build clear T17 maps?
	T17 mapping should be easy, keep in mind that your defenses can be bypassed by degens so make sure you avoid map mods like deatomizing storms.

What content is it good for?
    Alch-and-go strategies, strongboxes, shrines, expedition, abyss, breach, harbinger, ritual, mirror of delirium, harvest, heist, incursion, and lab running.
	The more expensive versions can eventually to more difficult content such as uber lab running, 5-way timeless conflicts, wave 15 simulacrum, or 100% delirious maps.

What content is it bad with?
    (Uber) Bossing, blight, delve, or anything that requires you to attack in place, follow a path, or survive very large degens.
	The more expensive versions can attempt some of this content. Uber bosses remain outside of the scope of most flicker strike builds.

What map mods should this build avoid?
	This build cannot do "Reflects Physical Damage", "Cannot leech", and struggles with "Less life recovery" and "Monster steals charges".

Why do I sometimes stop attacking entirely?
	You are running out of frenzy charges, or mana. Minimum Frenzy charges don't count. Make sure you are using Multistrike in your setup and have 20% quality on your flicker
	strike gem, otherwise it will be impossible to sustain charges.
		Retaliation charm gives the build up to 20% frenzy charge on hit vs. blinded
		Ashes of the Star gives the buipd up to 15% frenzy charge on hit from extra quality to flicker strike
		Other high-investment versions sword mastery (+8%) and mark mastery (+10%) for an additional 18% chance.

Can this build sustain "permanent" Berserk buff?
	Not at all. Berserk is a limited use button that you may want to drop it entirely from the build. The skill gem is inactive to not pad out the DPS of the build.

How important is Fortify? Should I use the fortify gem or passive tree nodes if I can't get it on my weapon?
	It's important and makes a difference. If you have to choose, use the eldritch implicit from the armour, or use 2x tattoos for fortify on melee stun. Otherwise use a fortify support.
	While it's not a BiS gem, it is one of the better options you can use for any generic melee build.

Alternative Gearing Options:
	Some of these options are really good for gearing but are ultimately not used for one reason or another.
		[Amulet] Defiance of Destiny
			Good defensive option. This item makes you effectively immortal against small hits that deal less than 15-20% of your max unreserved life. Won't save you from one-shots.
		[Amulet] Straglegasp
			Great offensive option. You annoint and can corrupt this item and potentially turn it into a rare item with useful modifiers. An expensive gamble.
		[Amulet] Aul's Uprising
			Provides the ability to slot an additional 50% reservation aura. Puts on additional socket pressure and there's not that many auras to choose from besides Determination,
			Purity of Elements, or Haste.
		[Helmet] Abyssus
			Probably the best melee damage helmet in the game. This build struggles with suffix pressure, specially when using self-blind from Retaliation Charm, so it's better to get a
			helmet with a big accuraccy roll instead.
		[Armour] Farrul's Fur
			Farrul's Fur becomes obsolete too quickly to recommend it. Not particularly useful for stacking ward compared to a T1 base.