8 weeks ago
 Level 99 Hybrid MoM Shield Charge Necromancer3.26
Life: 4,912140%
ES: 2,85445%
Mana: 1,50384%
eHP:
151,592
Resistances: 79%/65%/79%/75%
Armour: 18,537
DPS: 4,160,016
Speed: 6.86
Hit Chance: 37%
Config:
15% Shock, Custom Mods
Bandit: Kill All
Pantheon: Soul of the Brine King, Soul of Garukhan
Gear
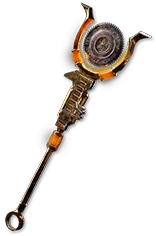
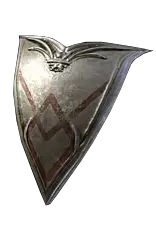



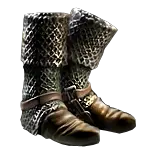


Gems
Shield Charge
Faster Attacks
Eternal Blessing
Determination
Flammability
Bone Offering
Elemental Weakness
Arcanist Brand
Desecrate
Spell Cascade
Detonate Dead of Chain Reaction
Hypothermia
Awakened Fire Penetration
Combustion
Flame Dash
Clarity
Arrogance
Vaal Molten Shell
Unearth
Empower
Greater Multiple Projectiles
Inspiration
Archmage
Enhance
Tree Preview
- 100% increased Armour and Energy Shield from Equipped Body Armour if Equipped Helmet, Gloves and Boots all have Armour and Energy Shield
- Critical Strikes do not inherently Ignite
- 100% increased Damage with Hits against Ignited Enemies
- 15% increased maximum Life if there are no Life Modifiers on Equipped Body Armour
- 10% of Damage taken Recouped as Mana
- 10% chance to Recover 10% of Mana when you use a Skill
- 20% increased effect of Offerings
- Corrupted Blood cannot be inflicted on you
- Life Recoup Effects instead occur over 3 seconds
- +1% Chance to Block Attack Damage per 5% Chance to Block on Equipped Shield
Notes
Forward - I am a flawed human being.  I sometimes forget to mention things in the build guide video, but everything you need to know should be down below.  Happy mapping!

IMPORANT NOTE - WE GOT BUFFED!  Necromancer scales up our attack speed at TWICE the previous rate, meaning our ability to 'spin up' to maximum DPS is more consistent than ever!
Additionally, Volatile Dead's orbs deal 25% More Damage at all levels, meaning early leveling before get Detonate Dead of Chaining is also just 'that much' better!

Example Gear - All Example Gear outside of the leveling portion shown was acquired in-league (during previous leagues) via trade/play by myself.  Leveling gear is deliberately depicted conservatively.

==================================================================================================================================================================================================
==================================================================================================================================================================================================
==================================================================================================================================================================================================


Preliminary Note - DPS is 'conservative' with a very reserved guess on corpse life. it's expected that there's more than 5 'instances' running at a time.  We DO reach maximum corpse consumed benefit from
Corpse Pact, and the post-20 gem scaling on Unearth HAS changed since its nerf, meaning that with endgame levels of investment the DPS increases WILDLY over the humble 2-3 Million we have early on.
Our DPS is much higher/smoother while mapping due to higher quality corpses from enemies we kill.  There may be things from the mechanic that help make up for what we lost.  Additionally, the Volatile Dead
buff should make leveling much easier, which is just a massive buff to satisfaction during the league-start overall.

!!!Detonate Dead Note!!! - We're scaling the Corpse Explosion Component.  Spell Damage DOES NOT affect this.  Fire Damage, Elemental Damage, Area Damage, Damage, and Minion Damage (Spiritual Aid) do.


LEVELING 1-50

It helps to have Detonate Dead of Chain Reaction ready to go, as this is a very nice leveling skill even when it's self-cast.  If league starting, Detonate Dead will do, and the improved version can be farmed from even the
first labyrinth.  That said, it's actually Volatile Dead, it being the old way we played this build, that's best until you get the transfigured chaining gem.  As of 3.27, Volatile Dead is now even stronger for leveling (25% More Damage)
In that setup, you run Volatile Dead, Detonate Dead, Combustion, and Fire Penetration together.  Simply get Unearth at level 10, slap on Volley + Lesser Multiple Projectiles, and go to town.  Descecrate + Spell Cascade makes for
a superior self-cast setup while working your way up to Level 50, and I recommend this if you're leveling Volatile Dead.  In addition, Desecrate + Spell Cascade + Arcanist Brand is a link setup we use anyway, so you lose nothing by
making use of those gems early.  You can switch your Unearth supports for Greater Multiple Projectiles at Level 38, but otherwise most of what you do
here is up to you, so long as your Skill Tree is ready at 50 for the switch.  You *may* be able to switch earlier than level 50, but at level 50 it's extremely likely you'll be able to hit the 100 mana per cast breakpoint Unearth requires
 for the build to 'begin'.  The links used for your initial setup are in the 'Skills' tab here on PoB.
                                                                                                       (Labeled Level 50 Unearth Links)

We use Determination with Eternal Blessing, as we need our Mana Pool unencumbered.  Vaal Molten Shell is amazing the moment Determination is running, and gives us the ability to wade confidently into a shitstorm when
the time comes.


Mana Regen - This build needs a lot of Mana Regen.  If you can get Mana Regeneration Rate WITHOUT increasing our Maximum Mana, it's a valuable stat.  Not ultra-necessary long-term, but some is required.

THE MANA FLASK - This is new, and possibly the most important change to the build made in 3.26.  We take Essence Extraction and make a mana flask with the Flagellant's (+3 Charges when hit) prefix, which more or less
removes all headaches with long-term mana sustain.  In some fights, it's a little easier to 'never get hit' than others, so you may have to learn when to stand still if things go long.  Otherwise, this small change opens up many other options,
and ultimately nets us an enormous DPS gain.


LEVELING 50-68

From this point onward, you're crusing and probably having a blast.  You will need a mana flask early on, perferably one with 50% increased recovery rate, and for quite a while beyond too for whenever you really 'commit' to blasting a tougher target.
So long as you have Aetherwind Gloves, (Aetherwind Gloves come from Ritual, so you'll have to trade for one or go without if you haven't acquired a pair. Leyline Gloves *can* be acquired in Act 2 at the Rituals Encounters there, but they're not
common. On Trade they may be inexpensive.) and the 10% Refund Mana Cost Mastery, as well as Essence Glutton from your Ascendancy, it's going to feel really smooth despite mana because you just absolutely demolish the entire campaign
with this setup.  Keep an eye on your Mana Cost as it WILL continue to rise, and the goal is to keep it as close to 100 without going under.  Switch the increased mana cost nodes to reduced when the times comes, and spec out of excess mana
nodes that don't have reduced cost on them later.  We get enough Mana otherwise to make Mind Over Matter do what it needs to, and we don't benefit terribly overmuch once our mana consumption is manageable.
If you do not have Aetherwind or Leyline Gloves, the setup still works just fine, it's just a bit more intense on the mana-management side of things.

The following Ascendancy nodes to pick up are Plaguebringer and Corpse Pact, which take your damage and give them the base scaling they need to really take off as time goes on.
They also bring no small bonus to survivability to the table, and lump in attack speed to make even Shield Charge smooth + fast, so that's nice.


MAPPING START (68+ / 72 Recommended)

Mapping starts with some immediate changes to gear that may or may not be immediately available (such as in a league start scenario).  Get a weapon with the 'Trigger a Socketed Spell when you use a Skill, with an 8 Second Cooldown'
fast, as you'll need it to make your Uber Lab Ascendancy (Mistress of Sacrifice) function.  This craft is picked up in mapping from the 'The Refinery' in Act 9.  This lets you approach block cap, and acquiring enough sources of Offering Effect
(Minion Offense Mastery, Eldritch Implicits on Chest/Boots) will bring you to the ultimate 75/75 Attack + Spell Block cap.  Socket Bone Offering into your weapon, and you will have 100% uptime.
I also socket Flammability and Wave of Conviction in for a bit more automation on Curses / Exposure. Long term, Wave of Convction is switched to a second curse of your choice, like Elemental Weakness,
as you get Fire Exposure through Awakened Fire Penetration.


You will want to attach Desecrate to Arcanist Brand either now, or even a little sooner.  This gives you more corpses to work with, and the corpses may even be stronger because they scale to the zone level (up to 80 at level 20), which is a notable
improvement over a baseline Level 20 Unearth gem.  It's not necessary for clear, but can help a lot with single target.


Early on, Annointing Sanctum of Thought is ideal, as with a reduced critical damage mod on your shield, this largely eliminates major spikes in gameplay that undermine the effectiveness of your block + recoup.  Speaking of recoup, do not skimp
on this!  It's your regen, and it's more effective than you might think, as recoup occurrs from all damage taken, even though it applies to only life.  With 50% Life Recoup and 22% Mana Recoupe (Achieved via Mana Mastery + Ring Crafts), you'll
find that your regen in combat is actually absurdly high.  The EHP isn't reflected in PoB from these stats, but some nodes are over-valued as well.  To get an accurate feeling value, make sure you invest in your recoup nodes before getting to red
maps.  Crit Reduction, Block, and Recoup are what make you extremely tanky on a budget.


During this time, you are still using the 4-link gloves setup, but should be conscious of the eventual 6-link setup to come.  This 4-link setup is very comfortable and even outright speed for mapping all the way up to T16 maps, and will
kill story Eater/Exarch, but will lack the punch of a build that can juice maps and fly through them effortlessly.  The 6-link setup comes when you can afford a Level 3 Empower AND Level 3 Enhance, which both run for significantly less
than a single Divine Orb total if you buy them corrupted (A week into the league usually, at least).  You then pair these with the usual Greater Multiple Projectiles and Archmage, as well as Inspiration.  When it comes to Inspiration,
use the level of the gem that gets you closes to 100 mana cost without going under.  Keeping the mana cost at 100 while raising your mana pool makes the build more consistent, so keep up on that for a smooth experience, and so
that you have mana for Mind Over Matter to actually contribute!


League Mechanic (Keepers of the Flame) - Unknown!  Obviously, we don't have the league yet.  The build is survivable, so exploring the mechanic once it gets going should be relatively safe.  Normal Breach was no problem for the build, and
nothing they've shown looks like it will be any different.  Grafts may open up an opportunity for rare mod availability.  The BIG COPIUM HOPE is that there is a Grafted Mod hiding out there that will lean into the quality of corpses generated.  Check
back for updates on this specifically.


!!!COOLDOWN RECOVERY!!! - This is a weird one.  The bare minimum "5% increased cooldown recovery rate" mod you can get on your boots eldritch implicit is very important, due to weird, technical
server mumbo jumbo that has to do with cooldowns.  Your DPS will be significantly more consistent at higher cast rates with this one little stat, so make sure it's on your boots as soon as you can get them, and then never remove it!


ENDGAME (90+)

Detonate Dead in Kitvava's Thirst does a great job maintaining damage all on their own.  Getting Detonate Dead of Chaining to 20% Quality is a HUGE AoE Boost, so run Lab to get that done early if you haven't already.  Likewise, Unearth to 20%
Quality is massive for our damage via Corpse Life.  A Descecrat Brand becomes extremely useful even after the nerfs to spectre pool shenanigans, because it gives us more corpses to consistently chain through, and the base-line level of these
corpses is 80.

Watcher's Eye offers many, MANY good mods for our build, but the two I'm most concerned with are 'Reduced Damage Taken from Critical Strikes while Affected by Determination' and then also
'#% Chance to Recover 10% of Mana when you Use a Skill while affected by Clarity'.  The Clarity mod takes our mana uptime and makes it INCREDIBLY STABLE.  These two mods together weren't particularly expensive for me, and aren't in general,
so you will likely have decent luck acquiring a jewel with both (unless this build gets more popular, sorry).  Getting the Determination mod lets you change your Annoint from Sanctum of Thought to a damage-oriented mod like Divine Judgement, or
if you have Awakened Fire Penetration, you can grab Whispers of Doom and change Wave of Conviction to Elemental Weakness in your trigger weapon.  Long term, 'Reduced Damage Taken from Critical Strikes while Affected by Determination' can
potentially be subbed out for a better mod, like 'Physical Damage Reduction while Affected by Determination' or another direct mitigation benefit, but this will be more expensive.
If you are wondering 'How are you running Clarity while also using Eternal Blessing?', the answer is, Eternal Blessing only stops you from reserving something else with MANA.  That's a neat little bit of tech to keep in mind for the future ;)

Recoup - We take these nodes because, with Mind Over Matter + Energy Shield, they're insane.  It gives Life Recovery for ALL damage taken, even if it doesn't take from Life.  This means we top off very quickly after taking huge amounts of incoming
damage.  I still run at least 1 Life and Mana Flask because of Bleed Immunity and Poison Immunity.  Poison Immunity is very useful at all stages, as stackable DoTs are the thing that creep up on and undermine your Recoup best.


Unearth Corpse Life Values (Input these to calculate DPS at higher investment; it is assumed you have Level 4 Enhance):

80 - 48,796
82 - 61,578
84 - 76,096
86 - 92,480
88 - 111,298
90 - 133,337

You'll notice that the corpse scaling becomes increasingly favorable as we invest, which is why baseline (Level 20) Unearth feels kind of poor when you first reach it, but every level after Level 25 (When we reach corpse level 80) starts
to scale the base damage of our corse explosion to increasingly enormous degrees.  This is a major reason why the build feels fine to play and 'punches up', because even if bosses can take time to kill, general clearspeed is subsidized
by the fact that enemy corpse life tends to be very high, and we're constantly exploiting that regardless of Unearth level.


!!!GEARING CONCERNS!!!
We want Life + Resistances Capped, but some things are a bit special for specific gear slots...
We need Strength (155/158) and Dexterity (100), alongside the usual Resistances.  We get a fair amount of Resistance from the tree to help with this.

Shield - GET REDUCED EXTRA DAMAGE TAKEN FROM CRITICAL STRIKES!
Affliction League really highlighted how good this stat is.  You can also annoint Sanctum of Thought early; at least 50% reduced extra damage taken from critical strikes will have you finding things much, MUCH more manageable.  Additionally, you
want as much additional Block and Spell Block on the shield as you can get to help achieve Block Cap.

Weapon/Amulet - Physical Gem Levels, NOT Fire Gem Levels
We are scaling the 'corpse' explosion of Detonate Dead, not the base fire explosion.  To this effect, we want Unearth to go up in levels.  We want Unearth to have additional Quality%.  This isn't as important while mapping, as you'll get strong corpses
from the enemies to blow up, but it makes a huge difference against stronger enemies + bosses.  For our weapon, because we have Spiritual Aid, you can use Essences of Fear to craft %Minion Damage and guarantee a functional damage mod for
 Detonate Dead.  Getting this with a +1 Physical Gems Mod on an Oscillating Sceptre frees up Elemental Overload, and gives you back some skill points to apply elsewhere.

Nexus Gloves - No Eldritch Implicits, Craft Yourself with Armour Essences!
Nexus Gloves are used for their implicits.  If you try to add one with the Eater/Exarch currency, you'll remove the baseline one.  Additionally, these gloves need an Armour roll, either from an Essence while making them, or crafted on afterward.  This
is because we use the Armour and Energy Shield Mastery that reads '100% Increased Armour and Energy Shield from Equipped Body Armour if Equipped Helmet, Gloves, and Boots all have Armour and Energy Shield'.  In the past, these were
eventually dropped for another base, but as time has progressed it's been found that freeing up the amulet slot is most important.

Body Armour - As much Armour/ES as you can get on the base as possible, but NO LIFE MODS!
We have decent Energy Shield uptime, we run Determination.  We take the Life Mastery that gives us '15% Increased Maximum Life if there are no Life Modifiers on Equipped Body Armour'.  Suffixes can be whatever you want, but Life Regeneration is
a Life Mod, so be aware that that bricks the Body Armour for our purposes.  Eldritch Implicits should avoid Life Modifiers as well (Yes, these count!  You can reroll them, though).  Determination Effect and Offering Effect are both very, very good.
Strength, Dexterity, Resistances (Chaos > Elemental), and Phys Damage Reduction are all very good as well.  We want 'Offering Effect' and the 'Physical Damage Taken as X' mods for our Eldritch Implicits.  Offering Effect can be changed out if you
are getting sufficient block elsewhere.

Boots - Free Square
Get whatever you can here alongside Movement Speed on an Armour/ES base.  The only thing that really matters is that your Eldritch Implicit for Cooldown Recovery is there.  If you go with unique boots, you want to get this CDR from somewhere
else (belt, maybe?).  If you get the CDR somewhere else, due to its changes, an Endurance-based Ralakesh's Impatience might be more useful than traditional boots if your stats/resistances can take it.

Jewellery - Resistances and Life | Cast Speed on Rings are nice in a min/max situation but %Minion Damage is better, Armour on Belts is great.  Strength + Dexterity need to reach their aforementioned values for all of our skills to operate at
maximum efficiency. This is much like Boots, where you're just looking to fill in the gaps.  For the amulet, what you ultimately want is a Replica Dragonfang's Flight (Unearth), which is usually not very expensive.  On Rings, you are most concerned
about having an open prefix so you can craft the +Mana/Mana Recoup mod; on a bone ring, it's Mana Recoup + %Minion Damage + Life.  Suffixes are whatever you need to round out the build.  If you're having a hard time getting the amulet,
anything with +Physical/All Skill Gems will work in the meanwhile.

Kitava's Thirst - Corruptions
There are lots of decent Corruptions for this helmet.  +2 Fire Levels is best, with +2 AoE close behind.  We don't get a massive benefit from this, but it's there, and the base is cheap.  Gem Levels on Detonate Dead both gives a little extra base
Corpse % Scaling, as well base AoE Radius.  A +4 Helmet would be good, but don't prioritize this as the value just isn't there compared to a much cheaper +2.  That would be a very, very late optimization.

Jewels - Watcher's Eye has been talked about, but it's Reduced Crit Damage w/ Determination + Recover Mana when you Use a Skill w/ Clarity that we want.
King in the Mists is back, and he drops a renamed version of The Perandus Pact.  The Fire version is what we want.  At the top witch jewel slot, this gives 100+% Fire Damage.
Certain Brutal Restrain Jewels can be used to net us some %Increased Damage, other useful stats, but will most notable fix our Dexterity once and for all.  This mostly opens up affixes on gear, but the further you get, the more important it becomes
to get.  Luckily, it's not terribly expensive.


!!!High Investment Options!!!

Getting a +2 Phys Spell Skills Weapon is the one of the biggest upgrades the build can get once you have most of the 'standard expensive' equipment, and it's also very expensive.  Realistically, rolling +1 All Spell Skills an Oscillating Sceptre yourself
and trying to Fracture it is probably your best bet (and also how I accomplished it).  Forbidden Flesh and Forbidden Flame can be used to hunt Elementalist Notables, such as Mastermind of Discord or Heart of Destruction.  The absolutely 'best' high
investment option, and also the most expensive, is a +4 Amulet (+2 Physical, +2 All).  This will likely cost you more than a hundred divines, but because every corpse level is more valuable than the last, it actually nets a significant DPS gain over
Replica Dragonfang's Flight.  Lastly, Awakened Greater Multiple Projectiles is a very expensive support, but having each Unearth cast generate 6 corpses instead of 5 DOES create a throughput gain in the sense that, even with a corpse cap, once
your chains are going you'll basically be consuming corpses faster than you create them.


I will likely be streaming Path of Exile, and even though I am too hyped about Melee to play the Corpseblaster (also, it's been like 3 leagues in a row now), I will be happy
to help people out as they run into issues with the build, whether that's because changes turn out to be different than expected, or because you want to pick my brain as you make changes and experiment on your own.  Don't be a stranger!
(Cardboard Bastards on Youtube is where I stream. You can also whisper 'Winkers' on  PoE (Winkers91#2848) to ask questions.  Really, I don't mind, although I may not be in a position to respond all the time.  Hopefully I don't regret saying this... lol)


Found a way to improve the build?  Shout me out on Youtube on the Build Guide video and I'll give you a mention for next league when I remake this guide (assuming it doesn't get nerfed into oblivious, of course...)  Alternatively, if you make your
own guide with your owns twists, I'd love to hear about it.