8 months ago
 Level 97 MoM Crit Flameblast of Celerity Totem Hierophant3.26
Life: 5,18699%
ES: 562
Mana: 4,434162%
eHP:
59,823
Resistances: 75%/75%/75%/53%
DPS: 6,014,042
Speed: 5.63
Hit Rate: 1.88
Hit Chance: 100%
Crit Chance: 86.79%
Crit Multi: 552%
Config: 25% Shock, Frenzy
Bandit: Kill All
Pantheon: Soul of the Brine King, Soul of Garukhan
Loadout
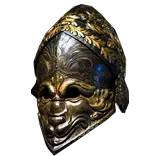
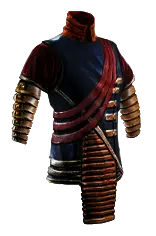
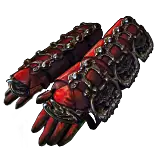
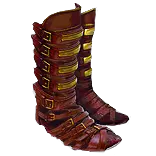
Gear


Gems
---------- FINAL GEM SETUP ----------
Flameblast of Celerity
Spell Totem
Increased Critical Strikes
Increased Critical Damage
Infused Channelling
Elemental Penetration
Decoy Totem
Multiple Totems
Zealotry
Eternal Blessing
Arcane Cloak
Automation
More Duration
Efficacy
Frostblink of Wintry Blast
Faster Casting
Assassin's Mark
Frostblink
Summon Flame Golem
Meat Shield
---------- LEVELING GEM SETUP ----------
---------- FINAL GEM SETUP ----------
Tree Preview
 Ancestral Bond
 Iron Will
 Magebane
 Mind Over Matter
 Charge Mastery
- 100% increased Charge Duration
 Critical Mastery
- 50% increased Effect of non-Damaging Ailments you inflict with Critical Strikes
 Elemental Mastery
- Hits have 15% chance to treat Enemy Monster Elemental Resistance values as inverted
 Evasion Mastery
- +15% chance to Suppress Spell Damage if Equipped Helmet, Body Armour, Gloves, and Boots all have Evasion Rating
 Totem Mastery
- Totems Taunt Enemies around them for 1 second when Summoned
- 60% increased Global Critical Strike Chance if you've Summoned a Totem Recently
Notes
Build made by Tatiantel2
If you have any questions/suggestions - feel free to ask in chat on Twitch (streaming almost every day):
https://www.twitch.tv/tatiantel2


------ VARIATIONS OF THE BUILD - "EARLY MAPS", "ENDGAME", "HIGH INVESTMENT" ------
There's a feature in PoB - "Loadouts". It allows switching between different versions of the build.
Find the drop-down menu in the top-right of the screen (to the right of "Level", "Templar", "Hierophant" -> "Loadouts").
There you can find "EARLY MAPS", "ENDGAME" and "HIGH INVESTMENT" options. When choosing each option, pob will switch the Passive Tree, Gear, Skills and Configuration to the respective version.

In Game - switch from "EARLY MAPS" to "ENDGAME" (mostly for Skills setup) once you get the gear with necessary Eldritch Implicits (Frenzy Charge generation on Body Armour, Exposure on Gloves, Physical taken as Elemental on Helmet and Body Armour).
Switch from "ENDGAME" to "HIGH INVESTMENT" once you get all the unique items and Jewels, and at the same time Rare Items with enough Spell Suppression for 100% Suppression cap, and stats and resists.


------ PLAYSTYLE / SKILLS TO USE ------
Mapping.
Place totems ahead of your char, right next to packs of monsters. This will immediately Taunt them to attack totems (because of Totem Mastery), and your char will not get hit.
When encountering bigger pack of monsters - after placing Flameblast Totems, place Decoy Totems slightly to the side. Decoys have big AoE Taunt, so monsters will group around Decoys, and it will allow Flameblast Totems to cast freely.
Against packs of monsters with Rares cast Assassin's Mark on Rare monster to kill it faster.

Bossing.
Against tougher enemies the "rotation" of skills is as follows:
1. Place Flameblast Totems (for Pinnalce Bosses switch Flameblast of Celerity with Incinerate of Venting);
2. Cast Assassin's Mark;
3. Place Decoy Totems (it gives more Damage from Ascendancy, and 10% less Damage taken from Taunt debuff);
4. a) "EARLY MAPS" version of the build: Throw a Pyroclast Mine (of Sabotage) mines in order to apply big Exposure debuff to the enemy.
    b) "ENDGAME" or "HIGH INVESTMENT" versions of the build: (optional) Throw Stormblast Mines WITHOUT DETONATING them (in order to proc 5% increased damage taken per Mine on Monsters from Mines Auras).

Arcane Cloak - this skill is linked to Automation Support, so it will be automatically activated once it's not on a cooldown. (Don't forget to activate Automation on your skill bar)


------ LEVELING ------
In "Tree" section at the bottom you can select different trees for different Levels to see which passives to take at each stage.
In "Skills" section you can see which skills to use at each Level. You don't need to use all the gems here if you don't have enough sockets in gear. Easily removable Skills marked with "optional".

As shown is Skills section we level with Holy Flame Totem and Flame Wall, this combination of skills can clear early acts pretty easily.
It is also possible to mule Sniper's Mark curse, which will increase damage of Holy Flame Totem even more. "To mule" means - you create a Duelist, and get to Submerged Passage waypoint with it, then Sniper's Mark will be offered
as a quest reward in town.
Adding Wave of Conviction Mines as early as possible (level 16) is recommended.

Switching to Flameblast Totems - at around Level 40, once we get decent amount of Cast Speed from the Tree.
Make sure that the Flameblast and Spell Totem Support gems are at appropriate level - if they are way lower level than your char, then level up gems in weapon-swap first while still playing Holy Flame Totems.
Switching to Mind over Matter - at around Level 67, once second Labyrinth is completed and we grab enough Mana from Tree. It gives really good source of Mana Regen, so it makes having damage taken from Mana less painful.

While leveling we use 2x Wands, ideally with Cast Speed on them. We switch to Wand+Shield only once we get Shaper-influenced Shield with +1 Totem mod on it.


------ LEVELING UNIQUES------
Good uniques items to use for leveling:
Replica Prismweave belt
Sacrificial Heart amulet
Thrillsteel helmet
2x Replica Tasalio's Sign rings
Nycta's Lantern sceptre


------ POSSIBLE UNIQUE ITEMS TO USE ------
Before we're able to craft/buy most of the gear in "ENDGAME" Items, we can use these early uniques to buy in trade:
Mindspiral, Singularity, Valako's Sign, Dream Fragments, Le Heup of All, Replica Prismweave
Also these uniques are good, but they might be more expensive:
The Dark Seer (Life and Mana version), Replica Dragonfang's Flight (for +3 to Flameblast)


------ IMPORTANT GEAR ------
The most important item in the build is a Shield with Shaper Influence
On the Shaper Shield ilvl70+ it's possible to have a "+1 to maximum number of Totems" prefix. This gives us 35% more damage, and good QoL.

Eldritch implicits on gear are important too, the most important ones:
1. On Body Armour - "Gain a Frenzy Charge every 15 seconds" (get it by spamming Lesser Eldritch Ember);
2. On Helmet and Body Armour - "% of Physical Damage from Hits taken as Lightning Damage (or fire, cold)". We can craft it with Lesser Eldritch Ichors

By the time we start farming t16 Maps we should get 100% chance to Suppress Spell Damage, so we need to have Suppression on most pieces of gear.

Having up to 16% Cast Speed on Rings is very nice too, and it's pretty easy to craft - spam "Reforge Caster modifier" on Harvest Station (each caster reforge guarantees Cast Speed).
On Rings we bench-craft "+1 to minimum Endurance Charges" once we get +1 to Maximum Endurance Charge from passive on Skill Tree, and the second one from Amulet Annoint.


------ FRENZY CHARGE GENERATION ------
We have 6 minimum Endurance and 5 minimum Power Charges, so these will be active all the time.
In order to get permanent Frenzy Charges, we need to get:
1. On Body Armour by spamming Lesser Eldritch Embers we get implicit "Gain a Frenzy Charge every 15 seconds";
2. On Skill Tree in Charge Mastery (Disciple of the Forbidden notable), we take 100% increased Charge Duration.
This way once we enter a map 3 Frenzy Charges will be generated over 45 seconds, and they will keep refreshing automatically.


------ FAQ ------
Q: Which Pantheon power, Bandit choice?
A: Bandits: kill all. Pantheon: Soul of Brine King, Soul of Garukhan.

Q: Is it ok to use Multiple Totems Support in main totem link?
A: No. The Support itself will provide only 20% more overall damage, but will reduce hits of each totem, which reduces Shocks they apply. So in comparison this Support is a big dps loss over any other option.
    Also using Multiple Totems Support in main skill link reduces mapping speed, because we can place totems only in 3 different spots (3x2 totems), instead of 4 different places (4x1 totems), so overall coverage of damage reduces.

Q: Soul Mantle with Self-Flagellation is a good option?
A: Combo of Soul Mantle, Self-Flagellation, Viridi's Veil and Coward's Legacy with Pain Attunement from tree. It gives total of 60% more damage, and 55% less Effective Hit Pool. Right now the build has very good damage, and good defences.
    Swapping to Soul Mantle will make it into: great damage and bad defences. I think it's not worth it, since instead of well-rounded build we're gonna get closer to glass-canon'ish build.

Q: I linked Arcane Cloak to Automation Support, but it doesn't work, why?
A: You need to put the "Automation" Skill on you skill bar, and then activate it like an Aura. Since patch 3.25 Automation skills don't trigger In Hideout anymore. If you go in the zone with enemies, it will work.

Q: Any particular league mechanics that this build excels at?
A: It's great for Breach, Legion, Delirium, Strongboxes, Harvest, Expedition, Abyss.

Q: If Totem Taunt mastery is back, why is Decoy still in the build?
A: Taunt from mastery is applied instantly, so it's great for distracting enemies fast. But it only lasts 1 second. So we want to use Decoy, which taunts permanently, after the initial short fast taunt from mastery. Also range of Decoy Taunt is way bigger.

Q: How's the build vs Uber Bosses? T17 maps?
A: It's good for T17s farm, not so good for Boss-killing though, but you can switch Flameblast of Celerity skill Gem to Incinerate of Venting for extra boss DPS.

Q: What unique items to use while leveling on trade league?
A:  There's a ------ LEVELING UNIQUES------ section here in the Notes.

Q: I switched to Flameblast Totems at level 40, but totems keep dying / deal small damage?
A:  Make sure that the Flameblast and Spell Totem Support gems are at appropriate level - if they are way lower level than your char, then level up gems in weapon-swap first while still playing Holy Flame Totems.

Q: My Pyroclast Mines stopped working, why?
A:  The mines need to be linked to Arrogance Support once you start using Eternal Blessing Support on the Aura.


Build made by Tatiantel2
If you have any questions/suggestions - feel free to ask in chat on Twitch (streaming almost every day):
https://www.twitch.tv/tatiantel2