21 months ago
 Level 96 Hybrid MoM Unearth Necromancer3.23
Life: 4,612137%
ES: 1,96045%
Mana: 1,916124%
eHP:
1,056,768
Resistances: 75%/75%/75%/75%
Block: 75%
Spell Block: 75%
Armour: 21,998
DPS: 8,292,160
Speed: 11.73
Hit Chance: 100%
Config: 15% Shock
Bandit: Kill All
Gear
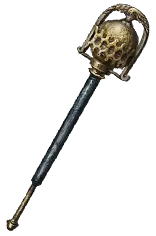







Gems
CHECK NOTES IF YOU HAVE QUESTIONS!
//////////////////////////////////////////////////
Vaal Molten Shell
Inspiration
Flame Dash
Flammability
Wave of Conviction
Bone Offering
Cruelty
Awakened Fire Penetration
Combustion
Detonate Dead of Chain Reaction
Shield Charge
Arrogance
Faster Attacks
Clarity
Unearth
Inspiration
Greater Multiple Projectiles
Empower
Enhance
Archmage
Determination
Eternal Blessing
/////////////////////////////////////////////////
Unearth
Archmage
Greater Multiple Projectiles
Arcane Surge
Tree Preview
- 100% increased Armour and Energy Shield from Equipped Body Armour if Equipped Helmet, Gloves and Boots all have Armour and Energy Shield
- 25% chance to open nearby Chests when you Cast a Spell
- Fire Exposure you inflict applies an extra -5% to Fire Resistance
- Critical Strikes do not inherently Ignite
- 100% increased Damage with Hits against Ignited Enemies
- 15% increased maximum Life if there are no Life Modifiers on Equipped Body Armour
- +50 to maximum Life
- 10% chance to Recover 10% of Mana when you use a Skill
- 10% of Damage taken Recouped as Mana
- 20% increased effect of Offerings
- Life Recoup Effects instead occur over 3 seconds
- +1% Chance to Block Attack Damage per 5% Chance to Block on Equipped Shield
Notes
Preliminary Note - DPS in FINAL is 'conservative', it's expected that there's more than 5 'instances' running at a time.  We DO reach maximum corpse consumed benefit from Corpse Pact (and maintain mana).

!!!Detonate Dead Note!!! - We're scalign the Corpse Explosion Component.  Spell Damage DOES NOT affect this.  Fire Damage, Elemental Damage, Area Damage, Damage, and Minion Damage (Spiritual Aid) do.


LEVELING 1-50

It helps to have Detonate Dead of Chain Reaction ready to go, as this is a very nice leveling skill even when it's self-cast.  Simply get Unearth at level 10, slap on Volley + Lesser Multiple Projectiles, and go to town.
You can drop those supports for Greater Multiple Projectiles at Level 38, but otherwise most of what you do here is up to you, so long as your Skill Tree is ready at 50 for the switch.  You *may* be able to switch earlier
than level 50, but at level 50 it's extremely likely you'll be able to hit the 100 mana per cast breakpoint Unearth requires for the build to 'begin'.  The links used for your initial setup are in the 'Skills' tab here on PoB.
                                                                                                                                                                                                                                                                                       (Labeled Level 50 Unearth Links)

We use Determination with Eternal Blessing, as we need our Mana Pool unencumbered.  Vaal Molten Shell is amazing the moment Determination is running, and gives us the ability to wade confidently into a shitstorm when
the time comes.


Mana Regen - This build needs a lot of Mana Regen.  If you can get Mana Regeneration Rate WITHOUT increasing our Maximum Mana, it's a valuable stat.  Not ultra-necessary long-term, but some is required.


LEVELING 50-68

From this point onward, you're crusing and probably having a blast.  You will need a mana flask early on, and for quite a while beyond too for whenever you really 'commit' to blasting a tougher target.  So long as you have Aetherwind Gloves
(Aetherwind Gloves come from Ritual, so you'll have to trade for one or go without if you haven't acquired a pair.) and the 10% Refund Mana Cost Mastery, as well as Essence Glutton from your Ascendancy, it's going to feel really smooth
despite mana because you just absolutely demolish the entire campaign with this setup.  Keep an eye on your Mana Cost as it WILL continue to rise, and the goal is to keep it as close to 100 without going under.  Switch the increased mana cost
nodes to reduced when the times comes, and spec out of excess mana nodes that don't have reduced cost on them later.  We get enough Mana otherwise to make Mind Over Matter do what it needs, and we don't benefit terribly overmuch once
our mana consumption is manageable.

The following Ascendancy nodes to pick up are Plaguebringer and Corpse Pact, which take your damage and give them the base scaling they need
to really take off as time goes on.  They also bring no small amount of bonus survivability to the table, so that's nice.


MAPPING START (68+ / 72 Recommended)

Mapping starts with some immediate changes to gear that may or may not be immediately available (such as in a league start scenario).  Get a weapon with the 'Trigger a Socketed Spell when you use a Skill, with an 8 Second Cooldown'
fast, as you'll need it to make your Uber Lab Ascendancy (Mistress of Sacrifice) function.  This lets you approach block cap, and acquiring enough sources of Offering Effect (Minion Offense Mastery, Eldritch Implicits on Chest/Boots) will
bring you to the ultimate 75/75 Attack + Spell Block cap.  Socket Bone Offering into your weapon, and you will have 100% uptime.  I also socket Flammability and Wave of Conviction in for a bit more automation on Curses / Exposure.


During this time, you are still using the 4-link gloves setup, but should be conscious of the eventual 6-link setup to come.  This 4-link setup is generally just fine for mapping all the way up to T16 maps, and will kill story Eater/Exarch, but will lack
the punch of a build that can juice maps and fly through them effortlessly.  The 6-link setup comes when you can afford a Level 3 Empower AND Level 3 Enhance, which both run for significantly less than a single Divine Orb total if you buy them
corrupted (at this point in the league, at least).  You then pair these with the usual Greater Multiple Projectiles and Archmage, as well as Inspiration.  When it comes to Inspiration, use the level of the gem that gets you closes to 100 mana cost
without going under.  Keeping the mana cost at 100 while raising your mana pool makes the build more consistent, so keep up on that for a smooth experience, and so that you have mana for Mind Over Matter to actually contribute!


League Mechanic (Primalist) - Charms and You!
Charms are AMAZING for this build.  We can get extra #% Mana Regen for consuming corpses, and we can get #% Corpse Life.  Both of these mods are incredible, as is #% Offering Effect.
These mods can also be found on the Unique Jewel 'That Which Was Taken'.

For the League Mechanic in general, the build does it EXTREMELY WELL.  I leveled to 96 (so far) running it in every map, and have not died a single time.  Crit Damage Reduction for Blue Wisps is the must-have.  Block helps most with Purple,
and then Yellow just makes 'em fast.  If your Block, Mana, and Crit Damage Reduction are all taken care of, this all becomes much more manageable.  Chaos Resistance is super necessary for the cultist mobs, and for King in the Mists himself.
Try to cap it.


ENDGAME (90+)

Detonate Dead in Kitvava's Thirst does a great job maintaining damage all on their own.  Getting Detonate Dead of Chaining to 20% Quality is a HUGE AoE Boost, so run Lab to get that done early if you haven't already.  Likewise, Unearth to 20%
Quality is massive for our damage via Corpse Life.

Watcher's Eye offers many, MANY good mods for our build, but the two I'm most concerned with are 'Reduced Damage Taken from Critical Strikes while Affected by Determination' (Blue Wisps from League Mechanic) and then also
'#% Chance to Recover 10% of Mana when you Use a Skill while affected by Clarity'.  The Clarity mod takes our mana uptime and makes it INCREDIBLY STABLE.  These two mods together weren't particularly expensive for me, and aren't in general,
so you will likely have decent luck acquiring a jewel with both (unless this build gets more popular, sorry).  Getting the Determination mod lets you change your Annoint from Sanctum of Thought to a damage-oriented mod like Divine Judgement.
If you are wondering 'How are you running Clarity while also using Eternal Blessing?', the answer is, Eternal Blessing only stops you from reserving something else with MANA.  That's a neat little bit of tech to keep in mind for the future ;)

If you plan to run Breach, I highly recommend the '25% Chance to Open a Chest when you Cast a Spell' mastery.

Recoup - We take these nodes because, with Mind Over Matter + Energy Shield, they're insane.  It gives Life Recovery for ALL damage taken, even if it doesn't take from Life.  This means we top off very quickly after taking huge amounts of incoming
damage.  I still run 2 Life Flasks because of Bleed Immunity and Poison Immunity.  Poison Immunity is very useful for Expedition, as the Poison Mod there gets very nasty, and degen effects, while well-mitigated, do put us in trouble.


!!!GEARING CONCERNS!!!
We want Life + Resistances Capped, but some things are a bit special for specific gear slots...
We need Strength (155/158) and Dexterity (100/111), alongside the usual Resistances.  We get a fair amount of Resistance from the tree to help with this.

Shield - GET REDUCED DAMAGE TAKEN FROM CRITICAL STRIKES!
The league mechanic is very rippy, and blue wisps make you take more critical strikes.  Get this mod and annoint Sanctum of Thought early, and you'll find things much, MUCH more manageable.  Additionally, you want as much additional Block and
Spell Block on the shield as you can get to achieve Block Cap.  The shield used in the build was bought early and never changed (I should probably upgrade it...).

Weapon/Amulet - Physical Gem Levels, NOT Fire Gem Levels
We are scaling the 'corpse' explosion of Detonate Dead, not the base fire explosion.  To this effect, we want Unearth to go up in levels.  We want Unearth to have additional Quality%.  In the Final setup, we have level 86 Bone Archer corpses with
+112% corpse life.  This isn't as important while mapping, as you'll get strong corpses from the enemies to blow up, but it makes a huge difference against stronger enemies + bosses.  For our weapon, because we have Spiritual Aid, you can use
Essences of Fear to craft %Minion Damage and guarantee a functional damage mod for Detonate Dead.

Nexus Gloves - No Eldritch Implicits, Craft Yourself with Armour Essences!
Nexus Gloves are used for their implicits.  If you try to add one with the Eater/Exarch currency, you'll remove the baseline one.  Additionally, these gloves need an Armour roll, either from an Essence while making them, or crafted on afterward.  This
is because we use the Armour and Energy Shield Mastery that reads '100% Increased Armour and Energy Shield from Equipped Body Armour if Equipped Helmet, Gloves, and Boots all have Armour and Energy Shield'.  That wil be talked about next...

Body Armour - As much Armour/ES as you can get on the base as possible!
We have decent Energy Shield uptime, we run Determination.  We take the Life Mastery that gives us '15% Increased Maximum Life if there are no Life Modifiers on Equipped Body Armour'.  Suffixes can be whatever you want, but Life Regeneration is
a Life Mod, so be aware that that bricks the Body Armour for our purposes.  Eldritch Implicits should avoid Life Modifiers as well (Yes, these count!  You can reroll them, though).  Determination Effect and Offering Effect are both very, very good.
Strength, Dexterity, Resistances (Chaos + Elemental), and Phys Damage Reduction are all very good.

Boots - Free Square
Get whatever you can here alongside Movement Speed.  Eldritch Implicits are likewise there to fill gaps.

Jewellery - Resistances and Life | Cast Speed on Rings are a bonus, Armour on Belts is great.  Strength + Dexterity need to reach their aforementioned values for all of our skills to operate at maximum efficiency.
This is much like Boots, where you're just looking to fill in the gaps.  Amulet has a bet more in the way of specifics to it, but we already went over that.

Kitava's Thirst - Corruptions
There are lots of decent Corruptions for this helmet.  +2 Fire Levels is best, with +2 AoE close behind.  We don't get a massive benefit from this, but it's there, and the base is cheap.  Gem Levels on Detonate Dead both gives a little extra base
Corpse % Scaling, as well base AoE Radius.


!!!GOING FORWARD!!!

Getting Ideal Charms, a +2 Phys Spell Skills Weapon, and a +2 Phys Amulet are all on the block, with varying degrees of really fucking expensive.  All the same, the corpse life scaling is only just starting to really get moving 'fast' for the build, and
will see huge benefits from this (all the way up to Gem Level 30, where things start to taper off).  The build is already a lot of fun to play though, and extremely functional in mapping scenarios with benefits to most difficult mechanics thanks to the
unique way base corpse life gives us a boost.  There are also probably parts of the tree that can be culled in favor of jewel nodes (we have so much % corpse life at this point that Undertaker might be worth cutting, which is a lot of points).


Found a way to improve the build?  Shout me out on Youtube on the Build Guide video and I'll give you a mention for next league when I remake this guide (assuming it doesn't get nerfed into oblivious, of course...)  Alternatively, if you make your
own guide with your owns twists, I'd love to hear about it.