4 months ago
 Level 60 Storm Burst Totem Hierophant3.21
Life: 2,366101%
ES: 139
Mana: 238
eHP:
14,702
Resistances: 60%/75%/75%/-22%
DPS: 4,304
Speed: 4.28
Hit Chance: 100%
Config: None
Bandit: Kill All
Gear
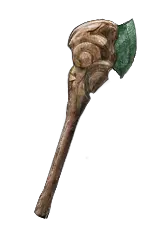

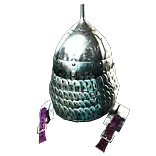
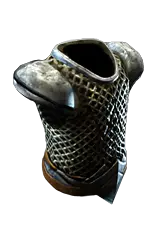
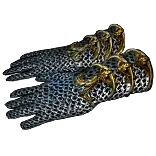
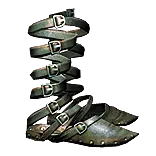


Gems
Storm Burst
Physical to Lightning
Spell Totem
Lightning Penetration
Stormblast Mine
Swift Assembly
Cruelty
Lightning Penetration
Determination
Herald of Ash
Leap Slam
Faster Attacks
Frostblink
Punishment
Herald of Purity
Steelskin
Tree Preview
- 6% increased Cast Speed for each different Non-Instant Spell you've Cast Recently
- 60% increased Damage while wielding two different Weapon Types
- Hits have 25% chance to treat Enemy Monster Elemental Resistance values as inverted
- Critical Strikes do not inherently Ignite
- 100% increased Damage with Hits against Ignited Enemies
- +50 to maximum Life
- 12% increased Mana Reservation Efficiency of Skills
- Totems Taunt Enemies around them for 1 second when Summoned
Notes
---Required Links---

	Travel Setup As Soon As Possible:
		Lvl 1 to 9: Frostblink (B)
        Lvl 10 and Beyond: Leap Slam (R) - Faster Attacks / Momentum (G) - Lifetap (R) [Priortize Faster Attacks over Momentum for Leap Slam, but need to do Library or Lily on Templar to Faster Attacks as of 3.21]
		* Can supplement Leap Slam with Frostblink (B) if you want some additional speed

    Single Target and Clear:
	    To Lvl 28:
              Rolling Magma (B) - Ele Prolif (B) [Priortize Prolif over any over support for Rolling Magma] - Combustion (B) / Cruelty (R) / Culling Strike (G) depending on 3rd color you have for Rolling Magma Setup - If 4L see list for 3rd socket. If blue, use arcane surge or faster casting. Arcane surge will be on hand.
              Holy Flame Totem (B) - Any support that applies to it that you have laying around, would not go out of way to buy one specifically
              Flame Wall (R)

        Lvl 29 and Beyond:
              Storm Burst (B) - Spell Totem (R) - Phys to Lighting (B) [Extremely Important Priortize This Over All Other Blue Link Possibilities] - Lightning Penetration (B) / Faster Casting (B) if you do not have access to 31 gems from Library or Lily yet as
              both Ele Focus and Controlled Destruct have issues with synergy in our tree/skill setup. If 4th socket is non-blue, any reasonable damage gem that applies

              Stormblast Mine (B) - Charged Mines (B) - Culling Strike (G) / Swift Assembly (G) / Any reasonable support that applies to mines - Any reasonable support that applies to mines

	Auras and Utility:
        Lvl 4 to 28:
             War Banner (R)
        Lvl 16 to Determ
             Herald of Ash (R)
             Herald of Purity (R)
        Lvl 29 and Beyond
             Vitality (R) [Extremely useful as they effectively offer huge sustain to totems given there low life totem, but huge DR, meaning the flat regen is very effective relative to there total health. Also nice for your sustain as well]
        A7:
             Determination (R) in A7 before Cruel Lab/Temple of Decay Enter. Drop purity for determ if you're not respeccing out of fire wheel and mastery, elsewise drop ash for determination.

---Flexible Links---

	Curse:
        Pre-Inversion Mastery/No Inversion (aka traditional minus res route): Conductivity (B) after you get flat lightning crafts, before Elemental Weakness (B)
        Post-Inversion Mastery: Punishment (R)

	Whenever you have free sockets:
		Add left-click steelskin (R) whenever you have free red socket available. If you can manage an additional red link and an alch, can CWDT steel skin instead.

     Minus Res Route Instead of Inversion:
         If you opt for minus res, you will want WoC - High Impact Mines - Charged Mines - Any reasonable 4th support that applies to damage or utility instead of stormblast mines to allow for expsoure and double damage bonus from hi-impact aura
         You will also use conductivity as main curse. Otherwise tree remains same.

---Notable Pathing---

(1) Templar Elemental Damage Start (5pts - Lvl 6)
(2) Retribution (1pt - Lvl 7)
(3) Precision (2pts - Lvl 8 w/ Dweller Pt)
(4) Discipline and Training (2pts - Lvl 10)
(5) Holy Dominion (2 pts - Lvl 12)
(6) Light of Divinity (1pt - Lvl 12 w/ Fairgraves Pt)
(7) Amplify (2pts - Lvl 14)
(8) Explosive Impact (7 pts - Lvl 20 w/ Way Foward Pt) [Path via area dmg node from Amplify and grab Inc AoE node in Explosive Impact cluster]
(9) 100% Damage with Hits Against Ignited Enemries Fire Mastery (1pt - Lvl 21)
(10) Dark Arts (4pts - Lvl 24 w/ Busts Pt)
(11) 60% Damage While Dual Wielding Different Weapon Type Dual Wield Mastery (1pt - Lvl 25)
(12) Ancestral Bond via Small Life Nodes (5pts - Lvl 29 w/ Piety Pt) [Important: DO NOT TAKE Purity of Flesh on way otherwise you will delay Ancestral Bond by 1 Lvl meaning you won't have for Dominus]
(13) Purity of Flesh (1pt - Lvl 30)
(14) 50 Life Mastery (1pt - Lvl 31)
(15) Elemental Overload (3pts - Lvl 33 w/ Deshret Pt)
(16) Primal Manifestion via Life/Res Totem Path (4pts - Lvl 37) [Use Life/Res Path to Improve QoL significantly and effectively increase dmg uptime. Also, don't really need extra damage from cast speed nodes, so QoL is way worth]
(17) Totems Taunt Mastery (1pt - Lvl 38)
(18) Sanctity (2pts - Lvl 40) [Note: If you need res for second half and can't get there through res crafts, take Sanctity AFTER Cruel Preparation]
(19) Cruel Preparation (5pts - Lvl 43 w/ Miasmeter and Torments Pts) [Note: If you need res for second half and can't get there through res crafts, take Cruel Preparation BEFORE Sanctity]
(20) Storm Weaver (3pts - Lvl 44 w/ Tukohama and Abberath Pts)
(21) Inverstion Elemental Mastery on Storm Weaver (1pt - Lvl 45)
(22) Sovereignty (4pts - Lvl 48 w/ Ryslatha Pt)
(23) Deep Thoughts (2pts - Lvl 49 w/ Ralakesh Pt)
(24) 12% Mana Reservation Efficiency Mana Mastery on Deep Thoughts (1pt - Lvl 49 w/ Gruthkul Pt)
(25) Arcanist's Dominion (2pts - Lvl 50 w/ Kishara's Star Pt)
(26) Lightning Walker (2pts - Lvl 52)
(27) Heart and Soul (2pts - Lvl 53 w/ Tolman Pt)
(28) Devotion (4pts - Lvl 55 w/ Gemling Legion and Yugul Pts)
(29) Mental Rapidity (3pts - Lvl 57 w/ Shakari Pt)
(30) 6% Inc Cast Speed for Each Different Spell Cast Recently Spell Mastery on Mental Rapidity (1pt - Lvl 57 w/ Garukhan Pt)

***Final 5 Pts you have options. In run, I pathed towards Quick Recovery via Str node next to Arcanist's Dominion. Didn't end up getting main notable itself because I forgot to respect Light of Divinity for it. You could instead fill out the 2 life nodes
after Cruel Preparation, Heart and Soul, or Devotion. Put the remaining two points into pathing towards Crackling Speed and then respec Light of Divinity for last point for the notable Crackling Speed itself. I opted to head towards
Quick Recovery so that if I were to continue to maps, I would be closer to the pathing for duration nodes which would be my next major target***

(31) Quick Recovery (5pts - Lvl 60 w/ Vilenta Pt and Respec of Light of Divinity)

ALTERNATE:
           (31) 2 Small Life Notables from Cruel Preparation, Heart and Soul, or Devotion clusters. Your pick of which. I like heart and soul, then second one doesn't matter since they are both 6%. (2pts - Lvl 59)
           (32) Cracking Speed (3 Pts - Lvl 60 w/ Vilenta Pt and Respec of Light of Divinity)
           *** Note if not careful respec of light of divinity CAN cause attribute issues, so please check before doing this alternate path ***

---Notes on Gear---
Try to get a heavy belt after Dweller and in subsequent A1 returns to help deal with early attribute issues for strength templar can have.

Doing den for second quicksilver for shield charge OR for flame dash until leap slam swap is helpful and will be a net time gain.

Take Rare Amber Amulet from Act 3 Quest - The Ribbon Spool - to help with strength requirements
Take Citrine Amulet in A7 if you end up doing the Gruest Necklace quest. Otherwise, can essence/alch a Citrine if your dex/str combined situation is bleak

Take literally any shield for shield charge with preference towards a non-armour only base as the armour only base has a %5 movement speed penalty. Not a big though, if thats what you are stuck on.

Try to find low level rusted hatched and rusted sword at vendor. The YT description regex for 1 to 23 will include 'rusted' to look for these at vendor. Else wise try to pick them up from ground. Need one of each ideally.
Can also pick up later 1h axe or sword bases so long as they have fast attack speed. Lower the base the better though as they are easier to recolor. R-G is a fantastic link to have on either of the weapons. Bunch of reds
is helpful as well.

---Gem Acquisition---
Please note that due to currency contraints from run to run, you may not be able to always buy the gems as listed here exactly when they are listed. Likewise, due to color/link constraints, you might not be able to
fit the gem into your gear when you buy it or use it period if proper colors/links do not become available at some point.


    Ranger Mule Hillock Reward:
		Take Whatever. Can sell this and burning arrow for scrap or keep one of them for a topaz ring recipe for later
        Mule over Momentum Support (G)
        Sell double strike for wisdom scrap or keep it for topaz recipe later along with iron ring

	Main Character Hillock Reward:
		Take Rolling Magma (B)

	Hailrake/Submerged Open Reward:
		Take Arcane Surge (B) from Hailrake Quest Reward via Nessa. Can use as a filler link until Combustion and then linked to frostblink/flame dash for occassional arcane surge procs
        Check vendor for goat's horns and priortize those over buying either Flame Wall or Banner, which you can safely delay until after Dweller if needed
		Buy  Flame Wall (B) and War Banner (R) from Nessa with preference towards Flame Wall. If can't afford both, buy War Banner after Dweller
		Take Holy Flame Totem (R) from First Submerged Quest Reward via Tarkleigh
        Take Frostblink (B) from Second Submerged Quest Reward via Tarkleigh

	Lower Prison Enter Reward:
		Take Combustion (B)

	Brutus Kill Reward:
		Take Shield Charge  (R)
        Optional: Buy Flame Dash (B), if you have extra transmute. This is preferred gap traversal skill for Flame Dash as there are some gaps in A2 that Frostblink cannot cross (eg Riverways, sometimes traversable with frostblink, but ntot always)

	Merveil's Caverns Enter Reward:
		Take Storm Burst (B)
        Optional: Buy Spell Totem (R), if you have extra transmute otherwise buy when you return to A1 for Way Forward Skill Point

	Fidelitas/Baleful Gem Reward:
		Take Herald of Ash (R)
		Buy Heral of Purity (R)

	Weaver Kill Reward:
		Take Cruelty (R) to have a damaging red socket available if needed for rolling magma or spell totem later
        Optional: Buy Phys to Lightning for Storm Burst later. Can delay until you actually swap at 29, but you want to absolutely have Phys to Lightning in priortized pretty much over any other support for Storm Burst (outside of spell totem)

	Way Forward Skill Point Act 1 Retrun:
       Buy Stormblast Mine (B) and level it in offhand. Otherwise, if can't level in off hand, just buy later when you swap to totems at 29
       Buy Steelskin (R) and use it when have open red socket available.
       Optional: Buy Vitality (R). Will not use it yet, will use later when we have sufficient reservation available after we both (1) swap to totems and (2) drop war banner. Also it is a wise idea to delay as the transmute currency pressure for this
       build can be extremely high

	Clarissa/Tolman Quest:
		Take Conductivity (B) or Elemental Weakness (B). Conductivity will allow stormburst to do more damage, but it is useless from 24 to 28 as rolling magma will not have any lightning damage. Elemental weakness is preferred for this reason,
        so some benefit could be had for rolling magma and later it will still be relelvant until we swap to punishment with inversion mastery as Storm Burst will benefit from Herald of Ash's Gain Phys as Extra and Fire Spell Damage Buff.

	Gravicius Quest:
		Skip

	Open Mines Quest:
		Preference to take Stone Golem (R), but whatever golem you want is fine. If you want to grab something else instead, go for it. Stone golem is helpful if you need extra life regen and have open red socket. If you do not have vitality yet,
        absolutely take the stone golem and use it until you get vitality

	Open Belly Quest:
		Optional: Take Multitotems (R). I typically won't end of equipping since it and using a secondary totem, but you can if you want. A decoy linked with second wind and multitotems is a great defensive layer, but not needed for run or campaign
        Alternate: Take Arcanist Brand (B) and use it linked to your curse to automate cursing, so you have to do it a little less frequently
        Optional Buy: Buy CWDT for steelskin if you have spare alch and red socket to link it to steelskin

    Lily:
        Buy Punishment (R)
        Buy Faster Attacks (G) and swap momentum out. Or if you some reason you have an extra green link can have Leap - Faster - Momentum
        Buy Lightning Penetration (B) for Storm Burst main links
        Buy Charged Mines (B) for Stormblast Mine
        Optional: Buy Swift Assembly (G) or Culling Strike (G) if you have an open green socket. Swift is more single target, Culling is more utility. Go Culling if you are just going to use stormblast mine for its aura effect from stacking them

    A7:
        Return to A3 and buy Determination and equip it near start/mid point of A7. Definitely do so before Temple of Decay/Cruel Lab as you will mana reservation nodes to allow swapping to Determination.

	Other:
		I like using steelskin if I have an open red socket. Will not always happen. As result, I will usually either keep one in inventory OR have it leveling in weapon swap for when I do have free red socket.
        It can be quite easy to forget this step though. If you're really swimming in red sockets and have a spare alch, steelskin + CWDT is great.

---Bandit Choice---
Alira or Kill All. Alira provides the most QoL through its resistance bonus and mana regen. Kill all is a good option as well as you can get some more power from offensive passives, but it just makes mana management and gearing more annoying.

I would recommend Alira over Kill All for speed leveling purposes. Otherwise, kill all will have more applicability if you're planning on taking the build past campaign.

---Pantheons---
Major: Brine King is a good option to prevent stun lock scenarios and its an easy to just click and forget.

Minor:  Ryslatha. Other lessers can be taken for improvements to quality of life, but Ryslatha will typically be best for additional comfort via flask sustain. Gruthkul or Tukohama are good alternatives if you want damage reduction instead of sustain.

---Muling---
Muling ranger is highly recommended for the extra currency, chance a good links for the run, and to get momentum support as Templar gets neither Momentum nor Faster Attacks anymore. You do not, however, need to mule as this run can
be done perfectly fine without it and you will instead just use Flame Dash as primary movement skill until you get access to Faster Attacks/Momentum via Library or Lily.
Nonetheless, Shield Charging/Leap Slam with Momentum will be faster than flame dash in long run as well as having much higher QoL from the extra starting currency/chance at colors and links. Consequently, a mule is strongly recommened.

---Weapons---
You are going to want to use at least one goat horn as soon as possible (Lvl 7 due to attribute requirements solved by speccing Retribution). Typically, I will try to use 2 goat's horn from 7 to 9 for Brutus. Afterwards, I will go down to a single
goat's horn + a shield for shield charge at 10 until we get flat lightning crafts to swap to leap slam (roughly 27 or so). You can swap to Leap Slam at 24 with flat fire crafts instead of lightning, but I would not recommend as flat lightning benefits
the build way more and 3 extra levels of shield charge until you get Lightning Craft at Piety room is not a big deal time wise (might be like 30ish seconds slower over that period).

Because we are going to swap to sword/axe (best APS bases) and get DW mastery, we want to be on look out for well-colored axes/swords as we level. The "rusted" part of the regec in YT description will highlight early rusted swords and rusted
hatchets, which are great bases for this purpose as we can easily color them with off colors given the lack of attribute requirements. Once we get our desired flat craft, we will craft it on both weapons and swap to leap slamming with frostblink as a
traversal skill. You do not need to upgrade the weapons for the rest of the run. Ideally, you will be able to snag an axe/sword with an r-g link to solve your movement. Typically, you can also get red sockets which you will use for reservations
such as War Banner, Heralds, Determination, Vitality, or a Curse depending on what part of the game you are in.

---Movement Skills---
You will use frost blink into shield charge at level 10. Because shield charge cannot traverse walls/gaps, you should also keep a secondary movement skill that can. Both flame dash and frostblink work for this purpose. I typically prefer flame dash
as there are certain gaps frostblink cannot traverse. Once we get flat lightning crafts, we will swap to Leap Slam (R) and Frostblink (B) as our movement combo for rest of run. You can skip the shield charge step and use double goat hoarns until
swap to leap slam with flat spell crafts on sword/axe. Hoever, it will be slower overall than shield charge, even though it has better single target and clear, because the traversal time is so much worse. Shield Charge is a happy medium between
speed and damage with the added bonus that link colors transition perfectly into leap slam once we swap.

---Inversion / Minus Res Flexibility---
We will go Inversion once we get inversion node and access to lightning pen from Lily. However, if you spell totem support can't support inversion route and a slot for both Phys to Lightning and Lightning Pen, ie it doesn't have a B-R-B-B, then you
should go minus res route instead. You can somewhat work around this by investing the fire mastery points into crackling lightning instead and taking the phys to lightning mastery if you only have a single blue socket. The downside to this approach
however is that we lose nice utitlity from increased dmg with hits against ignited enemies AND we lose the AoE nodes which are helpful to storm burst damage and clear through overlaps and larger effect. Nonethless, if you have invested into
trying inversion, that can work to solve issue if you end up with only one blue support link in the Storm Burst spell totem links. If you have no blue supports available in your 4L Storm Burst setup, you should definitely just go traditional minus res instead.

If you end up going traditional minus res route, the only difference is we will use conductivity as curse as soon as we swap to Storm Burst and use WoC mines with - High Impact Support from Lily (Blastchain before then) - Charged Mines - Any
reasonable 4th dmg or utility link

---Early Transmute Management---
This run is extremely heavy on transmutes. The double flat craft requires 8. You need 1 more for spell totem. You need 1 more for lealp slam. You need 1 more for vitality. Long and short of it, lots of transmutes required. Good news, however, is
that you only really need 2 alterations, 1 for Herald of Purity/Ash depending on which one you took from reward, 1 for Phys to Lightning Support. So that means, once you have those two alterations, you can sell all rares unidentified for transmutes.
You also need to factor in resistance crafts to the equation which further burdens transmute economy. The build mitigates this somewhat through Alira, Res Rings, and Res Passives, to allow for comfortable res through to about mid to late A4, where
you will likely have been able to somewhat replenish transmute situation for resistance crafts after the heavy early spending involved in the flat dmg crafts and buying gems.

---Library, Lily, Both or None---
I would skip Library as there isn't enough benefit from Library to justify the time investment. Because we do not have Inversion Mastery yet, there is no pressing need to get Lightning Pen or any of the other 31 gems from Library.
I would definitely do Lily, so you can get Lightning Penetration for Inversion Mastery scaling and Faster Attacks to help travesal speed. Only skip both Library and Lily if you are going the traditional minus resistance route instead of inversion as
you do not need lightning penetration in that setup necessarily.