18 months ago
 Level 94 Boneshatter Juggernaut3.23
Life: 4,895142%
Mana: 89
eHP:
173,352
Resistances: 80%/79%/79%/66%
Supp: 100%
Armour: 128,108
DPS: 3,400,893
Speed: 5.42
Hit Chance: 100%
Config: Pinnacle
Bandit: Kill All
Pantheon: Soul of Lunaris, Soul of Tukohama
Gear
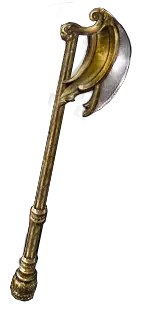
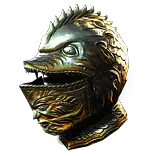
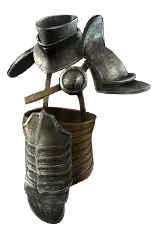
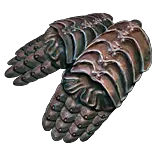


Gems
Boneshatter
Close Combat
Impale
Fortify
Brutality
Melee Physical Damage
Pride
Determination
War Banner
Pride
Determination
War Banner
Arctic Armour
Precision
Arrogance
Blood Rage
Leap Slam
Cast when Damage Taken
Vaal Molten Shell
Lifetap
Vulnerability
Multiple Totems
Ancestral Warchief
Ancestral Protector
Berserk
--------------------------
Vengeance
Rage
Tree Preview
- Immune to Bleeding if Equipped Helmet has higher Armour than Evasion Rating
- Immune to Poison if Equipped Helmet has higher Evasion Rating than Armour
- Attacks with Axes or Swords grant 1 Rage on Hit, no more than once every second
- 30% increased Damage while in Blood Stance
- 15% increased Area of Effect while in Sand Stance
- Skills Cost Life instead of 30% of Mana Cost
- +50 to maximum Life
- 12% increased Mana Reservation Efficiency of Skills
- 40% increased Physical Damage with Skills that Cost Life
- Corrupted Blood cannot be inflicted on you
- +1% to all maximum Elemental Resistances if you have Reserved Life and Mana
- Buffs from Active Ancestor Totems Linger for 3 seconds
- 40% increased Damage with Hits against Rare and Unique Enemies
Notes
PLEASE READ ALL NOTES AND WATCH THE FULL VIDEO BEFORE ASKING QUESTIONS. I will be more than happy to help either on twitch or discord.

																																PSA!!!!!!!!!!!!!

Also since so many people ask, you CAN take the Axe Mastery that gives 30% increased damage while in Blood Stance even you if you do not use a stance skill. Characters are in Blood Stance by default!

All damage calculated in the build does not include berserk. You can enable it in the gems section if you want to see how much damage it adds. Since it is just a damage burst, I do not include to inflate the numbers.

Brass Dome is not Mandatory, but is extremely strong for defences. Max Resistances and Crit Immnuty, as well as a lot of armour, which gets doubled thanks to our ascendancy is extremely good.

Last PSA, once you reach the Endgame tree, with or our without clusters, you might need some respecing to do. Look carefully.


##################################### PRECISE TECHNIQUE #######################################

Make sure you have more accuracy rating than maximum life. If you have more life you lose all the damage from precise Technique, which is a lot. Easier to do with Brass Dome since you get less Maximum Life.


##################################### Weapon #################################################

Normal % Phys, Flat Phys and attack speed are the main stats.
If you can manage to get accuracy on top of that this is even better.

The following stats are good but have to come after the ones above.
Chance to deal Double Damage as a Suffix (Unlocked from betrayal)
Attack Speed while a rare or unique enemy is nearby (Unlocked From Betrayal)

If you craft the Impale chance and % physical damage from Betrayal (see the weapon called Impale chance Despot Axe in the gear section), you can unspec from the Harpooner Notable wheel on the tree and take damage elsewhere since these nodes are taken for impale chance mostly.
Just make sure that even without it you still have a 100% Impale chance. I would take the Butchery notable instead if all of the above requirements are met. This is also a 3 points notable with a lot of damage.


#################################### Helmet Crafting ######################################################

Some of the gear sets use an evasion base helmet instead of a hybrid armor/evasion base. The reason is we more often than not need to use an essence of loathing to add mana reservation. Since this can be hard to get a good Helmet with the essence,
using an evasion base allows us to more easily get Spell Suppression on the Helmet. It all gets converted to armour anyway with the Iron Reflexes keystone.

This however not compulsory as is shown in the NO BRASS DOME SETUP gear set where I did not add the Loathing modifier on the helmet. It is still good to do however but for the guide's sake, I thought it was better to show that it is not compulsory.

########################################## Skills ########################################################

Do not level up Molten Shell to more than level 10 and CWDT at all, unless you have enough int to do so. However, don't level it up too much as the more you level it up, the less often it will proc. The new Cast When Damage Taken quality reduces the damage needed to proc so leveling it up slightly will help,
especially for vulnerability since we use CWDT to cast it.

Awakened gems are included in the build but not active as they are not that easy to get in SSF. They were fairly cheap last league in trade. They are better than their non awakened counterparts.

AURAS: Use the Early gamke aura setup until you get enough Mana reservation. Then switch to the endgame aura setup in the gems. The only difference is that we add Arctic Armour.
Once you can, you also switch to Awakened gems. Once they are level 5, you get Intimidate and Crush for free we both Brutality and Melee physical Damage Support. Don't forget to tick the boxes in the configuration tab!

##################################### Mana Reservation ###########################################

With the Eater of Worlds Implicit and the Cluster Jewels we do not need to take any mana reservation nodes elsewhere on the Tree, as long as you have enough on the helm. Until you do, I recommend not activating Arctic Armour.
We would need both the Mana Mastery AND all of the reservation efficiency nodes in the Champion of the Cause Cluster to free as much mana as the 3 nodes on the Cluster jewels.
Using the Cluster Jewel setup is the best way I could find to reserve all the mana we want to add Arctic Armour, Pride, War Banner AND Determination to the build while getting the most damage.


##################################### Pantheon ################################################
IMPORTANT!!

I misspoke in the video and said to use Brine King for Freeze immunity. However, this is useless since the Unstoppable Ascendancy Node (Cruel Lab in our case) already covers that.I mixed up things from another build
I am working on!

Minor God is Tukohama. Physical damage mitgation and life regen are both stats we want a lot of.
Major God: Lunaris is better overall, more physical mitigation when mapping and the other stats are somewhat useful. HOWEVER, Lunaris is better for Bosses.
	switching to Lunaris before doing Bosses like Eater of Worlds or Maven is a good idea.

#################################### Annointment ################################################

I chose Charisma in the setup WITHOUT brass dome. The reason is that a rare chest can give you Spell Suppression while Brass Dome cannot. This is the best way I could find to fit in all the auras while maximizing damage. With Brass Dome you need to annoint Inveterate as well as big Suppress roll on gear.


############################# Precise Technique ##########################################

ACCURACY > TOTAL MAXIMUM LIFE

All you need is more accuracy than Maximum life. Which means once you get Brass Dome, you don't need as many accuracy nodes on the tree.
Versatility is a 2 point node that gives both accuracy and dexterity. You can unspec from this node if you still have more accuracy rating than maximum life, as well as enough dexterity for stats requirement.

Consider taking either the Eagle Eye or Weathered Hunter Notables if you need more accuracy when you don't have Brass Dome.
The best however is accuracy on gear, like on weapon or amulet.


##################################### Leech ###############################################

Leech is solved with our Cluster Jewels, until then you might want a mana leech jewel and take the first node in a leech cluster on the tree, like in the Vitality Void Cluster. This one actually takes care of both mana and life leech.

######################### Vendor Recipe ######################################

Some useful Vendor Recipes for getting a wepon:
	Vendor a White weapon with a Blacksmith Whetstone AND an either magic or rare Rustic Sash. This gives you a Magic Weapon with %Physical damage. This is a good way of getting upgrades during the campaign.
	Endgame you can Vendor a Weapon that has Flat physical Damage with an orb of Augmentation AND a Granite Flask. This upgrades the flat physical damage to the next tier up t


######################################### Cluster Jewels #######################################

- The Reservation Efficiency Cluster Jewel Notable has a level requirement of level 50. (3 passive one is required to get enough reservation efficiency)
	You need Uncompromising here, even if it can roll on an armour cluster jewel, you need the small nodes as well since they give reservation efficiency.
- The Large Cluster Jewel Notables have a level requirement of 1, 1 and 50. So you can swap as soon as you enter maps and get 1. (8 passive one is best to save skill points.)
	You need Fuel the Fight for Mana leech
	Feed the Fury gives leech AND a lot of damage.
	Martial Prowess gives Attack speed, damage and accuracy, which synergises with our Ascendancy.


############################## Eldritch Implicits ########################################

A list of good implicits to get on every piece of gear

Body Amrour:
	EoW: Increased Pride aura effect - Increased Determination Aura Effect
	Exarch: Increased effect of Non-Curse Auras from your skills - + to All Maximum Resistances

Gloves:
	EoW: Overwhelm Physical Reduction - Chance to maim on Hit
	Exarch: Attack Speed - Add Flat Physical damage to Attacks - Gain rage on Hit - + Max Cold resistance

Boots:
	EoW:Life regen per endurance charge - Increased armour from gloves and helmet
	Exarch: Increased action speed - increased movement speed - increased damage per endurance charge - + to maximum fire resistance
Helmet:
	EoW: Increased Mana Reservation Efficiency - Increased Attack Damage
	Exarch: Physical damage taken recouped as life (Cold, Fire and Lightning as well but phys is probably best) - Increased Vulnerability Curse Effect - + Maximum Lightning Resistance

Eldritch gloves are better than spiked gloves


######################################### Other Stats #################################


Secondary stats that are good on gear:
	Strength: Gives Life and accuracy Because of the Jugg Ascendancy Node
	Life regen: more life regen!
	Non channeling skills have -7 to mana cost (Rings)


############################### TIER 1 Maps Gear Set ##################################


I added this set of gear to give people an idea of what stats you should look for during the campaign as this was requested. These are just example stats, you can get better items. Your items might be slightly worse. It does not matter.
All you need to focus on is getting 75% to fire, cold and lightning resistances and getting some life for survivability. Getting the right links and socket color is the main priority early on.
Spell Suppression is nice, but will be more important as you enter maps and get some on the tree. Getting a 100% spell suppression chance is hard in white maps, but later on with higher level gear, it is easier to achieve.
Not easy, but easier.

As for flasks during the campaing, a life flask with bleed and corrupting blood immunity is a great asset, and can be crafted with orbs of alteration.


####################################### Early Leveling #################################

---------Act 1 ----------

Get Ground Slam as soon as you enter Lioneye's Watch.
Get Leap Slam from Tarkleigh after getting into the Prison.
Get Chance to Bleed from Nessa, I usually pick it up after killing Brutus.
Other Gems you can buy at that time: Ancestral Protector, Precision (Important!!!), War Banner, Vitality. Vitality is not Compulsory but helpful. Vitality reserves a lot of mana so don't use it if this does not feel good.
After Entering The cavern of Wrath you can get new skills from Nessa. Wait after Killing Fairgraves to limit trips to town.
Stick with GS or switch to either Sunder or Earthshatter. Pick the skill you prefer. I prefer Sunder.

Link at the end of Act 1: Sunder->Ruthless-> Chance to Bleed
Precision
Ancestral Protector

---------Act 2 ----------

After Killing Weaver get Melee Phys support as a reward and buy Rage support from Yeena.
Link at the end of Act 2: Sunder->Ruthless->Melee Phys Support.
Rage is good but you might run out of mana since rage increases attack speed. Rage is a good 4th link if doing as a second char or if you have an orb of binding.
Get Close Combat if you have enough Currency. Level it up.


---------Act 3 ----------

After "Rescuing" Tolman's Bracelet, talk to maramoa and get Pride as a reward.
If you have enough currency, buy vengeance and determination. Start leveling the gems.
Next do the Fixture of Fate Quest (Library) to get Fortify Support and Arrogance Support, as well as impale support.
Once you kill Gravicius you can buy Boneshatter from Clarissa. Use Boneshatter AND Determination. Level it up in the meantime anyway.
Don't forget to upgrade your weapon frequently. Use the vendor recipe if needed.

Siosa: Take Fortify as a quest reward and Buy Arrogance Support for 1 Orb of Chance


Link at the end of Act 3: Boneshatter->Ruthless->Melee Phys->Fortify
Vengeance->Rage
Precision->Arrogance

---------Act 4 ----------

Get Berserk after entering the mines and use only on bosses when you have enough rage.
Get Brutality from the quest reward (The eternal nightmare)
Links at the end of act 4: Bonehsatter->Melee Phys->Brutality->Fortify
Precision->Arrogance
Vengeance->Rage (Optional)

Close combat and impale will be the next support gems so level them up in your off hand.

---------Act 5 ----------

Level up to level 49 in chamber of Innocence. By then you should have allocated the small leech node. With this you barely use the mana flask at all. We will spec out of this node later.

---------Act 6 ----------

Complete Lily's Quest (Clear the Twilight Strand)
Buy the missing gems and start using the ones you can.