17 months ago
 Level 90 Hybrid Crit Winter Orb Occultist3.24
Life: 3,850106%
ES: 1,25946%
Mana: 134
eHP:
12,668
Resistances: 75%/75%/75%/72%
DPS: 2,272,733
Speed: 12.34
Hit Rate: 7.00
Hit Chance: 100%
Crit Chance: 100.00%
Crit Multi: 300%
Config: Frenzy, Power
Bandit: Alira
Pantheon: Soul of Lunaris
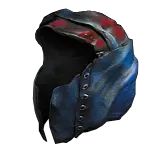
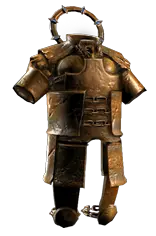
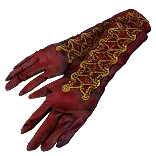
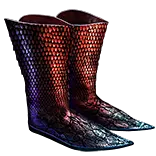
Gear


Gems
Frostbite
EnemyExplode
EnemyExplode
Winter Orb
Awakened Added Cold Damage
Awakened Greater Multiple Projectiles
Inspiration
Infused Channelling
Power Charge On Critical
Hatred
Zealotry
Herald of Ice
Clarity
Cast when Damage Taken
Steelskin
Increased Duration
Vaal Righteous Fire
Hydrosphere
Bonechill
Culling Strike
Portal
Decoy Totem
Sniper's Mark
Flame Dash
Arcane Surge
Enduring Cry
Urgent Orders
Tree Preview
- 25% chance to open nearby Chests when you Cast a Spell
- 3% increased Damage per Endurance, Frenzy or Power Charge
- +25% to Critical Strike Multiplier against Unique Enemies
- 60% reduced Reflected Elemental Damage taken
- +50 to maximum Life
- 12% increased Mana Reservation Efficiency of Skills
- Auras from your Skills have 10% increased Effect on you
Notes
Leveling (ignore the pre-Bitterdream stuff if you're already a leveling god - I'm not a racer and your plan may be more efficient and/or more comfortable)

Act 1
Damage Skills - Freezing Pulse + Arcane Surge, Holy Flame Totem + Summon Phantasm + Combustion
Auras - Clarity
Mobility - Frostblink, then Flame Dash (preference)

Act 2
Damage Skills - Cold Snap + Faster Casting, Holy Flame Totem + Summon Phantasm + Combustion
Auras - Clarity, Herald of Ice
Mobility - Flame Dash + Arcane Surge
BANDITS -> Help Alira

Act 3
Damage Skills - Vortex + Arcane Surge + Efficacy, Holy Flame Totem + Summon Phantasm + Combustion, Glacial Cascade + Faster Casting
Auras - Zealotry, Clarity, Herald of Ice
Mobility - Flame Dash
Curses - Frostbite
Offhand leveling - Winter Orb
FIRST LAB -> Forbidden Power

Act 4 and 5
Damage Skills - Vortex + Area of Effect + Efficacy, Holy Flame Totem + Summon Phantasm + Combustion, Glacial Cascade + Faster Casting
Auras - Zealotry, Clarity, Herald of Ice
Mobility - Flame Dash + Arcane Surge
Curses - Frostbite
Minions - Stone Golem
Offhand leveling - Winter Orb, Greater Multiple Projectiles

Act 6+ Pre-Bitterdream/Praxis
Damage Skills - Vortex + Area of Effect + Efficacy, Holy Flame Totem + Summon Phantasm + Combustion, Glacial Cascade + Faster Casting
Auras - Zealotry, Clarity, Herald of Ice
Mobility - Flame Dash + Arcane Surge
Curses - Frostbite
Minions - Stone Golem
Offhand leveling - Winter Orb, Greater Multiple Projectiles, Hatred, Power Charge on Crit, Inspiration
I recommend going to Heist immediately when you get your first Rogue Marker (typically around the middle of Act 6) and farm enough chaos to buy Bitterdream and a 6+ Praxis.  DO NOT take caster mastery before doing Heist or you will
be opening chests by accident.  You can buy orbs of chance from vendors for 1 orb of fusing each to buy more contracts from Whakano.  Doing a handful of contracts will also make you slightly overleveled for the rest of the campaign.

Rest of Campaign with Biterdream/Praxis
Damage Skills - Winter Orb + Greater Multiple Projectiles + Power Charge on Critical (MUST be socketed in Bitterdream),  Hydrosphere + Bonechill + Faster Casting
Auras - Hatred, Zealotry, Clarity, Herald of Ice (May need to delevel or rebuy Clarity if mana is too low)
Minions - Stone Golem
Mobility - Flame Dash + Arcane Surge
Offhand leveling - Inspiration, Added Cold Damage, Infused Channelling, Decoy Totem, CWDT, Steelskin, Vaal Righteous Fire
LABS 2+3 - Void Beacon and Frigid Wake

---------------------------------------------------------------------------------------------------------------------------------------------------

Tips for Early Maps

1. If Intuitive Leap can be bought cheaply, this helps with mana reservation and survivability.  Take both Herald notables, Infused Flesh, and Prodigal Perfection.  Don't drop the spell damage per power charge minor node.

2. Atziri's Promise should be cheap as well, which gives you early access to leech on top of the chaos resistance that you won't have at this point.

3. 20% quality on Winter Orb is necessary.  12 stages is a lot more projectile frequency and duration, and projectile frequency keeps mobs frozen.

4. While you're still on the weaker side, shrine nodes on the atlas passive tree can be a massive boost to your transition into solid mid-level gear.

5. For the rest of your gear, try to cap your resistances.  The Bitterdream setup will carry you well into upper yellow maps and possibly even lower reds.

---------------------------------------------------------------------------------------------------------------------------------------------------

Upgrade Priorities

1. Elusive and Frenzy Charges
    Absolute highest priority, even before Void Batteries, is the combination of Badge of the Brotherhood with elusive boots.  Elusive is a major defensive layer as well as a movement speed boost, and stacking both power and frenzy charges is our
    biggest source of damage.  Since you won't have crit chance capped yet, a 10% elusive chance boot with low movement speed will outperform a 6% elusive chance with 25-30% movement speed.  Elusive also makes your Flame Dash
    cooldown much faster.  You can buy any cheap Redeemer influenced boots and hit it with a Harvest critical reforge for guaranteed elusive chance.  I recommend a STR+INT boot because this will be a good slot for our CWDT setup and Vaal
    Righteous Fire.  Catalyze your Badge for attributes - 17% is enough to hit 28, so using 3 more catalysts to go to 20% is a waste.

2. Frenzy+Curse Chest with Sniper's Mark and first Void Battery
    This is where we finally drop Bitterdream for a double influenced chest (Redeemer+Hunter).  A 5-link chest can work but I would recommend waiting until you can get a 6-link before swapping.  Ideally, we want chance to gain Frenzy on
    hit (Redeemer suffix), flat critical chance to spells (Hunter suffix), and +1 additional curse (Hunter prefix).  If you don't want to buy it, it can be easily crafted by Awakener Orb slamming the two suffixes (pray for open prefix), lock suffixes,
    and Harvest reforge caster.  Your links will be: Winter Orb + Infused Channelling + Inspiration + Added Cold Damage + Greater Multiple Projectiles + Power Charge on Critical.
    If you are hitting a wall with the Bitterdream (typically T10 or so) and can't afford the double influence, then any 6L would be an upgrade, but in order to gain frenzy charges, you'll need an Ice Bite support instead of Added Cold Damage.
    However, I recommend farming until you can afford the double influence chest since the Ice Bite setup will be unable to gain frenzy charges against bosses, which is where you'll be needing it most, and the additional curse is also for
    applying Sniper's Mark to single targets in addition to Frostbite.  Eventually you will want to upgrade your chest to one with double elevated suffixes to make it easier to hit 100% crit.
    Now that you've dropped Bitterdream, it's time to buy two Void Batteries, which don't have to come simultaneously.  Getting a good cast speed roll is the top priority.

3. Explosions
    After Uber Lab (Profane Bloom), buy a ring with curse on hit.  Frostbite is the best option, Elemental Weakness is second, but any curse will work for now.  Preferably it would come as a synth implicit, but it will be cheaper as either a Delve
    mod or an influenced mod (Redeemer for Frostbite, Hunter for Elemental Weakness).  This will be a massive boost to your clear speed.

-------------------------------------------------

Upgrades to solve problems and improve feel:

1. Freeze proliferation.  This is big for clear but it also keeps you safe.  Eventually we want to obtain this on a large cluster jewel, but until then, we can roll this as an Exarch implicit on gloves.  Don't spend too much on getting a higher
    tier as it'll eventually move to the cluster.

2. Leech.  Ideally, this will come from transforming a notable with Glorious Vanity.  Until then, we can also roll this as an Eater implicit on gloves.  Again, the tier doesn't matter as much since it will be replaced with Glorious Vanity.  Another
    alternative is Doryani's Lesson on a cluster, but that is typically more expensive and not as efficient as the other methods.

3. Increased skill duration and cast speed.  Socketing an Unnatural Instinct in the bottom left Scion wheel is an amazing improvement to the smoothness of gameplay.  You get cast speed, increased duration, area of effect, maximum mana,
    and some other minor nodes.  If the Unnatural Instinct is too expensive, I recommend taking the Potency of Will wheel and its 10% more duration mastery.

4. Amulet anointment.  The best option here is clear: Infused (Crimson Silver Silver) gives you another maximum power charge.  Disciple of the Unyielding is okay if you're having trouble keeping resistances capped, and Whispers of Doom
    can be considered if you still haven't gotten the additional curse from your chest.

5. Reflected damage.  Early on, you'll need to either skip maps with elemental reflect or rely on the upgraded Yugul pantheon (-50%) along with the elemental mastery (-60%).  On most maps, this is immunity, but if you're on shocked ground,
    this can surpass 110% and still get you.  The endgame solution here is the Bastion of Elements Forbidden Flame/Flesh jewels, and I usually do this swap along with a cluster jewel setup.  Avoid getting sources of additional physical spell damage.
    After swapping to clusters/Forbiddens, you can completely drop the elemental wheel on the left because in the later stages of this build, the increased elemental damage becomes less worth taking due to diminishing returns.

6. Corrupted blood.  Get it on a jewel corruption implicit.  Cast speed, max life, crit multi, and resists are all desirable explicits for normal jewels.  For abyss jewels, look for phasing on kill, flat life, flat energy shield, flat cold damage to spells.
    Before you get it on a jewel, it's fine to have bleed immunity on a life flask, and I'll often keep a bleed immunity flask as it's the only ailment that can significantly harm us.

7. Energy shield.  Glorious Vanity with Doryani transforms Pain Attunement into Corrupted Soul.  This gives you more ES and splits damage into both pools.  Look for one that transforms a notable into cold leech.  Other good transformations
    for small nodes are chaos resistance and increased duration.

8. Area of Effect.  You want a medium cluster jewel with Vast Power to stack area per power charge.  It's optional to get two of these but once we get enough power charges, some area is lost in the redundancy.  Towering Threat and Magnifier
    are both great second notables, and try to get decent resist/attribute rolls on the other explicits.  These usually aren't expensive and are worth taking a chance on corruption.

9. Rampage.  At the cost of 3 less offhand gem slots, Sinvicta's Mettle is amazing as an offhand.  Since your Winter Orb setup is in your chest, as long as your auras aren't in your weapons, you can easily swap twice to activate Rampage as you
    run by a pack.  It sounds clunky at first but eventually feels automatic at the start of a map.  I recommend waiting until elusive procs before performing the swap since the drop in cast speed leaves you temporarily vulnerable.

10. Single target defense.  Decoy Totem is very underrated.  Drop one on the opposite side of a boss and you're generally safe as long as you're not in a map that prevents taunting.  As a general rule, don't pop Vaal Righteous Fire until the boss
      is taunted and unlikely to target you while you're low on life.

11. Mana and no-regen.  An Enduring mana flask solves any issues here.  Pre-3.24 I chose reduced mana cost as a suffix but it wasn't very impactful.  Choose one that targets a pain point, possibly poison/ignite immunity.  Immunity to hinder is
      important for this build when running Delirium content but that can be cheaply obtained elsewhere through a jewel corruption.

12. Juice.  Inspired Learning is a great bang for the buck before transitioning to the higher investment Headhunter.

---------------------------------------------------------------------------------------------------------------------------------------------------

Medium investment upgrades:

1.  Boots with Tailwind, Elusive, and Onslaught on kill.  Tremendous boost to map clear.

2.  Hatred Watcher's Eye.  Flat critical chance is the top priority, and it's a tie for second priority between cold penetration and flat added cold damage.

3.  Awakened Greater Multiple Projectiles support.  Going from 5 to 6 projectiles is straight up 20% more damage.

4.  Incursion gloves.  You want the incursion mod that gives cold resistance and damage with hits against chilled enemies, and high chaos resistance as a second suffix.  For sockets, I recommend an INT or DEX+INT base as this is a great place for our auras.  With the loss of veiled chaos orbs, we have to lock suffixes and use the new veiled orb to slam +2 to socketed AoE gems as a prefix to boost our aura levels and give us 8-10% AoE as a bonus.
     For implicits, choose cold exposure and chance to unnerve.  The unnerve can be conditional on being in the presence of a unique enemy, but you'll lose out on good damage against tanky rares.

5.  Power charge helmet.  Corrupted Heatshiver is probably still best in slot.  A Blizzard Crown with Warlord influence is also a great option here.  Combined with the amulet anoint, you're now at 10 power and frenzy charges.

6.  Explody flask.  You already have Herald of Ice explosions on top of Profane Bloom, but adding an Oriath's End instilled to reuse at the end of its duration still feels impactful.  If you can afford it, get it, doubly so if you went with Fugitive boots instead of Two-Toned and still have some resistance needs.

7.  Elevated chest.  This is an important upgrade because of the possible +2% crit chance to help you reach 100%.  Movement speed per frenzy charge (the elevated version of the frenzy on hit mod) is nice if you can get it.  It's not necessary, but if you're already paying for an elevated double influence chest, it's worth it.  Elevating the curse mod isn't helpful.  Astral Plate is the best option here if you're able to hit the strength requirement.  If you are at 100% crit chance at full power charges, you
     may be able to drop the Annihilation nodes on the passive tree.

---------------------------------------------------------------------------------------------------------------------------------------------------

High investment upgrades:

1. Headhunter: Prioritize DEX/STR rolls as these can be difficult to hit on other gear while capping resistances. Catalyze for attributes. It's so impactful that its priority should really be above some of the medium investment upgrades.
    I push for this as early as possible.

2. Power charge synth rings: Ideal explicit mods would be life, flat elemental damage, cold damage per frenzy charge, cast speed, crit multi, and chaos resistance. Hitting 12 power charges is extremely powerful and it trickles down into
    many areas: defense, raw offense, cooldown speed, cast speed, and crit chance, mana regeneration, movement speed, and probably more. Ice Bite support outperforms Awakened Added Cold at this point.

3. Triple elevated boots: Of the three elevations, elusive effect is the least impactful as you're already scaling it so high through the Badge of the Brotherhood.

4. Third mod on Watcher's Eye: Penetration mods for either Hatred or Zealotry are excellent. Crit multiplier for Precision is also good if you can fit the aura in, but due to the popularity of other cold builds, this combination will likely be multiple
    mirrors. Extra ES for Clarity will also help defensively.

5. Mana reservation and penetration corruptions on jewels.

6. Increased maximum resistance or Additional curse corruption on amulet.  Dexterity is tight on this build, so you may need to prioritize it on a cluster jewel if you're giving up the 28 from the amulet's original implicit.

---------------------------------------------------------------------------------------------------------------------------------------------------

Pantheons:

Major pantheon: Lunaris - 10% chance to avoid projectiles stacked on top of the elusive effect is impactful, and avoiding chaining projectiles eliminates bosses from chaining from your decoy totems.  Movement speed gets you out of sticky
   situations, and the elemental reduction is obvious with a CWDT setup.
Minor pantheon, before Forbidden pair: Yugul - unless we land a lucky reflect immunity as a Redeemer chest prefix, this pantheon paired with the elemental mastery is our only way to deal with reflected damage.
Minor pantheon, after Forbidden pair: Abberath - this lets us ignore one of the only dangerous Exarch altar mods.

---------------------------------------------------------------------------------------------------------------------------------------------------

New 3.24 Possibilities
Call to Arms + Enduring Cry might be a nice thing to add if you've got open sockets.  The Call to Arms support isn't in PoB at the time of writing so I've got it socketed in the helmet as Urgent Orders.
Tattoos could make it easier to cap chaos resistance.  You'll need 245 intelligence for your Void Battery, 159 strength (180 if you're using Astral Plate), and 159 dexterity for Sniper's Mark, so there should be a handful of intelligence nodes
  and maybe some strength nodes for you to tattoo.  Unfortunately, the increased duration tattoos were changed.
New league crafted helmets have a +1 power charge mod available, so with Eldritch implicits, it might be possible to outperform Heatshiver.  There could be some other nice surprises.

---------------------------------------------------------------------------------------------------------------------------------------------------

Miscellaneous Dos and Don'ts

1. If you're dying a lot in maps, something's not right. I've been running this build for close to two years, and every time it reached a point where it would routinely go 10+ maps without taking any damage.  Early on, Soul Eater can be a problem,
    although that's being capped at 45 stacks with 3.24, so that may not be so bad anymore. The most dangerous map mods are increased attack speed and elemental avoidance, but there's no map mod outside of T17s that is a brick.

2. Hitting 100% crit chance is a magic turning point in this build. If you think you're done putting it together and you aren't at 100% crit chance at max power charges, you're missing something important and won't be guaranteed to freeze
    everything you hit.

3. If you're wanting to play this in SSF, you're going to be in for a bumpy ride. A lot of these items are going to be very difficult to obtain without trading.

4. After getting a Glorious Vanity, reconsider your pathing from the start. You might get some good small nodes on the right that help more than the intelligence nodes on the left.

5. Don't invest into projectile speed. I haven't tested this myself, but I've heard from others that it has no effect.

6. If your Vaal Righteous Fire is linked to your CWDT support to take advantage of Increased Duration, make sure the level of Vaal Righteous Fire is higher than the level requirement for CWDT. If it's equal or lower, you're going to trigger
    normal Righteous Fire and drain all of your life away. A low CWDT threshold can be nice, and ultimately it's up to preference, but I like to keep CWDT/Steelskin at level 19 and Vaal Righteous Fire at 20.

7. This build is capable of all non-Valdo content, including ubers if you're fairly good at dodging the mechanics, but it's not an uber farmer. Make a dedicated bosser if you want to do that. This build is a zoomy map blaster that excels at
    Legion, Expedition, and Breach, as well as blind alch+go with all map mods (can run all unidentified). If you're dead set on bossing, unspec Profane Bloom, add a third curse, and swap out the Headhunter to a Stygian Vise or something.

8. Don't pay attention to the misleading DPS numbers in Path of Building. I do ubers with this build every league, and if the numbers shown are remotely accurate, I wouldn't even be able to kill the non-uber versions. On top of that,
    you're mapping with Headhunter, and that can't be factored into these calculations. Explosions aren't calculated.

9. Also, don't be scared off because of the lack of traditional defensive layers. You get a ton of other minor layers that keep you safe, and one-shots are rare. That said, if you're looking to facetank mechanics like a Fulcrum Chieftain,
    this isn't the build for you.

10. The Watcher's Eye and Awakened Greater Multiple Projectiles support get expensive in week 2 or 3. Get them as early as possible even if it means delaying your Headhunter.

11. After lots of testing, Headhunter is the clear belt of choice for this build. Mageblood may work very well with other Winter Orb setups, but not this particular one. You steal a lot of defensive and offensive buffs, and they synergize
      extremely well with the strengths of our build.

12. Cast speed is absolutely crucial to making this build feel good by maxing out your running:channelling ratio. You hit max stacks faster and your projectiles shoot more frequently as you run, which means you can still reliably clear
      packs while running past at lower stacks. Poor cast speed will make you miss packs as you run by, and those packs will get to attack you. This, along with non-capped crit chance, is likely what's missing if you either find yourself
      dying or the build feels bad.

13. Another big mistake a lot of players make is running to a pack and then charging up to attack. Don't do that. Especially without elusive up. You've got an auto-aimer with 100% freeze chance and proliferation. Let it work by making
      sure you've got at least a few stacks up before going anywhere that might have mobs.

14. Although this build can run all content, don't farm blue altars. It's a charge stacking, cold damage, projectile spell build, and blue altars are practically engineered to turn your zoom into a slog. Red altars are the way to go, and as long
      as you're chaos capped and keep moving, you can ignore every single downside.

15. It's debatable whether or not putting Herald of Ice in its own 4-link is a good idea. Clear speed explosions are undoubtedly better with it, but it comes with sacrifices due to socket pressure, and it's difficult to 4-link without a level 4 Enlighten
      in your Zealotry+Hatred setup. If you're going to separate it, I recommend putting it in the helm and linking it to Increased Critical Strikes, Area of Effect, and Ice Bite.

Have fun and happy Worbing.
-Doctor Yoy
3/23/2024