2 years ago
 Level 91 Boneshatter Juggernaut3.22
Life: 4,138135%
Mana: 31
eHP:
31,386
Resistances: 80%/79%/79%/16%
Supp: 92.71%
Armour: 51,572
DPS: 2,221,648
Speed: 4.65
Hit Chance: 100%
Config: Pinnacle
Bandit: Kill All
Pantheon: Soul of Lunaris, Soul of Ralakesh
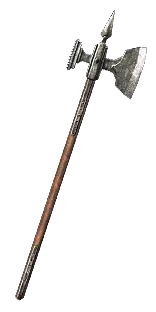
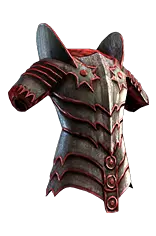
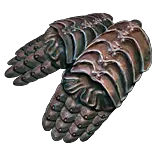
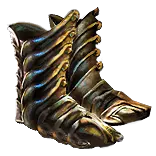
Gear


Gems
Boneshatter
Fortify
Ruthless
Close Combat
Brutality
Melee Physical Damage
Determination
War Banner
Pride
Blood Rage
Ancestral Protector
Multiple Totems
Maim
Ancestral Cry
Arrogance
Precision
Leap Slam
Faster Attacks
Cast when Damage Taken
Vaal Molten Shell
Lifetap
Vulnerability
Vaal Ancestral Warchief
Tree Preview
 Call to Arms
 Iron Reflexes
 Precise Technique
 Accuracy Mastery
- +500 to Accuracy Rating
- -2 to Accuracy Rating per Level
 Armour Mastery
- +1% to all maximum Elemental Resistances if Equipped Helmet, Body Armour, Gloves, and Boots all have Armour
- You take 30% reduced Extra Damage from Critical Strikes
 Attack Mastery
- Non-Vaal Strike Skills target 1 additional nearby Enemy
 Axe Mastery
- Enemies Killed by your Hits are destroyed
- Attacks with Axes or Swords grant 1 Rage on Hit, no more than once every second
 Life Mastery
- 15% increased maximum Life if there are no Life Modifiers on Equipped Body Armour
- +50 to maximum Life
 Physical Mastery
- 10% more Maximum Physical Attack Damage
 Reservation Mastery
- +1% to all maximum Elemental Resistances if you have Reserved Life and Mana
 Spell Suppression Mastery
- Chance to Suppress Spell Damage is Lucky
 Totem Mastery
- Buffs from Active Ancestor Totems Linger for 3 seconds
 Two Hand Mastery
- 40% increased Damage with Hits against Rare and Unique Enemies
- 10% increased Armour per Red Socket on Main Hand Weapon
- 10% increased Evasion Rating per Green Socket on Main Hand Weapon
Notes
> PLAYSTYLE <
BONEZONE BAM BAM BAM

Ok, seriously now: for clear you leap slam around using Boneshatter to kill anything that gets in your way.
The only thing that can be a little annoying is that ideally you swap out Vulnerability with Warlord's Mark until you have 55 rage(should be within a couple of hits), but if you hate doing it it's not required to make the build work.
Make sure your Ancestral Cry is on left click so it automatically triggers all the time. Berserk can be used for rares and map bosses.

For single target you want to place down your totems and keep them up, they're huge buffs to your damage. If you're at 55 rage and you see an opportunity to deal a bunch of damage press your Berserk to go completely ham.
If you have a "chance to deal double damage while focussed" axe you can press your focus when your berserk is up for a lot of extra damage.
You don't have to press many more buttons than that, you can leap slam to dodge abilities, but your curse should automatically trigger because of the self-damage of Boneshatter in the CWDT setup.

> SUPPRESS <
Suppress cap can be pretty hard to get on this build, so it requires a separate "chapter" in the notes.
Endgame, with Inveterate annointed and T1 suppress rolls on your helmet, gloves and boots you get to 101% suppress chance, just enough to not have a perfect roll on 1 piece of gear.
Before endgame you pretty much have to accept you're not going to be suppress capped, swapping out your chest for an armour/evasion chest so it can roll suppress naturally is simply not worth it on a Juggernaut.
This is not as bad as you might think though, the "Unbreakable" ascendancy node gives us plenty of defenses to compensate for our lack of suppress cap, on top of that you can do the following:
- Pick up the suppress mastery "Chance to Suppress Spell Damage is Lucky" (huge when not capped suppress, means your suppress rolls twice vs spell hits)
- Hope that the Trial of the Ancestors league adds tattoos that give you suppress(I think this is pretty likely, but it hasn't been confirmed as of writing this guide)

> FAQ <
Why not Slayer?
Jugg vs Slayer comes down to the following:
- Slayer has more recovery
- Slayer has more damage
- Jugg can tank more trauma stacks(acceleration shrine can kill Slayer quite easily if you're not paying attention cause of the amount of stacks you get)
- Jugg has a much easier time reaching the accuracy required for Precise Technique
- Jugg is tankier vs multiple hits
- Slayer has an easier time reaching 100% suppress(because it doesn't need to use a pure armour chest)

There are some more differences of course, but those are probably what your choice comes down to.

How do I deal with mana issues?
The easiest way is getting -mana cost on as much jewellery as possible(you should only need it on your 2 rings in endgame).
This can be a bit annoying though, especially early on, so some ways you can deal with it as well:
- Link lifetap to Ancestral Cry and/or Leap Slam(might require an unset ring)
- Get some mana leech(phys mana leech on a jewel or taking it on the tree near Vaal Pact)
- Disable War Banner to have a bit more room to play with
- Get the "reduced mana cost of attacks" implicit on your helmet from Searing Exarch currency
- Keep using Poacher's Mark instead of Vulnerability for a bit, since the former gives mana gained on hit.

How does Precise Technique work/how do I make it work?
Basically your flat accuracy has to be higher than your maximum UNRESERVED life. If this is the case you get the 40% more damage bonus.
Since Jugg gets a decent amount of accuracy from the ascendancy you should be fine with an accuracy roll on about 2 pieces of gear.
If you're having trouble though you can grab some accuracy nodes on the tree until you have enough accuracy on gear.

How do I become shock immune?
For shock immunity we take Thick Skin and its small nodes, roll shock avoid on our boots as an implicit and get an abyss jewel with shock avoid.
Before you have all these things you can use "Soul of Garukhan" as your small pantheon or roll "Reduced effect of shocks on your on a flask"(or both).

Why does your chest have no life?
There's a life mastery we use that gives us 15% life when our chest has no life modifiers on it, we use this to get more armour on our chest to compensate for the lost life(since it's still worse than a life roll).
Having a bit less life but more damage reduction means we more easily get higher accuracy than life as well for Precise Technique.

Precision reserves my life, isn't that bad?/Can I replace Precision?
We get a lot of mitigation and recovery on this build, so it's not that bad to lose some life.
Since we have so little intelligence we get very little mana, and Precision reserves flat mana, that makes it really hard to fit it on our mana pool.
As an added bonus we get 1% max res from reserving some life through an aura mastery.
If you have a lot of accuracy on gear you can probably drop Precision and use the gem sockets you freed up for Frostblink and a manually cast Warlord's Mark(so you don't have to swap it at the start of your maps)

> LEVELING <
In act 1 we level with Ground Slam, this should be pretty straight forward and while not the smoothest experience should still get you through act 1 just fine.
Make sure to place your War Banner whenever you need a bit of extra damage since this gives you a couple of seconds of Adrenaline. And for maximum optimization stay in close range since this gives Ground Slam a damage bonus.
Kill all essences you see, even the useless ones like spell damage, we'll need them later.

At level 12 we switch to Sunder, the playstyle is actually pretty similar to Ground Slam, it just deals more damage and you don't need to stay as close for it.
This is also around the time we want to use one of those essences we picked up earlier, take the most useless one you have and use it on a rustic sash, then vendor that belt with a blacksmith wetstone and a white Woodsplitter axe to create a 2H axe with %phys damage.
You can keep doing this recipe to upgrade your weapon throughout the campaign.

At around level 42 you can make the switch to Boneshatter, make sure you have Determination before you do this and preferably use an armour chest.
Use Poacher's Mark on bosses for some extra life sustain, damage and mana sustain. Bind Ancestral Cry to your left mouse button for extra clearspeed and armour.
This should carry you all the way to maps, at this point you can switch to the midgame tree and maps gem setup.