14 months ago
 Level 99 Crit Ice Crash Juggernaut3.25
Life: 2,71343%
Ward: 232
Mana: 88
Pool: 2,945
Resistances: 76%/80%/75%/67%
Armour: 23,146
DPS: 51,343,408
Speed: 1.13
Hit Chance: 100%
Crit Chance: 100.00%
Crit Multi: 546%
Config: Pinnacle, 5x Frenzy, 5x Power
Bandit: Kill All
Pantheon: Soul of Lunaris
Gear
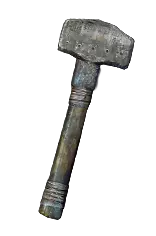


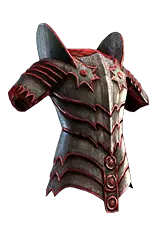




Gems
Molten Shell
Frost Bomb
Summon Ice Golem
Ice Crash
Overexertion
Awakened Cold Penetration
Pulverise
Awakened Melee Physical Damage
Awakened Elemental Damage with Attacks
Hatred
Precision
Arrogance
Blood and Sand
Battlemage's Cry
Infernal Cry
Urgent Orders
Frostbite
Leap Slam
Faster Attacks
Enduring Cry
Autoexertion
Intimidating Cry
Seismic Cry
Rallying Cry
Assassin's Mark
Tree Preview
Tattoo of the Arohongui Warrior
5% increased Cold Damage
Tattoo of the Tukohama Warrior(x3)
Melee Hits which Stun have 5% chance to Fortify
- 20 Life gained when you Block
- 20 Mana gained when you Block
- +1% Chance to Block Spell Damage per 5% Chance to Block Attack Damage
- +25% to Critical Strike Multiplier against Unique Enemies
- 10% more Maximum Physical Attack Damage
- Warcries grant 1 Rage per 5 Enemy Power, up to 5
- Warcries have a minimum of 10 Power
- Recover 15% of Life when you use a Warcry
Notes
-------------------------------------------------------------------------------------
Welcome to Famuel's Path of Building for the Ice Crash Build!
-------------------------------------------------------------------------------------

Discord (for any questions):    https://discord.com/invite/kE33KDPRJV
To support me/my content: 	 https://buymeacoffee.com/famuel

--------------
Build Theory
--------------
 - This build is all based around the Ice Crash skill. We make it's Area of Effect blow up the ENTIRE screen, doing massive damage and chilling/freezing all enemies - including bosses.
 - You can League Start with this build! You get Ice Crash in Act 3, just need to be aware that it is Mana hungry!

 - The early (levelling and mapping) trees are ALL based around a 2H Fleshripper Axe.
 - Use any 2H axe to start, and go for a Fleshripper (with as much physical damage as possible) as soon as you can get one!

 - NOTE: The last tree in this POB is a tanky Mace & Shield version of the build that can be swapped to much later on, if desired. Great for endgame T17 content, etc.
  - Please see the very bottom of this note section for more details on this! The rest of these notes are generic information for the build.

--------------
Mechanics
--------------
 - Use Sand Stance while mapping (more Area of Effect)
 - Use Blood Stance ONLY for Bosses or particularly chonky rares (more Damage)

 - You take the War Cry mastery 'Warcries cannot exert travel skills' while levelling. You will want this on a piece of gear (rings/belt) later on to free up the passive point for a better mastery.

 - We juice up the damage and area of effect of Ice Crash with our various warcries. You will want to weave these in between your slams while you get started.
  - Seismic Cry: Area of Effect
  - Intimidating Cry: Double Damage
  - Enduring Cry: Endurance Charges & Life Regeneration

------------------------------
Autoexertion Mechanics
------------------------------
 - Later in the game, we will automate all of our flasks and most of our warcries, which we then only really need to refresh to get life back (or every 7 attacks, for optimal DPS).

 - NOTE: DO NOT AUTOEXERT warcries until later in the game. You will not have the mana to do so with all the auras we need! Just manually cast them to start.
  - When you do start autoexerting, you may find you still do not have enough mana efficiency.
   - If so, just remove a warcry from the autoexertion link and manually cast it, until you fix the issue. There are cluster jewels or masteries on the tree that can help.
    - Infernal Cry and Rallying Cry are also low-priority. They solely exist to boost Overexertion DPS, so can be dropped if required.

----------
Bandits
----------
 - Either kill them all straight away, or take 'Alira' while levelling for resistances.

------------
Pantheon
------------
 - Take whatever you need most, except for Brine King (we are stun immune through an ascendancy)
 - I like to take Lunaris and Abberath.

-----------------
Ascendancies
-----------------
 - LEVELING:
    - Undeniable + Unstoppable + Unflinching + Unbreakable
	 - This gets you accuracy (huge DPS increase), then stun immunity, then lots of defences.
     - You can use 'Kaom's Roots' while levelling and swap Unstoppable for something else.

 - ENDGAME:
    - Unstoppable + Unbreakable + Unflinching + Last point as per below:
	 - I NEED ACCURACY: Take 'Undeniable'.
     - I NEED DAMAGE: Take 'Unyielding'. More damage, and more AOE. Very solid pick
     - I NEED DEFENCES: Take 'Unrelenting'. My favourite of the last options, it's a really really nice defensive boost.

--------
Gems
--------
 - Ice Crash + (Awakened) Melee Physical Damage + (Awakened) Elemental Damage with Attacks + Fist of War + Overexertion + Pulverise
 - Intimidating Cry + Seismic Cry + Rallying Cry + Autoexertion
 - Enduring Cry
 - Cast When Damage Taken + Molten Shell + Blood Rage
 - Leap Slam + Faster Attacks

 - Hatred
 - Precision + Arrogance
 - Blood and Sand

 - Battlemage's Cry + Frostbite + Urgent Orders + Infernal Cry
 	- NOTE: These gems require Whispers of Doom annointed on your amulet first, in order to apply two curses (the other being Assassin's Mark from the Oskarm unique gloves)

-------
Gear
-------
 - Fleshripper Axe
  - With as much Physical Damage, Critical Strike Chance and Critical Strike Multiplier as possible.

 - Rare Body Armour / Boots / Rings
  - With as much Armour, Life, Elemental Damage and Resists as possible.

 - Oskarm Nubuck Gloves
  - Our way of getting a nice amount of crit and accuracy, and applying assassin's mark to targets that need it (any rare or unique enemies)
  - Try to get the Critical Strike Chance corruption on these as well.

 - Pandemonius
  - Likely your first big purchase of the build, offers a great defensive layer in blinding and chilling enemies on hit, and slowing their action speed by 30%. ALWAYS.
  - Really huge amulet, but any rare with a cheap annointment while gearing up does the job.
  - Would only annoint 'Whispers of Doom' on this amulet when gearing up, as it is very expensive to do so.

 - Echoes of Creation
  - Helmet that gives a STAGGERING amount of damage to the build. Can add 70-90% damage.
  - Keep in mind you will hurt yourself when you attack, so make sure you have a form of life leech, and are going to hit something when you Ice Crash.
  - You also need to make sure you have all 7 endurance charges up! I recommend only getting this helmet around the level 90 version of the tree, with the Medium Cluster Jewel.

--------
Jewels
--------
  - Rare Jewels
   - With as MUCH Critical Strike Multiplier as possible. Best case: 4 mods with crit multi, but this is very expensive. Settle for 3 mods of crit multi and 1 other relevant stat.

 - Timeless Jewel
  - Search for a Lethal Pride jewel, commanded by Akoya.
  - We ideally want 3 sources of 15% crit multiplier here, along with other great modifiers like 'life leech', 'fire resistance', 'max life' and so on!
  - NOTE: These are hard to search for. Use this tool: https://vilsol.github.io/timeless-jewels

 - Impossible Escape (Point Blank)
  - By taking this Jewel, you can pick up two impactful passive points (Fangs of Frost and Marked for Death) at the bottom right of the tree, without having to path down there.

-----------------
Cluster Jewels
-----------------
 - Large Cluster Jewel #1
	- Brutal Infamy + Fuel the Fight + Martial Prowess
		- Gives you Mana leech, lots of 2H attack damage and attack speed.

 - Large Cluster Jewel #2
	- Blanketed Snow + Corrosive Elements + (Anything else at the BACK slot, you do not take this)
		- Gives you Cold Exposure and more cold penetration.

 - Medium Cluster Jewel
	- Lead By Example + Mob Mentality
		- Gives you permanent onslaught and permanent uptime on all endurance/power/frenzy charges.

 - Small Cluster Jewel
	- Spiteful Presence
		- Gives you a lot of reserved mana back to use in AutoExerting.

--------
Flasks
--------
 - Life Flask with instant recovery for dicey situations
 - Diamond Flask for crit chance
 - Taste of Hate for more cold DPS
 - The Wise Oak with uncapped cold resist highest for more DPS and penetration
 - Lion's Roar for defences

--------------------------------------------
Expensive Upgrades / Chase Items
--------------------------------------------
 - Flask: Bottled Faith
  - Very expensive unique flask that replaces your Diamond Flask in the endgame.
  - Huge crit chance and damage buff - use an enkindling orb to give it increased effect.

 - Flask: Progenesis
  - The most expensive item in the entire build! Replaces your Life Flask in the endgame.
  - Adds an exceptional defensive layer, as 1/4 of all incoming damage is spread out over 4 seconds instead.
  - This is fantastic as we simply leech this life back up.

 - Belt: Headhunter
  - Crazy fun item that, if worked into the build, will increase your clear time by a considerable amount.
  - You will fly through maps with ease, and it is a good time all around. Expensive chase item to work toward.

 - Jewel: Forbidden Flesh + Flame
  - Can use this combo which gives 'Tukohama, War's Herald'. If so, replace your Fist of War support with (Awakened) Cold Penetration / Hypothermia / Inspiration.

 - Jewel: Watcher's Eye
  - Get a 6% maximum life roll with 'Damage Penetrates Cold Resistance' while affected by Hatred.
  - You can then look for getting additional modifiers like 'Gain flask charges' and 'Increased attack damage' while affected by Precision.

----------------------------
Mace & Shield Variant
----------------------------
 - 1H Mace
   - With as much Physical Damage, Critical Strike Chance and Critical Strike Multiplier as possible.

 - 2H Mace
   - With as much Physical Damage, Critical Strike Chance and Critical Strike Multiplier as possible.
   - You swap to this (by pressing X) for bossfights. You will hit like a truck at the expense of the defences.
   - 3.25: Get the Runesmithing enchantment "Gain (30-50)% of Weapon Physical Damage as Extra Damage of each Element"

 - Svalinn Shield
  - Get a perfect roll on 'Chance to Block Spell Damage'

 - Anvil Amulet
  - A massive source of Attack Block and Life Gained on Block.
  - Normally very cheap - you can look for corrupted implicits with 'You can apply an additional curse' here.

 - Spell Block, Attack Block and Life Gained on Block
  - Stack all of these as high as possible until you are comfortable, or POB says your effective health pool is 'infinite'.

 - Small Cluster Jewels
  - You can use multiple 'One with the Shield' clusters to get a lot of Attack Block and Life Gained on Block!

 - Large Cluster Jewels
  - Swap 'Brutal Infamy' on the original Cluster Jewel for 'Weight Advantage'.

----------------------------
Thanks for reading!
----------------------------

 - I hope you enjoy the build!
  - Famuel <3