3 months ago
 3.28 Storm Burst totem Hiero league starter3.28
Life: 4,617116%
ES: 613
Mana: 3,788195%
eHP:
150,861
Resistances: 76%/76%/76%/46%
Armour: 6,229
DPS: 19,006,668
Speed: 9.50
Hit Chance: 100%
Config:
50% Shock, Custom Mods
Bandit: Alira
Pantheon: Soul of the Brine King, Soul of Garukhan
Loadout
Gear
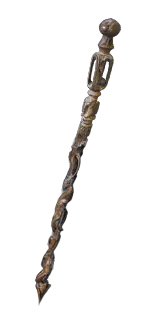
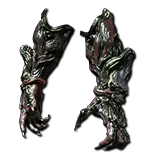







Gems
Storm Burst
Spell Totem
Controlled Destruction
Lightning Penetration
Physical to Lightning
Infused Channelling
Wave of Conviction
Multiple Totems
Spell Totem
Overcharge
Physical to Lightning
Unbound Ailments
Arcanist Brand
Conductivity
Creeping Frost of Floes
Arcane Cloak
Automation
More Duration
Sigil of Power
Eternal Blessing
Wrath
Frostblink of Wintry Blast
Spell Echo
Tree Preview
Runegraft of Resurgence
Arcane Surge also grants 15% increased Life Regeneration Rate to you
Limited to 1 Runegraft of Resurgence
Tattoo of the Valako Scout(x4)
10% reduced Effect of Shock on you
 Ancestral Bond
 Elemental Overload
 Iron Will
 Mind Over Matter
 Duration Mastery
- 10% more Skill Effect Duration
 Lightning Mastery
- Increases and reductions to Maximum Mana also apply to Shock Effect at 30% of their value
 Mana Mastery
- 10% of Damage taken Recouped as Mana
 Staff Mastery
- 3% increased maximum Life per Red Socket on equipped Staff
- 5% increased maximum Mana per Blue Socket on equipped Staff
 Totem Mastery
- Totems Taunt Enemies around them for 1 second when Summoned
Notes
This build guide is intended as a day 1 league starter.  It specifically avoids using any items which are not easily obtainable
from trade for a few chaos on the first day of a league for all loadouts of the build until the final version.  The only items
required for the build are the Agnerod West staff (not useable until level 66) and the Algor Mortis gloves.  Both items are
readily available on trade for 1 to 3 chaos on day 1.

Both of these items aren't used until completing the campaign.  Once you are done with the campaign, you buy those two
items and the build will already have around 1 million dps for bossing or tanky monsters.  For normal mapping you should
still have over 500k dps without casting arcanist brand to trigger the conductivity curse and chillled ground for the extra
damage bonus from the Algor Mortis gloves.  The level 70 damage assumes only a 4 link and the two unique items.

By level 90, even with fairly mediocre gear, the build has over 6 million boss dps and 4 million map dps using a 6 link body
armour and still using the Agnerod West staff plus Algor Mortis gloves.  The level 90 version shown in this guide can easily
complete your atlas and get all 4 voidstones and can then be used to farm as much currency as needed for another build or
to push this one to 20 million+ dps.  This guide does not include a full mix-max version of the build as it is only intended for
league start and a bit beyond.  I did include a medium invement version of this build in the guide which more than doubles
dps and greatly increases tankiness on maybe 10 div investment.

I should also note that it is definitely possible to squeeze out a little more damage during leveling by slightly altering the
pathing used in this guide.  You are welcome to do that if you want, but having played this build multiple times though the
campaign it does not suffer from lack of damage once you reach level 12 and switch to using Absolution.  The pathing I
used in this pob requires zero respecing until the campaign is complete and you switch to using the Agnerod staff.  At that
point you need to respec 11 points which you have available to you from the passive quests during the campaign.  I would
not recommend using gold for the respec into the level 70 version of the build as you'll get much better value by using your
gold to gamble for gear from the vendor or for setting up Kingsmarch.

Level 1 to 12

Getting to level 12 can be done in many different ways.  The meta way to level early with Templar is to use Rolling Magma
cast through a flame wall for the extra flat fire damage.  If you use this, you'll want to take the three 10% elemental damage
nodes near the Templar start on the way to Retribution.  You can also just use Purifying Flame which allows you to take the
three 10% physical + 10% minion damage nodes so you don't need to respec later.  In both cases, you'll also use Holy Flame
Totem which can be acquired at level 4 as soon as you get past the Mud Flats zone.  If you use Purifying Flame instead of
Rolling Magma, make sure to buy the best available Rustic Sash belt from Nessa with 2  of your first 3 wisdom scrolls after
killing Hillock as it will benefit both HFT and Purifying Flame.

Once reaching the Merveil's Caverns zone you can return to town and Nessa will give you the Absolution skill gem.  The first
layout in this guide is for level 12 with Absolution.  You then continue to use Absolution plus Holy Flame Totem until after
completing the first lab, at which point this guide switches to using Storm Burst totem plus Summon Raging Spirts. Absolution
needs to be supported by added lightning damage support and added fire damage support, so you want to find a useable 3
link RRB item asap.  Holy Flame totem also works best as RRB but is fine with RBB using added lightning damage support
instead of added fire damage support.

After 1st lab (storm burst)

Take the Pursuit of Faith ascendancy passive to give you +1 totems and 100% totem duration + placement speed.

Drop HFT and replace it with Storm Burst supported by Spell Totem and Physical to Lightning.  If you have a 4 link, the best
supports are either Infused Channeling or Added Fire Damage if you have a red socket.  Having 3 blue sockets is required,
but the 4th socket can be either red or blue.

Drop Absolution and replace it with Summon Raging Spirts, supported by minion speed, added lightning, and minon damage.
If you have a red socket,  you can use either melee splash to give you better clear or elemental damage with attacks for more
single target damage.  Once you get Unleash support (after killing Kaom and Daresso and talking to Dialla), the SRS minions
do more damage than the storm burst totems until you finish the 2nd lab.

You'll want to use the Elemental Weakness curse to boost your damage since it works for both Fire and Lightning Damage
and thus benefits both Storm Burst and Summon Raging Spirits (SRS).  Elemental Weakness and Flame Dash (or Frostblink)
can be supported by a level 1 arcane surge support gem to give you arcane surge.  The extra 20% cast speed and 30% mana
regen is pretty good.

Sigil of Power can also be used to boost SRS minions as well as Storm Burst in boss fights by summining the sigil underneath
the boss.  All minions as well as other players who are within the sigil benefit from it.  SRS is very good at killing bosses
since you can cast sigil of power and then summon all 20 SRS minions while waiting on the boss invulnerability phases to end.
The sigil of power gem is available as a reward from Oyun after killing Voll and entering the mines.

After 2nd lab

Take Arcane Blessing after the 2nd lab as it provides a 32% more damage boost for storm burst along with mana regen and
cast speed.  After completing the 2nd lab Storm Burst starts to outscale SRS faily quickly.  The SRS minions are still useful
to cast them and keep moving as well as for pre stacking boss fights, but most of your damage will be coming from the totems.

After 3rd lab

Take Ritual of Awakening as your 3rd ascendancy passive.  No changes to the build here.  You can do the 3rd lab before or
after killing Kitiva to complete the campaign.  You'll want to repeat the merc lab multiple times to use the Divine Font at the
end of the lab to add quality to the storm burst totem gem.  Getting to 20 quality gives storm burst 25% more damage against
bosses and tanky rares.  You have to get to 20 quality to gain any benefit as that raises the base  duration of the storm burst
orbs from 1.2 seconds to 1.6 seconds, thus they get one full extra hit (going from 4 hits to 5 per orb for 25% more damage).
That damage, however, is delayed so doesn't help much with map clear, but it is very useful for tanky monsters.

After campaign

Buy the two uniques needed for the level 70 version of the build.  The Algor Mortis gloves and the Agnerod West staff.  You
can also buy any of the other 3 version of Agnerod (East, North, or South) as they are perfectly useable, but the West
version is significantly better since it gives you +lightning damage to spells.  You can also buy an Honourhome helm to use
for your 4 link storm burst totems.  The +2 skill levels and flat spell lightning damage honourhome gives is almost as good as
a 5th link for storm burst.  This helm is a great leveling item and you can usually buy one very early in the campaign and just
use it until you get a 6 link for storm burst.  The damage is already so good with storm burst during the campaign that I don't
bother, but the option is there if you want it.

The SRS minions can now finally be retired and replaced with a 4 link of Wave of Conviction + spell totem + multiple totem +
over shock.  The WoC totem gives you -15% lightning exposure plus big shocks due to Overcharge.  This also gives you two
extra totems for your Ritual of Awakening ascendancy passive (+10% more damage, 1% mana regen, and 2% life regen).

You now get rid of all the auras  you were using except for Wrath supported by Eternal Blessing.  You want no mana
reservation to benefit from Mind over Matter as well as Arcane Cloak.

Since you are swapping from wand + shield to a staff, you have to retire shield charge and replace it with leap slam.  If you
have the sockets, it is helpful to support leap slam with both faster attacks and momentum.  My 2nd highest priority after the
campaign is to replace leap slam + flame dash (or frostblink) with the frostblink of winterly blast gem.  This gem is relatively
cheap early league due to everyone running labs and wanting to get quick currency for gear, but the price goes up massively
a few days into the league as the only people still running lab at that point are doing it only for profit.

Your skill rotation will now be to summon WoC totems (one button summons 2x totems due to multiple totem support), followed
by 3x storm burst totems.

Against tanky monsters you also cast the arcanist brand which will apply the Conduction curse plus cast creeping frost
(or creeping frost of floes is better) to create chilled ground.  The chilled ground activates the "enemies in your chilling areas
take 25 to 35% increased lightning damage" from the Algor Mortis gloves.  Note that this is a separate damage multiplier
category combined with shock, so 35% increased lightning damage + 30% shock means a monster will take 65% more damage.
Thus, between Conductivity and the Algor Mortis gloves effect, casting the Arcanist brand will give you roughly 60% more
damage when needed.

In some situations, Sigil of Power can be a substantial damage boost as well.  Typically I'll use it when farming content like
breach hives or fortress where you just stand in the middle and wait for monsters to attack you.  It is also great vs. some
bosses which make you stand around and wait to attack them, so you might as well give yourself some extra damage while
waiting on them.

If you followed the PoB you have 11 passives to respec before switching to the level 70 mapping build.  You can use gold to
respec if you want, but I recommened using gold to gamble for better gear and to just use the free respec points from the
campaign.  Here is the list of the 11 respec passives for the level 70 tree:
  * 3 points on the Enduring Bond wheel
  * 3 points on the spiritual command wheel
  * 2 of the 5% life nodes on the purity of flesh wheel
  * 2 int travel nodes leading to the purity of flesh wheel
  * 1 point for the 12% reservation efficiency node on the arcane capacitor wheel

The respec to switch to the Agnerod staff can be done at level 66 since that is the minimum level required to use the staff,
but I recommend just finishing the campaign using a wand + shield and then farming merc lab to get 20 quality on storm burst
before switching to the staff.  Shield charge is faster than leap slam and the build has plenty of damage without the staff.
If you do switch early,  you can just not take some of the staff block nodes and then take them as you level up.  You might
struggle to get the 158 strength if you didn't plan for it and be forced to take the 30 strength Might node or the 20 str/dex
Practical Application node.  I usually solve strength between a heavy belt and a citrine amulet plus either getting a strength
affix on one of them or crafting strength.

After taking all the passives shown on the level 70 tree, spend 1 point to take the lightning mastery node in the Crackling Speed
wheel to make increased mana apply to shock effect, then spend 2 points to take Deep Thoughts.  After that your remaining
points will be spent pathing down to the Potency of Will duration wheel and then down to Dynamo for more mana + duration for
Arcane Cloak, plus Iron Will and life nodes.

Storm Burst of Repulsion

You can replace Storm Burst with the transfigured Storm Burst of Repulsion for better clear while mapping.  The SBoR gem
is also fine for boss damage, but requires you to keep summoning new totems to trigger the secondary effect on the gem
which causes the orbs to explode for 75% of their remaining damage.  If you do not keep summining new totems, the single
target damage for SBoR is pretty bad.  Tthe normal SB gem is better overall for bossing since you don't need to keep
summing new totems, but unless you are fighting pinnacle bosses it isn't worth the trouble to switch to normal SB if you are
mapping with SBoR.

You can also use multiple totem support with SBoR so that you don't need to summon the Wave of Conviction totems
during normal mapping to maintain 5 totems.  It also more efficient in terms of the number of times you have to press the
buttons to clear the screen even though you do give up some damage.  Once your damage sufficient it just makes sense to
switch to SBoR due to the better clear / faster mapping.

Timeclasp ring

If you use a Timeclasp ring, you need to get one with a minimum of 15% increased skill duration, assuming that you are
using the passive tree as shown in this guide and do not have any additional sources of skill effect duration.  More duration
than 15% does almost nothing for the build, so you instead want to get as much cast speed and recoup as possible on a
Timeclasp with 15% or higher skill duration.

It is also very nice to be get a corrupted Timeclasp which gives you immunity to ignite or corrupted blood, especially when
using multiple Replica Reckless defense jewels to max out block,  you want to be immune to ignite, freeze, and shock.  The
level 98 version of this build gets ignite immunity from a corrupted Timeclasp, Freeze immunity from the Brine King pantheon,
and (mostly) shock immunity from the Soul of Garukhan pantheon plus 4 INT tatoos which give 10% reduced effect of shock.

Scaling damage further

You can  switch to a wand + shield setup since you can get a shaper shield with +1 totems.  An extra totem is 33% more
damage, but at the cost of having to summon the extra totem.  A shaper shield is very easy to craft becuase all you need to
do is buy or make a good shield with 1 open prefix and no open suffixes.  Then hit it with a shaper exalted orb and the open
prefix will be filled with +1 totems since there is only one shaper prefix on shields.  If you stay with a block setup instead of
switching to suppression, it is much easier to cap spell and attack block if you get a shield with 40-45% attack block and a t1
spell block roll.  Switching to a shaper shileld, however, means you lose the 2nd 6 link on your staff which means you
get much  lower shock effect with the WoC totems.  You also lose the other high modifiers on the staff since a staff can have
far higher attribute values than a wand.  In my opinion this is mostly a push and not really worth switching away from a staff.

Getting an amulet with +1 lightning skill level is another straight foward way to get more damage.  The Ashes of the Stars
amulet pushes the duration of SB very high and thus gives a lot of damage in PoB, but in actual use the extra duration
isn't very useful since you don't want to be standing around for 6 seconds before that damage even shows up.  It works
pretty well, but imo Ashes of the Stars is mostly a PoB special to claim the build is doing a lot of damage but in actual
usage the damage isn't really there most of the time.

You can craft or buy a storm burst gem which has been corrupted to be level 21, but make sure it also has 20 quality as
otherwise it is worthless.  You can make this yourself without a lot of difficulty, or just try and buy one as they are generally
easily available.

The imbued gem support can be really good for this build if you find or make one with a physical to lightning damage
support.  Controlled destrution support imbued on storm burst is also pretty cheap in trade league since most people who
play storm burst followTatiantel2's version of the build which scales via crit damage.  Other useful imbued games are
more duration, culling strike, elemental focus, infused channelling, cruelty, or lightning penetration

If you have really good life/mana regen, it may be worthwhile to use Righteous Fire of Arcane Devotion.  This gives you
24% more damage, but comes at the cost of losing 25 to 50% of your recovery.  I've used this for mapping and it generally
feels fine, but can occasially result in death.  If you can significantly increase your max fire resistance it will remove most of
the negatives of using this gem.

How does storm burst scale damage?

If you already know the details of how storm burst works or you don't care, you can skip down to the next section.  Storm burst
is a channeling skill which relies heavily on doing multiple hits over a duration.  Every cast you summon an orb which does some
amount of damage, then every 0.4 seconds that you continue to channel that orb does damage again.  As you continue
channeling the skill, you summon more and more orbs and every orb keeps doing damage every 0.4 seconds until the orb's
duration expires.  A 0 quality storm burst gem has a duration of 1.2 seconds.  This means that each orb will do damage a total of
4 times (once when cast and then 3 more times) without any additional skill duration.  A 20 quality gem adds .4 seconds to the
duration, pushing the base duration of the gem to 1.6 seconds so each orb will do damage 5 times, thus a 20 quality gem does
25% more damage, but it takes 1.6 seconds to ramp up to full dps.

Thus, if you have +100% duration you are basically doubling the total damage that storm burst does.  The down side to this,
however, is that storm burst takes a while to ramp up to the full damage, especially if you are relying very heavily on scaling skill
duration.  With the More Duration support along with the two skill duration mastery wheels near the Scion starting location in the
center of the passive tree, it is easy to scale storm burst duration by over 300%, pushing the storm burst orb duration to over
4.8 seconds, meaning that each orb will hit 13 times instead of 5 times by default.

While hitting 13 times per cast (as long as you keep channeling) is a fantastic damage multiplier, that isn't optimal for clearing
maps as you don't want to wait around for several seconds to start doing damage.  In my opinion, the excessive reliance on
using skill duration to pad DPS causes the build to feel disappointing to many people because they see a build that claims to do
12 million DPS, but it certainly does not feel like it does 12m DPS. The 12m DPS is real, but the issue is that it takes 4.8
seconds for a totem to ramp up to that 12m DPS number.  So this is fantastic for killing bosses or for doing content that involves
standing in a circle, but it isn't great for mapping due to the damage ramp time.

The Ashes of the Stars amulet gives all gems +30% quality, thus further pushing the SB orb duration out to nealry 7 seconds.  I
just don't see the point in that and I strongly disagree with anyone who claims this amulet is good for a Storm Burst build.  The
only way this amulet gives you useful damage is if you just resummon the totems to cause the orbs to explode for 75% of
their remaining damage.  This is certainly viable, but you are giving up all of the damage you supposadly gained if you do this.
Instead you could just have cast speed, life, attributes, critical damage (if playing a crit based version), etc on your amulet and
only give up 5 to 10% of  your PoB damage without pushing your SB orb duration out to ridiculous levels.