4 weeks ago
 3.28 Lightning Conduit Elementalist league starter3.28
Life: 3,82982%
ES: 4,15120%
Mana: 106
eHP:
131,842
Resistances: 75%/75%/75%/75%
DPS: 15,044,084
Speed: 5.20
Hit Chance: 100%
Crit Chance: 98.64%
Crit Multi: 592%
Config:
65% Shock, Power, Custom Mods
Bandit: Alira
Pantheon: Soul of Arakaali, Soul of Ralakesh
Loadout
Gear




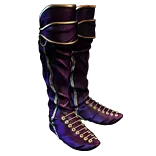



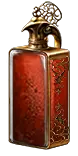






Gems
Lightning Conduit
Arcane Surge
Inspiration
Increased Critical Strikes
Increased Critical Damage
Elemental Focus
Summon Flame Golem
Flesh and Stone
Summon Stone Golem
Enduring Cry
More Duration
Sigil of Power
Righteous Fire of Arcane Devotion
Wrath
Purity of Elements
Summon Chaos Golem
Orb of Storms
Unbound Ailments
Chain
Power Charge On Critical
Frostblink of Wintry Blast
Spell Echo
Clarity
Summon Lightning Golem
Conductivity
Tree Preview
 The Agnostic
 Zealot's Oath
 Block Mastery
- +1% Chance to Block Spell Damage per 5% Chance to Block Attack Damage
 Caster Mastery
- 6% increased Cast Speed for each different Non-Instant Spell you've Cast Recently
 Charge Mastery
- 100% increased Charge Duration
 Lightning Mastery
- +15% to Maximum Effect of Shock
- 60% increased Critical Strike Chance against enemies with Lightning Exposure
 Mana Mastery
- 12% increased Mana Reservation Efficiency of Skills
 Staff Mastery
- 3% increased maximum Life per Red Socket on equipped Staff
- 5% increased maximum Mana per Blue Socket on equipped Staff
- 30% increased Defences while wielding a Staff
Notes
The notes in this guide are organized in sections with a blue header to make each section easy to find.
Yellow text is more detailed information for newer players which can be skipped.  The blue header
plus the level based layouts in this pob should be suffient for experienced players.
Orange text is information which is critical to understand and should be read by everyone.

BUILD SUMMARY

This build guide is intended to be used as a league starter during the first three days of a league.  It
is not intended as an optimal way to level this build later in a league.  The build easily scales damage
to 4+ million with very cheap gear while also being somewhat tanky.  The level 90 version of this build
is more than capable of getting 4 voidstones, completing your atlas, and farming currency to move to
another build.  With investment, you can push well beyond 10 million dps while becoming tanky enough
that you won't die to any normal content.

Lightning conduit is a 2 button build, you cast orb of storms and then hold down the lightning conduit
button until everything is dead. Both the player and some monsters must be within the orb of storms
for lighting conduit to do any damage.

When you cast lightning conduit, that triggers orb of storms to hit all enemies within the orb of storms,
shocking them (via Shaper of Storms).  In addition the lightning strike from orb of storms can split and
chain to enemies outside of the orb of storms.  With the Shaper of Storms passive from the Elementalist
ascendancy, orb of storms will always shock every enemy it hits. The lightning conduit spell only hits
enemies which are shocked, which is why this is a two button combo with one skill that shocks enemies
and then lightning conduit which actually does the damage but only hits enemies which are shocked.

The build is a fairly fast mapper since the damage is pretty high even with very little gear and every cast
of lightning conduit hits all enemies within range.  It plays a lot like a melee build since you have to move
within range of the monsters, cast orb of storms, and then repeadily cast lightning conduit.  Generally
one press of the lightning conduit spell is enough to kill most white/blue packs.  This guide invests into
a good amount of defense early due to the nature of the build requiring you to be within close range of
enemies to do damage.  If you do not invest into defense, you will die constantly and you will not have
a good time.

Mana is often an issue with this build, it is very important to make sure that you have enough mana
regeneration to avoid running out of mana constantly.  This build relies heavily on the Mystic Bulwark
passive which gives you 1% mana regen per 1% spell block, so in this case investing in defense gives
you offense.  Make sure to take Mystic Bulark and invest in spell block after completing your 2nd lab.
Tempest shield gives you spell block as well as shock immunity during acts 8 through 10.  When you
switch to using a staff after the campaign, you immediatly take the staff block nodes to get to 75%
spell block so that you have enough mana regen to sustain casting lightning conduit.

Level 2-28 rolling magma + holy flame totem

When you get to town take rolling magma as your reward for killing Hillock.  This is pretty standard
for early witch levelling, but there aren't really any other good choices.  Once you get past the Mud
Flats zone you can return to town and take Flame Wall and Frostblink as your quest reward and then
buy Holy Flame Totem from Nessa.  These are the skills you'll be using all the way until you reach level
28 and kill Gravicious in the Act 3 zone The Ebony Barracks.

Both Rolling Magma and Holy Flame Totem gain around 50% more damage from passing through a
flame wall, so against tanky monsters, bosses, etc it is vital to cast through a flamewall and to position
a flamewall between your totem and your target.

Once you kill Brutus, you can return to town and Tarklleigh will give you a quest reward.  You can take
combustion from him as you'll need two of them anyway.  Then you can go buy additional supports
from Nessa.  I recommend a 2nd combustion (for holy flame totem and rolling magma), clarity, vitality,
and flame dash to replace frostblink.  If you prefer frostblink you keep it.  Don't forget to enable
clarity and vitality once you leave town.

I recommend taking the regenerate life per fire resistance mastery node once you reach Heart of
Flame at the top of the passive tree.  The 100% increased damage against ignited enemies node is
also very strong, but I don't find that I need the damage by the time I reach the node, whereas if I craft
fire resistance on several pieces of equipment I get 75 to 100 life regen per second.  That much life
regen basically means I never die and I can just mindlessly shield charge through zones ignoring
monsters to get through the early part of the campaign faster.

When you find Dialla in the act 3 zone "Solaris Temple Level 2", just past her is the entrance to a room
named Eternal Laboratory.  This room contains a crafting bench recipe which allows you to craft added
spell fire damage onto your wand.  This recipe massivly boosts your damage and you should use the
crafting bench to add this to your wand as soon as you get it.


=======================================
LEVEL 28
=======================================

28 Switch to Firestorm (or armageddon brand if you prefer, or both, whatever)

After killing Gravicious in the act 3 zone "The Ebony Barracks",  you can return to town and Marmoa
will give you a free Firestorm gem which is a massive upgrade over Rolling Magma.  The minimum level
to use Firestorm is level 28.  Mana will be significant issue with Firestorm until you complete your first
labrynth trial and add lightning golem.

You can also buy armageddon brand from the vendor.  Many people prefer to use armageddon brand
over firestorm, or use both skills since firestorm does substantially more burst damage, especially when
supported by spell echo or unleash.  Taking the Runebinder keystone effectively doubles armageddon
brand's damage vs. bosses by allowing 2 brands to attach to a single target.  I do not take that keystone
in this build guide since I personally prefer to use firestorm for bossing, but feel free to take it if you
prefer armageddon brand for bossing.

Note: you also need to get a lightning conduit gem and keep it in an offhand weapon or a spare socket
so that when you are ready to switch to lighting conduit the gem is fully leveled.

First lab, take Liege of the Primordial

If the divine font gives you an option to add quality to a gem, you should use it to add quality to your
lightning conduit gem.  You did remember to buy a lightning conduit gem before doing lab right?

If you really want to, you can take shaper of storms here and switch to lightning conduit, but imo fire
spells are much stronger during this part of the campaign and you are better off waiting until your 2nd lab
to switch to lightning conduit.  Taking the golems on your first lab just makes leveling very comfortable
between your first and second lab.

Take the Liege of the Primordial node to give +2 golems and make your golems automatically resummon
after they die.  The most important golem is the lightning golem as it gieves you mana regeneration and
cast speed.  After that, stone golem and flame golem are both helpful.  Chaos golem isn't necessary
early, but it is a massive benefit later due to giving you a lot of free chaos resistance.


=======================================
LEVEL 55
=======================================

2nd lab, take Shaper of Storms, swap to lightning conduit

If the divine font gives you an option to add quality to a gem, you should use it to add quality to your
lightning conduit gem.  You did remember to buy a lightning conduit gem before doing lab right?

Note: By the time you complete your 2nd lab, using Faustus to respec your passive points will cost
around 300 gold each.  Assuming you are following this guide, you have 12 passive points which you
have to change from fire to lighting, so make sure to have close to 4000 gold before doing your 2nd
lab.  You can use some of the free respec points you have gotten from quests, but imo those are
more valuable later when the gold cost to respec passive points gets much higher.

On the 2nd lab you take the Shaper of Storms ascendancy passive to give you guaranteed shocks.
Please read the shock & ailmet effect section below for a full explansion of how shock is utilized by
this build and how important it is.  Once you have shaper of storms you can now switch to using
lighting conduit + orb of storms.

After completing the 2nd lab you may be able to buy the two unique rings used by this build.  Generally
these are available for 1 to 3 chaos on day 1, but if you are very fast to level 55 they may not be
available or might be a bit more expensive.  I would not pay more than 3c for either as the build works
fine without them during the campaign and you can just self cast conductivity vs. tanky monsters as
needed.

buy Valako's Sign unique ring (very nice)

You can check trade when swapping to lightning conduit to see if a Valako's sign ring is available for
a few chaos, it is a really nice damage and survivability boost for this build even during the campaign.

buy Honourhome helm (very nice)

Since this build guide uses the Honourhome helm all the way to level 80+, it makes sense to go ahead
and buy one now as they should be able for 1 chaos.  You'll probably have to 4 link it, but you should
have the currency to do so.  If not, you can just wait, but Honourhome gives you around 30% more
damage.  The only roll on Honourhome you care about is getting 15 to 20% mana cost reduction.

buy Mark of Submission unique ring (quality of life, highly recommened)

Using the Mark of Submission ring is not mandatory for the build, but I would not recommened playing
without it.  If your resistances are fine and you can buy this ring for cheap, it removes 1 button from the
build and frees up a socket at the same time.  This build is fairly socket constrained due to the golems
and requiring both orb or storms and lightning conduit to do damage.  Having conductivity apply
automatically without having to press a button also gives a large damage boost during the campaign
and while mapping instead of only benefitting from conductivy when you manually cast it against tanky
monsters.

Shock & non-damaging ailment effect

It is very important to generate 65% shocks to maximize damage with lightning conduit.  This build requires
the ascendancy passive Shaper of Storms to give guarnteed 25% shocks, an additional 160%
increased shock effect to generate 65% shocks, and finally the +15% maximum shock lighting mastery to
raise your maximum shock from 50% to 65%.

Not only do you get 65% more damage from the shock itself, but when lighting conduit consumes the shock
it gets 16% more damage per 5% shock effect, or 208% more damage from a 65% shock.  Getting 20%
quality on lightning conduit gives you an additional 4% more damage per 5% shock.  Additional sources of
gem quality such as the Ashes of the Stars amulet are also very valuable for lightning conduit.

The 65% shock effect is generated from the guaranteed 25% shock from Shaper of Storms plus an
additional 160% increased shock/ailment effect from passives and the unbound ailments support gem on
the orb of storms spell.  The sources of shock/ailment effect useful for this build are listed here:

    50% from level 16 unbound ailments (54% @ level 20)
    50% from the Breath of Lightning passive
    10% from the small ascendancy passive node before Shaper of Storms

    30% from the Static Blows passive
    20% from the lightning ailmet effect passive before Static Blows
    20% from the ailment effect passive next to Divine Judgement
    30% from annoiting Ash, Frost, Storm
    40% from Overshock passive node on a lightning damage cluster jewel
	3% per 10 devotion via Militant Faith timeless jewel
	23-30% crafting bench amulet suffix (receipe found in maps)
	23-30% crafting bench boots suffix (receipe found in maps)

To get to 160%, you  need the 110% from the first 3 sources plus another 50%.  Initially this build
guide spends 4 pasive points on the tree to take Static blows and the passive next to it.  Later on when
you are able to farm or buy a Teal, Violet, and Crimson oil, you can annoint Static Blows which frees up
those 4 passive points since you'll also have the 20% from the passive node next to Divine Judgement.

3rd lab, take mastermind of discord or bastion of elements

If the divine font gives you an option to add quality to a gem, you should use it to add quality to your
lighttning conduit gem.  Getting 20 quality on your lightning conduit gem gives you 14.5% more damage.
I recommend running the 3rd lab multiple times to get 20 quality before going to maps.

If you want more damage and don't mind adding an additional button, take Mastermind of Discord and
cast Wave of Conviction on tanky monsters to give you about 30% more damage.  Once  you get a
pair of gloves that give lightning exposure on hit you can drop wave of conviction.

If you want to be tankier, take Bastion of Elements which will massively boost your defenses against
elemental damage.  Your damage in early maps even without exposure should be more than sufficient,
so taking extra defense is the safe bet and you can respec later on when you get some gloves to give
exposure or when you start feeling like you need more damage.

=======================================
LEVEL 66 - 70
=======================================

Get 20 quality on your lightning conduit gem

Getting to 20 quality on the lightning conduit gem gives the build 14.5% MORE damage.  This should be
done asap.  I recommend doing several runs through the lab trials to use the divine font at the end to
add quality to lightning conduit.  While doing this you should also make sure you have a frostblink gem
just in case you get the option to transform a gem into the transfigured version to guarntee you get a
frostblink of wintry blast gem.

Swap to Agnerod West staff after campaign, the staff requires level 66

The +2 skill levels, 20% lightning penetration, and added lightning damage from the Agnerod West staff
gives far better damage than any wand + shield setup available for reasonable prices on the first day or
two of the league.  It will likely be necessary to take a +30 strength passive initially to satisfy the 158
strength requirement.

You eventually want to make sure to have 5 red sockets on the Agnerod West staff so that when you
take the staff mastery that gives 3% life per red socket you get 15% increased life.

If you are playing in a small private league or SSF, any of the 4 versions of the Agnerod staff will
suffice (North, South, East, or West).  The West version is the best, but the others are still better than
any rare wand/shield setup you'll be able to get when first entering maps.  You can also play the build
using a rare staff or a wand/shield setup (with some changes to the passive tree).

Additional skill changes when swapping to staff setup

Since you are moving away from a wand/shield setup to a staff, you have to replace shield charge with
leap slam.  Leap slam is a little slow with this build due to limited attack speed, but it is better than nothing.
I'd recommend buying a Frostblink of Wintry Blast supported by supported by faster casting and/or spell
echo as soon as possible as it feels far better than leap slam.  This also frees up one or two sockets.

Your aura setup will now be Purity of Elements, Wrath, and Flesh and Stone (in sand stance for the
damage reduction).  Not only does purity of elements make it easy to max your resistances, but the
elemental ailment immunities it gives greatnly increase tankiness. Flesh and Stone is also very
effective since this build has a lot of increased area of effect and monsters will usually be within the
range of the flesh and stone aura.

Use Honourhome Helm instead of trying to find a 5 link body armour

Using the honourhome helm as a 4 link for lightning conduit is generally better than trying to find a
decent 5 link body armour early on day 1 of a league. Furthermore, mana can be an issue with this
build and not only does a 4 link lightning conduit with the +2 skill levels from Honourhome do almost
exactly the same damage as a 5 link, it also costs less mana to cast.  Since this build guide uses
purity of elements, helps Alira, and gets a fair amount of resistances from the passive tree, you should
still be able to reach 75% on all of  your resistances even with 4 unique items.

Staying with Honourhome until you get a decent 6 link body armour is generally the best option.  The
only reason to switch before getting a 6 link is to get a helm with a good life roll and chaos resistnace.
To make that switch, you also need to get a 5 link body armour, as you'll be giving up a lot of damage
by switching away from honourhome and not going to a 5 link setup for lightning conduit.  Otherwise,
while you are using Honourhome, you can buy a body armour with really good stats on it but only 4
links since it will be very cheap to buy.

Flasks, get a bleeding/corrupted blood immunity life flask

Unless you like playing flask piano, the only flasks that matter much until you can automate them are
one or two life flasks which give you bleeding/corrupted blood immunity and maybe some quicksilver
flasks to make you move faster.  This build is immune to elemental ailments due to the purity of
elements aura, so you don't care about ignite, shock, or freeze immunity via a flask.  Bleed can kill
you very quickly, however, and is a mandatory mod on this build to have on your life flasks.


=======================================
LEVEL 80
=======================================

Amulet annointment

Some time in the level 80 to 90 range, you'll want to annoint your amulet with Static Blows.  This
allows you to deallocate the 4 passive points to get to that node and use them elsewhere.  The oils
for this annoitment are fairly cheap to buy or easy to farm via Blight.

Gloves that give lightning exposure

Getting a pair of gloves with a high life roll (100+) and  3 good affixes (open suffix, 25% or higher
resistance rolls, or 30+ strength/dexterity) is the first piece of gear you want to spend a fair amount
of currency on.  Once you have these gloves, you'll have to spend around 26 lesser eldrich ichor
to roll the "inflict -11% lightning exposure on hit" implicit.  Early league ichors cost around 1 chaos
each, so before spending that much currency on the gloves it makes sense to have a pair of
gloves that you'll be able to keep for a long time before needing to replace them.

These gloves combined with the Mastermind of Discord ascendancy passive node give you around
30% more damage without requiring you to press any buttons. Less buttons = win.  Until  you get
these gloves, you have to manually cost wave of conviction to activate Mastermind of Discord.

Get frostblink of wintry blast asap

Transfigured gems are much cheaper on the first day of a league because everyone is doing labs
during the campaign.  You can buy a frostblink of wintry blast for 5 to 20 choas on the first weekend,
but by the end of the week it will shoot up to 100c or higher.  I strongly recommend buying one early
as it is much better than using leap slam + frostblink.

Replace Honourhome helm when you get a decent 6 link chest armour

Sometime in the level 80 to 90 range you will probably be able to buy a 6 link body armour with bad
stats or corrupted (make sure to get 5B + 1R socket if corrupted).  If it isn't corrupted you can always
throw some essences at it even if it is on a bad base to make it useable.  You'll want to get either
an energy shield base or energy shield / armour to make it easy to get 5 blue + 1 red socket.

Sigil of Power

Note that you want to keep the your Sigil of Power gem at level 10 so that it quickly gains stages.
At level 20, SoP takes 400 mana to gain a stage, which is over twice what it takes at level 10.
Keeping SoP at level 10 allows it to reach max stages quickly so that you get the damage reduction
bonus which only happens at stage 4.  The extra damage reduction makes it easier to just stand in
the sigil, tank damage, and keep blasting instead of dodging.

This build guide does not have sigil of power eneabled by default so that it properly reflects the
typical damage you have while mapping, but in many situations you'll be able to cast SoP while waiting
and  charge it up before monsters or a boss appears.  The extra damage and defense you get from SoP
is very valuable.

4th Lab, take Heart of Destruction

On the 4th lab, take Mastermind of Discord if you haven't yet, or if you have, take Heart of Destruction.
The 60% increased AoE is fantastic for this build, and vs. bosses where you don't need the extra AoE
you get 30% more damage.

Storm brand instead of Orb of Storms (advice for bossing)

You may find it easier to use storm brand instead of orb of storms for certain difficult bosses. This
is a simple drop in replacement.  I keep a storm brand gem in my inventory for some bosses which move
around a lot or are which are difficult / dangerons to be close to.  Storm brand is more defensive than
orb of storms since it allows you to shock enemies from further away.  If you are dying regularly in
maps due to poor defences, not enough max hit, etc you can switch to storm brand and stay further
away from monsters since the area of effect for lightning conduit is nearly the entire screen.

The reason this build guide defaults to using orb of storms, is that it works better for clear.  Orb of
storms shocks all enemies within the orb and the range is much larger.  Storm brand only shocks in
a small area plus a few extra enemies nearby.  Storm brand works pretty well for mapping as long as
you have some form of shock propagation (either as a glove implicit or via a passive point for the
lightning  mastery), but it does require a bit more aiming and on highly juiced maps with huge hordes of
monsters it is much less effective than orb of storms.

The reason storm brand works with lightning conduit is both skills have the same cast time (activation
time for storm brand).  Thus as long as neither skill is benefitting from a support to change their cast
speed, both activiate at the same rate.  You should try swapping out orb of storms with storm brand
for mapping and make your own judgement on which you prefer.


=======================================
LEVEL 90
=======================================

Swapping to crit around level 90

It doesn't make sense to swap to scaling damage via critical hits until you get close to level 90. By that
time you should already have completed your 4th lab and taken the Heart of Destruction passive.  The
60% area of effect you get from that passive is very important since you have to replace the increased
area of effect support on orb of storms with a power charge on critical support.  There are a lot of really
strong crit nodes for staff builds, but it does take spending around 10 passive points on them before
switching from Elemental Overload to crit.  The level 90 skill tree shows the passives you need to take
to scale crit.  You can switch to crit starting at level 85, but you won't see a significant damage gain
until you are able to take most of the crit nodes.

Replace chaos golem with ice golem if you have enough chaos resistance

If your chaos resistance is pretty good without the chaos golem, you can replace it with an ice golem.
The ice golem gives 72% increased critical srike chance, which is around 6% more damage.

Breach is great for creating most of the rare items used by this build

Most of the rare gear on this build can be farmed using breach.  The 500% increased chance of life
mods on gear gives you life and life regen and the 500% increased chance of chaos mods give you
chaos resistance.  The rest is just taking the nodes which raise the tier, give chance to drop additional
items, and raising the chance of getting int gear / lowering the chance to get dex or str gear.  This build
is really good at farming breach as well, so it works well to use breach to level while trying to find good
ES armour which also has life regen and chaos res.

Zealots Oath

Zealot's Oath is very important for increasing your defense.  This build guide uses life regen to restore
energy shield rather than relying on leech.  Energy shield leech is helpful, but it requires a lot of passive
points and it is still much worse than Zealots Oath if you only have 2000 energy shield.

Zealots Oath is far more effective at restoring ES during combat with moderate amounts of ES.  This
build already gets almost 200 life regen from the stone golem, and if you can get another 200-300 life
regen on your gear, having 500 energy shield recharge via Zealots Oath feels really good for 2000 to
3000 ES.

With Zealot's Oath allocated, your own source of life is the life leech from Valako's sign and life flasks,
so bleed or corrupted blood can kill you very quickly outside of combat.  Having a life flask which grants
bleed and corrupted blood immunity is mandatory.

Getting 1000+ ES and allocating Zealots Oath is a very important

Automate + quality your flasks

As mentiioned elsewhere, you need to have at least 1 life flask which gives immunity to bleeding and
corrupted blood.  In addition to that, you'll want a diamond flask (crit chance), silver flask (onslaught),
quicksilver flask (movement speed), and a granite flask (armour).  On the utility flasks, getting a prefix
of gain 3 charges when hit, increased duration, or reduced cost is good.  For the suffixes, you want
one of each of these: % spell damage leeched as energy shield, % increased armour, % increased
critical strike chance, and % increased block and stun recovery.  Having more than one flask with
the same suffix is unhelpful since only one of them will count.  Other good suffixes for utility flasks
are % increased movement speed or % chance to avoid being stunned.

The % spell damage leeched as energy shield is an easy way to get some energy shield leech.  It
isn't active all the time, but during mapping it generally will be and the leech helps with your recovery
until you get energy shield leech via a cluster jewel or amulet annointment.

Automating flasks costs 5 instilling orbs + 5 glassblower's baubles in the crafting bench to craft the
"used when charges reach full" enchantment onto the flask.  While this isn't as good as manually
pressing the buttons to use flasks at the best time, hardly anyone does that outside of hardcore
gamers.  Just automate the flasks and they'll usually be up during combat.

A Rumi's Concoction granite flask gives a nice defensive boost since this build does not have capped
attack block until switching to the Duskdawn staff later.

=======================================
END GAME SCALING
=======================================

get a +3 lightning conduit Replica Dragonfang's flight or an Ashes of the Stars amulet

Either of these amulets gives this build around 30% more damage vs a rare amulet with a good cast
speed roll, so this is by far the biggest single item damage upgrade to the build.  The +1 skill level and
30% quality from ashes of the stars is a little better because the 30% quality benefits the golem buff
effects.  The 30% quality from ashes of the stars also gives 7% all resistance via purity of elements
which roughly matches the 5 to 10% all resistance roll on replica dragonfang's flight.  Overall ashes of
the stars is slightly better, but if you can find a replica dragonfang's flight early league it is likely to be
cheaper.  Just buy whichever one is cheapest, with a slight preference for ashes of the stars since it
gives better defenses and is also useful for other builds.

If you use replica dragonfang's flight instead of ashes of the stars and you are also using RF of Arcane
Devotion, you'll need to add a low level Clarity gem to sustain mana or find some other way to reduce
mana costs / increase mana regen.

add Righteous Fire of Arcane Devotion

The transfigured RF gem gives you 24% more cast speed which is 24% more damage, but you do give
up a moderate amount of recovery and depending on your gear you might need to find a way to deal
with spending more mana per second due to the higher cast speed.  It is important to not get any extra
mana on your gear if you are going  to use this as any mana you get increases the amount of damage
this skill does to you.  Using this gem isn't mandatory for the build, but you definitely do feel the extra
damage and it makes frostblink of wintry blast feel fantastic.  The downside is that it adds to screen
clutter.  If I could use this gem without seeing the effect on screen it would be an S tier addition to the
build.

add Light of meaning for added lightning damage

The Light of Meaning jewel with 6% increased lightning damage per passive node in range is very good
in the jewel socket above the witch starting location.  This jewel gives somewhere in the range of 16%
to 20% more damage assuming that you are following this guide.

add Watcher's Eye jewel

Watcher's Eye has several good mods for the Wrath aura.  The lightning penetration mod and the
critical strike mod are the best ones, but increased lightning damage is also decent.  There is also a
very good purity of elements mod which gives 30% to 50% chaos resistance.  That mod solves your
chaos resistance and allows you to replace your chaos golem with an ice golem for 72% increased
critical strike chance (roughly the same as you get from the Wrath critical strike chance mod).

A good 2 mod WE jewel with lightning penetration and either critical strike chance or chaos resistance
gives this build around 15% more damage.  Getting a WE jewel which has two good Wrath mods will
be fairly expensive early league, but a WE which has lightning penetration and chaos resistance will
cost less because it is far less common for players to run both Wrath and Purity of Elements.

add Militant Faith timeless jewel with High Templar Dominus mod

Details on the Militant Faith jewel can be found here:
https://www.poewiki.net/wiki/Militant_Faith

A Militant Faith timeless jewel with a "converted by High Templar Dominus" mod will transform any
keystones within range into "Inner Conviction" which gives 3% MORE damage per power charge.  The
level 98 layout uses Militant Faith to transform "The Agnostic".

Militant faith always transforms all attribute nodes in range into nodes that just give 10 devotion.
This build already struggles with attributes, and in the level 98 passive tree Militant Faith will convert
3 strength nodes and 2 intelligence nodes, so make sure that you have extra str and int before buying
the jewel.

Militant faith also randomly transforms some notable passives within range into new notables.  The
only way to know which notables it will transform is to copy the jewel from the trade site and paste it
into pob to see what happens.  You want to make sure the jewel does not transform any of the
passives this build is using as the new notables always require 150 devotion to become active and
this build does not use enough passives without range of Militant Faith to activate the transformed
notables.

In addition to changing the keystone, Militant Faith has two additional mods which give benefits per
10 devotion. On the level 98 passive tree, Militant Faith gives 110 devotion.  The Militant Faith which
are useful for this build are as follows:
	4% increased elemental damage per 10 devotion
	1% reduced mana cost  per 10 devotion
	regenerate 0.6 mana per 10 devotion
	3% increased effect of non-damaging ailments per 10 devotion
	2% to all elemental resistances per 10 devotion

The regenerate 0.6 mana per 10 devotion may appear weak, but this build has around 180% increased
mana regeneration which makes 6.6 mana regen almost as good as 11% skill cost reduction.  The 0.6
mana regeneration mod is much cheaper to buy.

If you get a Militant Faith which gives increased effect of non-damaging ailments you do not have to
get the Overshock notable passive when you buy/craft a cluster jewel since the 30% effect of non-
damaging ailmets from Militant Faith plus the 20% from the passive node next to Divine Judgement
is enough to give 160% ailment effect to generate 65% shocks.

add Replica Reckeless Defense jewel

This build is immune to elemental ailments, so the downside of Replica Reckeless Defense has no effect.
A 6% attack and spell block jewel allows this build to get 74/78% block in the Duskdawn staff setup.

Bleed immunity via a corrupted Valako's Sign ring

If you can make up for the loss of 30% lightning resistance, buying or crafting a corrupted Valako's Sign
ring which gives bleed immunity is a nice addition to the build.

Corrupted blood immunity via a corrupted jewel

Getting immunity to corrupted blood is another "nice to have", but it can be quite expensive to get a jewel
with good mods as well as the corruped blood immunity corruption.

Replace Mark of Submission ring with a delve curse on hit ring (maybe)

Delve can drop rings which provide a "curse enemies with conductivity on hit" effect, but the delve rings
only give the same effect as a level 1 conductivity gem (-17% to lightning resistance), whereas a level
20 conductivity gem gives -36% to lightning resistance.  A delve ring with a good cast speed roll almost
makes up for the difference and the remaining affixes on the ring may make swapping to a delve curse
on hit ring a minor improvement if you can find a curse on hit ring with resistances, life, etc.

add a source of Energy shield leech

This build needs to add energy shield leech in the end game version.  Here is a list of some easy ways
to do that ordered from best to worst:
		Stormdrinker notable in a lightning damage cluster jewel
		Annoint Light Eater on your amulet or cord belt
		Watcher's Eye with a leech ES while affected by wrath mod

Even without a cord belt, you can annoint Light Eater on your amulet and bench craft 26% increased
effect of non damaging ailments on your boots, assuming that your unbound ailments support gem is
level 20.  The sum of unbound ailments + the bench craft has to be 80%.

Replace Agnerod West with Duskdawn

The Duskdawn staff frees up a large number of passive points while also allowing you to cap both attack
and spell block.  You probably won't see a Duskdawn for sale as the staff can only be created using a
vendor recipe and hardly anyone ever uses this staff.  From a damage perspective, the Duskdawn staff
is roughly equal to the Agnerod West staff, but it gives you 35% attack block which allows you to
deallocate all of the passive nodes in the templar area and then use them in a cluster jewel setup.

The recipe to create Duskdawn is to sell a Shade of Solaris wand, a Light of Lunaris focus, and one orb
of fusing to a vendor.  If an unidentified staff doesn't show up in the window, you did something wrong,
most  likely one of your items is corrupted.  The recipe only works with both the wand and focus identified
and uncorrupted.  Both items should generally be available for under 20 chaos.  The wand is very cheap
for such a rare item because it is completely useless, but the focus is a niche item used by some energy
blade builds.

Note that even if you get 100% chance to crit on lightning conduit, orb of storms will still trigger the
"60% critical strike multiplier if you've dealt a non critical strike recently" effect on Duskdawn.

add cluster jewel

Once you have Duskdawn, you can buy or craft an 8 passive lightning cluster jewel which has Storm
Drinker (gives you energy shield leech and 8% lightning penetration) and Overshock (40% effect of
lightning ailments). Overshock allows you to replace your Static Blows annointment with either Golem
Commander  (freeing up four passive points), High Voltage (100% increased critical hit chance), or
some other notable passive which you find beneficial.  The level 98 layout in this guide shows the
result of all of these end game gear and passive tree changes to add the cluster jewel.

Note that if you get a Militant Faith jewel which gives 3% effect of non-damaging ailments per 10
devotion you do not need Overshock on the cluster jewel.

I don't know how else to craft the lighting damage cluster other than buying a lightning damage cluster
with 8 passive nodes and spamming harvest reforge lightning.  This method takes somewhere around
80 attempts on average to get both Storm Drinker and Overshock, for a total cost around 4000 lifeforce.
On day 2 or 3 of the league, that is less than 1 divine orb to buy the lifeforce, or you can just farm it
yourself.  Plus the cost of the cluster jewel.  Of course you might get unlucky, and you'll just have to take
whatever other mods show up when you finally get the two notable passives you want.  As mentioned
above, if you get ailment effect from Militant Faith the only notable you require is Storm Drinker on the
cluster jewel which makes it fairly cheap to craft/buy and you can  instead try to get better added small
passive skill effects instead.

Endurance charges

The "100% increased charge duration" charge mastery makes power, frenzy, and endurance charges
last for 20 seconds. This matters a lot because you can roll an implicit mod which generates charges
every 15 seconds on your chest armour using eldirch embers.  Since 15 seconds is less than 20, this
means that you'll build up to max charges and stay there.  This build guide uses the endurance charge
generation rather than frenzy charges since defense is a much larger issue than offense.  It also includes
enduring cry to quickly get to 4 endurance charges while mapping instead of waiting.  It is only necessary
to use enduring cry once at the beginning of each map.

Shaper of Flames

Taking the Shaper of Flames ascendancy passive instead of Heart of Destruction gives you the 40%
physical damage to fire damage conversion which massively improves physical max hit.  Giving up 30%
more damage from convergence against unique monsters is painful, but more defense is mandatory for
end game content.  You also lose the 60% increased area of effect from Heart of Destruction, but most
of that is made up for in the level 96 version of this build by taking the Enigmatic Reach staff mastery
wheel which gives you 42% area of effect.

Note that pob does not show the effect of Shaper of Flames on your physical max hit even if  you check
the  'enemy is ignited' configuration box, but you can use a manual configuration to show the actual
effect Shaper of Flames gives on phys max hit and EHP.

The manual configuration is "33.6% of Physical Damage from Hits taken as Fire Damage".  The reason
it is an odd  number is the Shaper of Flames damage conversion effect happens before damage is dealt,
which makes the conversion multiplicative with other "taken as" effects on your gear.  Since this build gets
16% physical to elemental conversion via implicits on the helmet and body armour, the 40% effect gets
reduced by 16% to yield 33.6%.

=================================
23 MILLION DPS +5 SKILL STAFF
=================================

It is possible to push this build over 20m dps without completely reworking the setup.  A +5 skill
staff with good cast speed, spell damage, and crit rolls can be used instead of the Agnerod West or
Duskdawn staff.  I included a +5 skill staff named Blight Post which I saw for sale for 40 divines in gear
which you can swap out for Duskdawn.  The build loses a lot of block by switching away from Duskdawn
since it has 35% attack block.  You'd need to unspec some of the spell block nodes and path back over
to the Steelwood Stance attack block wheel to balance out attack and spell block.  You'd also need to
rely on Rumi's Concoction to boost block back above 70% while mapping.